
Visit our community sponsor

Thanks:
24

Likes:
101
-
Brandon #9196


Originally Posted by
TexasAviator

I have to steer you towards tje 347. Great power in a compact package and you will have more tjan 450hp at your eight foot. It makes more power than the original ac cobra made in most models.
Originally Posted by
Yama-Bro
Yep, that one is being considered for all those reasons. I'll have to make up my mind at some point.
I must have been drinking when I wrote that. Sorry. Hey I just wanted to let you know that I had my engine dyno tuned. With accessories, stock ffr exhaust, and on break in oil, the car made 475 horsepower and 440 torque. I cant believe the power this combo was able to make. With your knowledge of engines and blueprint at you figertips you could get one of their 347's throw a Trick flow 224/232 cam in it (if your compression is up for it) and easily make 450.
I drove bobl car yesterday and he has a similar 347 with 500 hp at the top of the range. I didn't even have to get to the 500 hp and I was blown away by the experience. It was like light speed as my eyes jiggled in my head and I could see there was so much pull on that car.
My point and btw I hope you are doing well, its been a few days... my point is that I feel you will have a small mighty power plant in the 347.
Brandon
-
Senior Member

Originally Posted by
TexasAviator
I must have been drinking when I wrote that. Sorry. Hey I just wanted to let you know that I had my engine dyno tuned. With accessories, stock ffr exhaust, and on break in oil, the car made 475 horsepower and 440 torque. I cant believe the power this combo was able to make. With your knowledge of engines and blueprint at you figertips you could get one of their 347's throw a Trick flow 224/232 cam in it (if your compression is up for it) and easily make 450.
I drove bobl car yesterday and he has a similar 347 with 500 hp at the top of the range. I didn't even have to get to the 500 hp and I was blown away by the experience. It was like light speed as my eyes jiggled in my head and I could see there was so much pull on that car.
My point and btw I hope you are doing well, its been a few days... my point is that I feel you will have a small mighty power plant in the 347.
Brandon
Awesome, Thanks for the update on your dyno run. I'll get over and read your post next. I'm definitely giving the 347 some serious consideration. The Blueprint engines tend to run on the conservative side of power, since we offer a 30 month/50,000 mile warranty and they all run on pump gas. But...that doesn't mean I have to do have my engine...
Started dreaming of a Cobra around 1987
Purchased Complete Kit 6/9/2017, Delivered 9/4/2017, Rolling Chassis 3/30/2018, Engine Dyno'ed 3/4/2022, Engine installed 8/27/2022
Click here for my build thread
Serial #9158
Design Engineer at BluePrint Engines
-
Senior Member
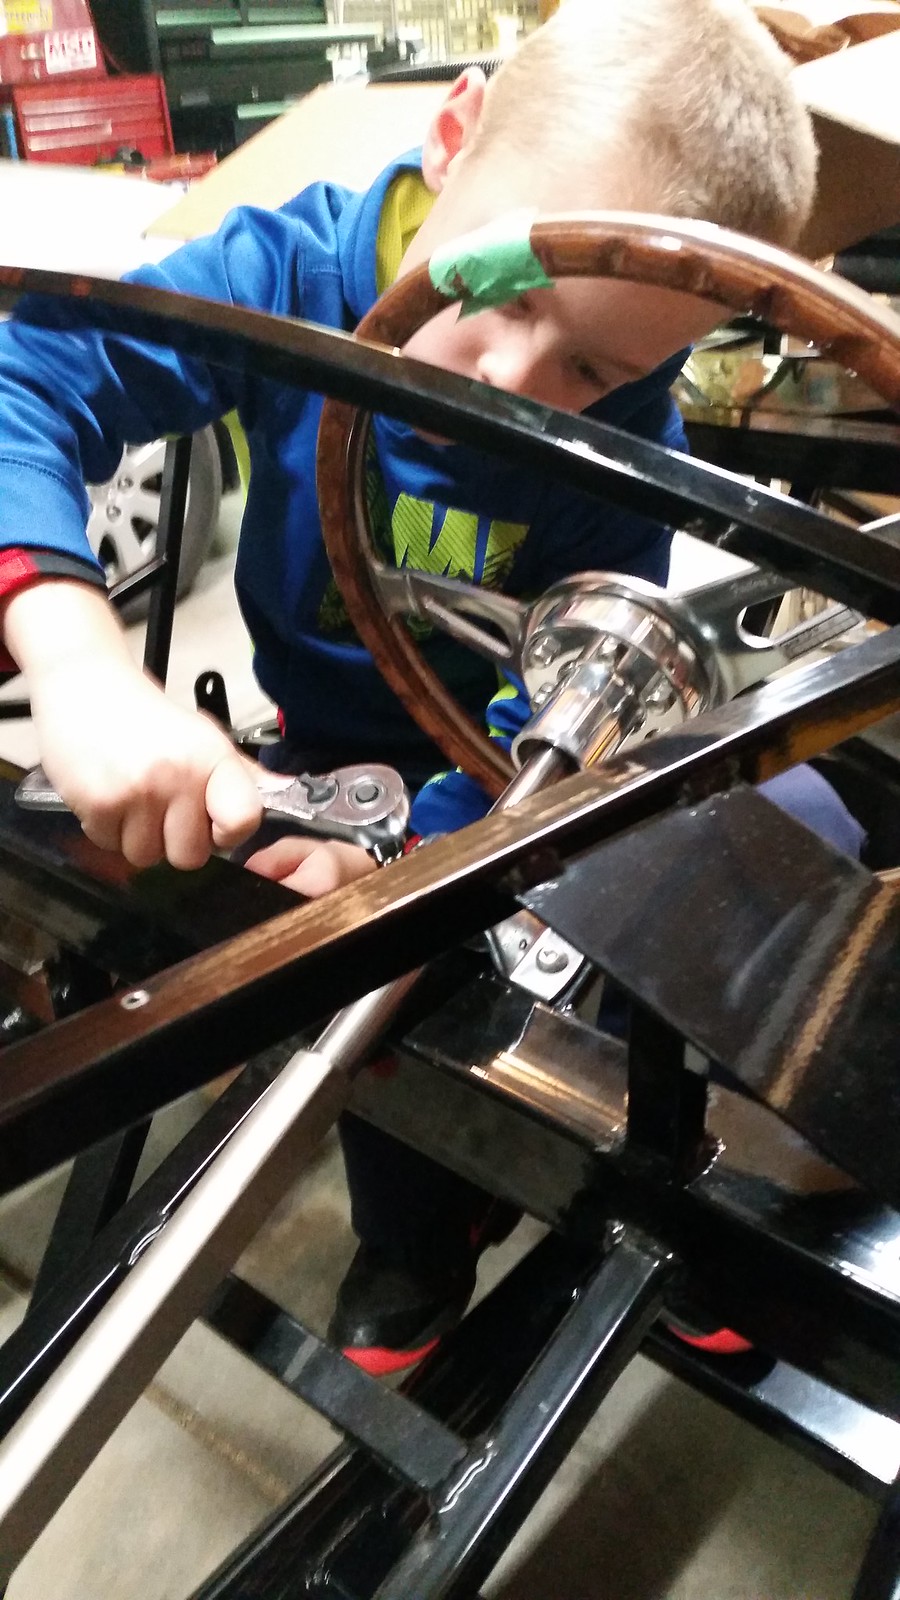
We made more baby steps this weekend. We installed the driver's side footbox front panel, the steering tie rods, steering shafts/bearings and temporarily installed the steering wheel.
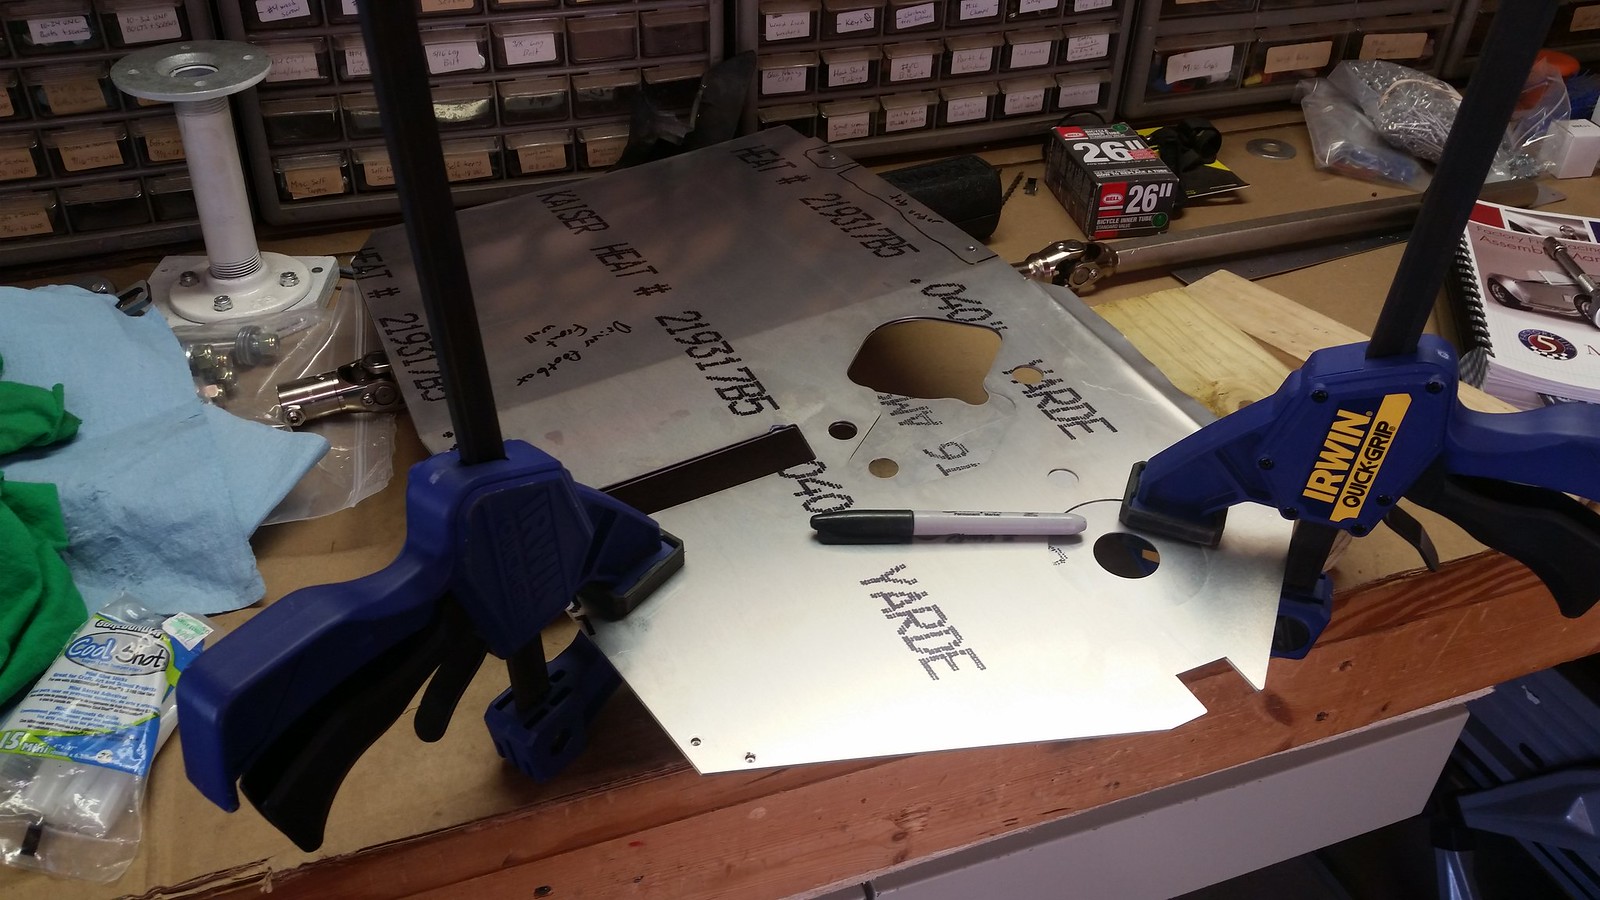
Since we have the complete kit we needed to swap out the donor driver's side footbox front panel for the complete kit panel that was shipped in one of the boxes. Since the donor panel has all the holes drilled in it to locate the mating footbox panels, we sacrificed the donor panel by flattening it's tabs so we could accurately transfer the holes from it to the complete kit panel.
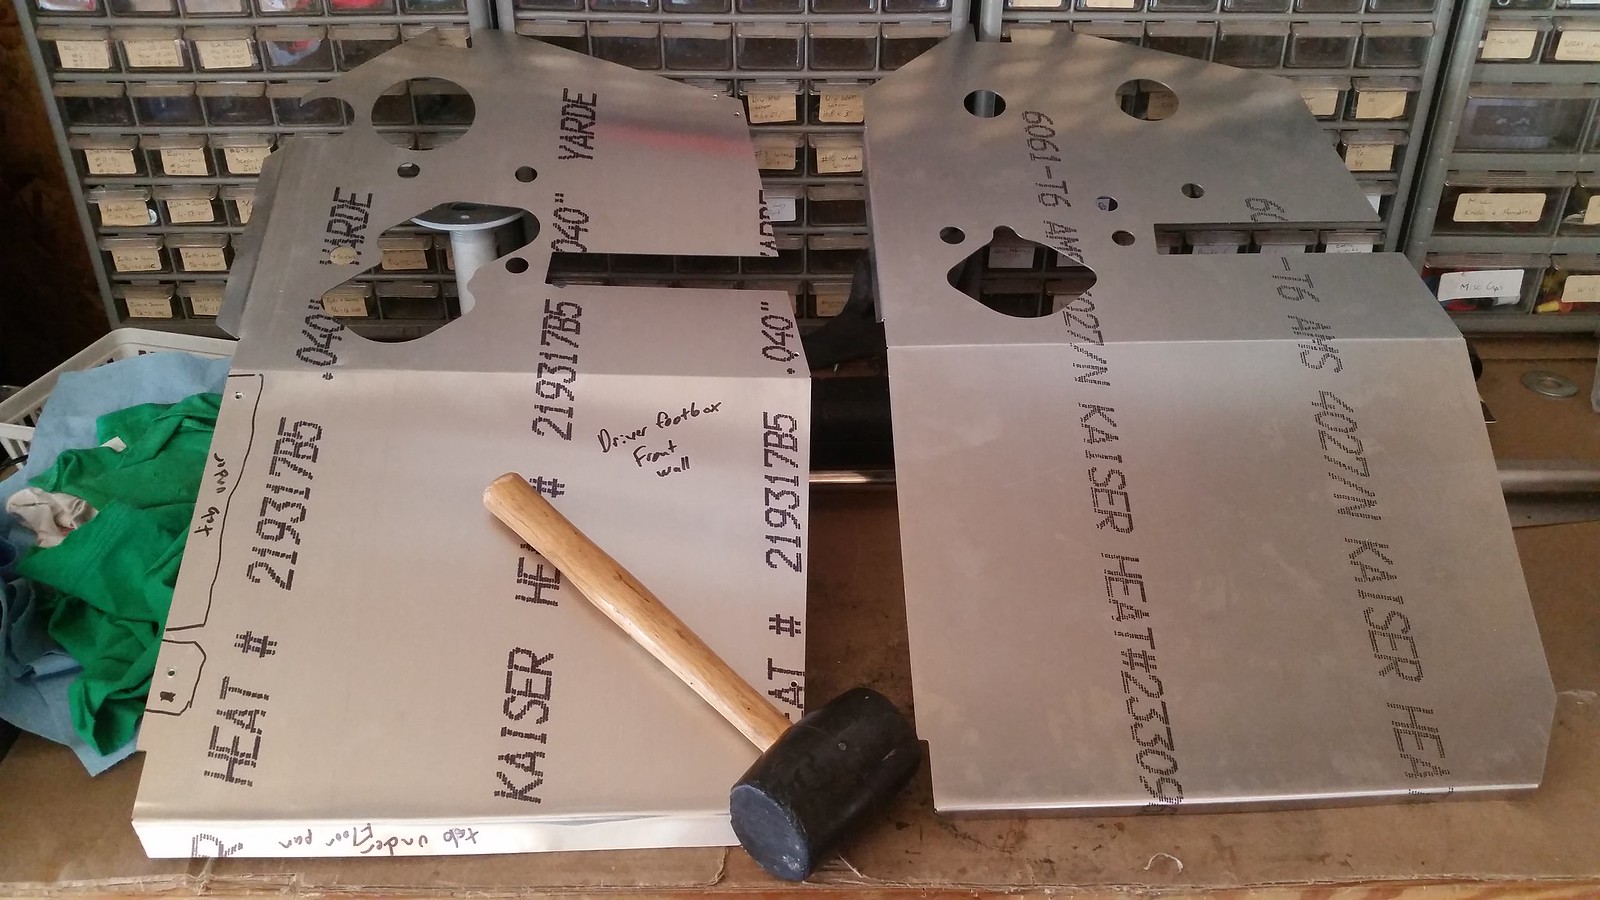
Once flattened, we aligned the edges, clamped, and marked the holes for drilling. After doing it the way we did, I think it would have been easier, and maybe more accurate, just to drill when the two panels were clamped together.
My youngest son temporarily attaching the panel for rivet location marking...
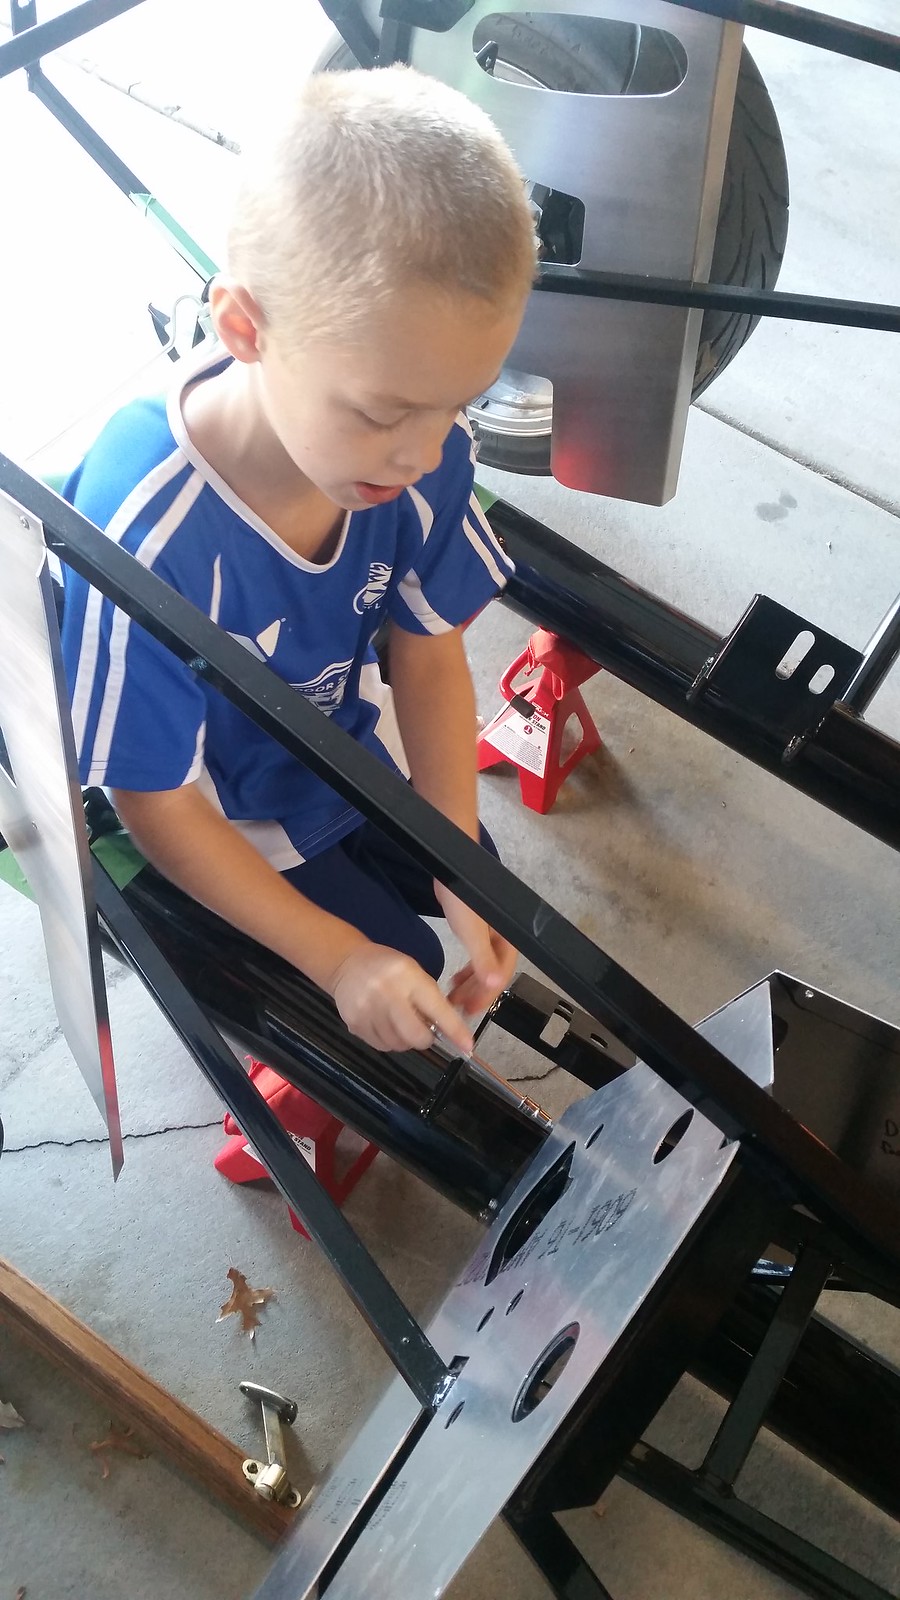
It's a fact...kids love Clecos...
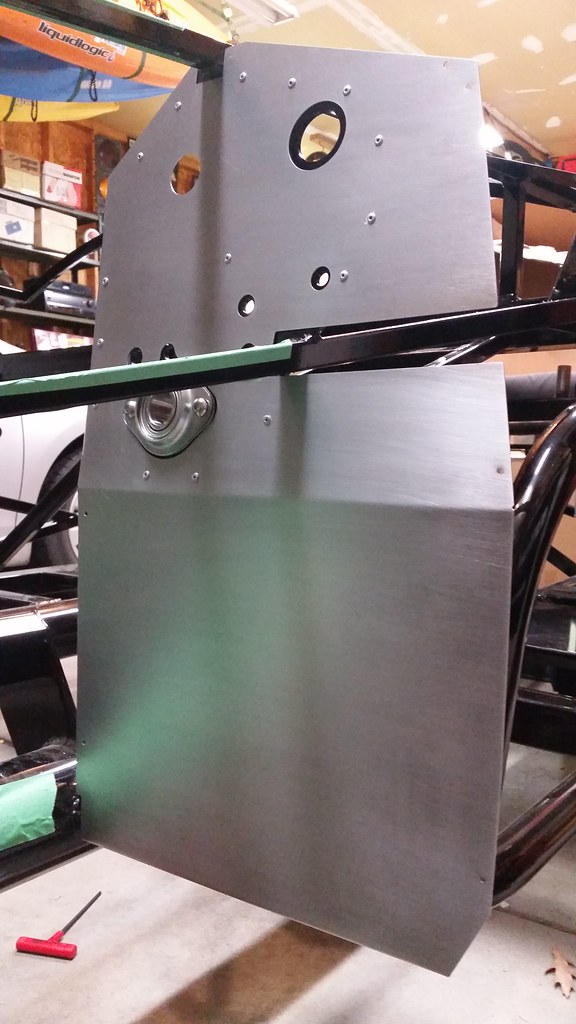
**Edit** After installing the pedal box, I discovered the three rivets in the center of the panel interfere with the pedal box bracket. If you are drilling holes for rivets, don't do the same mistake I did. The rivets I am referring to are the three directly above the lower frame tube taped with green tape in this picture.
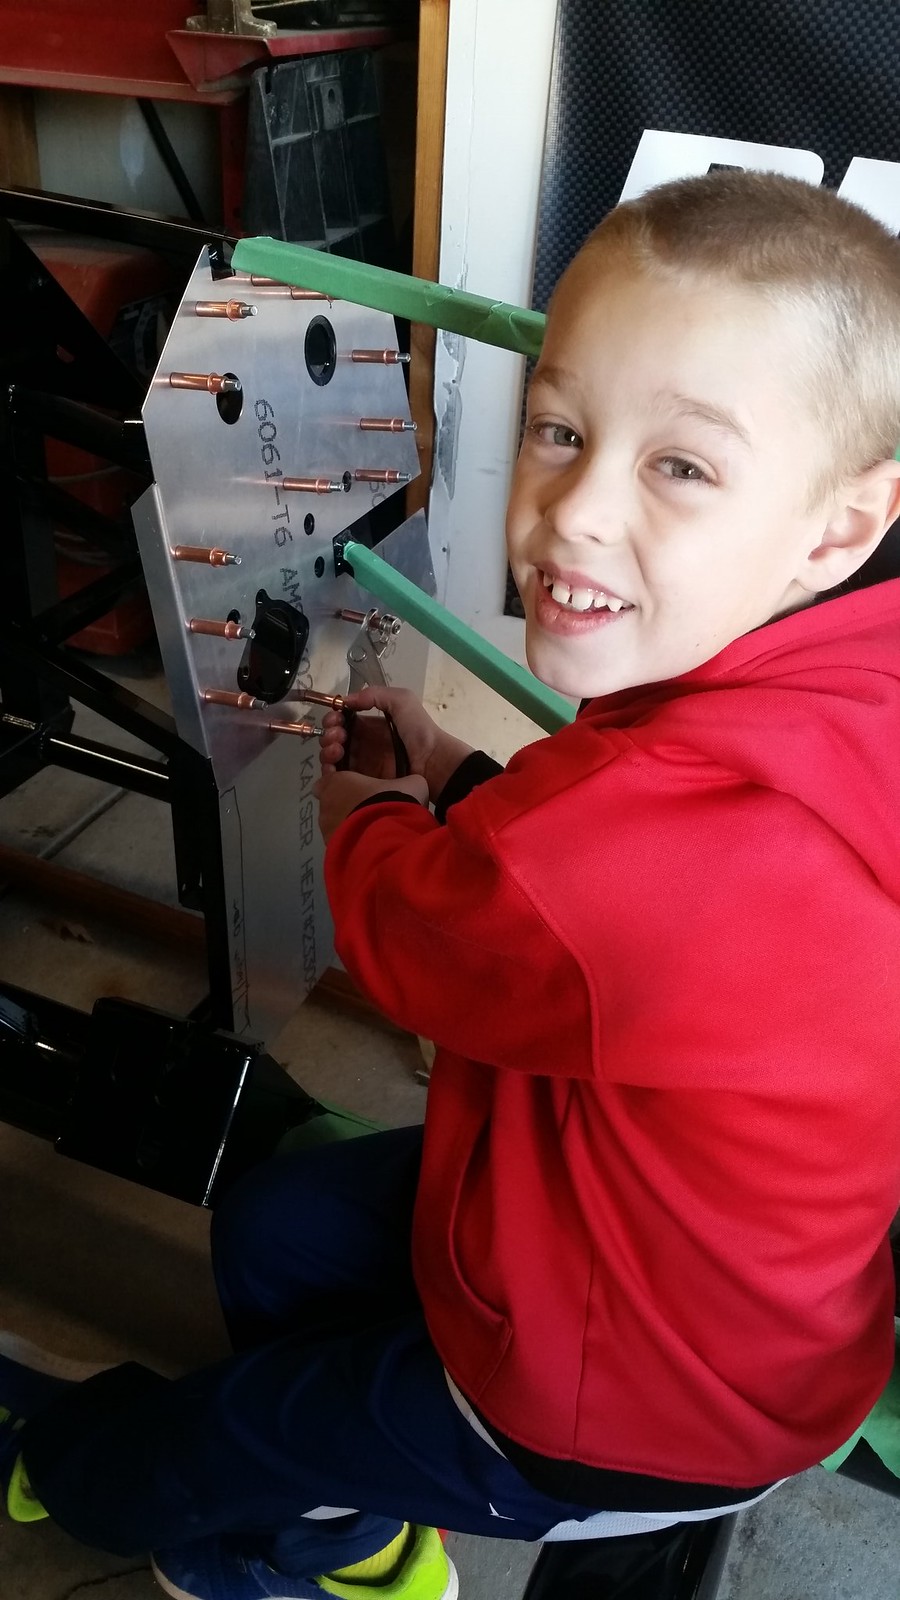
My oldest going to town giving the panel a brushed look...
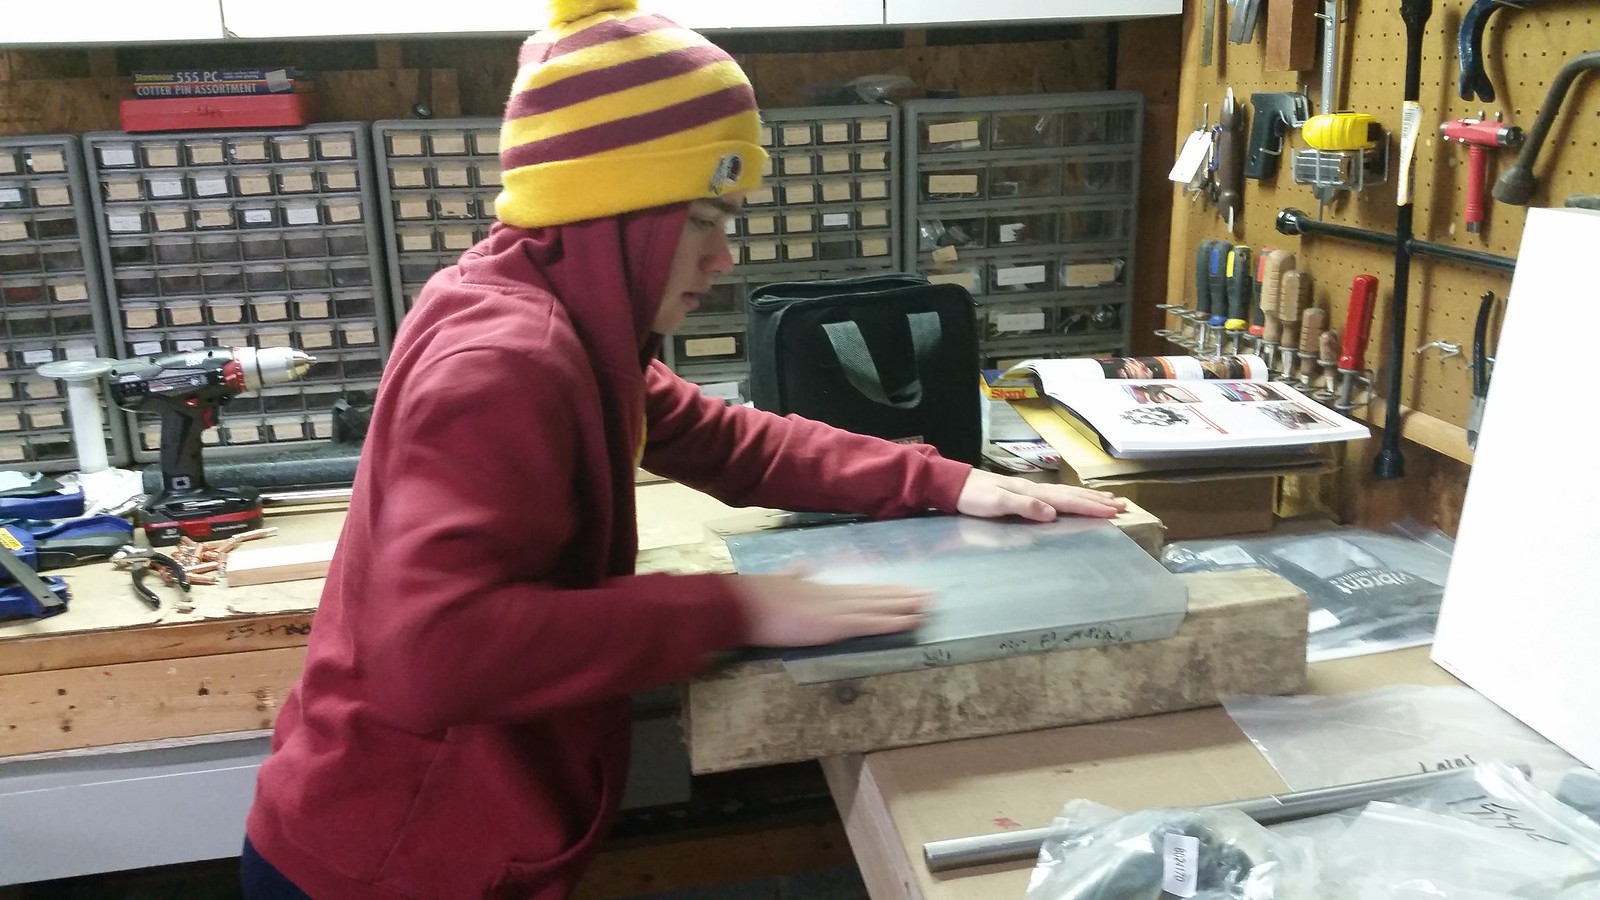
The panel installed and riveted. I'm loving the way these brushed panels look. I can't wait to see the whole engine bay done like this.
Last edited by Yama-Bro; 10-17-2018 at 12:30 PM.
Started dreaming of a Cobra around 1987
Purchased Complete Kit 6/9/2017, Delivered 9/4/2017, Rolling Chassis 3/30/2018, Engine Dyno'ed 3/4/2022, Engine installed 8/27/2022
Click here for my build thread
Serial #9158
Design Engineer at BluePrint Engines
-
Senior Member
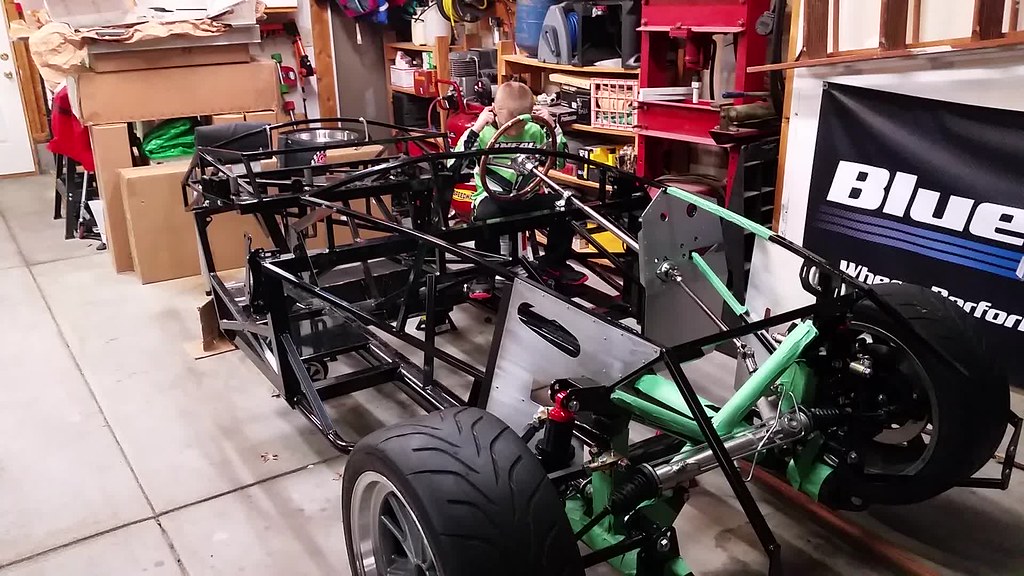
The tie rods installed. This is something I wasn't sure about. I centered the rack to the steering wheel using Papa's method (See post #68) and double checked by counting the turns of the steering wheel (like FFR's build video...here). I lined the wheels up straight by eyeballing, then assembled the tie rods to the steering arms. After assembly, there's only about .75" thread engagement on the passenger side and 1.00" on the driver's side. Is this enough? Seems like there should be more. Do I need to get some sort of extension? Note: the tie rod nuts are not tightened in this picture.

The lower steering shaft where it mates to the rack (pre tightening of the set screws)
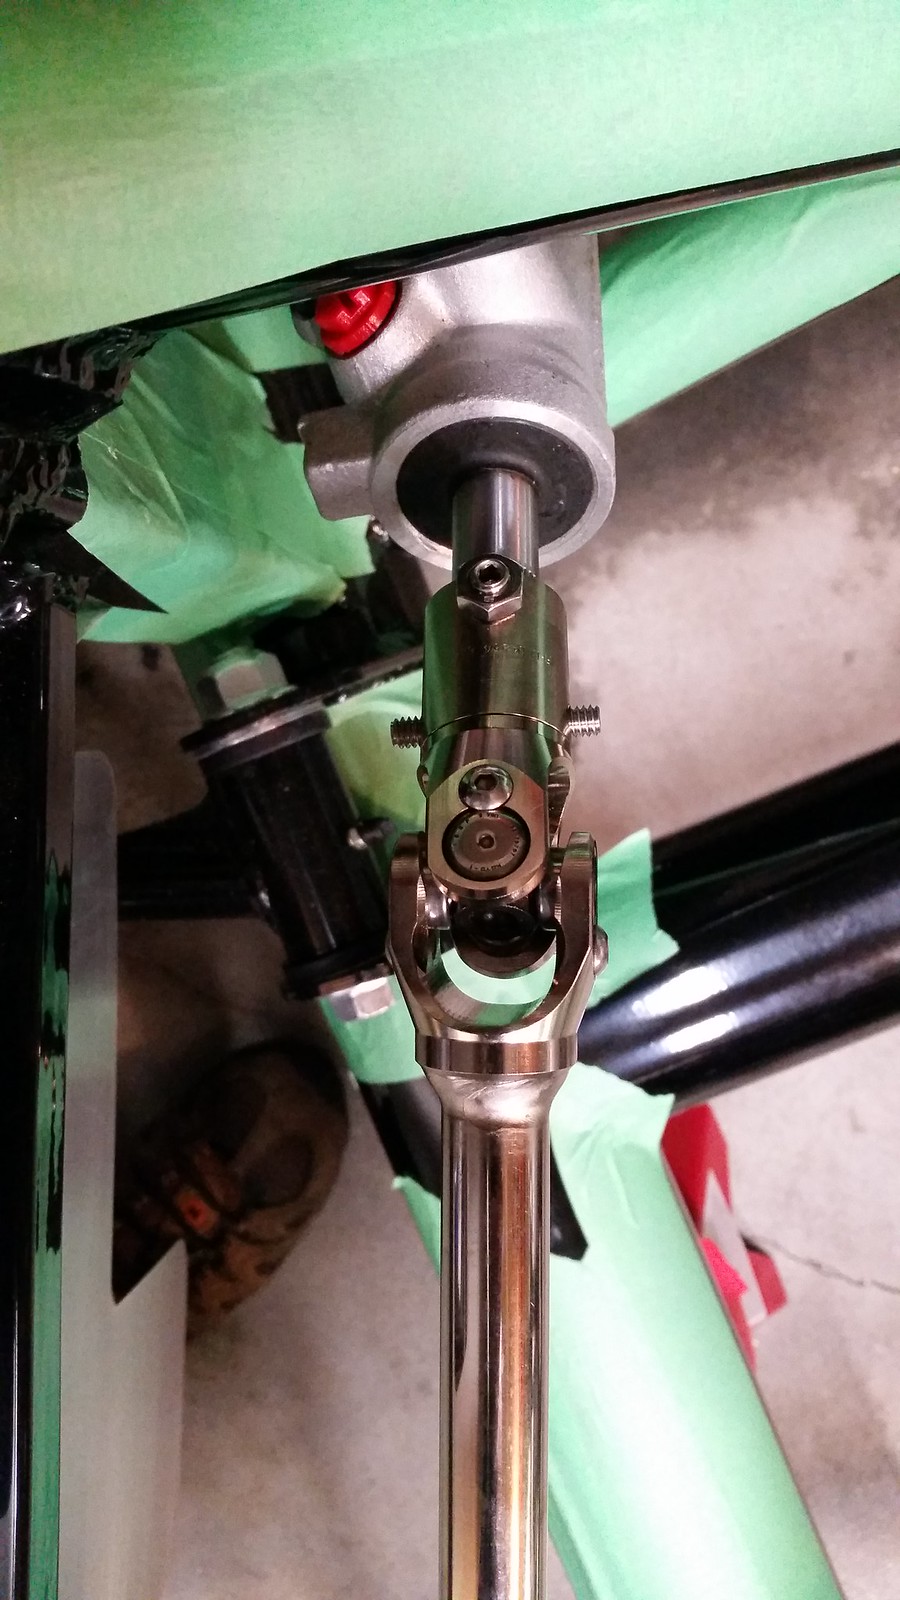
Where the shaft enters the foot box (also pre tightening of the bolts)
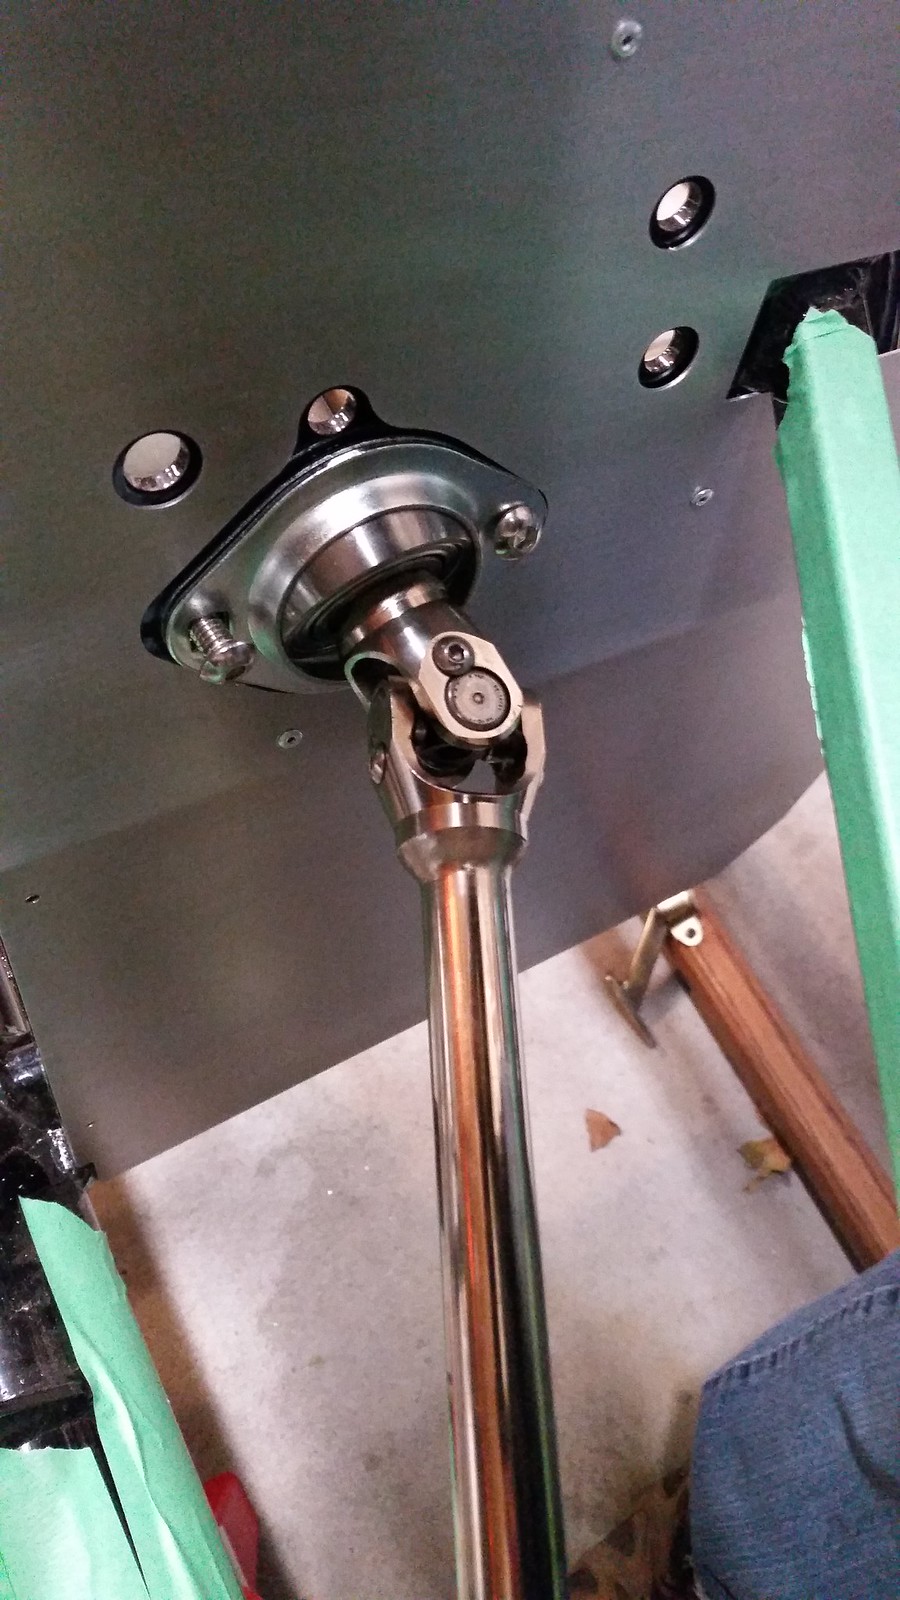
Wyatt fastening the bearing to the frame...
A video of us testing the steering after all the fasteners were snugged up. This was a pretty big moment for us. 
To finish this step, we need to Loctite the set screws, torque the fasteners, and do whatever is needed to get the proper thread engagement on the tie rods. After that we are starting on the rear axle rebuild. I'm not really looking forward to that too much. In fact, it made me think how glad I am that I didn't go the whole donor route. I'm just not excited about cleaning old rusty greasy parts. But this should save me a few hundred bucks so it'll be worth it.
Last edited by Yama-Bro; 10-17-2018 at 12:33 PM.
Started dreaming of a Cobra around 1987
Purchased Complete Kit 6/9/2017, Delivered 9/4/2017, Rolling Chassis 3/30/2018, Engine Dyno'ed 3/4/2022, Engine installed 8/27/2022
Click here for my build thread
Serial #9158
Design Engineer at BluePrint Engines
 Posting Permissions
- You may not post new threads
- You may not post replies
- You may not post attachments
- You may not edit your posts
-
Forum Rules

Visit our community sponsor


 Reply With Quote