-
Senior Member

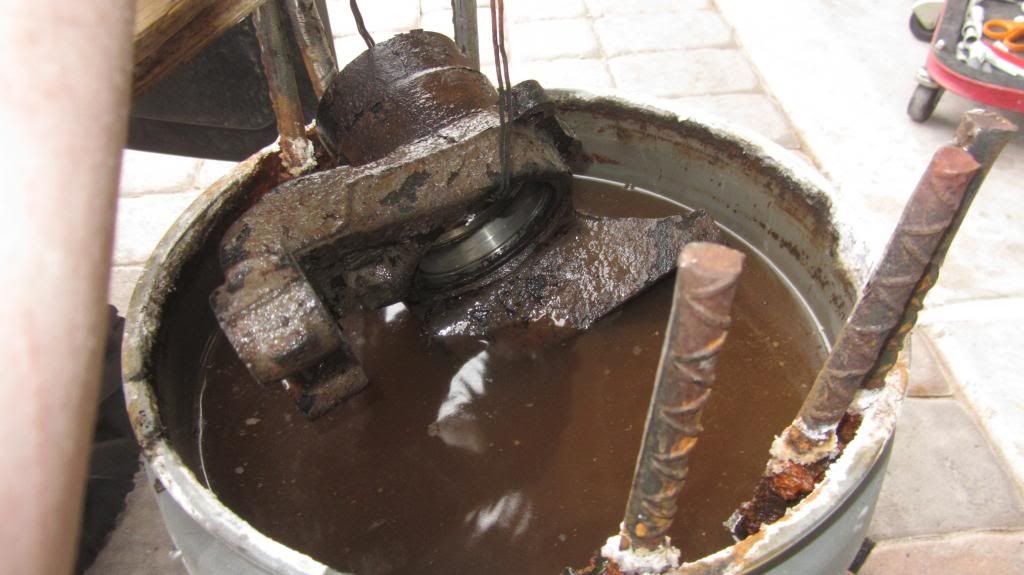
It amazes me how well and easy this rust electrolysis process performs. The above rear knuckle has been cathodizing for about 6 hours. All those rusty bits are just business card to postage stamp size surface flakes now. 95% of it came off with a 2 minute wire brushing and a garden hosing. Missed a few areas so I realigned the part and dunked it for another session. Line-of-sight issue. The anode got super rusty funky for session one.
And that's the same water and washing soda solution with which I started. I had to add a pint of water or so due to evaporation but the solution doesn't go bad. You just keep reusing it until the wife threatens to SuperFund the garage if you don't change it out.
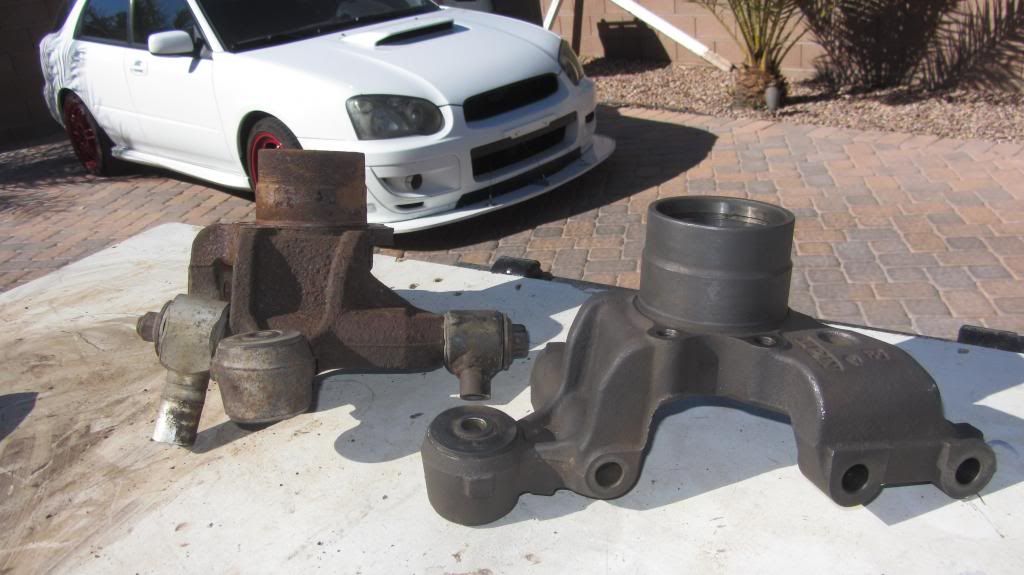
Here's a better before/after shot. After pulling the part out I wire brushed it down for 5 minutes then misted it with WD-40, to Displace the Water, then 10 minutes later wiped the WD-40 and water it displaced off. Parts come out dull charcoal black. I hypothesize the black is the "good rust", aka magnetite. Magnetite is Fe3O4. Red rust (or “hematite”) is Fe2O3. Unlike red rust, black rust is protective and prevents corrosion. Also, things bond better to magnetite than bare iron. Black rust is not sufficient by itself to protect cast iron from corrosion. It’s easily removed if you don't like it. It'll come off on your hands when you handle it.
Our Frank818 found that the best settings to run the charger at are 12v@2 amps for about 3 hours. If it needs more: wire brush for a minute, set it back in the bucket at a different angle, then another 3 hours.
Tips for best results:
- Process works by line-of-sight. If the anode can't see a rusty section of the cathode (your part), it's not getting de-rusted.
- 12v@2 amps for about 3 hours, then brush. Repeat if necessary.
- Don't let the anode and cathode touch under the water/washing soda solution. You'll complete the circuit and electrolysis will stop.
- Hook the negative lead (black) up to the cathode/rusty part, and the positive lead (red) up to your anode. Do it the other way and you'll just make your part rustier.
- Once you've made your solution of 5 gallons of water / 5 tablespoons of washing soda you don't need to add more washing soda for future de-rusting sessions. It doesn't get used up in the process.
- You may end up having to add more water due to evaporation.
- Adding more than 5 tablespoons of washing soda to 5 gallons of water doesn't make the process work better or faster. It just wastes the washing soda. Not that it's all that expensive; it just doesn't do anything. More is not better in this case.
- You can use Baking Soda (Sodium-Bicarbonate) instead of Washing Soda (Sodium-Carbonate) but it's been reported as being half as effective. Meaning you'll have to run your parts longer and your results won't be as good.
- You can put your bare skin right into the water/washing soda/rust solution. It's about as caustic as a load of wet laundry in the washer.
- The anode gets used up as you go. It will get thinner and thinner the more you do the process. So expect to replace it if you do a lot of de-rusting.
- You risk your health putting anything galvanized though this process. Be smart. Save your lungs.
Last edited by Rasmus; 03-30-2014 at 11:09 AM.
-
Post Thanks / Like - 0 Thanks, 1 Likes


 Thanks:
  Likes:


 Reply With Quote
