Very Cool Parts

Visit our community sponsor

Thanks Thanks:  0
Likes Likes:  0
Page 9 of 20 FirstFirst ... 789101119 ... LastLast
Results 321 to 360 of 779

Thread: 818Rasmus E Modified

  1. #321
    Senior Member Rasmus's Avatar
    Join Date
    Mar 2012
    Location
    Las Vegas, USA
    Posts
    983
    Post Thanks / Like

    Got an idea in my head to build my own bump-steer correction kit. Apparently, the 818 bumps steers when you install the suspension in "R" ride height.


    After days of thought on the imperial vs metric debate, I decided to go with imperial size rod ends. Two reasons. 1. The majority of the suspension in the rear will run imperial rod ends and bolts. 2. Price. M16 rod ends run about $65 and 5/8" rod ends run $20 for similar ratings. Next you get in the price of Metric Grade 10.9 hardware vs Imperial Grade 8. Anyway, I cut the end off some old OEM steering rod ends. Drilled and tapped them for 5/8"-18.


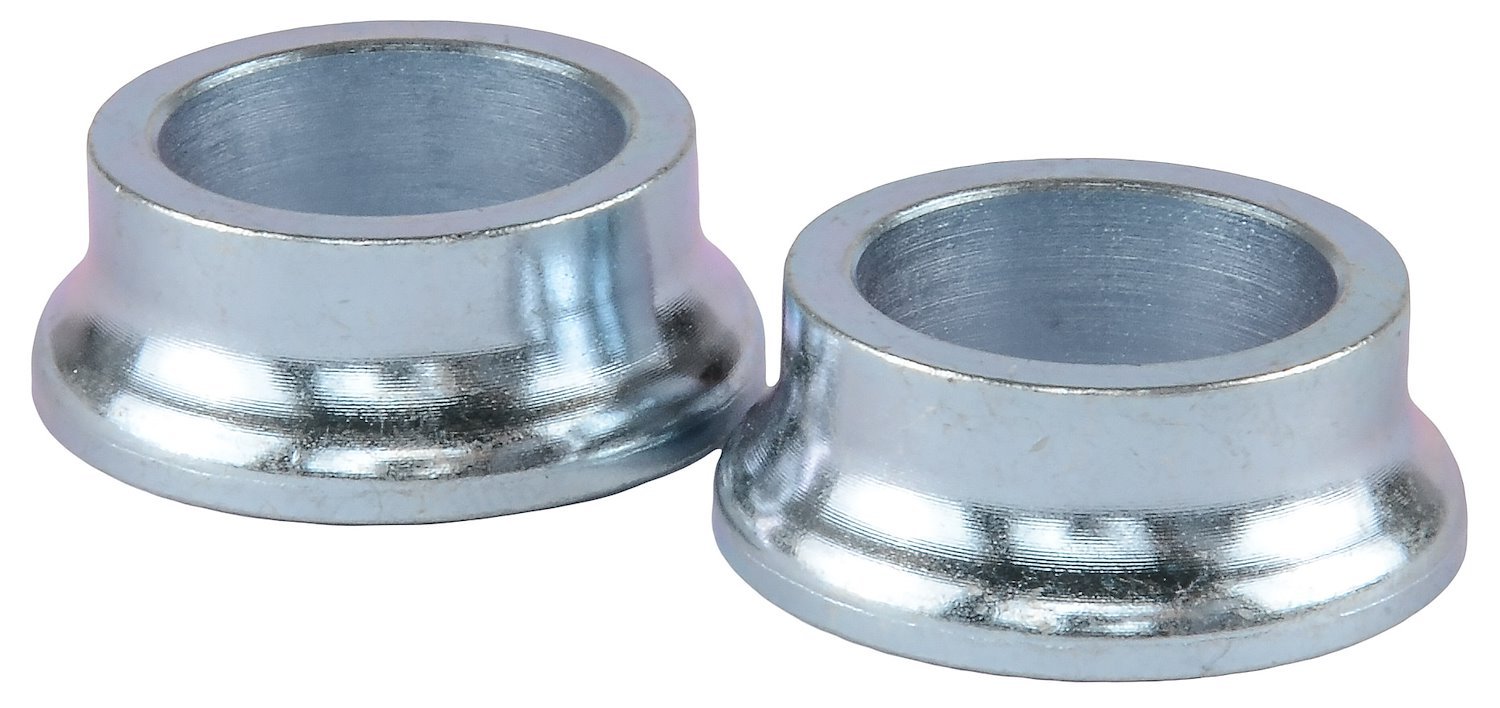
    Notice the spacers. FFR's recommendation to correct the bump-steer is to space the rod end's 2 7/16" down from the steering arm. Or 2 13/16" from bottom of steering arm to center of pivot point. I, intentionally, included a 0.128" washer and cut my main spacer short. Just in case I need to adjust something in the future by running thinner washer, no washer, or more washer.


    Drilling out the steering arms to accept 5/8" bolts. Ridiculousness.


    The full set of hardware that went into it all. I found some nice rod end boots from Jegs. The stainless steel washers in the boots are 0.047" thick. So my full spacer kit is ---> 0.128" washer ---> 2.263" big spacer with bevel for range of motion ---> 0.047" stainless steel washer with boot.


    Installed.


    Other side.

  2. #322
    Senior Member Brando's Avatar
    Join Date
    Oct 2013
    Location
    Irvine, Ca
    Posts
    566
    Post Thanks / Like
    Blog Entries
    1
    Yesterday I also installed my bump steer kit. I was not able to find grade 8 5" 5/8" bolts however. I opted for regular bolts. Those bolts are HUGE and there really isn't that much strain put on the steering rack in contrast to the size of those monsters.
    Do you think that grade 8 is critical for those bolts or is it just to be safe?

  3. #323
    Senior Member Rasmus's Avatar
    Join Date
    Mar 2012
    Location
    Las Vegas, USA
    Posts
    983
    Post Thanks / Like
    Quote Originally Posted by Brando View Post
    Do you think that grade 8 is critical for those bolts or is it just to be safe?
    I don't know if it's critical. I didn't do an engineering stress analysis. I, personally, use only grade 8 or 10.9 hardware in the suspension and braking systems. Especially anything in single shear, like what I did above. That 5 inch bolt will see stress from steering and also under braking.

  4. #324
    Senior Member
    Join Date
    Jan 2014
    Posts
    617
    Post Thanks / Like
    It's not so much shear as tension from levering the end of the bolt using the spacer-knuckle interface as a lever. Probably 5:1 lever ratio on the bolt, times the approximately 20:1 ratio of pinion radius to steering wheel radius. This means the 50 pound of steering effort on the wheel turns into thousands on the bolt. However, back of the envelope calculations say that the wheel should be ripped out of your hands long before the bolt yields.

  5. #325
    Senior Member Brando's Avatar
    Join Date
    Oct 2013
    Location
    Irvine, Ca
    Posts
    566
    Post Thanks / Like
    Blog Entries
    1
    Sorry for the thread jack on this subject. The more I read the more convoluted I feel about this subject. I think i'm sticking with grade 5

    which is stronger grade 8 or grade 5 bolts

    Many people state they discourage grade 8 when shear force is concerned due to being more brittle and snapping as opposed to grade 5 which bends.
    Last edited by Brando; 05-30-2014 at 04:19 PM.

  6. #326
    Senior Member Frank818's Avatar
    Join Date
    Jun 2013
    Location
    QC, Canada
    Posts
    5,732
    Post Thanks / Like
    Rasmus, you are amazing and will never stop surprising us with your awesomely smart ideas. It's nice you share with us part of your brain!
    Frank
    818 chassis #181 powered by a '93 VW VR6 Turbo GT3582R
    Go-karted Aug 5, 2016 - Then May 19+21, 2017
    Tracked May 27/July 26, 2017
    Build time before being driveable on Sep 27, 2019: over 6000h
    Build Completed Winter 2021

  7. #327
    Senior Member
    Join Date
    Jan 2014
    Posts
    617
    Post Thanks / Like
    Quote Originally Posted by Brando View Post
    Sorry for the thread jack on this subject. The more I read the more convoluted I feel about this subject. I think i'm sticking with grade 5

    which is stronger grade 8 or grade 5 bolts

    Many people state they discourage grade 8 when shear force is concerned due to being more brittle and snapping as opposed to grade 5 which bends.
    You can tighten grade 8 bolts more, so the static friction between the surfaces is much higher, keeping shear off the bolt. Also, once a bolt permanently deforms, it's usually only a matter of seconds before it breaks, unless there is a secondary support mechanism. I don't buy the "grade 5s are better" theory. I'd guess that most grade 8 failures are due to improper installation, or on poorly designed joints.

    Always make sure to tighten high grade bolts to their recommended torque value.

  8. #328
    Senior Member Rasmus's Avatar
    Join Date
    Mar 2012
    Location
    Las Vegas, USA
    Posts
    983
    Post Thanks / Like
    Quote Originally Posted by Frank818 View Post
    It's nice you share with us part of your brain!
    Thanks for the compliment. I like giving back to the communities that give so much to me. Plus if I do something boneheaded the interwebs will point it out.

    Quote Originally Posted by Jaime View Post
    Always make sure to tighten high grade bolts to their recommended torque value.
    Just looked up the torque spec for 5/8"-18 Grade 8 bolts. 240 ft-lb dry, 180 ft-lb lubed. Yikees Shaggy! My 1/2" drive torque wrench only goes to 150.

  9. #329
    Senior Member D Clary's Avatar
    Join Date
    Aug 2013
    Location
    Santa Rosa CA
    Posts
    407
    Post Thanks / Like
    I would prefer grade 8, but in this case a half inch bolt would be big enough so a 5/8 is kind of overkill.

  10. #330
    Senior Member
    Join Date
    Jan 2014
    Posts
    617
    Post Thanks / Like
    Quote Originally Posted by Rasmus View Post
    Just looked up the torque spec for 5/8"-18 Grade 8 bolts. 240 ft-lb dry, 180 ft-lb lubed. Yikees Shaggy! My 1/2" drive torque wrench only goes to 150.
    Them's some big bolts. A common problem with under torqued bolts is that they don't stretch enough and then are prone to vibrating loose. Since you have a lock nut on there, that won't happen to you. Like you, I always use high grade bolts for suspension, and I always use lock nuts or lock washers. You can tell a real hardware geek when they always put washers on upside-right.

  11. #331
    Senior Member Rasmus's Avatar
    Join Date
    Mar 2012
    Location
    Las Vegas, USA
    Posts
    983
    Post Thanks / Like
    Quote Originally Posted by Jaime View Post
    You can tell a real hardware geek when they always put washers on upside-right.
    Guess I'm not a real hardware geek then. What side goes where? The rounded side or the sharp side toward the work?


    Now you'll see why I debated on the Metric vs Imperial Rod End question. At $65 per M16 ($65 x 10) vs $20 per 5/8" ($20 x 10). I set my lateral links at Wagon width. 400mm center-to-center. Sedan links are 410mm c-to-c. Pictured above is my low-tech way of getting all four links to the same length. Having set one link to 400mm c-to-c I clamped down some metal angles to just touch got the rod crowns. Set the other three after that. Easy.


    Thus allowing me to hang the rear suspension and knuckles.


    Right Rear. The sweged rods I used are Allstar brand. About $13 per. They're an inconsistent gun-metal color. Some have a slightly more yellow tint, some more green, some more black. I went with 12.5" lengths instead of the FFR recommended 13" because I wanted Wagon width in the rear and I didn't want to screw the rods all the way down, only to come up long trying to get to 400mm. So 12.5". You can see how much thread is exposed.


    Left Rear.


    Drilled out the knuckle's lateral link suspension points to accept a 5/8"-18, 9.5" grip length bolt. Beefy.


    The amount of clearance between the coil spring and the rear upper lateral link is worrisome.


    If you fellas see I've installed anything incorrectly please let me know. Thanks.
    Last edited by Rasmus; 05-31-2014 at 02:52 PM.

  12. #332
    818 builder metalmaker12's Avatar
    Join Date
    Mar 2012
    Location
    Exeter R.I
    Posts
    2,834
    Post Thanks / Like
    Blog Entries
    1
    Lol, looks good!

  13. #333
    Senior Member AZPete's Avatar
    Join Date
    Feb 2011
    Location
    Scottsdale, AZ
    Posts
    2,374
    Post Thanks / Like
    Anything wrong? Those alum panels in your tank bed!
    Other than that, you do nice work!

  14. #334
    Senior Member Rasmus's Avatar
    Join Date
    Mar 2012
    Location
    Las Vegas, USA
    Posts
    983
    Post Thanks / Like
    Quote Originally Posted by AZPete View Post
    Anything wrong? Those alum panels in your tank bed!
    Great. Now I've got 120 1/8" holes to fill in my frame.


    Again.


  15. #335
    Tazio Nuvolari wannabe Scargo's Avatar
    Join Date
    Nov 2013
    Location
    south-central CT
    Posts
    1,611
    Post Thanks / Like
    Ras... That's some nice work. Obviously a machinist or ex-machinist (like me).
    I have to ask why you didn't consider just moving the steering rack up? I will be doing that.

    About the bolts: To everyone, Please... I know I am always sounding like your mother, but this is important! Exclamation point.
    Racers turn loose of their steering wheels when they are about to have a front-end crash. Why? Because everything in the front suspension, which includes the steering, is built hell-for-stout. They do not want to break their hands or wrists. Likewise, you do not wanting anything breaking on your suspension. It sees huge loads (like when you run over a six~eight inch curb).

    You do not want low-grade bolts in anything in your suspension. Just assume I put exclamation points at the end of all my sentences from this point on, OK? In the first place, if you go to Home Despot, or similar, you may be getting inferior, cheap, Chinese bolts. Second place: You do not want common grade bolts in your suspension. You also want to torque everything and use Locktite.

    I'm fascinated that Metric is so expensive compared to SAE. I will keep that in mind when I shop for my end links, etc.
    Where did you buy yours? I have many bookmarks for places to buy this stuff from, but find that there always seems to be the same item for cheaper, hiding under the next rock. And, then there is the other OEM brand of car parts that fits or interchanges that can be had for cheap, IF you know what you are looking for.
    I like: Chromoly tubes with 5/8" ends. Chromoly End links. About $60 for a thin-wall adjustable chromoly lateral link.
    Aluminum and all that yada-yada. Heim ends with load specs. Joe's aluminum hex tube in 3/4 thread.
    These might be what FFR is supplying.
    Last edited by Scargo; 05-31-2014 at 04:57 PM.

  16. #336
    Senior Member Rasmus's Avatar
    Join Date
    Mar 2012
    Location
    Las Vegas, USA
    Posts
    983
    Post Thanks / Like
    Quote Originally Posted by Scargo View Post
    Ras... That's some nice work. Obviously a machinist or ex-machinist (like me).
    I have to ask why you didn't consider just moving the steering rack up? I will be doing that.
    Thanks for the compliment.

    I did consider moving the rack. I even created a thread asking just this question: 818R Suspension and the Steering Rack.

    Quote Originally Posted by Rasmus View Post
    Inspired by a question in another thread:

    Quote Originally Posted by Scargo View Post
    "Running the low ride height requires the use of a bumpsteer kit because the steering rack stays in the same chassis location." Does this mean that the steering rack can't be moved up to stay in plane
    Rather then install a 25mm bumpsteer kit to make up for the drop in height, could we not just move the steering rack up 25mm to correct the geometry?
    Quote Originally Posted by Jim Schenck View Post
    You could do that but the steering geometry will be better if you leave the rack where it is and move the outer tie rod. Getting the long tie rods closer to the plane of the longer lower control arm (longer than the upper) is what you want.
    So I didn't do that 'cause Jim Schenck said to not to.

  17. #337
    Senior Member Rasmus's Avatar
    Join Date
    Mar 2012
    Location
    Las Vegas, USA
    Posts
    983
    Post Thanks / Like
    I ordered my rod ends and hardware from McMaster-Carr.


    Link to my exact rod end.

    Static Radial Load Capacity: 17,955 lbs.

  18. #338
    Senior Member RM1SepEx's Avatar
    Join Date
    Jul 2011
    Location
    Freeport, ME
    Posts
    3,801
    Post Thanks / Like
    I like speedway motors for these rods and links... I've used McMaster too
    Dan

    818S #17 Picked up 8/1/13 First start 11/1/13 Go Kart 3/28/14

  19. #339
    Senior Member Frank818's Avatar
    Join Date
    Jun 2013
    Location
    QC, Canada
    Posts
    5,732
    Post Thanks / Like
    Rasmus, you didn't have any issues when installing the front LCAs' tabs (rearwards big bushings)?
    Frank
    818 chassis #181 powered by a '93 VW VR6 Turbo GT3582R
    Go-karted Aug 5, 2016 - Then May 19+21, 2017
    Tracked May 27/July 26, 2017
    Build time before being driveable on Sep 27, 2019: over 6000h
    Build Completed Winter 2021

  20. #340
    Senior Member Rasmus's Avatar
    Join Date
    Mar 2012
    Location
    Las Vegas, USA
    Posts
    983
    Post Thanks / Like
    Quote Originally Posted by Frank818 View Post
    Rasmus, you didn't have any issues when installing the front LCAs' tabs (rearwards big bushings)?
    Oh, I did. That was not fun. I eventually just went by the FFR manual and installed the Lower Trailing Link onto the the knuckle first thing, while it was on the bench. Helped to smear a dab of grease on the bushing and tabs then "walked" it on. Next came the Lower Lateral Links. Easy. Then I used a pry bar to open up the tabs so the Lower Trailing Arm's front bushing would slide in there. After that it was easy. After setting a rough alignment, coilovers go on last.

  21. #341
    Member mentatbashar's Avatar
    Join Date
    Jul 2011
    Location
    Wichita, Ks
    Posts
    58
    Post Thanks / Like
    Quote Originally Posted by Rasmus View Post
    Guess I'm not a real hardware geek then. What side goes where? The rounded side or the sharp side toward the work?
    Rounded off side of washers to the part. Sharp edges to the bolt. You don't want the sharp edges "digging into" the material of your part.

  22. #342
    Tazio Nuvolari wannabe Scargo's Avatar
    Join Date
    Nov 2013
    Location
    south-central CT
    Posts
    1,611
    Post Thanks / Like
    Quote Originally Posted by RM1SepEx View Post
    I like speedway motors for these rods and links... I've used McMaster too
    Some sources say they can be had with grease fittings. Does anyone feel this is a plus? How do you lube yours?
    Along similar lines, I have looked at 1 inch swaged aluminum tubes (using 5/8" threads) for use in the rear suspension. Are they going to be strong enough for lateral links and trailing arms, etc? I have calculated that I can save over a pound in partially unsprung weight by using these aluminum tube links.
    Last edited by Scargo; 06-01-2014 at 11:20 AM.

  23. #343
    Senior Member Rasmus's Avatar
    Join Date
    Mar 2012
    Location
    Las Vegas, USA
    Posts
    983
    Post Thanks / Like
    I understand I'm building a kit car. I know there will be issues I have to work though. I've worked through several already. It's not a Toyota and stuffs gonna need a little tweaking to fit. But this:


    The throttle pedal. That's how FFR's designed mounting bracket makes the throttle sit. And because it is made of from thin 16ga metal it flexes when you press on it. That is, it twists to the side under any load. It's just a bad design and poorly engineered. Like it was an after thought, "Guess we need to mount the DBW throttle some how. Hey, have the intern design something. Perfect. Where we going for lunch?"
    Last edited by Rasmus; 06-01-2014 at 07:55 PM.

  24. #344
    Senior Member Frank818's Avatar
    Join Date
    Jun 2013
    Location
    QC, Canada
    Posts
    5,732
    Post Thanks / Like
    You did not receive a pedal box thick metal plate to bolt on the chassis?
    Frank
    818 chassis #181 powered by a '93 VW VR6 Turbo GT3582R
    Go-karted Aug 5, 2016 - Then May 19+21, 2017
    Tracked May 27/July 26, 2017
    Build time before being driveable on Sep 27, 2019: over 6000h
    Build Completed Winter 2021

  25. #345
    Senior Member Rasmus's Avatar
    Join Date
    Mar 2012
    Location
    Las Vegas, USA
    Posts
    983
    Post Thanks / Like
    Quote Originally Posted by Frank818 View Post
    You did not receive a pedal box thick metal plate to bolt on the chassis?
    I did. The clutch and brake pedal assembly bolts to that. The throttle bracket is separate.

  26. #346
    Senior Member RM1SepEx's Avatar
    Join Date
    Jul 2011
    Location
    Freeport, ME
    Posts
    3,801
    Post Thanks / Like
    The cable setup flexes too... I eliminated it and mounted the pedal right to the firewall
    Dan

    818S #17 Picked up 8/1/13 First start 11/1/13 Go Kart 3/28/14

  27. #347
    Senior Member
    Join Date
    Jan 2014
    Posts
    617
    Post Thanks / Like
    Quote Originally Posted by RM1SepEx View Post
    The cable setup flexes too... I eliminated it and mounted the pedal right to the firewall
    Any details on what you did? The cable pedal mount is one of my backordered parts and something I'd like to get finished.

  28. #348
    Senior Member Bob_n_Cincy's Avatar
    Join Date
    Sep 2012
    Location
    Cincinnati OH
    Posts
    3,904
    Post Thanks / Like
    Rasmus
    I reshaped the bracket to bring the pedal to the proper angle.
    The pedal still has some flex.
    Don't forget to put in the pedal stop, like oem.
    Bob
    See pictures.
    gas pedal.jpg250px-Pedal_Locations_in_2007_Subaru_Legacy.jpg

  29. #349
    Senior Member Pearldrummer7's Avatar
    Join Date
    Feb 2014
    Location
    Asheville, NC
    Posts
    1,230
    Post Thanks / Like
    Quote Originally Posted by Rasmus View Post
    Hey, have the intern design something.
    Hey, their intern Frank did some great work on that car, actually! :lol:

    But seriously, that's so poorly designed. Why isn't it mounted to the firewall, anyway? Wouldn't that be the easiest solution?

  30. #350
    Senior Member RM1SepEx's Avatar
    Join Date
    Jul 2011
    Location
    Freeport, ME
    Posts
    3,801
    Post Thanks / Like
    Quote Originally Posted by Jaime View Post
    Any details on what you did? The cable pedal mount is one of my backordered parts and something I'd like to get finished.
    details are on my thread, just line up the cable hole and drill holes through the aluminum. Take the thin steel mount bracket and toss it. I also found that I didn't have enough cable free play using the supplied bracket. It is quite a bit "stiffer" w/o the bracket. Wayne did his car and the GRM car w/o the bracket
    Dan

    818S #17 Picked up 8/1/13 First start 11/1/13 Go Kart 3/28/14

  31. #351
    fasterer and furiouser longislandwrx's Avatar
    Join Date
    Aug 2012
    Location
    Long Island
    Posts
    2,540
    Post Thanks / Like
    Blog Entries
    6
    Wait the rear knuckle Subaru long bolts are M16?

    Also what did you use to space the rod ends off the knuckles?
    Last edited by longislandwrx; 06-02-2014 at 07:16 AM.
    A well stocked beverage fridge is the key to any successful project.

  32. #352
    Senior Member Rasmus's Avatar
    Join Date
    Mar 2012
    Location
    Las Vegas, USA
    Posts
    983
    Post Thanks / Like
    Thanks for the help on the throttle position fellas. Might just put a spacer in there. RM1SepEx, mines DBW but thanks for the thought.

  33. #353
    Senior Member Rasmus's Avatar
    Join Date
    Mar 2012
    Location
    Las Vegas, USA
    Posts
    983
    Post Thanks / Like
    Quote Originally Posted by longislandwrx View Post
    Wait the rear knuckle Subaru long bolts are M16?

    Also what did you use to space the rod ends off the knuckles?
    No. The rear knuckle Subaru long bolts are M14-1.50 x 240mm. The reason I mentioned M16 rod ends are the 5/8" upper holes FFR designed into the frame's lateral link tabs. 5/8" is 15.875mm which is just about the width of an M16 bolt shank. 15.80-15.85mm. So it's tight with the powercoat on but it could work.


    Spaced off the knuckles with this neat part I found on Jegs for $2.59 per pair:


    JEGS 555-64255

    Its comes in 1/2" and 5/8" diameters and widths from 1/4" to 1". I used two 3/8" width ones for the knuckle side and four of the same for the frame side. Or twelve for the whole system, (i.e. six packages).

  34. #354
    Senior Member C.Plavan's Avatar
    Join Date
    Mar 2011
    Location
    Clovis, Ca
    Posts
    2,225
    Post Thanks / Like
    Been there, done that on the throttle. I used a spacer. I then welded a brace up top to stop wobble. I plan on just making a throttle stop so I don't break the pedal off when racing.

    http://thefactoryfiveforum.com/showt...l=1#post129042
    Last edited by C.Plavan; 06-02-2014 at 10:08 AM.
    Thanks- Chad
    818R-SOLD!!!- Go Karted 7/20/14/ Officially raced NASA ST2- 2/28/15
    2016 Elan NP01 Prototype Racecar Chassis #20
    1969 Porsche 911ST Vintage Race Car
    1972 Porsche 911T (#'s matching undergoing nut & bolt resto in my garage)

  35. #355
    Member
    Join Date
    Apr 2014
    Posts
    79
    Post Thanks / Like
    Quote Originally Posted by Rasmus View Post
    Even welded it back together with the weird ~20 degree offset the two opposing universal joints had originally. I don't know why Subaru welded it together that way but I didn't care to research why and just duplicated it.
    They're at an angle so all the needle bearings roll when rotated. If they were straight, they wouldnt move enough and would wear a pit in the shaft, like the bearings did on your bad CV-joint.. You end up with this "clicking" feel in the steering.

  36. #356
    Senior Member wleehendrick's Avatar
    Join Date
    Jul 2012
    Location
    Encinitas, CA
    Posts
    1,653
    Post Thanks / Like
    Blog Entries
    2
    Quote Originally Posted by Rasmus View Post
    Thanks for the help on the throttle position fellas. Might just put a spacer in there. RM1SepEx, mines DBW but thanks for the thought.
    I also have a DBW throttle (06 donor) and wasn't happy with the position. I bent the top flange of the FFR bracket and added a spacer on the bottom bolt, I think I ended up ~1.25". This puts it in a great spot for heel-and-toe operation, but it's still a bit flexy, so I'll probably beef it up at some point. But, being DBW, it's easy to move it around since you don't have to worry about routing a cable!

  37. #357
    Senior Member Rasmus's Avatar
    Join Date
    Mar 2012
    Location
    Las Vegas, USA
    Posts
    983
    Post Thanks / Like
    Quote Originally Posted by wleehendrick View Post
    But, being DBW, it's easy to move it around since you don't have to worry about routing a cable!
    There's the positive I needed. Thanks man all things considered at least it's DBW and I can "easily" make a bracket to suit.

  38. #358
    Senior Member wleehendrick's Avatar
    Join Date
    Jul 2012
    Location
    Encinitas, CA
    Posts
    1,653
    Post Thanks / Like
    Blog Entries
    2
    Ha! in the grand scheme of building a kit car... yes, this was an easy one

  39. #359
    Senior Member Rasmus's Avatar
    Join Date
    Mar 2012
    Location
    Las Vegas, USA
    Posts
    983
    Post Thanks / Like

    Made a 22mm spacer out of HDPE. Sits the throttle pedal back just a bit behind the plane of the clutch and brake. Which is how Subaru mounts it.


    Bolted the steering column in. The seat's on 25mm wood blocks so I could have a sit.

  40. #360
    Tazio Nuvolari wannabe Scargo's Avatar
    Join Date
    Nov 2013
    Location
    south-central CT
    Posts
    1,611
    Post Thanks / Like
    Great find on the JEGS spacers. Now, who has all the grade 8 bolts in onesie-twosies?
    PS: I'm trying to do as much Metric as I can when cost is not totally prohibitive.
    Last edited by Scargo; 06-03-2014 at 10:03 AM.

Page 9 of 20 FirstFirst ... 789101119 ... LastLast

Posting Permissions

  • You may not post new threads
  • You may not post replies
  • You may not post attachments
  • You may not edit your posts
  •  

Breeze

Visit our community sponsor