-
Senior Member

Bren's Build Thread
Well, I've made my final changes to my Factory Five invoice and they've started assembling my kit. I expect to have it delivered to my Dad's house in a little over a month. So, I thought this would be a good time to start a build thread.
I've already started a blog on another website (http://cobraproject2014.wordpress.com/). I plan on replicating everything from that site to this thread, so the first few posts will actually have been written some time in the past. I apologize if the first few posts are a bit boring to all of you "in the know," but part of my goal of the thread is to help others who are just starting off.
Anyway, I hope this will be entertaining to everyone as it will be a bit fast paced (relatively speaking). I plan on finishing the build by the end of summer (except for body work and a few odds and ends).
I look forward to the actual building of the car. I have no doubt that you all will be extremely helpful (as you already have been)!
Enjoy!
Last edited by Bren; 04-01-2014 at 10:46 AM.
-
Senior Member
A couple of months ago I pulled the trigger and bought a kit car for an AC Shelby Cobra replica from Factory Five. My goal with this blog is to detail and memorialize the building process so that (1) I can keep friends up to date, (2) help out other people going down this path, and (3) keep a record of the process.
Ever since I was a teenager my dream car has always been the Shelby Cobra. I remember searching the classified ads for cobras when I was 15 shopping for my first car. That (obviously) didn’t pan out, and I ended up with a Honda Civic. Good car, but no Cobra.
After growing up a bit, I realized that I’ll never own a real Cobra. Aside from the astronomical price, I’d be too scared to really drive the thing because who wants to be responsible for ruining history like that? The only way I could own such a gorgeous and powerful vehicle is if I bought a replica. So I looked into that, but who wants to buy a replica when you can build your own?! (A lot of people, probably, but not me!)
So, for a long time I was stuck with this pipe dream of one day building a Cobra replica. Living in Arkansas, I never had the garage space. Living in Madison as a student, I had no space and no money. So, what’s changed? Having a complete summer off with (almost) nothing to do. I graduate in May, but I won’t start working until the Fall and all I have to do between then is study for the patent bar exam, which I’m hoping to knock out (at least a portion) during my last semester.
So, to make a long story short, the summer of 2014 is the only opportunity I will ever have to build and work extensively on a car with my dad. And I’m taking that opportunity.
-
Senior Member
Now that I’ve got the intro out of the way, lets get into the fun stuff!
First of all, I chose to go with a Factory Five brand (www.factoryfive.com) Cobra replica kit. Factory Five has been making these things since the 1990′s and have sold thousands of them. That they are considered to be among the best kit cars around (especially for the price) was only part of my decision to go with Factory Five. My primary reason, however, was that they offer the ability to build a (almost) completely brand new car, i.e., no donor car is needed! That means not having to deal with a rusted out junker or something that got t-boned by a semi and pulling out all the pieces you need to cobble together your kit car (that’s how kit cars got such a bad rep). That means a brand new chassis, suspension (except for some rear drive train parts, but more on that later), brakes, steering, cooling system, everything. They supply everything you need to build a car except the engine and transmission. Also, their roadster is designed with racing in mind, so the quality of the build is superb. I don’t plan on racing, but I still want to have a good car that’s more than for show and can actually perform (and not throw me off the road).
So, here’s a list of everything I ordered, and some explanation why (you’ll notice that many of my choices are because I think something is cool, and that’s the best part about this – I’m building my dream car!):
Factory Five MK IV Complete Kit – The complete kit means you don’t need a donor car; MK IV is their latest and greatest model of the Roadster (i.e., Cobra replica)
Powder coated chassis – this means that the chassis will be painted at the factory; it’s a rust preventer and looks better
Body cut outs – typically, the fiberglass body comes as if it had just come off of the mold (with the addition of the glass welds they use to put the various pieces together) meaning that there are no holes for things like the gas cap, headlamps, roll bar, etc.; I’m not that into body work and I don’t know anything about working with fiberglass, so I’ll let the professionals do the cutting (although, even with the cut outs being done at the factory, they are still only rough cut, so I’ll have to tidy them up to make them perfect)
Black leather seats – Factory Five offers a vinyl seat, a leather seat, and a high backed racing style seat, all in black; I’m going for more of the traditional look, so I got the lower backed seats, and I decided to upgrade to leather, just because
Pin drive suspension - the pin drive rear suspension comes only in an independent rear suspension (as opposed to a straight axle) configuration, which is what I wanted because the IRS improves handling and ride quality; “pin drive” refers to how the wheels are connected to the car – instead of having five lug nuts holding your wheels on, like most modern cars, there is a single, large wing nut holding the wheels on (the nut is on a “pin”); I chose the pin drive for the cool factor, and because that’s what was on the original (vintage) cars
Vintage gauges – the standard gauges that come with the kit look like they came off of a modern race car but, as I’ve already said, I’m going for the traditional look; the speedometer is pretty cool because it’s “reversed” meaning that 0mph is around the 4 o’clock position, and top speed is about the 8 o’clock position, just like the originals – neat!; I also added an oil temperature gauge to replace the clock that comes in the vintage gauge set (I’d much rather know that my engine is doing alright than know what time it is)
Stainless side exhaust - the standard exhaust comes out of the side, but is bare steel, meaning that you have to paint it (or chrome it, I suppose); I chose the stainless steel version because after years of use, the stainless acquires a brownish patina that, in my opinion, looks cool because it’s actually being driven, instead of in a museum or hiding away in someone’s garage
Wind wings/sun visors – these are pieces of glass that hang off of the windshield and are used to deflect the wind (as there is no top to this car) and the sun visors are tinted to, obviously, block out the sun; I chose these so that I can control (somewhat) the wind and make the ride more comfortable; apparently, they make a big difference
Windshield wiper kit – the basic kit does not come with windshield wipers; I got them so that if I ever accidentally get rained on, I can still drive; also, Wisconsin regulations require a car to have wipers before it can be registered
Chrome roll bar – all of the kits come with a single roll bar on the driver’s side; I upgraded to chrome to match the side exhaust (as opposed to painting the roll bars); I did not get a roll bar on the passenger side solely for aesthetic reasons
Pin drive wheels – I’ve got to get the pin drive wheels from someone, so why not Factory Five?; the wheels they have are replicas of the wheels used in the Cobra race cars (also, when I placed my order, all accessories were 50% off!)
Stainless steel bumper kit – also required by Wisconsin regulations; the basic kit comes with quick jacks which were used by the race cars the place of bumpers – they are basically little arms that come off of the front and rear ends that you can put a bar under the quick jacks and lift the entire end up at once instead of jacking up one wheel at a time.
Rear brakes – the kit comes only with front brakes and when you have as much power as I plan to have in the engine, you need to be able to stop quickly, so I’m adding rear brakes (I think everyone should have front and rear brakes – you can’t have too much stopping power); I’m limited to the stock Mustang brakes because of my pin drive wheels which are only 15″ in diameter (most of the standard drive/lug wheels are larger in the rear an can accommodate larger brakes) but, since I don’t plan on racing anyone, and I figure the car is so light anyway, these brakes should do
Blank dash – the dash that comes with the kit is pre-drilled for all of the instruments; that sounds great and easy, but I want to lay out my own dash so that everything is exactly where I want it (line of sight for me); I also plan on modifying some of the controls (I’ll explain that later) so I need to make sure none of the pre-drilled holes are too big or in the way; the dash is just an aluminum plate on top of a wood back, so cutting through it shouldn’t be too difficult
These are just the things I’m getting from Factory Five. I plan on getting other “accessories” from third party vendors. I’ll detail those as I purchase them. I plan on finally deciding on an engine and engine builder in the next few days and you’ll get to hear the roller coaster that was that decision then.
The kit will be ready to go on April 26 when it will be picked up from the Factory Five shop in Massachusetts by Stewart Transportation, who ship these things all the time. The body will be bolted onto the chassis, and the rest of the parts will come in about 35 other boxes. It will be delivered to Mom and Dad’s garage around May 10, hopefully a few days after I get down there. Notice, May 10 is a few weeks before graduation, so I’ll miss the graduation ceremonies to start work on my car (time WAY better spent). I can’t wait!
-
Senior Member
This week we sent a check to Performance Automotive Customs for our engine! It’s now on order and they are going to start working on it. I’m so excited!
So, what engine am I getting? Well, I settled on a 427 ci carbureted, naturally aspirated engine based on the Dart 351W v8 that will produce (I’m told) 575 hp and 575 ft lbs torque (that’s a lot, if you don’t know). This is a Ford engine. I went with Ford because of the Cobra’s history with Ford. To me, putting anything but a Ford in a Cobra is just plain wrong. Here’s what this means and why I made those decisions:
427 ci refers to the displacement of the engine. In metric terms, that’s about 7 liters. I chose 427 because that was the largest engines that came in the original AC Shelby Cobras (the actual 427s were 425 cubic inches because racing rules limited engine size to 7 liters). Now, I’m going to briefly tell you the history of the Cobra engines because I find it interesting.
Originally, Ford provided Carroll Shelby with a smaller, 260 ci engine to place into the small, British made AC Ace car (AC had just lost their source for engines and was looking for another manufacturer). During the first production year, the engine size was increased to a 289 Windsor (more on Windsor later). Shelby used the 289 engine with great success on the race tracks in the US. Nobody could beat the Cobras (including Corvette, which Ford really wanted to beat). Eventually, he decided to try his hand in Europe at Le Mans (a prestigious 24-hour race). The 289 engines did great in the corners and could easily beat Ferrari. However, Le Mans has long, straight portions of the race, and the Ferraris had a much higher top speed than the Cobras, and Shelby lost. So, logically, to increase top speed, increase the engine size. Luckily, Ford just began producing a 427 ci engine that they gave to Shelby for the Cobras. The (much) larger engines required some body modification to the cars. Shelby had to bulge the sides out. Before that, the sides of the cars were flat (slab side). Cobra kit cars today are all based on the 427 Cobras because they look SO much better. Anyway, Shelby took the 427 Cobras to Le Mans, but was unsuccessful. First, the Cobras still didn’t have the top speed to match Ferrari because the aerodynamics of the Cobra just didn’t allow for the speeds to beat Ferrari. Secondly, and more importantly, the 427s had cooling problems and overheated easily (the street 427 Cobras that were produced had a big problem overheating when they were stopped at red lights because no air was flowing through the radiator to cool down the water). The 427 Cobras didn’t even finish the race. To finish first, you first have to finish. That’s when Shelby redesigned the body into the Daytona Coupe style (also a beautiful car). With the redesigned body, Shelby beat Ferrari which was a huge victory for Shelby, the US, and everyone who was not Ferrari.
Anyway, like I said, I chose the 427 ci size because it was the biggest and most powerful. This car, after all, is a race car. If I’m going to do this project, I’m going to do it right. Also, in keeping with originality, the 427 matches most closely with the body style. Further, there’s just something about being able to say, “Yeah, it’s a 427.”
With size figured out, I next had to decide which engine block to get. Of course, the original 427s were big blocks (today referred to as FE, for Fords). Today, there is a choice between a big block engine with 427 ci and a small block 427 ci. I decided to go with the small block. I know what you’re saying: “But I thought you were concerned with originality! Why not go with the big block?” The answer: practicality. Yes, the big blocks are more original and they also look better because they really fill out the engine compartment. However, there are some downsides. First, fuel consumption. The big blocks get very poor gas milage. The small blocks don’t get good gas milage either, but the gas tanks on these cars are relatively small. I don’t want to have to fill up on gas every 80 miles. Second, availability of parts. The small blocks have a huge following in other muscle cars (like the Mustang) and there are tons of aftermarket suppliers and parts available. Everyone who works on Ford engines knows their way around a small block v8. Third, price. The big block 427s aren’t really produced anymore. Thus, to get a big block 427, you have to find an old 427 and re-do everything. This isn’t as easy as buying a new small block, and adds about $5,000 to the cost of the engine. Finally, originality. To be truly authentic, I’d need a “side oiler.” The side oilers are preferred because the lubrication system is a bit better. However, they are very rare. I didn’t even find any side oilers for sale, but I’d guess that to get a side oiler would be tens of thousands of dollars more. That’s just way too much for me, so a big block wouldn’t even be truly authentic.
Next decision: which small block? Well, there are three choices: 351W, 335 Cleveland, and a Dart (or Boss) 351W. The 351W and 351 Cleveland are both 351 ci engine blocks produced by Ford in Windsor, Ontario and Cleveland, Ohio, respectively. The two engines are not identical. The 351 Clevelands are hard to find and rare. Also, there are tons and tons of 351W aftermarket parts available. The Ford 351W block is not that great if you want to bore out the cylinders to 427 ci. By the time you shave away all that metal, the cylinder walls are very thin, and can be damaged relatively easy. Thus, I decided to go with a Dart brand 351. The Darts are made with stronger steel and have thicker walls. They also improved the cooling system within the block. Ford Boss also makes a heavy duty 351W block, but from what I can tell, there’s not much difference between the Boss and the Dart blocks (although, I’m sure there’s some). Accordingly, the Dart block will last longer than a 351W, be more durable if something does break (easier fixing), supposedly retain its value better (although I haven’t found much support for this), and improve cooling of the engine. The cost is a little bit more (a couple thousand), but in the long run, I think it’s worth it.
I chose to go with a carbureted engine for fun. The other option is a fuel injected engine. For those that don’t know, a carburetor is used mix fuel into the air that goes into the engine to be exploded/burned. Gasoline is not flammable as a gas – it must be aerated. Traditionally, all cars were carbureted. I think the first fuel injected cars started in the 1960′s (Corvette made a fuel injected engine in their C1/original models). If you don’t use a carburetor, you can use a fuel injector that sprays gas into the air, thereby atomizing/aerating the gas. Fuel injected engines produce more power, are more reliable, and require less tinkering/maintenance. However, I don’t need more power (575 hp is more than plenty), and I like tinkering with carburetors.
“Naturally aspirated” means that there is no turbo charger or super charger. Aside from not having room for one in the engine compartment, they are not even close to being original to the AC Shelby Cobras. I’m not even sure what it would take to turbo charge a carbureted engine (I’m sure it’s not easy). And, again, I don’t need more power.
Other details about my motor:
non-polished pulleys (I like the “stock” look of it because it’s not too flashy. I like the understatedness of it.)
Dart brand headers
Stroker engine (To get to 427 ci, the stroke length of the piston is increased. This reduces the top rev speed, but produces more torque, i.e., get-going/acceleration power).
Quickfuel brand 850 CFM carburetor
Edelbrock air intake manifold
Mechanical fuel pump (Mechanical fuel pumps are more durable. Electric fuel pumps produce higher pressure, so a pressure regulator is needed to reduce the pressure at the carb [they are usually used with fuel injectors]. Electric pumps have the advantage of being able to be turned off with a switch that makes emptying the carb easier if you are going to leave the car sit for a while.)
MSD brand electronic ignition (The mechanical ignition system requires more maintenance. The electric system has electronics that control when each cylinder fires. You can hook up to the system to configure things like a rev limiter, which is helpful.)
Cobra valve covers and air filter (this is merely aesthetics – they look very cool)
One more thing about carburetors: I originally wanted Weber carburetors. The Weber system has one carb for two cylinders (so you need 4 total). Each cylinder has its own intake.
The Weber system looks SUPER cool. It also produces more power, and was put on the original Cobras. However, they are very expensive and very temper-mental. Also, as you can see, there isn’t any air filter to keep debris out of the engine. You can buy stainless steel mesh coverings to keep big stuff out (like squirrels), but it would be very easy to get water and fine dirt into the engine, which is never good. I wanted the relatively maintenance free carburetor considering that there will be plenty of things to get correct to get this car going in the first place.
Anyway, the lead time is about 6-8 weeks, and Performance Automotive Customs will send picture updates as they build it. I’ll share those as they come in. I need to thank Dad for talking me off the ledge of buying a big block Weber carbureted 427. This would have cost WAY too much, and have been way more trouble than its worth. I don’t regret for a second not going with the big block, and, if I change my mind later, I can buy a Weber system.
-
Senior Member
I’m now one piece closer to getting the entire car ordered. As I mentioned before, the so called “complete kit” from Factory Five comes with almost everything you need to build a complete car. Because I chose an independent rear suspension, I have to source my own rear end. The donor parts must be an 8.8″ Ford rear end. Nobody makes complete aftermarket rear ends, and you can buy all new individual pieces and put one together if you don’t mind spending about several times the price of finding one at a junkyard and rebuilding it. Rather, you need to find a used one out of one of several cars (1989-1997 Thunderbird Supercoupe [all have LS]; 1989-1992 Mercury Cougar XR-7, supercharged V-6 [all have LS]; 1992-1997 Thunderbird V-8 models with rear disc brakes [some have LS];1992-1997 Lincoln Mark VIII [some have LS]; 1993-1997 Mercury Cougar V-8 with rear disc brakes [some have LS]). As with everything else on this build, there are options to choose from.
First, and most importantly, is whether or not to get a limited slip differential (commonly referred to as positraction) or an open differential (a differential, basically, allows one rear wheel to spin faster than the other so that you can make smooth turns). To make a complex topic simple, an open differential will allow a wheel with no traction to take all of the power from the engine and spin uselessly. A limited slip differential will lock up a wheel with no traction limiting the power the no-traction-tire can take, leaving the rest of the power for the wheel with traction to actually get you moving. Accordingly, when you want to put power on the pavement, a limited slip differential is the only real option.
Dad went to the trouble of trying to find a donor rear end with limited slip and had no luck with several junk yards. I emailed around to several more junk yards and Dad called several others, but not one of the junk yard operators we contacted were willing to get off of their lazy butts to go out to the yard and check for us. With that route exhausted (and not wanting to send Dad out to all Texas junk yards), I looked into whether you can convert an open differential to a limited slip differential. You can, and without much work (it seems that a notch on the pumpkin may need to be ground down, but that was it). However, all advice I read online said that rebuilding a differential should be left to the professionals because the tolerances are so tight and making a tiny mistake can be catastrophic. So, luckily, I stumbled upon a guy (Gordon Levy levyracing.com) who deals in Factory Five cars and parts in Arizona who had a rust free rear end from a Mark VIII (these had the aluminum pumpkins which are desired because they are lighter than the steel ones) that was ready to be rebuilt. All in all, I could have saved a couple hundred dollars in shipping and expense (finders fee, I suppose) if we sourced all of our own parts (rear end, brake pads, rebuild kit, gaskets, yoke, gears, limited slip case, etc.), but decided it was worth it since the parts were from Arizona (i.e., no rust) and we could trust that this guy was going to do it properly (as opposed to having some guy at a local shop do the rebuild work). He could also guarantee that everything would work perfectly in the Factory Five kit car as he’s built so many in the past.
The next decision is the rear end gear ratio. You can’t use a 1:1 ratio from the output of the transmission to the wheels because the wheels would spin too fast and the engine would have a tough time getting the wheels started in the first place (i.e., not enough torque at that ratio). Basically, using the same engine, the higher ratio gears will spend less time in first gear and will rev higher to go the same speed in fifth gear. The three most common ratios I saw online for these cars were 3.73, 3.55, and 3.27, although there are many other alternatives (e.g., 3.31, 3.54, 3.08). In general, the 3.73 seem to be good for engines with lower power (300 hp?), the 3.55 seems to be the sweet spot for many who run engines with 400 hp-475 hp. For me, with my engine producing about 575 hp, I needed to go with the 3.27 (maybe even the 3.08, but we’ll see about that down the line). With the torque I’ll be producing, getting started won’t be a problem. Also, the lower ratio will allow the engine to run at a lower rev at highway/interstate speeds.
So, last week we put the money down on the rear end which should be ready in another couple of weeks. All that’s left for me to order is the transmission package (including bellhousing, clutch assembly, etc.), tires (which is turning out to be a bit of a pain as well), and the various other “options” I’m planning (right now I’m trying to figure out whether I should get an oil cooler).
All of these decisions take FOREVER for me to make because I basically have to learn exactly how the parts work to choose what to do. It’s frustrating at times because of the time, but in the end, it’s really fun learning how this stuff works. It’s amazing.
-
Senior Member
This week I got the last major component of the car ordered: the transmission.
I think I’ve mentioned this before, but part of the fun of all of this is learning how everything works. In excruciating detail. I am by no means an expert on cars, but before starting out on this project I thought I had a pretty decent grasp on the mechanics of a car. I am now learning that I was quite naïve in that thought. For example, I thought that I was going to be able to buy one crate engine from the Ford factory and one transmission and I would be done with the drivetrain.
Nope. Wrong. A crate engine is missing a lot of parts before it’s a complete, working engine (e.g., alternator, fuel pump, intake manifold, carburetor, shallow oil pan, etc.). Also, there are a lot of pieces that go between the engine and transmission (and, a lot of pieces to the rear end that need to be specified). So, during this process, I got to learn exactly what pieces are needed, and exactly how they worked. For example, I knew the concept of how a clutch works, but I’ve never had to actually put my hands on one to see the moving parts or how they interact. Now I know.
So, here is what I specified for the transmission:
Tremec TKO-600: Tremec is an American company that produces transmissions. They are often used in aftermarket applications, but can also be found in production cars such as the Corvette. Really, I didn’t have to choose the manufacturer of the transmission as it seems to be already chosen for me. From all of the blogs, forums, instruction manuals, and whatever other information I can find online, it seems like 99% of Cobra replica (or any aftermarket transmission attached to a Ford engine) owners use Tremec. So much so that I only performed a cursory search for alternatives. Tremec apparently makes a good product for a decent price, so why question it? Anyway, the three main options for models for these types of cars seems to be the T-5, the TKO-500, and the TKO-600 with the T-5 being the smallest, cheapest, and weakest and the TKO-600 the largest, most expensive, and strongest. The determination is based on the amount of power the engine will produce. If you hooked up a huge engine to a small transmission, the gears inside the transmission would fail as they are not strong enough to withstand that much force. Thus, with my behemoth engine, I had to go with the TKO-600. The T-5 is the smoothest shifting and the TKO-600 the “notchiest.” Some owners complain that the TKO-600 is too notchy and not smooth enough, so they go for the T-5 (or a T-5 with upgraded internals) or modify the TKO-600 to improving its shifting. I think having a notchy shift is part of the experience. It is, after all, a race car, even if I don’t plan on racing it. Finally, because of the size of the car and the location of the engine (its practically a mid-engine car), the shift lever is ordinarily located further behind in the car than it is on normal cars. A mid-shift adaptor can be fitted to place the shift lever in the “normal” position, or a lever can be attached that angles forward.
The original Cobras had the lever angled forward. I like the look and the uniqueness to the car that it adds, so I stuck with the original style and did not get the mid shifter (about $450 extra, by the way). Some people complain that it’s not as easy to drive, but I think it’s just something you have to get used to.
Bellhousing: This is just a cover for all of the parts between the engine and transmission. Quicktime seems to be the most popular brand. The options are aluminum and steel. The steel bellhousings are more expensive and much tougher (not as brittle) than the aluminum ones. Steel is required if the car is to be used harshly, like on a racing track. That is because if something inside the bellhousing breaks (e.g., clutch) at a high rotational speed, a big metal shard can be spun off right into the cockpit. Because I’m going to be using mine for cruising Main St., this isn’t a concern of mine.
Clutch: Here, the basic options are single disc or dual disc. I won’t go into the details of how they work here, but suffice it to say that the dual disc clutch is stronger, faster, and used primarily for racing because it’s also harder to shift smoothly than a single disc is. Again, I went with a single disc because it’s easier to drive and I don’t need to sacrifice ease/fun of driving for performance. Again, I didn’t go into much research with manufacturers. The RAM brand Powergrip HD clutch has been recommended by several people without any complaints, so I just went with it.
Flywheel: Again, this can come in steel or aluminum. The aluminum flywheel is lighter, so it allows the engine to rev faster when you give it the gas with no load. It’s also about $100 more expensive. I just went with a light weight steel flywheel instead (what’s an extra couple of pounds to a 500+ hp engine?).
Throwout bearing: This is the piece that allows an outside force (i.e., the pedal via a cable or hydraulics) to actuate the clutch movement.
Pilot bearing: Don’t forget this piece! This goes on the driveshaft and does not come with the engine.
Clutch master cylinder: This is only needed if you’re using a hydraulic clutch rather than a cable clutch. Apparently the hydraulic clutches are more responsive and sensitive than the cables. Additionally, the way the cable is routed in the FFR cars, they have a tendency to bind and stick just a little bit because of the tight turns in the coaxial cable. That’s why I went with hydraulic. Wilwood is known in the industry as being a quality part. As for size, I couldn’t tell you right now. I just let the vendor size it and I’ll trust him.
Starter: Not really part of the transmission, but it doesn’t come with the engine as it connects to the flywheel. The ministarters are handy because they don’t need a solenoid to be activated.
I ordered all of this through the same guy that’s doing my rear end: Gordon Levy. He’s super knowledgeable and has built these cars in the past so I know I can trust him to deliver a product that will work. His pricing was also pretty competitive. He’s going to be shipping this with the rear end in an attempt to save a little bit of money.
I also decided on which tires to put on the car (although I haven’t bought them yet because I don’t have the wheels yet). I’m using the pin drive system for authenticity, so I naturally got 15″ Trigo brand pin drive wheels that are also authentic. However, not many tire manufacturers make tires for this size. The recommended tire size is 235/60 R15 for the front, and 275/50 R15 for the rear. After much searching on the internet, I learned that the Avon CR6ZZ tires are the best performing. They are also the most expensive, coming in at about $2000 for a full set. The Mickey Thompson Sportsman S/R (26×10 for the front, 26×12 for the rear) also have gotten good reviews, but are also quite expensive.
Both the Avon and the MT tires look quite modern in that the sidewalls extend straight up from the rim to the tread and do not bulge out. If you look at the old Cobras, the wheels looked mean and bulgy, especially with the deep wheel wells of the pin drive wheels. That’s the look I’m going for, so I’m going to go with Cooper Cobras. Aside from being better looking and being much more readily available than the Avons or MTs, they are also much more affordable. No, their performance is not as good, but, again, I don’t plan on racing this car. If I change my mind later, it’s not hard to change tires.
So, what’s left? Nothing else is required! But much can be improved on. There are a number of upgrades and little add ons that I’m planning, but a lot of that can wait until this summer. So, for now, I’m going to try to take it easy and finish up my school work so I can devote my entire time to the car!
Specing all of this stuff out takes a HUGE amount of time. All in all, I’ve spent more than 40 hours (probably closer to 80, if not more) dealing with vendors, choosing components, reading up on the car, reading the forums, etc. Aside from being a distraction from my school work, it’s also what I do in my free time, so it’s not a chore. I also have a tendency to be crippled with indecision unless I know all of the options, their advantages and disadvantages, and what the experts think. I also don’t think I’ve made a single decision yet without talking it over with Dad (I’ve probably spent 5 hours talking on the phone about the car with him).
In less than a month the car should be shipped from the factory and on its way to Sugar Land!
-
Senior Member
-
Senior Member

With size figured out, I next had to decide which engine block to get. Of course, the original 427s were big blocks (today referred to as FE, for Fords). Today, there is a choice between a big block engine with 427 ci and a small block 427 ci. I decided to go with the small block. I know what youre saying: But I thought you were concerned with originality! Why not go with the big block? The answer: practicality. Yes, the big blocks are more original and they also look better because they really fill out the engine compartment. However, there are some downsides. First, fuel consumption. The big blocks get very poor gas milage. The small blocks dont get good gas milage either, but the gas tanks on these cars are relatively small. I dont want to have to fill up on gas every 80 miles. Second, availability of parts. The small blocks have a huge following in other muscle cars (like the Mustang) and there are tons of aftermarket suppliers and parts available. Everyone who works on Ford engines knows their way around a small block v8. Third, price. The big block 427s arent really produced anymore. Thus, to get a big block 427, you have to find an old 427 and re-do everything. This isnt as easy as buying a new small block, and adds about $5,000 to the cost of the engine. Finally, originality. To be truly authentic, Id need a side oiler. The side oilers are preferred because the lubrication system is a bit better. However, they are very rare. I didnt even find any side oilers for sale, but Id guess that to get a side oiler would be tens of thousands of dollars more. Thats just way too much for me, so a big block wouldnt even be truly authentic.
FE stands for Ford-Edsel. The FE engines include top oilers and side oilers. You can get either design today. They are being produced again in iron and aluminum. Most 427 Cobras were actually fitted with the 428 FE engine. You can buy 427 FE engines from numerous engine builders. Granted they are more expensive than the other engines. But they are indeed available with new production parts.
-
Senior Member

Originally Posted by
2FAST4U

FE stands for Ford-Edsel. The FE engines include top oilers and side oilers. You can get either design today. They are being produced again in iron and aluminum. Most 427 Cobras were actually fitted with the 428 FE engine. You can buy 427 FE engines from numerous engine builders. Granted they are more expensive than the other engines. But they are indeed available with new production parts.
Thanks for that! I'm still very new to all of this and appreciate all the help. It's a bit too late for me now, but just out of curiosity, does anyone make a reproduction side oiler?
-
 Administrator

Holy smokes Bren! I missed this thread so far. If you need any help creating an album, learning to upload pics, etc. let me know.
Sounds like you're off to a great start!

FFR 5369 Pin Drive, IRS, Trigos, Torsen, Wilwoods, FMS BOSS 302 "B" cam , Mass-flo. CA SB100 (SPCN) Registered
Delivered 4/23/06. "Finished" 4/2012 (still not done!)
-
Administrator
Originally Posted by
Bren
Thanks for that! I'm still very new to all of this and appreciate all the help. It's a bit too late for me now, but just out of curiosity, does anyone make a reproduction side oiler?
http://www.shelbyengines.com/collect...ete-engines-fe
$$$$$$$$$$$$$$$$$$$$$$$$$$$$$$$$$$$$$$$$$$$$$$$$$$ $$$$$$$$$$$!!!!!!!!!!!!!!!!!
FFR 5369 Pin Drive, IRS, Trigos, Torsen, Wilwoods, FMS BOSS 302 "B" cam , Mass-flo. CA SB100 (SPCN) Registered
Delivered 4/23/06. "Finished" 4/2012 (still not done!)
-
Senior Member
If you want an FE side oiler, Keith Craft and Bret Lykins are good sources.
-
Senior Member
Now that the delivery date for the roadster is getting closer (sometime around May 10, so less than two weeks!) I’ve started ordering some of the third party “extras.” It’s an easy way to rack up the costs. I’m already way over budget, but most of that was because of the cost of the engine (I way underestimated that). Anyway, here’s what I’ve got coming:
Seat warmers – On most cars, seat warmers are an extravagance. On this car, it’s necessary if I want to be able to drive it more than a few months a year. Apparently, the seat warmers do more to keep you warm than the heater! So, I got a pair of them from CobraHeat.
Sound/vibration dampening – On the face of it you would think that it would be a waste of time to try to lessen car sounds in an open top roadster. But, it actually goes a long way to improving the ride of the car. First, with enough material, you can significantly reduce the exhaust noise (the Factory Five exhaust is notoriously loud and is so oppressive that on long rides you need ear plugs). With the dampening kit I got, the exhaust noise should be much more bearable for the riders (I can’t say the same for everyone else). One guy told me he can barely hear the passenger side exhaust. Second, if you can reduce the vibrations in the car, you can reduce driving fatigue and improve comfort. Any vehicle with a lot of vibration (like a 4-wheeler or, say, a 550 hp roadster) just wears down the driver. Whenever the engine is shut off, you immediately feel better. So, if you can reduce the vibration, it improves the driving experience. Third, the more you insulate the car, the less engine heat you’ll get. As you can imagine, having your feet right next to an engine and exhaust can get a bit toasty in the summer. Adding some heat barrier is a good idea. Finally, the dampening improves the feel and the perception of a solid car. Regardless of any dampening, the car is not going to fall apart. But, with the sound dampener, the aluminum panels feel much stronger. It’s like the difference between closing the door on my Civic and closing the door on a Mercedes. Anyway, there are a lot of options out there, both for manufacturers and types like sound deadening vs. vibration deadening vs. heat barriers and spray in vs. mats. I went with Second Skin’s mats because I’ve heard excellent things about their products and they have a (very comprehensive) kit made just for the roadster. The kit includes enough to cover the cockpit and the trunk with a vibration dampener with a thick aluminum heat barrier and a thick foam sound deadener. It also has enough to cover the footboxes and the firewall with a thick heat barrier. That ought to do the trick. The whole thing weighs 100 lbs. so the shipping costs were astronomical.
Gas pedal kit – Apparently the gas pedal that FFR supplies is a cheap Chinese piece and everyone recommends upgrading to a new pedal. Russ Thompson makes one that everyone seems to love that’s made just for the roadster, so I went with that. (Side note: I also ordered a dead pedal and pads for the clutch and brake pedals to match the gas pedal, and Mark at Breeze Automotive recommended that I not get the pads for the brake and clutch because the ones that come with the kit are really good. It’s not often that you get a vendor to try to talk you out of buying something from them. That just goes to show the quality, honesty, and customer satisfaction that he has. I will not hesitate to buy more stuff from him in the future. In fact, I’m already planning on getting his radiator hoses someday [they're a bit too expensive for me at the moment].)
Lower radiator support kit – The radiator in the roadster is mounted at the top and just kind of hangs down at an angle. I don’t like the idea of that, so I bought a kit to support the bottom end.
Radiator shroud – I’m a little worried about being able to keep the engine cool, especially on really hot days, so I bought a shroud for the radiator. The shroud improves air flow through the entire rectangular radiator instead of just where the circular fan is.
Oil cooler and shroud – If you look at the front of the Cobras they have two holes. One big one for the radiator and one little one for an oil cooler. Every car needs a radiator, so I’ve already got that hole plugged up. Without anything in the lower, smaller hole, I think the car looks weird and ornamental. So, I bought an oil cooler and shroud to fill that gap. Running cold oil through your engine is really bad for lots of reasons, so I’m getting a thermostat for it such that the oil only runs through the cooler if the oil temp is above 180F. Even if the oil cooler rarely runs, it’ll give me a bit more confidence that the engine won’t overheat. It’s probably not needed, but it also looks a lot better with it.
Bumper grommets – The bumper is held on by two shafts that stick out of the body on both sides of the car. These rubber grommets improve the look (makes it look more professional and finished) as well as prevent any rubbing of the paint and the metal shafts.
Emblems – A car without emblems looks too plane and too homemade. So, I got two little rectangular badges that go just behind the wheel wells that say “427 Ford” and “Cobra.” I also got an AC badge that will go in the center of the steering wheel.
That’s all I’ve got for now, but I’ll soon be ordering a turn signal system that goes on the steering shaft and some shields for the exhaust so you don’t burn yourself as badly when you step out of the car.
If you think I may have overlooked an option/upgrade that I haven't listed, please let me know!
As a reward for reading (or scrolling) down this far, here are some pics of my engine that will be ready to ship in a matter of weeks!
IMG_20130729_155318.jpg
IMG_20140501_141220.jpg
Last edited by Bren; 05-02-2014 at 08:15 PM.
Build Blog
#8203, carbed 427W (611 hp), TKO 600, IRS
Delivered: May 27, 2014
Mechanically "Complete": October 1, 2014
-
Senior Member

Looks like you have done your homework... Thanks for sharing! Let me know when it arrives, I'm up the road in Katy I'd like to swing by and see what I'm getting my self into...
-
Senior Member

Wow. very impressive, well thought out and researched plan. Great job.
Sounds like a fun build!
A couple things to confirm:
unless they changed something,
- there is no wood behind the dash
- the wind wings and visors are not glass
- I thought the complete kit comes with rear brakes too
but double check, it's been a couple years since I ordered mine.
Also, don't know how old you are (talking about graduating), but most insurance companies will not cover drivers under 25. Might want to check around.
Look forward to seeing your build start and good luck. Post often and we like pictures!
F5R #7446: MK4, 302, T5 midshift, 3.55 Posi IRS, 17" Halibrands
Delivered 4/4/11, First start 9/29/12, Licensed 4/24/13, off to PAINT 2/15/14!! Wahoo!
-
Senior Member
Originally Posted by
MPTech
Wow. very impressive, well thought out and researched plan. Great job.
Sounds like a fun build!
A couple things to confirm:
unless they changed something,
- there is no wood behind the dash
- the wind wings and visors are not glass
- I thought the complete kit comes with rear brakes too
but double check, it's been a couple years since I ordered mine.
Also, don't know how old you are (talking about graduating), but most insurance companies will not cover drivers under 25. Might want to check around.
Look forward to seeing your build start and good luck. Post often and we like pictures!
Thanks for the info. And this isn't my first time graduating, so getting insurance won't be an issue.
So I thought the dash was wood with an aluminum face. Is it just aluminum, then?
Build Blog
#8203, carbed 427W (611 hp), TKO 600, IRS
Delivered: May 27, 2014
Mechanically "Complete": October 1, 2014
-
Senior Member

Yes, very thin aluminum. Works well.
SOLD 03/2013: MK II #5004: 5.0 EFI: 8.8, 3.55, E303, TW heads, GT40 intake, 24#, 70mm MAF
Ordered MK IV Coyote Complete Kit.
-
Senior Member
I got into Houston yesterday, and I’m already making progress. I got tires onto the wheels today:
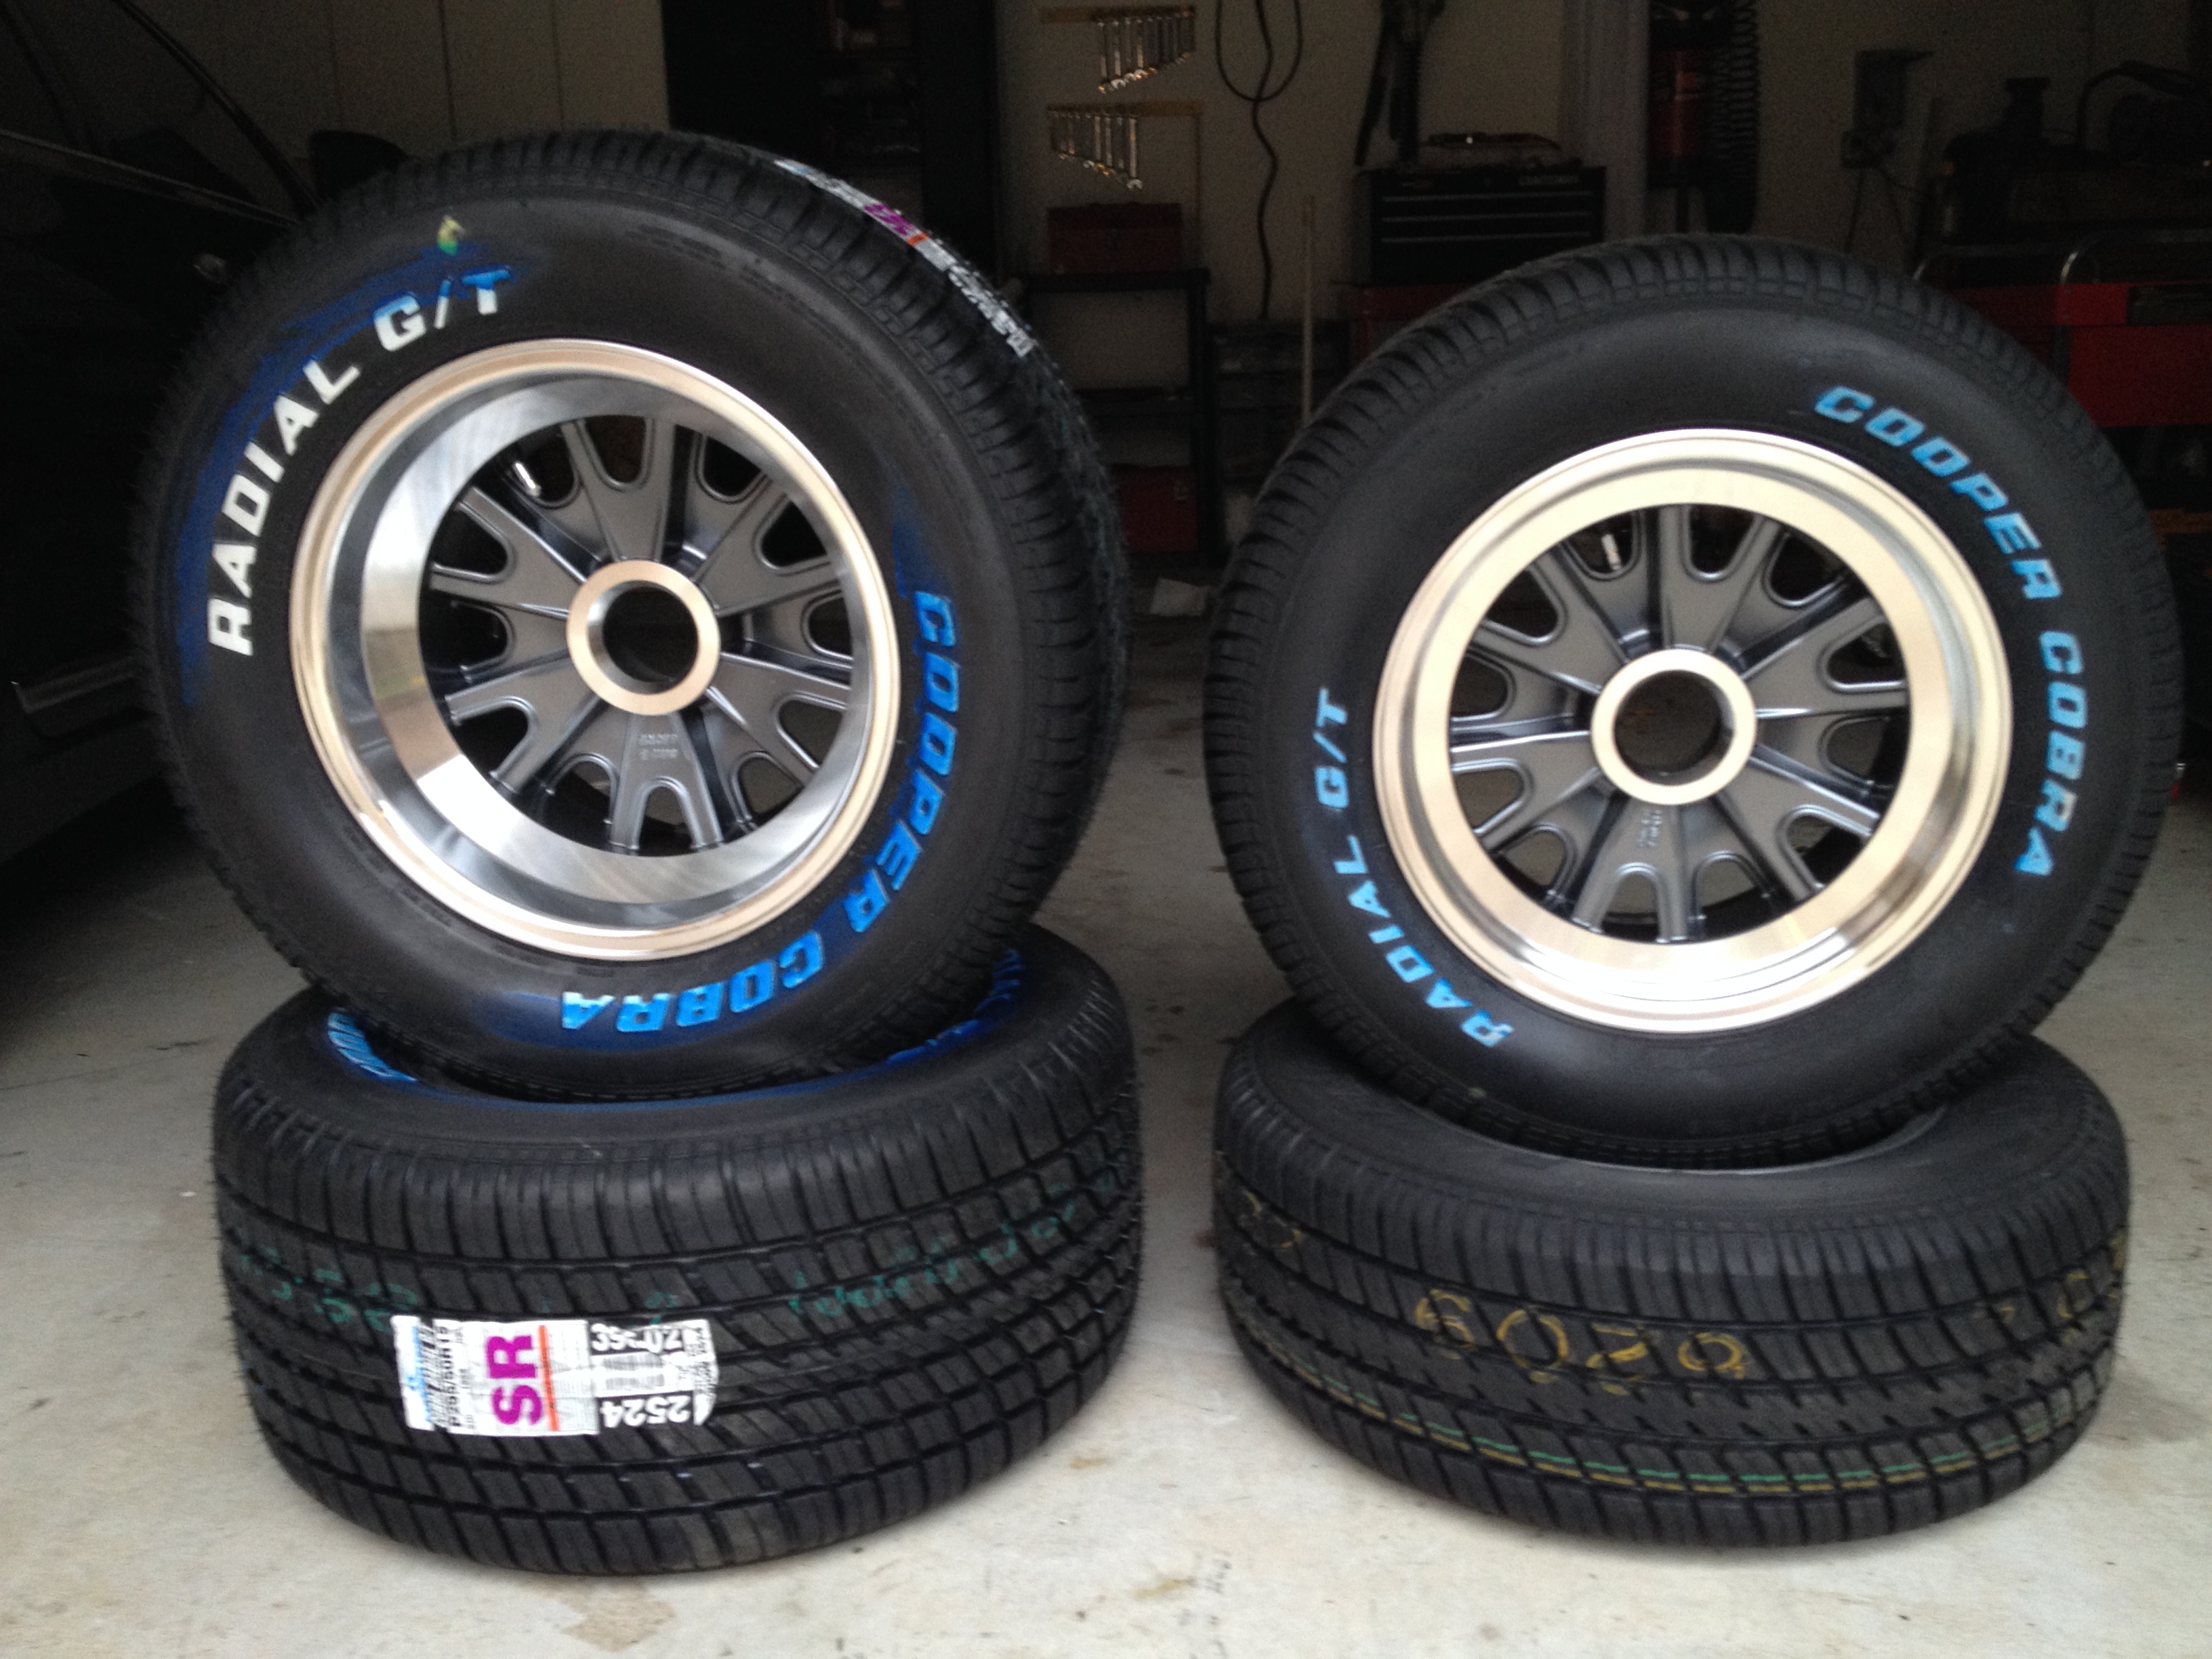
Look at how wide the rear tires are!
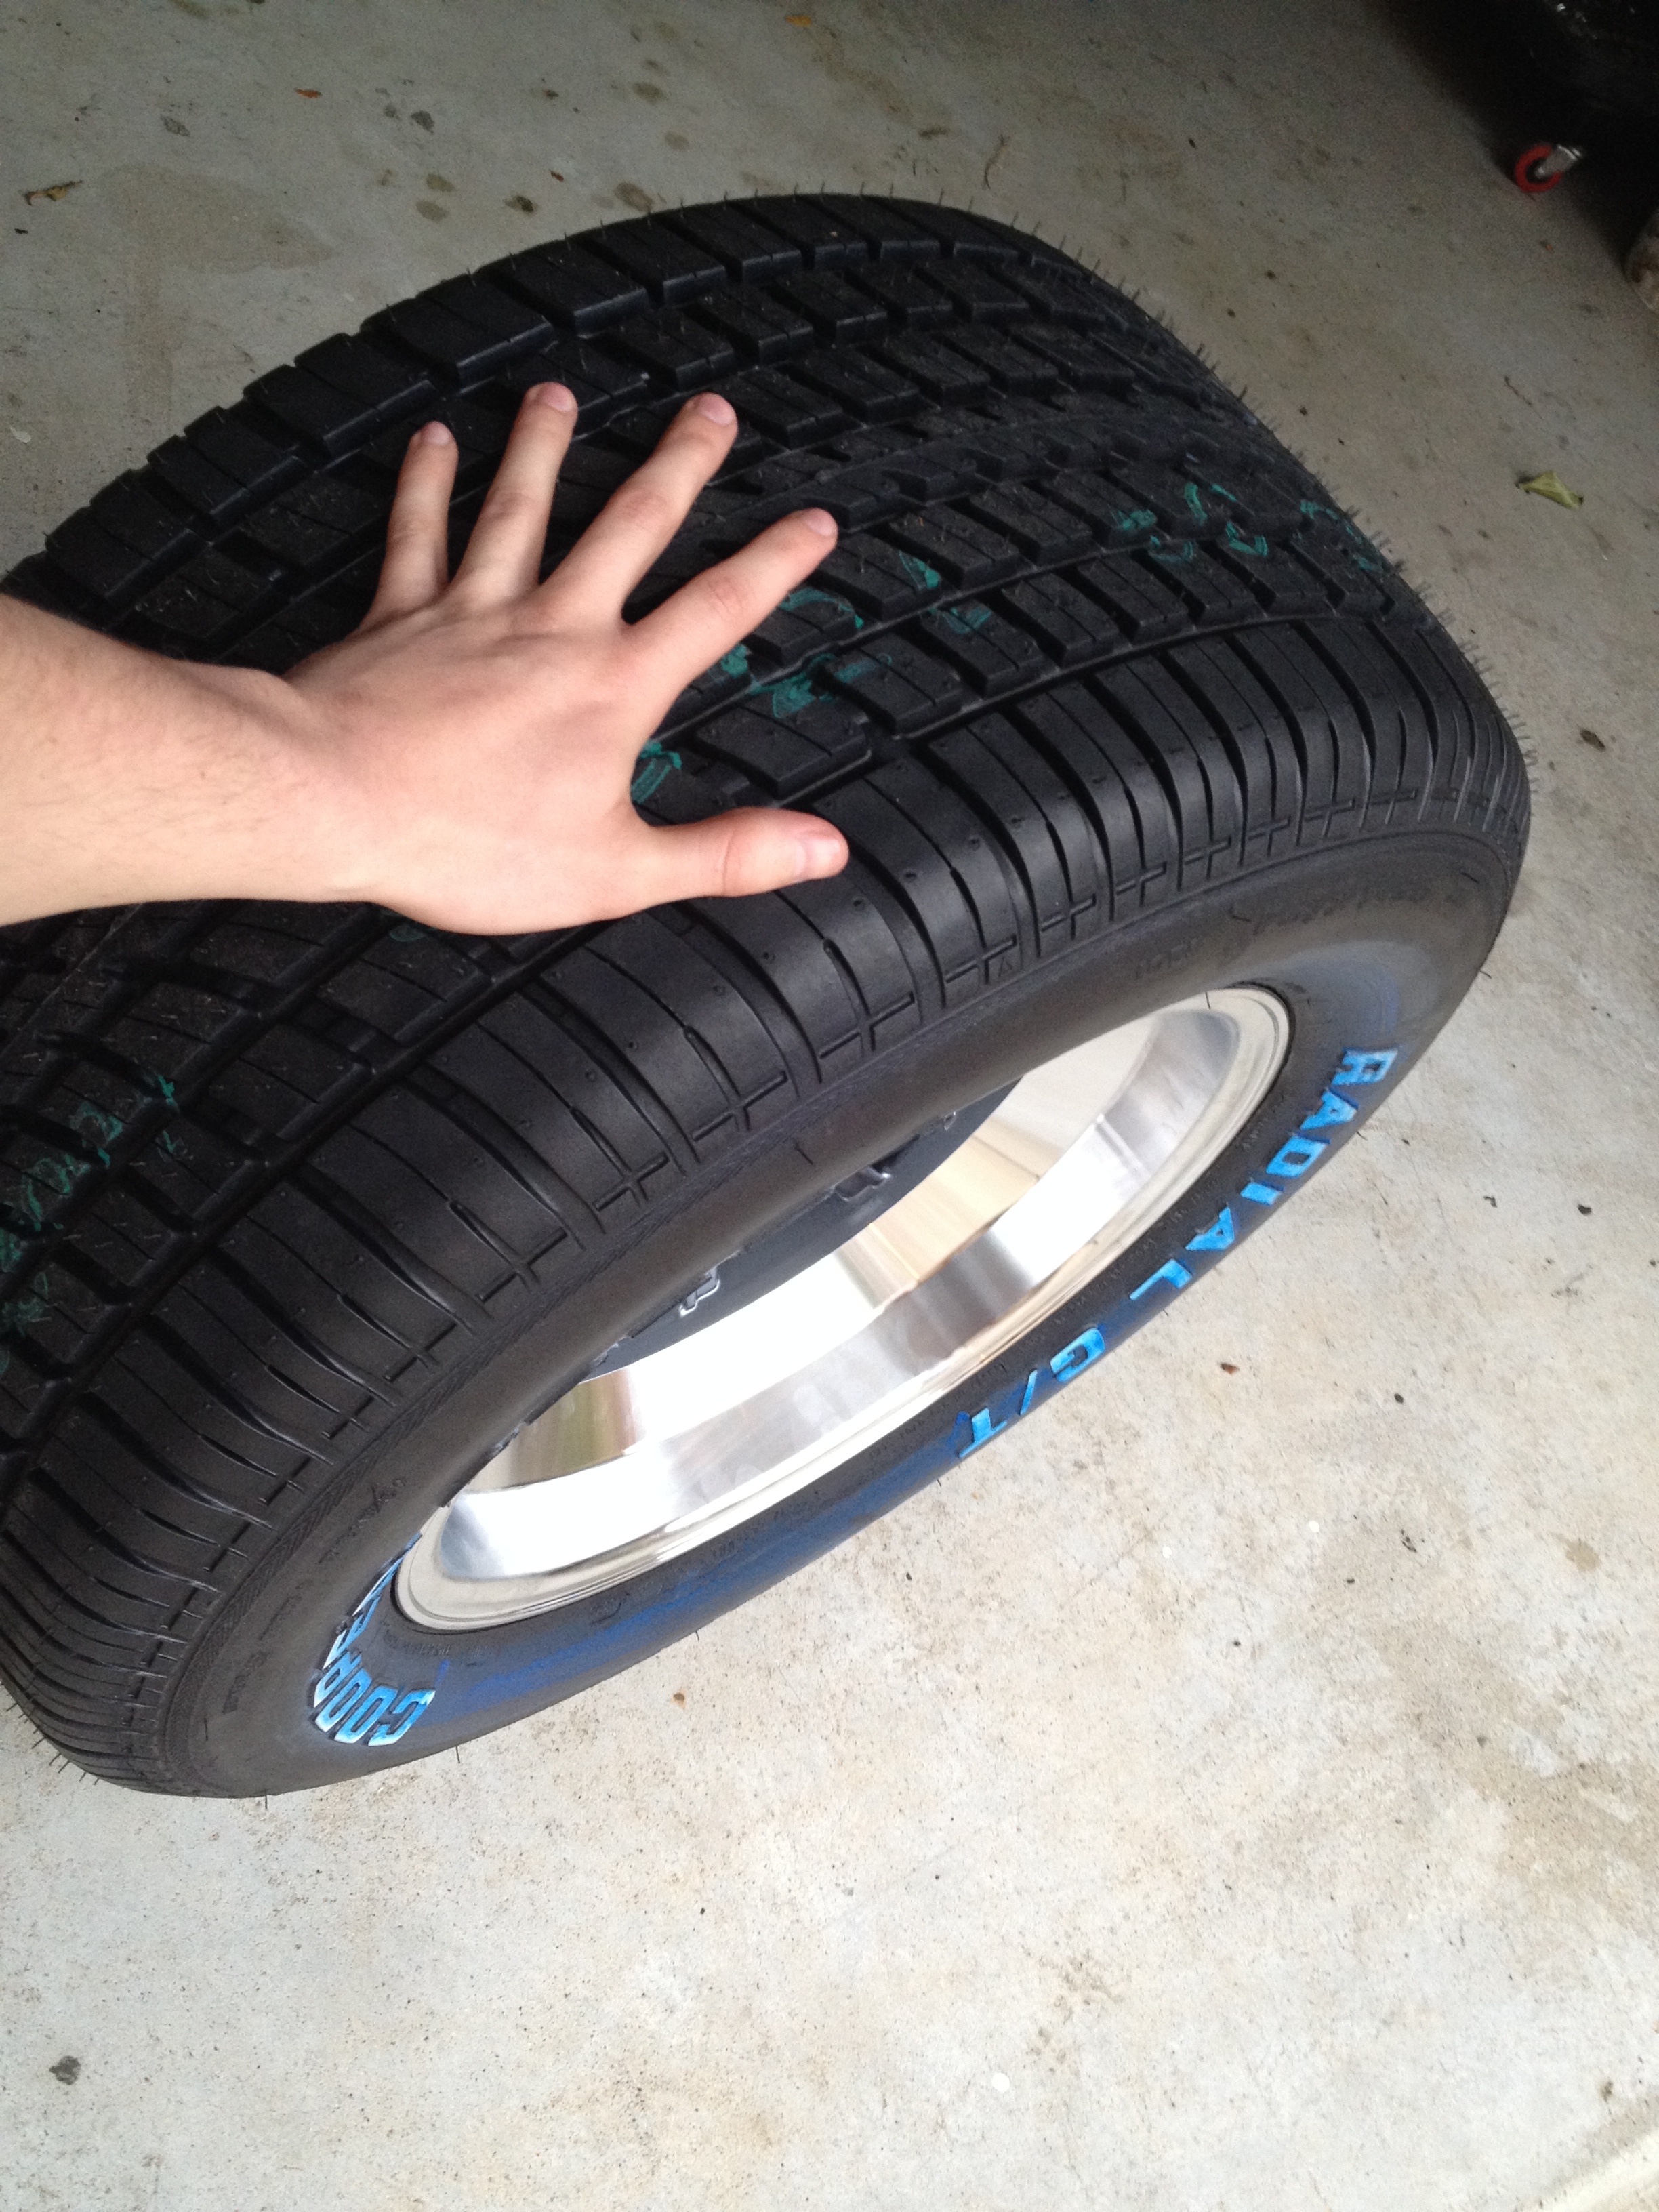
I ended up with 235/60 R15 for the front and 295/50 R15 for the rear. The front size is the recommended, but the rears are a bit wider than recommended to give me more of the balloon effect. Apparently, if the fronts are wider than recommended, the tires rub against the body when fully turned.
Also, my motor has been completed and dynoed at 611 hp and 593 ft lbs of torque. That’s a bit more than I was expecting, so I’m a bit nervous about having too much power, but I’ll live with it. I’ll post the torque and hp curves when I get them with the motor.
We’re getting closer to delivery; should be any day now. Just waiting for the call.
Last edited by Bren; 06-10-2014 at 11:34 AM.
Build Blog
#8203, carbed 427W (611 hp), TKO 600, IRS
Delivered: May 27, 2014
Mechanically "Complete": October 1, 2014
-
Senior Member
Well, I expected the kit to be delivered over the weekend, but I’ve got no such luck. I finally got a hold of Stewart Transport on Monday and they said it wouldn’t arrive until this upcoming weekend. I guess I could have stayed in Madison to graduate this Friday after all. Oh well.
In the mean time, Dad and I made a body buck using the plans in the manual and Stan’s modification of the rear support to meet the MK4 modifications. We haven’t decided whether to hang it or just let it stand in the garage. We’ll wait to see how much space we have. Anyway, here are some pictures:
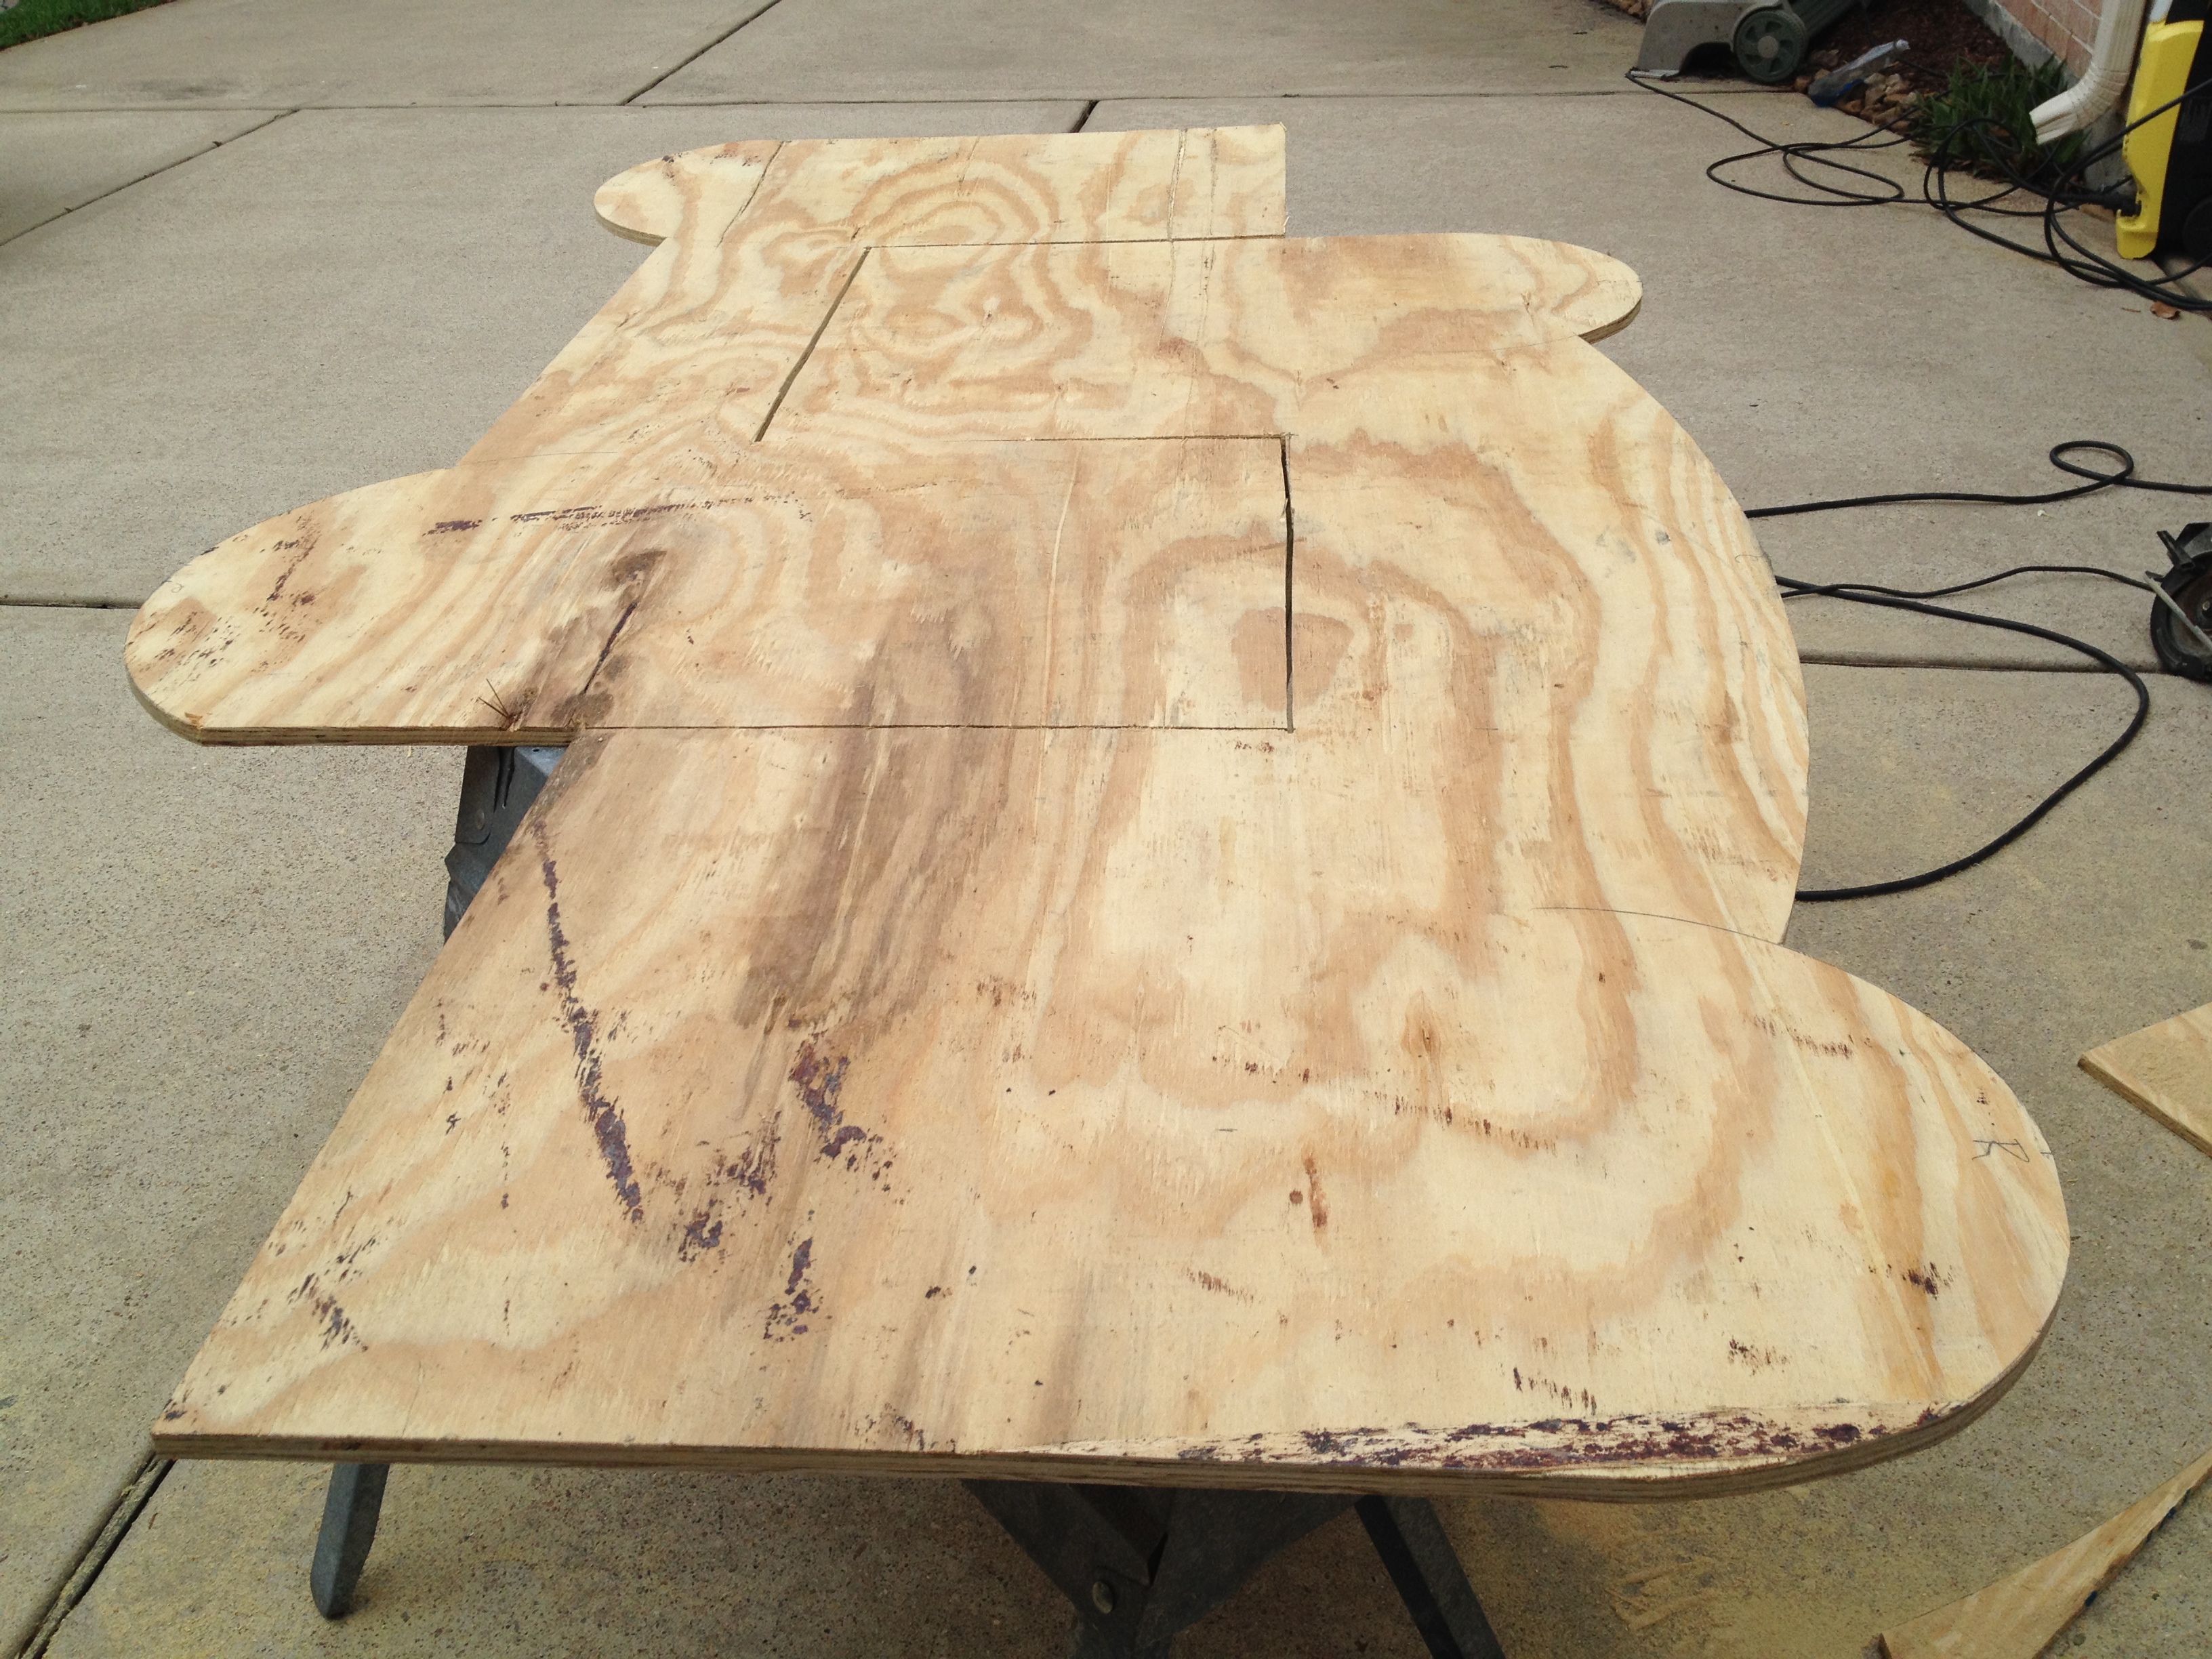
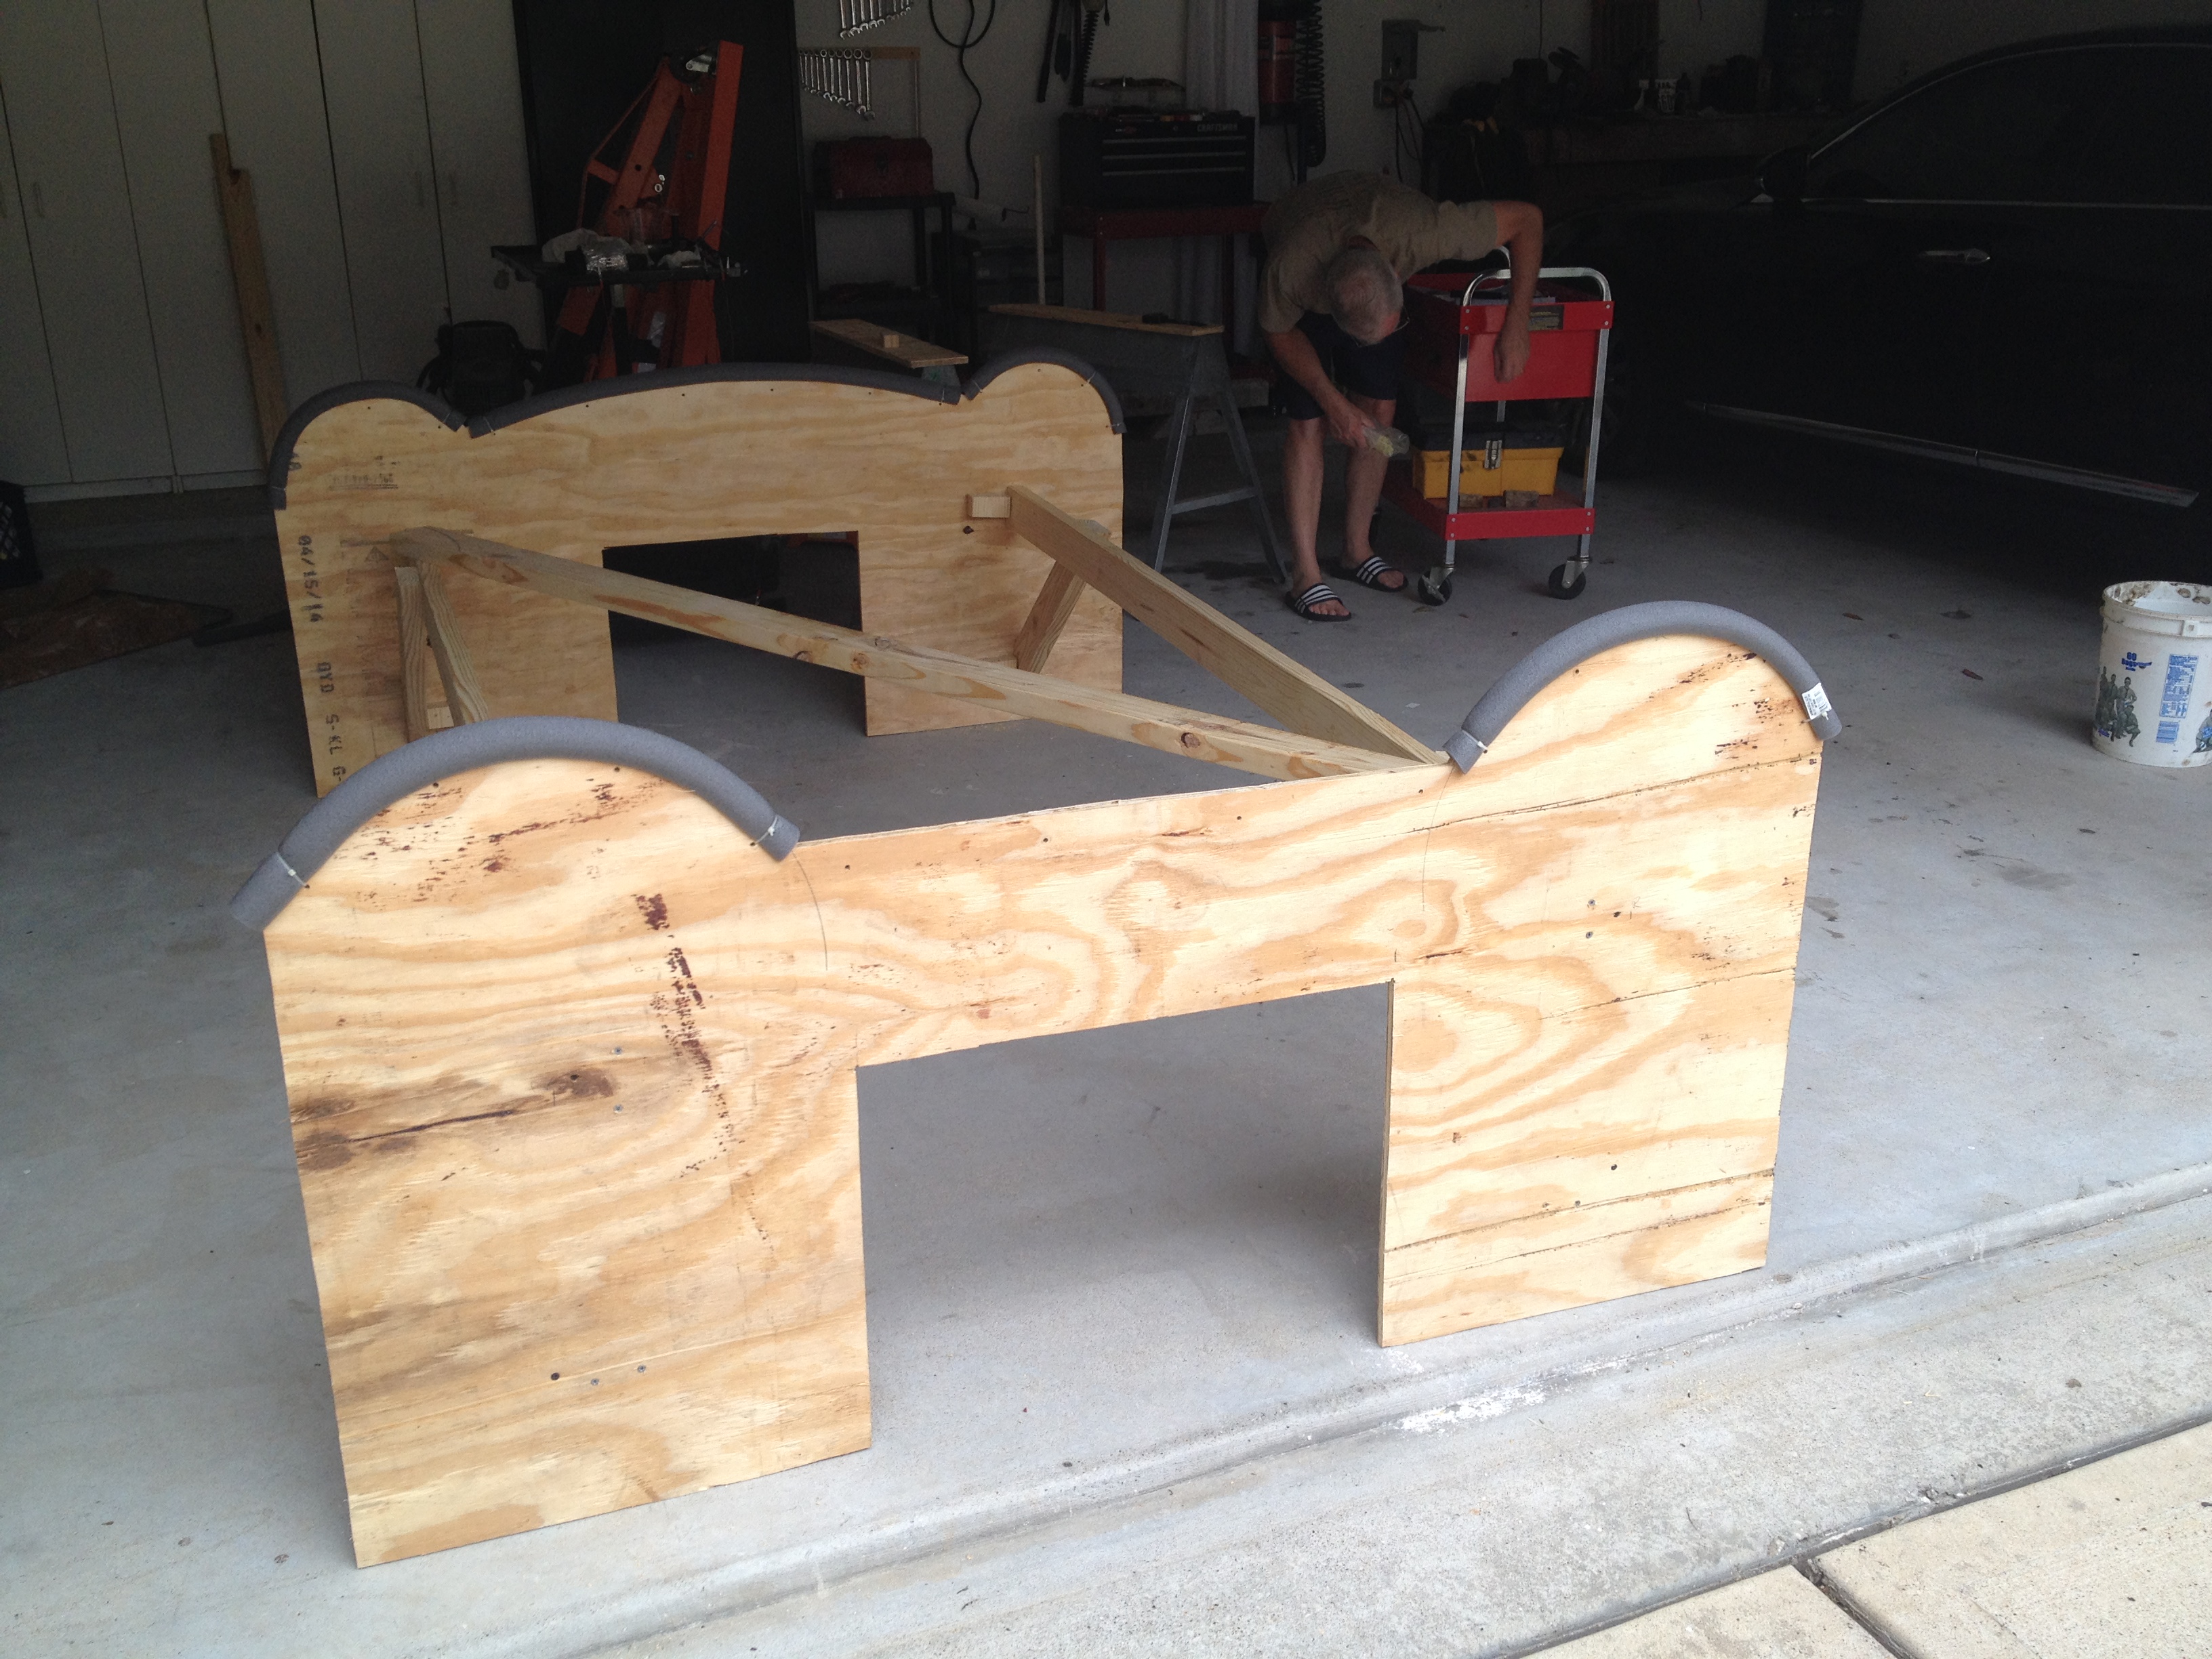
Now there’s nothing to do but wait and continue to collect as many supplies as are necessary.
Last edited by Bren; 06-10-2014 at 11:35 AM.
Build Blog
#8203, carbed 427W (611 hp), TKO 600, IRS
Delivered: May 27, 2014
Mechanically "Complete": October 1, 2014
-
Member

Bren,
I recommend getting A/C and heat system to finish off the car as you know Texas heat is not a lot of fun as you are baking in traffic. I have recently finished my MkIV and used the Whitby A/C unit it really keeps the legs and lower torso cool, not cold, but cool while sitting in traffic. Just a suggestion.
-
Senior Member
Originally Posted by
cobraguy13
Bren,
I recommend getting A/C and heat system to finish off the car as you know Texas heat is not a lot of fun as you are baking in traffic. I have recently finished my MkIV and used the Whitby A/C unit it really keeps the legs and lower torso cool, not cold, but cool while sitting in traffic. Just a suggestion.
If I was going to be driving around in Houston, I'd definitely consider an AC unit. Fortunately, I'll be up in Wisconsin once the car is complete. It still gets hot there, but nothing like in Texas. So, I've definitely got the heater, but I'm holding off on the AC.
Build Blog
#8203, carbed 427W (611 hp), TKO 600, IRS
Delivered: May 27, 2014
Mechanically "Complete": October 1, 2014
-
Senior Member
Well, I've been delayed another week by Stewart Transport. Is there anything I can be doing in the mean time?
Build Blog
#8203, carbed 427W (611 hp), TKO 600, IRS
Delivered: May 27, 2014
Mechanically "Complete": October 1, 2014
-
Senior Member
Originally Posted by
Bren
If I was going to be driving around in Houston, I'd definitely consider an AC unit. Fortunately, I'll be up in Wisconsin once the car is complete. It still gets hot there, but nothing like in Texas. So, I've definitely got the heater, but I'm holding off on the AC.
Might want to consider seat heaters too, they are relatively cheap and easy to install.
F5R #7446: MK4, 302, T5 midshift, 3.55 Posi IRS, 17" Halibrands
Delivered 4/4/11, First start 9/29/12, Licensed 4/24/13, off to PAINT 2/15/14!! Wahoo!
-
Senior Member
Originally Posted by
MPTech
Might want to consider seat heaters too, they are relatively cheap and easy to install.
Yep, got those sitting in the garage already waiting for seats to put them into.
Build Blog
#8203, carbed 427W (611 hp), TKO 600, IRS
Delivered: May 27, 2014
Mechanically "Complete": October 1, 2014
-
Senior Member
Bren,
I guess you could organize tools, buy any tools still needed, Buy any fluids your going to need, Oil, Tranny, Coolant...etc. Grab all the Rags and Hand cleaners... etc you need, Make a list of the Build tips you plan to do and get those things needed...
The one tip that I though was awesome and Genius was to get 1/2 masking tape and drill doles every 2 inches around the tape roll, so you could just unroll and stick to the aluminum panels for perfect spacing of your rivet holes... There were several others on the Build Tip Thread that I plan to use as well.
Other than that install a Port-a-cool in that Houston Garage so you don't Melt this summer.... 
-
Originally Posted by
Mslone
The one tip that I though was awesome and Genius was to get 1/2 masking tape and drill doles every 2 inches around the tape roll, so you could just unroll and stick to the aluminum panels for perfect spacing of your rivet holes... There were several others on the Build Tip Thread that I plan to use as well.
fwiw, that actually won't be "perfect." As you unroll the tape, the gaps between holes will get smaller and smaller. I don't know that it would be enough to notice (depends on the diameter of the roll and how much tape you go through), but that's geometry for ya.
-
Senior Member
Originally Posted by
Pylons
fwiw, that actually won't be "perfect." As you unroll the tape, the gaps between holes will get smaller and smaller. I don't know that it would be enough to notice (depends on the diameter of the roll and how much tape you go through), but that's geometry for ya.
True, Good point... So I guess don't buy a deep roll! Several Shallow roles...
-
Senior Member
First off, can someone instruct me on how to add pictures that show up in the post? All of mine keep being rejected for being too large, but I don't know how to shrink them easily. Thanks.
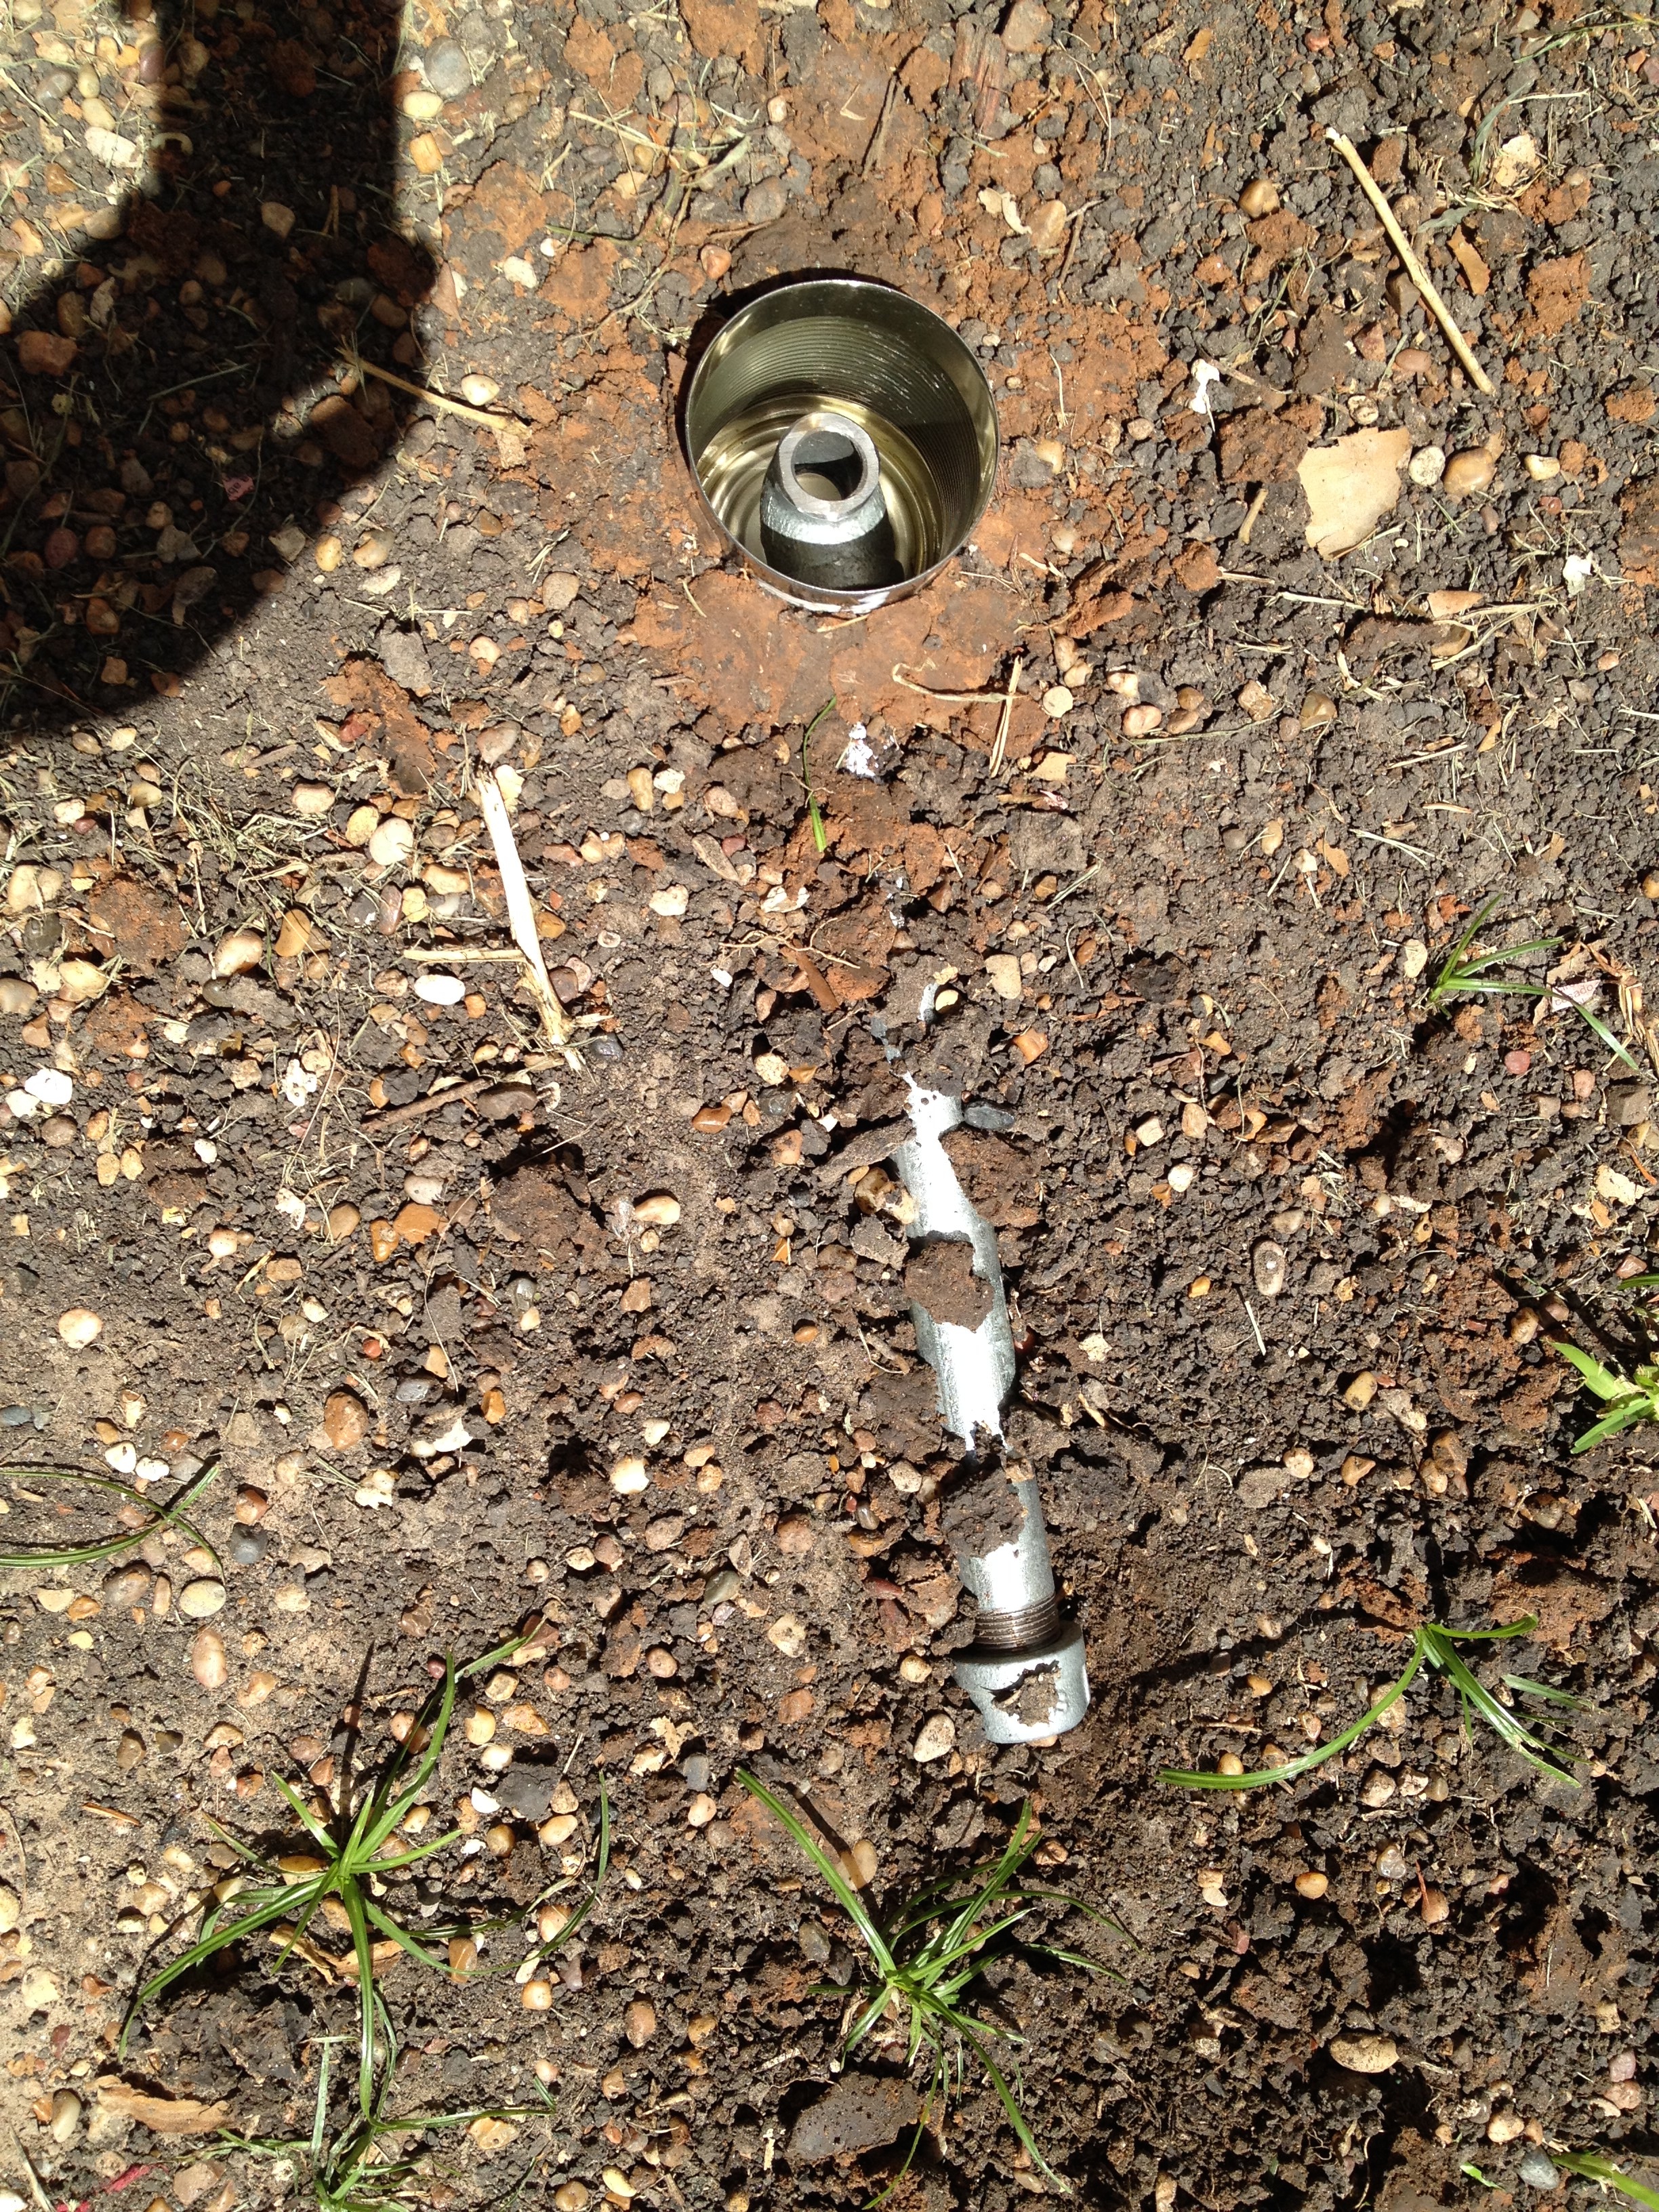
Well, I’ve got to do something while I wait for the kit, so why not try my hand at smelting? So the pin drive wheels have a single spinner nut that holds the wheels onto the axle. Instead of whacking away at it to tighten or loosen it with a regular handle, a dead blow hammer is required to prevent damaging the spinner. The typical dead blow hammer at the stores has a metal head filled with hydraulic fluid (oil) and lead pellets with the head covered in some soft polymer. The old timers used a lead hammer. You can buy a lead hammer online for about $30, but then you have to pay to ship lead. That seems wasteful, so I decided to make my own. It ended up being pretty easy.
Here are the supplies I used:
3/4″ Galvanized steel pipe with a 3/4″x1/2″ tee (with the 1/2″ ends cut off)
a can with a hole cut into the side
tiny baking pans ($3 at Walmart)
propane stove
10 lbs of scrap lead
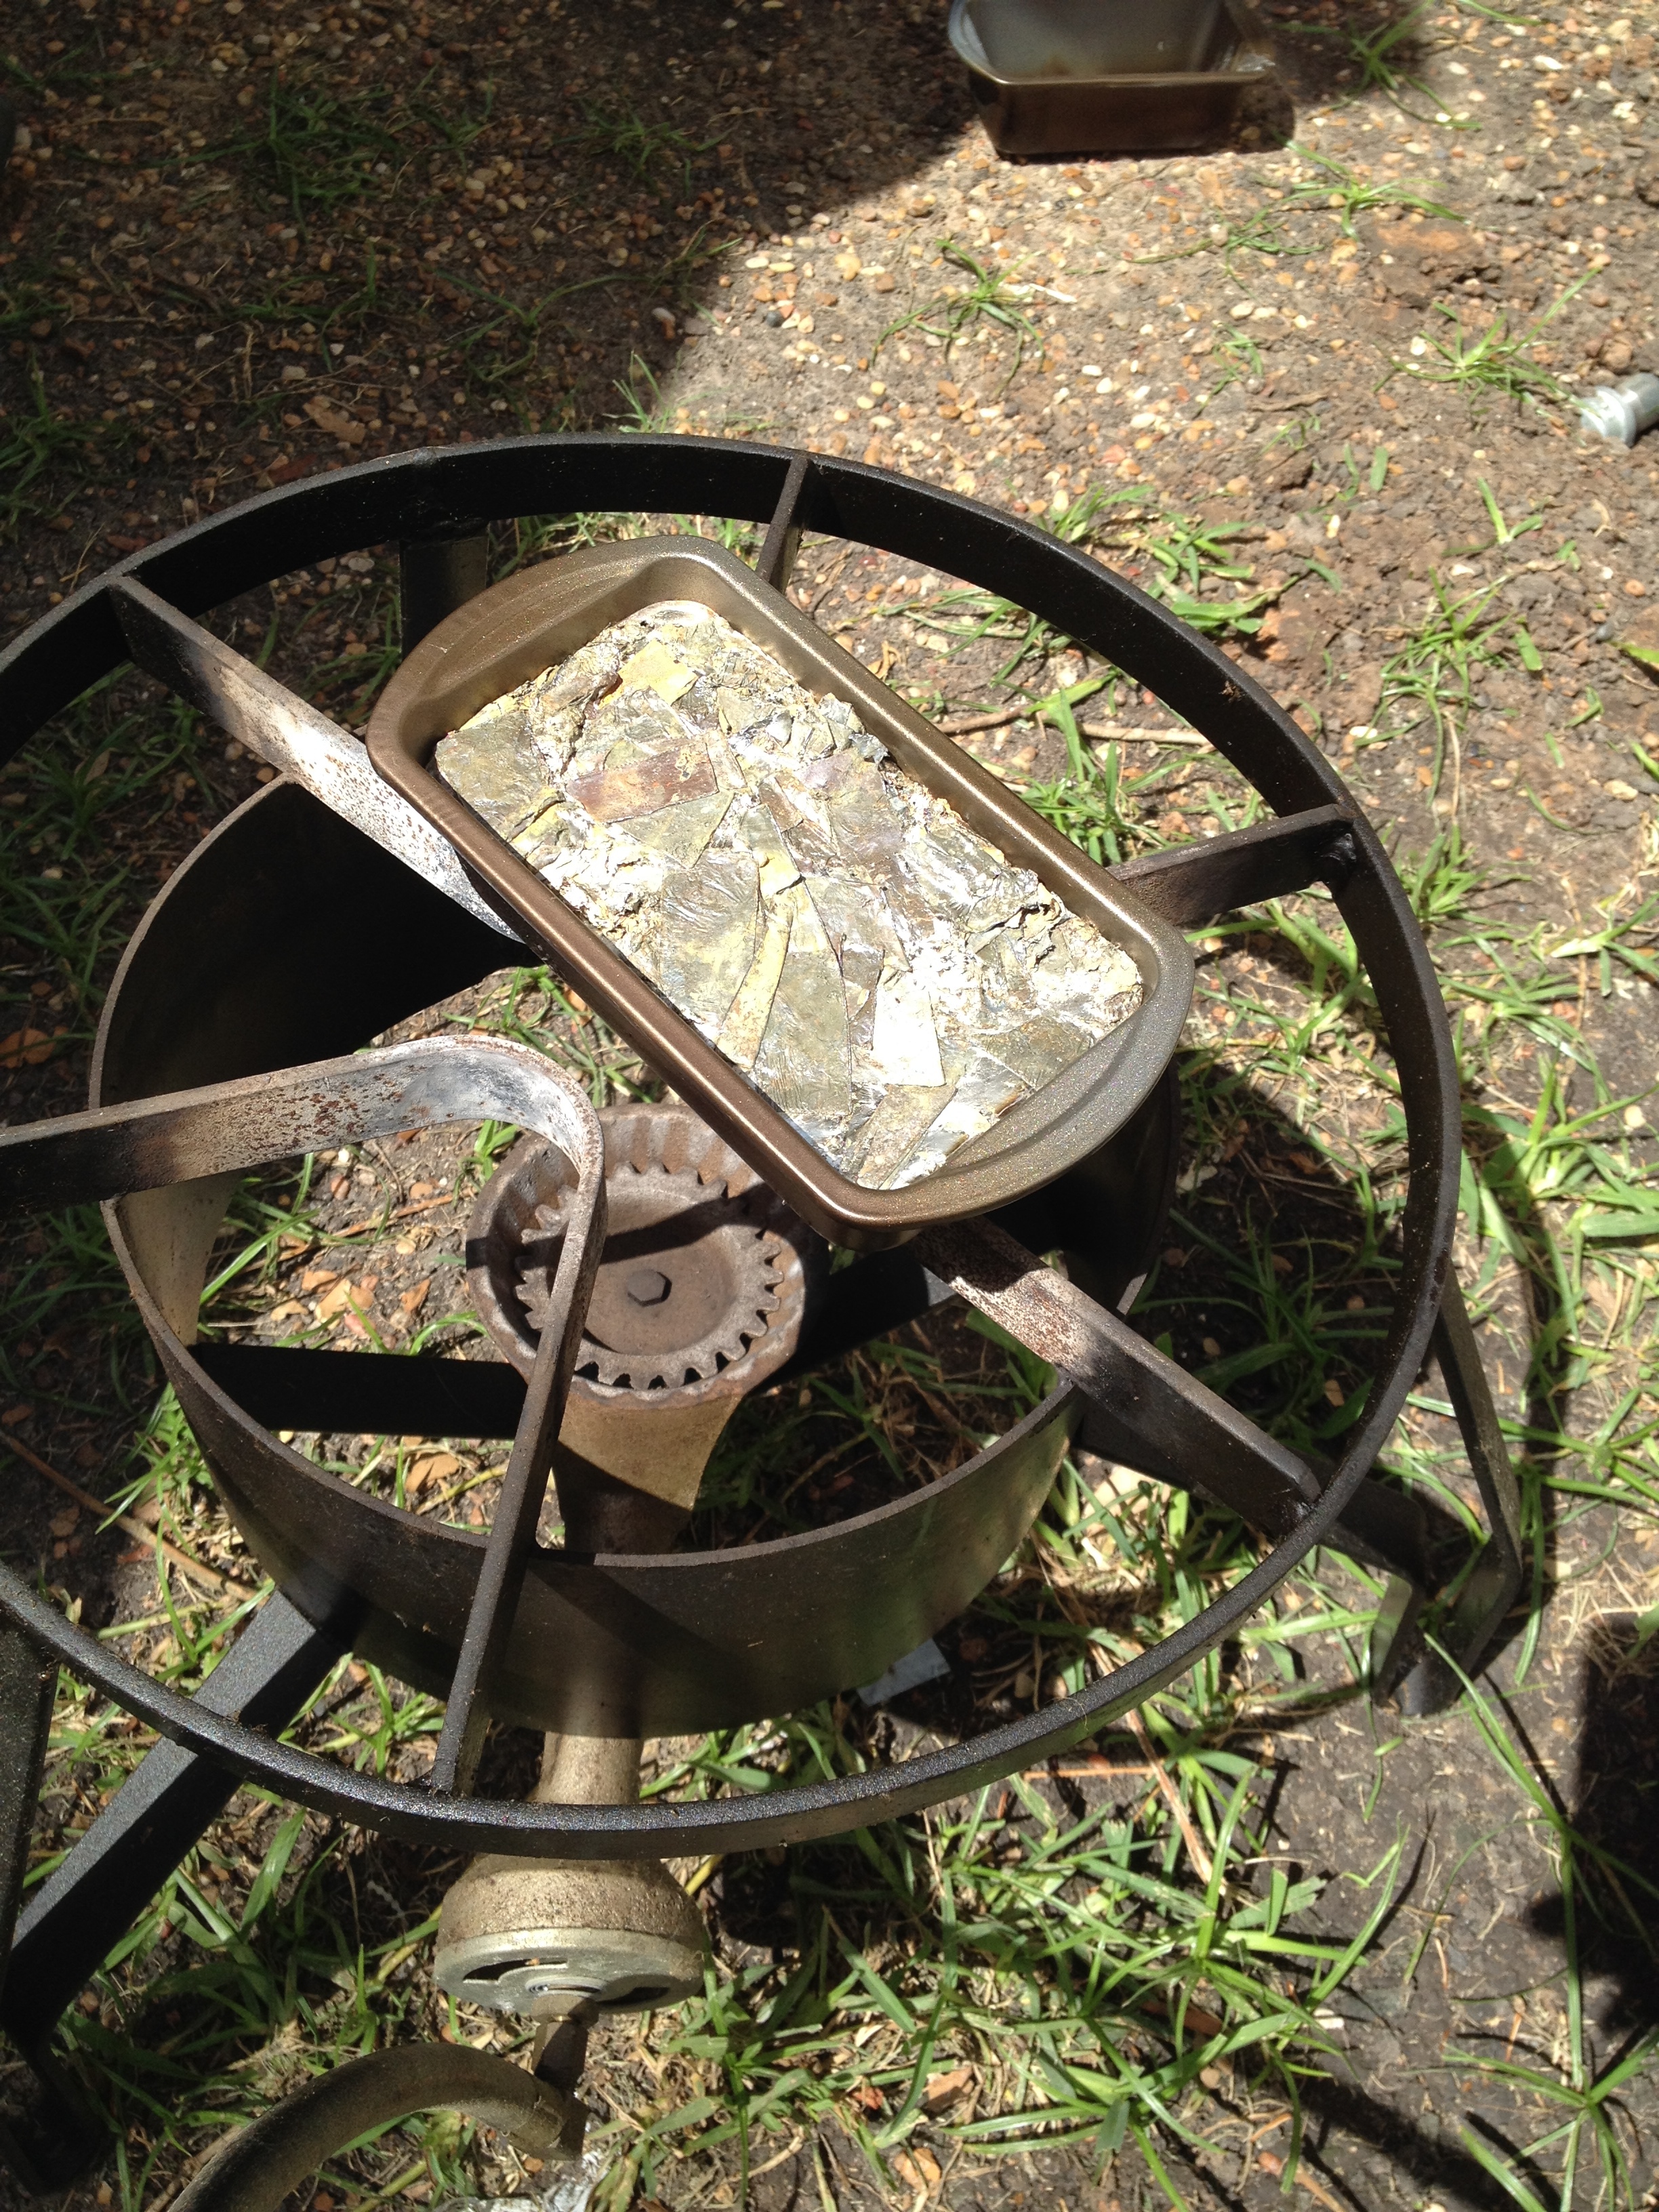
This is what 10 lbs of lead looks like flattened out. I bought it at a local scrap yard for $1 per pound. I cut it up into small pieces so that we could add a little bit at a time for melting.
Here is the mold (i.e., can) in the ground.
All ten pounds fit into one of the pans. This was taken before all of the crap was cleaned off of the top. (tip: use very very long handled tools for this job, it gets hot)
Here it is just after we poured it:
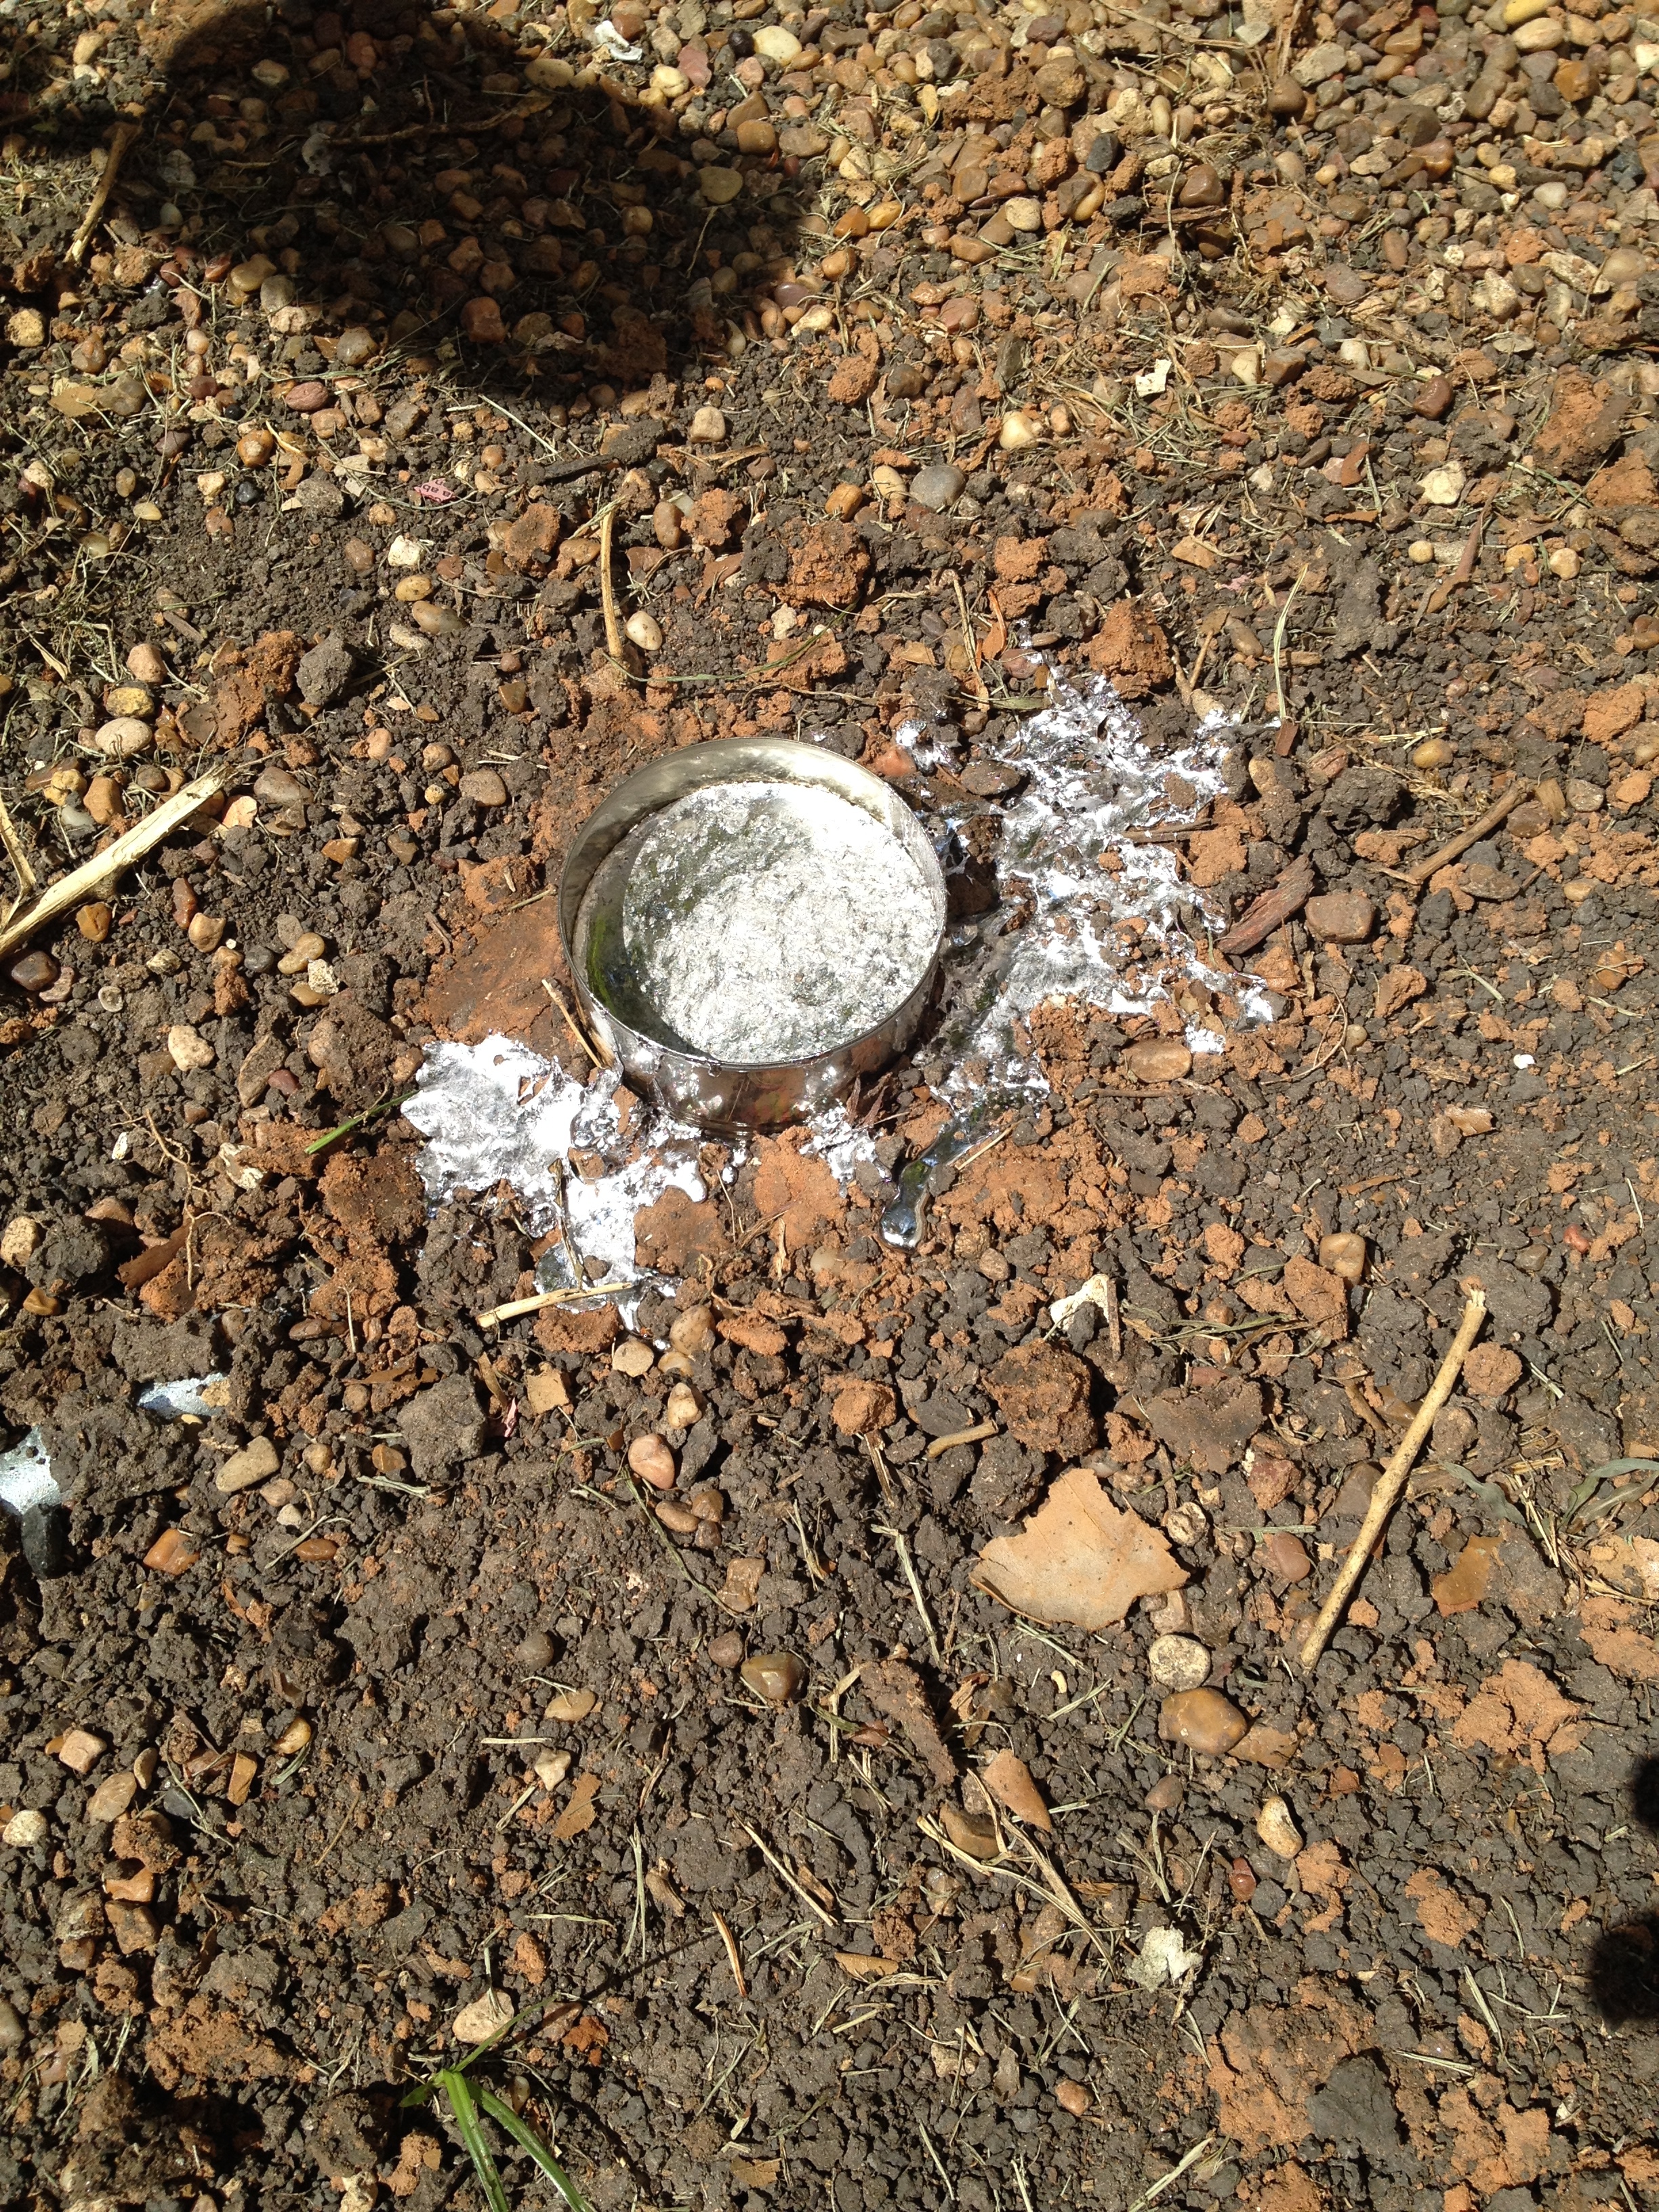
It didn’t quite fit fill the can we had. You can see that it collapsed a bit as it cooled:
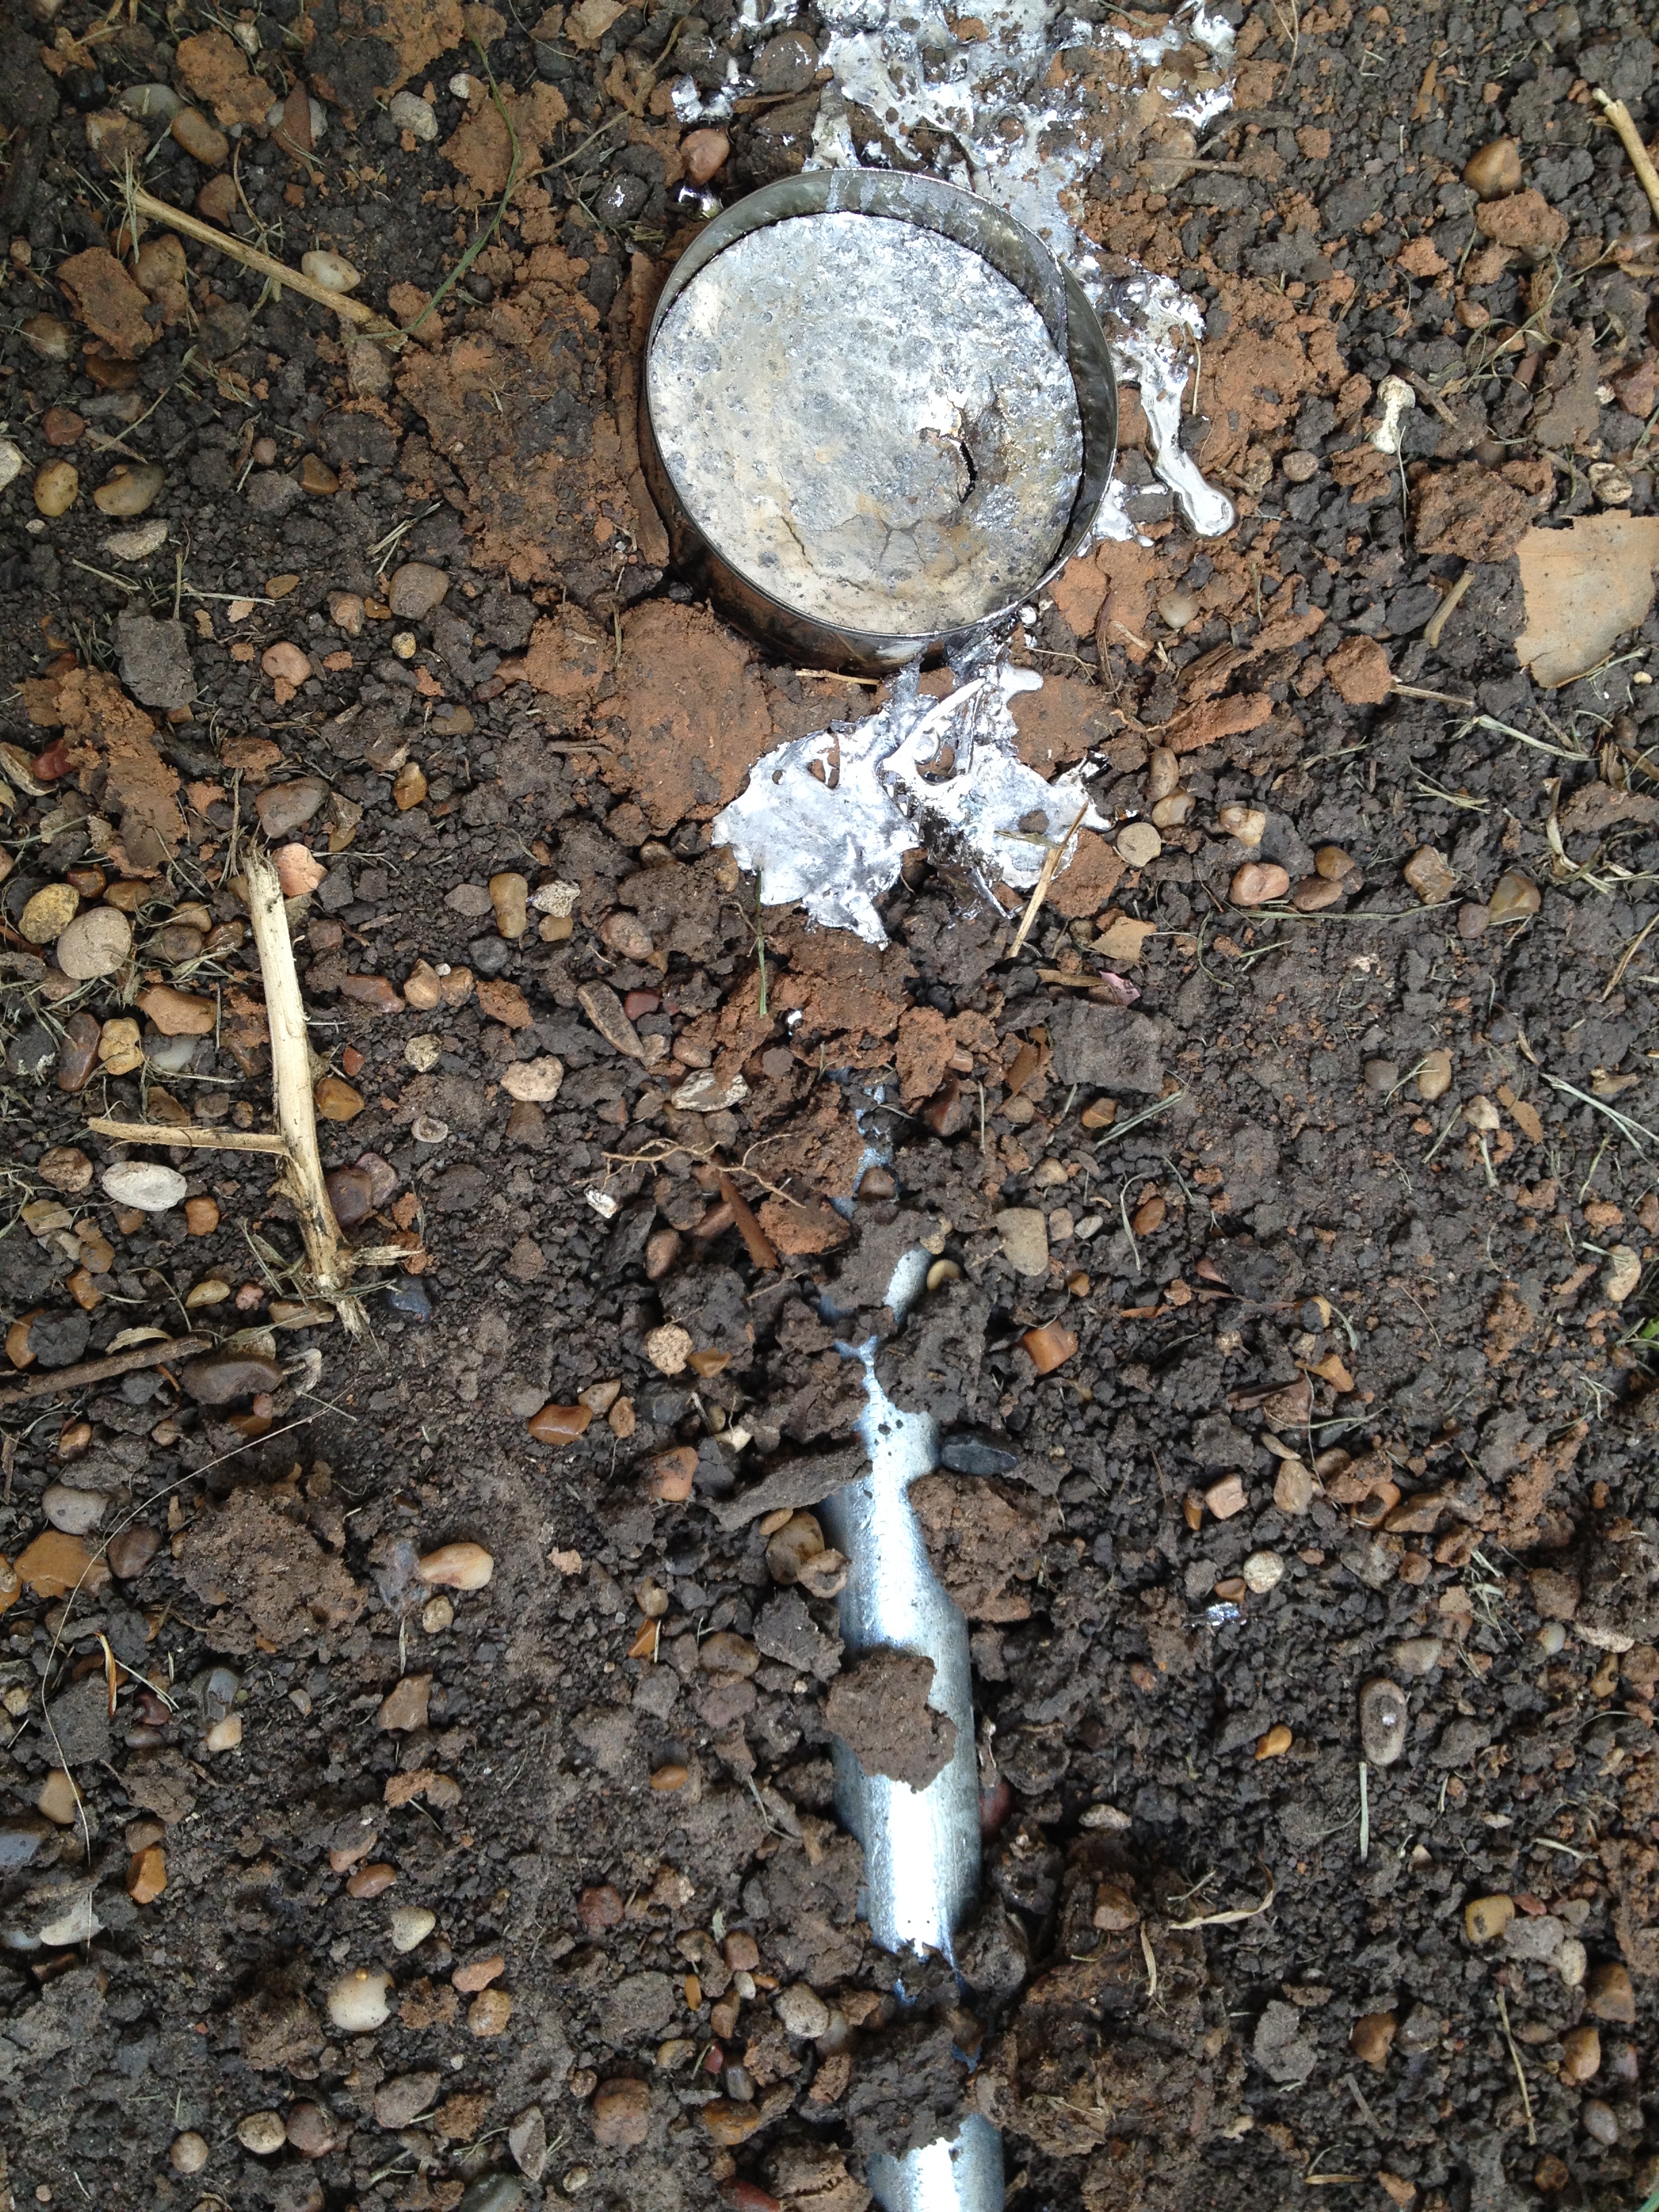
Here it is out of the ground (the aluminum foil around the handle was used to plug the gap between the hole in the can and the handle, which also had foil stuffed in it to keep it from being filled with lead):
http://cobraproject2014.files.wordpr...5/img_0557.jpg
All done:
http://cobraproject2014.files.wordpr...5/img_0559.jpg
Man that sucker is heavy. Both Dad and me had fun making this, and it ended up being cheaper than the $30 store bought hammer, even without shipping.
Last edited by Bren; 06-10-2014 at 11:37 AM.
Build Blog
#8203, carbed 427W (611 hp), TKO 600, IRS
Delivered: May 27, 2014
Mechanically "Complete": October 1, 2014
-
Senior Member
I’ll start with the relatively boring decision, then move to the fun one (in my opinion).
The kit ships from Factory Five with steel brake and fuel lines. Everyone knows that, unprotected, regular steel will rust. So, eventually, steel lines will have to be replaced. One of my mottos on this project has been, “Do it right the first time.” Now, this motto has already blown my budget, and it just won’t quit. Anyway, most people upgrade from steel to stainless steel. It makes sense. But, most people also complain about how tough it is to work with because all of the flared line connections. Apparently the stainless can break at the welded seam and is very difficult to flare evenly, even with the best tool (Eastwood makes a highly recommended but $300 tool).
It has been mentioned that with a little practice and the right methods (i.e., experience), stainless steel lines are just as easy to work with as steel lines. This may well be true, but how much line do I have to waste practicing and how many attempts failed before I actually get lines I can use? The thing is, I’m not experienced in flaring stainless line, at all. So my first reaction was to just stick with the steel lines. They can’t be that bad. Cars have run with steel lines for decades. But, I don’t want to have rusty lines on the car. Also, I don’t want to ever have to replace them (a real pain in the ***). Further, almost everyone recommends upgrading the tubing. So, what’s a guy to do?
Apparently, buy cunifer lines. “Cunifer” is an alloy made of copper (Cu), nickel (Ni), and iron (Fe) and is extremely corrosion resistant, but unlike stainless steel, it’s very malleable (i.e., flaring is no problem). It has a brass/copper look to it so, depending on your taste, it also looks better (as an electrical engineer, I love everything copper). So, that’s what I’m going to do. 3/16″ cunifer tubing for brakes, and 3/8″ cunifer tubing for fuel (5/16″ is standard, but with the high horsepower engine, it’s suggested to upgrade the fuel line). Cunifer can be bought at fedhillusa.com.
With the material of construction figured out, the next and seemingly easy step was to determine the length of tubing to buy. It should be a straight forward question, right? As with nearly everything on this build, there is much more to learn. So, with respect to the fuel line, the answer is “no.” The biggest determining factor is whether you want a return line. A fuel return line does exactly what it sounds like it does: returns gas to the tank from the engine. My initial impression was that return lines were used mainly for EFI systems, so I didn’t need it.
After looking a bit closer, Quick Fuel (the maker of my carburetor) also makes a fuel regulator that bolts up to the carb for a fuel return line. Why? With all of the new additives to gasoline (mainly alcohol), the boiling temperature of gas has dropped significantly since the 60′s. Accordingly, may older cars that didn’t have this problem before now have issues of vapor lock, which essentially is just pockets of vaporized (boiled) gas that gets stuck in the lines and won’t allow liquid gas to flow to the engine. One way to prevent this is to insulate gas lines to keep them from getting too hot. Another, is to use a fuel return line. Without the return, when sitting at a red light just idling the engine, not a lot of gas is being used, so not much is flowing through the lines. The gas in the lines next to the engine just sits there, getting hot. The return lines allow fuel to continuously flow through the lines, even when not being used by the engine. Thus, the gas doesn’t have time to get hot and vaporize.
So, I bought Quick Fuel’s regulator and extra fuel line (another unexpected cost).
Now, I know what you’re thinking: “He said he was going to talk about some boring stuff but he just got done discussing types of metal and vapor lock. What’s more exciting than that?!” This:
mppMrEj08kt-I6oe8olVLEg.jpg
It’s a Lucas PLC5 switch. It integrates the ignition key switch with the headlamp controls. I first came across this when looking for switches for the dashboard and thought it looked really cool. It looks like it belongs on a 60′s era car. Actually, they were used on a lot of British motorcycles. But, they were also used on some small British roadsters. I did some research, and couldn’t determine if they were ever used by AC on their cars, so I gave up thinking that it just wouldn’t match with the car.
As you know, the delivery of the car has been delayed (I called Stewart today and it is supposed to be picked up at the factory today – more delays), so I’ve been watching more TV than I should. One show (Chasing Classic Cars) had two episodes that both had AC cars on them. One, an AC Ace. The other, an AC Bristol. Both had this exact switch on the dash. That sealed the deal for me. I ordered one this morning.
No, it’s not original. But it’s original-ish. It can be traced to cars in the AC Cobra’s lineage, and I think it looks 60′s, which is kind of what I’m trying to replicate (the golden era of cars). I love stuff like this that I’m sure the engineers at the time thought was quite clever. I can just imagine the designers thinking that stuff like this would surely catch on, but it never did. I love that.
I wanted to replace the standard ignition switch that came with the kit anyway. The standard barrel comes with four positions: off, accessories, on (ignition), and start. I plan on using a start button, so the last position is useless to me. Also, the key that comes looks like it’s from the 90′s with a huge plastic head. This fixes both problems. The key is nice and small (and not hideous) and has only three positions: off, accessories, and on. Perfect!
Build Blog
#8203, carbed 427W (611 hp), TKO 600, IRS
Delivered: May 27, 2014
Mechanically "Complete": October 1, 2014
-
Senior Member

Bren, I think that you are overthinking the steel brake/fuel lines. My roadster was completed in 2003 and there is no hint of rust or corrosion anywhere. Stainless lines are great to look at but in my world I would rather spend the money somewhere else in a build. Just my thoughts, I have enjoyed reading your posts and look forward to your build.
Doug
-
Senior Member
Originally Posted by
68GT500MAN
Bren, I think that you are overthinking the steel brake/fuel lines. My roadster was completed in 2003 and there is no hint of rust or corrosion anywhere. Stainless lines are great to look at but in my world I would rather spend the money somewhere else in a build. Just my thoughts, I have enjoyed reading your posts and look forward to your build.
Doug
Doug, I think you're probably right. Especially with how this car will be babied from the get go, steel lines will uphold just fine. But the upgrade isn't all that much money as long as I don't have to pay for an expensive flaring tool. Now that I've discovered the cunifer lines, I'm actually looking forward to how they'll look. So there's that as well.
Build Blog
#8203, carbed 427W (611 hp), TKO 600, IRS
Delivered: May 27, 2014
Mechanically "Complete": October 1, 2014
-
Senior Member
The supplied steel lines are coated for corrosion resistance. If you use the supplied lines, why would you need a flaring tool? Not trying to dissuade you from cunifer; many like working with it.
SOLD 03/2013: MK II #5004: 5.0 EFI: 8.8, 3.55, E303, TW heads, GT40 intake, 24#, 70mm MAF
Ordered MK IV Coyote Complete Kit.
-
Senior Member

Originally Posted by
Bren
Doug, I think you're probably right. Especially with how this car will be babied from the get go, steel lines will uphold just fine. But the upgrade isn't all that much money as long as I don't have to pay for an expensive flaring tool. Now that I've discovered the cunifer lines, I'm actually looking forward to how they'll look. So there's that as well.
That's fine. Understand your decision. SS needs a decent (and admittedly expensive) flaring tool. Just don't make the mistake of thinking that just any flaring tool is going to work with steel or cunifer. The cheap sets will make more scrap than good flares in my experience. Even in relatively soft steel or cunifer, it's real easy for them to go off center, not flare well, slip, etc. IMO, expect to pay $40-50-60 (or so) for a name brand tool. I found this one works pretty well. http://www.amazon.com/General-Tools-.../dp/B001HWDJJE And then practice until you can make them repeatedly. Guys talk up the difficulty of SS so much I think people get the idea everything else is just automatic. It's not. Still requires the right tools, a little practice, and the right process.
Last edited by edwardb; 05-20-2014 at 01:47 PM.
Build 1: Mk3 Roadster #5125. Sold 11/08/2014.
Build 2: Mk4 Roadster #7750. Sold 04/10/2017.
Build Thread
Build 3: Mk4 Roadster 20th Anniversary #8674. Sold 09/07/2020.
Build Thread and
Video.
Build 4: Gen 3 Type 65 Coupe #59. Gen 3 Coyote. Legal 03/04/2020.
Build Thread and
Video
Build 5: 35 Hot Rod Truck #138. LS3 and 4L65E auto. Rcvd 01/05/2021. Legal 04/20/2023.
Build Thread. Sold 11/9/2023.
-
Senior Member
Originally Posted by
edwardb
That's fine. Understand your decision. SS needs a decent (and admittedly expensive) flaring tool. Just don't make the mistake of thinking that just any flaring tool is going to work with steel or cunifer. The cheap sets will make more scrap than good flares in my experience. Even in relatively soft steel or cunifer, it's real easy for them to go off center, not flare well, slip, etc. IMO, expect to pay $40-50-60 (or so) for a name brand tool. I found this one works pretty well.
http://www.amazon.com/General-Tools-.../dp/B001HWDJJE And then practice until you can make them repeatedly. Guys talk up the difficulty of SS so much I think people get the idea everything else is just automatic. It's not. Still requires the right tools, a little practice, and the right process.
My plan was to rent a flaring tool from the local auto parts store. I assume that their tool will be decent. Has anyone had an experience to the contrary?
Build Blog
#8203, carbed 427W (611 hp), TKO 600, IRS
Delivered: May 27, 2014
Mechanically "Complete": October 1, 2014
-
Senior Member
Originally Posted by
Bren
My plan was to rent a flaring tool from the local auto parts store. I assume that their tool will be decent. Has anyone had an experience to the contrary?
I started there with our local Auto Zone. The set they had was OK quality, but the 3/16 die was pretty much worn out. Never did get a successful flare with it. Just didn't want to mess around trying other places, so bought the General Tools one. My time has value too.
Build 1: Mk3 Roadster #5125. Sold 11/08/2014.
Build 2: Mk4 Roadster #7750. Sold 04/10/2017.
Build Thread
Build 3: Mk4 Roadster 20th Anniversary #8674. Sold 09/07/2020.
Build Thread and
Video.
Build 4: Gen 3 Type 65 Coupe #59. Gen 3 Coyote. Legal 03/04/2020.
Build Thread and
Video
Build 5: 35 Hot Rod Truck #138. LS3 and 4L65E auto. Rcvd 01/05/2021. Legal 04/20/2023.
Build Thread. Sold 11/9/2023.
-
If you are going to do the larger size line for the fuel, you are forced to either get a flaring tool or buy the line pre-flared. Let me help spend your money-this is the tool everyone raves about including me, http://www.eastwood.com/professional...ring-tool.html . If you don't want to keep it in your tool box, sell it when you are done. A 25% loss may be equivalent to the rental price on a worn out tool. It also makes bubble flares to keep rubber tubing from sliding off, an option you might like somewhere else in your build.
-
Not a waxer

Bren,
You're kind of new here and I don't think we've talked much, if at all. I'm not one of "those guys" who recommends upgrades simply for the sake of upgrading and if that's what a builder wants I won't discourage him but will encourage him to take in the big picture. With that said, as Dale mentioned the supplied brake and fuel tubing is coated. I've built a few of these cars, the oldest having been on the road for 7 years and they've all been in the rain. There isn't a hint of rust on the tubing of any so really that is a non issue. Based on your home brewed lead hammer it sounds like you enjoy experimenting so with that in mind if you don't object to spending the additional $$$ give the cunifer a try, polish it up to a stainless steel like finish and have a good time! I'll echo what edwardb said; a quality flaring tool makes the difference between success and an exercise in frustration.
Good luck,
Jeff
-
Post Thanks / Like - 1 Thanks, 0 Likes
-
Senior Member

Another thought re brake lines. I have helped w/ two cars now and we used the supplied lines on both. They are the same dark green coated lines that some of the auto parts store sell. On the most recent car we only needed to cut and flare one end of one line. On the other one, I think we may have cut and flared two ends.
FFR MkII, 408W, Tremec TKO 500, 2015 IRS, DA QA1s, Forte front bar, APE hardtop.
-
Senior Member
Thanks for all of the comments, it's a lot to consider. But that's what I love about this!
Build Blog
#8203, carbed 427W (611 hp), TKO 600, IRS
Delivered: May 27, 2014
Mechanically "Complete": October 1, 2014
-
Member

LOVE reading what you've put up so far. Enjoy the process!
While you're down here, make sure and enjoy some local grub. Larry's Mexican Restaurant, in Richmond/Rosenberg, is not far from you and is a taste of old-school Tex-Mex. Place has been open forever.


 Thanks:
  Likes:


 Reply With Quote


