Forte's

Visit our community sponsor

Thanks Thanks:  0
Likes Likes:  1
Page 2 of 3 FirstFirst 123 LastLast
Results 41 to 80 of 110

Thread: Mark's MKIV 8666 Build Thread - Now for sale!

  1. #41
    Senior Member 6t8dart's Avatar
    Join Date
    Apr 2015
    Location
    Irving, TX
    Posts
    545
    Post Thanks / Like
    Yes, the radiator came from Factory Five recently.

  2. #42
    Senior Member edwardb's Avatar
    Join Date
    Feb 2011
    Location
    Lake Orion, Michigan
    Posts
    10,578
    Post Thanks / Like
    Quote Originally Posted by 6t8dart View Post
    Yes, the radiator came from Factory Five recently.
    Very interesting. The radiator I received with my kit just last month was the same as the one several years ago. And the dates on the boxes from Afco are July. So apparently a very recent change. The angled lower radiator connection points the hose away from the end of the 4 inch chassis tube and the tow hook, which some have struggled with a bit. But also means some of the available mandrel bent solutions, like from Breeze, would no longer work as is.
    Build 1: Mk3 Roadster #5125. Sold 11/08/2014. Build 2: Mk4 Roadster #7750. Sold 04/10/2017. Build Thread
    Build 3: Mk4 Roadster 20th Anniversary #8674. Sold 09/07/2020. Build Thread and Video. Build 4: Gen 3 Type 65 Coupe #59. Gen 3 Coyote. Legal 03/04/2020. Build Thread and Video
    Build 5: 35 Hot Rod Truck #138. LS3 and 4L65E auto. Rcvd 01/05/2021. Legal 04/20/2023. Build Thread. Sold 11/9/2023.

  3. #43
    Senior Member 6t8dart's Avatar
    Join Date
    Apr 2015
    Location
    Irving, TX
    Posts
    545
    Post Thanks / Like
    I took a second look at the picture on FFR's website, I guess they did change the lower outlet a bit. I like it better.

  4. #44
    Senior Member 6t8dart's Avatar
    Join Date
    Apr 2015
    Location
    Irving, TX
    Posts
    545
    Post Thanks / Like
    I took another day off from work to work on the MKIV today. I decided to tackle drilling all the foot box aluminum, F panels, and firewall.

    image.jpg. image.jpg

    On the firewall, I decided that it was as flimsy as everyone says, I added the typical brace to the dash hoop.

    image.jpg

    Unfortunately, I ended up scratching the engine side of the firewall, so now I need to figure out what to do. Paint, brushing, powder coating?

  5. #45
    Member sbak's Avatar
    Join Date
    Feb 2015
    Location
    Dallas, Texas
    Posts
    39
    Post Thanks / Like
    If its in the black paint.. paint over it.. then cover it with some tape (when it dries).. I think.. edwardb has some tape on parts of his chassis in his latest build thread.

  6. #46
    Senior Member 6t8dart's Avatar
    Join Date
    Apr 2015
    Location
    Irving, TX
    Posts
    545
    Post Thanks / Like
    No it's raw aluminum, I'm thinking of painting the black though, maybe brushed finish. Not decided.

  7. #47
    Carl carlewms's Avatar
    Join Date
    May 2012
    Location
    Nokesville, VA
    Posts
    1,125
    Post Thanks / Like
    Depending on how deep a scratch ... it is fixable without resorting to paint.

    In my case I am keeping the engine compartment side in a "raw" look but protected by Shark Hide. If I got a scratch before going through the preparation process, I would use a sanding block first to try to eliminate the scratch working my way up to wire wheel if needed.

    I then used WD-30 as a lubricant and a scotch pad to give the aluminum a grain. After a through cleaning I then applied the Shark Hide.

    Here is a panel after treatment ...

    Mk 4 Roadster
    October 25, 2012 - Kit Arrives
    April 8, 2013 - Build Starts
    August 23, 2015 - Rolling Chassis/Engine & Transmission Installed
    March 26, 2016 - Go Cart

  8. #48
    Senior Member 6t8dart's Avatar
    Join Date
    Apr 2015
    Location
    Irving, TX
    Posts
    545
    Post Thanks / Like
    Well, life always has a way of getting in the way. I have not touched the car in six weeks, and with going back to school, it looks like progress will be slow. Hopefully I will have some time around thanksgiving to knock out a few things. Family always comes first.

  9. #49
    Senior Member 6t8dart's Avatar
    Join Date
    Apr 2015
    Location
    Irving, TX
    Posts
    545
    Post Thanks / Like
    OK, Im back to working on my car again. I started yesterday by picking up some parts from King (2bKing). I have a manual rack now. I also want to thank King for giving me a tour of his MMIV and giving me a ride in it, it definitely feels very solid and rattle free. Nice car! I loved the clam-shell hood, but that's too big a project for me.

    I am now considering getting rid of all the front accessories from the explorer drive engine setup and just going with a alternator only.

    After I came back, I started cleaning up three month of junk accumulation in the garage to make room again. I organized any parts I had unboxed and put them away again.

    Now...on to the kit...I cleaned up my pass side aluminum footbox panels and coated them with sharkhide. I decided that I liked the sharkhide look, and wont be doing painted or brushed panels. The sharkhide gives them a nice glossy, clear look. I did wonder if spraying the panels will work too. I might do a little experimenting later.

    I then worked on finding and test fitting the accessory drives and making sure I had all the correct bolts. I ended up only missing two bolts. I will have to find those at the hardware store.

    I also cleaned up some my handbrake and shifter cables with acetone. I would like to test fit the engine and trans sometime soon and get all the lines run.

    I have most of the rivet holes drilled on everything from the dash forward. (I love my air drill!) Next on the agenda is to sharkhide the driver's side footbox, but I want to do a foot-room mod first. Then I can finish final install on the pedalbox, gas pedal, and brake booster.
    Last edited by 6t8dart; 01-14-2016 at 11:19 AM.

  10. #50
    Senior Member 6t8dart's Avatar
    Join Date
    Apr 2015
    Location
    Irving, TX
    Posts
    545
    Post Thanks / Like
    Update: Picked up more parts from 2bKing last Saturday. I picked up some sheet aluminum last week too.

    Changes to the plan:

    1. I am replacing the factory gas pedal with the F5 setup.

    2. I am expanding the passenger footbox to its maximum extent, and expanding the driver's a little bit.

    3. I am going to install a trunk drop kit

    4. I am going to mock-up and see if moving the firewall forward about 4-5 inches will clear the engine and give me enough room to fit an A/C unit. I already have a compact Superfrost unit from Southern Air, its only 18"x8"x8", so i have a shot of it fitting.)
    z090-00625kz09000625ksuperfrostpro.jpg

  11. #51
    Senior Member 6t8dart's Avatar
    Join Date
    Apr 2015
    Location
    Irving, TX
    Posts
    545
    Post Thanks / Like
    Today I had a few hours to play with and started modding tithe passenger footbox. I moved the crease forward a few inches, the inner aluminum panel now hugs the square tube from the trans tunnel to the 4" tube. The footbox is now 2 1/2" wider than stock, and there seems to be a lot lot more left calf room now. You can see from the pictures how much farther in it is. I didn't see a need to move the front farther out. I was a little conservative on width, but I was able to maintain 1/2" clearance to the headers. I still need to patch the bottom panel and fabricate a new top panel still.

    image.jpeg

    image.jpeg

    image.jpeg
    Last edited by 6t8dart; 02-01-2016 at 07:49 PM.

  12. #52
    Senior Member edwardb's Avatar
    Join Date
    Feb 2011
    Location
    Lake Orion, Michigan
    Posts
    10,578
    Post Thanks / Like
    Quote Originally Posted by 6t8dart View Post
    Today I had a few hours to play with and started modding tithe passenger footbox. I moved the crease forward a few inches, the inner aluminum panel now hugs the square tube from the trans tunnel to the 4" tube. The footbox is now 2 1/2" wider than stock, and there seems to be a lot lot more left calf room now. You can see from the pictures how much farther in it is. I didn't see a need to move the front farther out. I was a little conservative on width, but I was able to maintain 1/2" clearance to the headers. I still need to patch the bottom panel and fabricate a new top panel still.
    Nice work. I did a similar mod on my last build. Plenty of room to add this space with a small block, and your passengers will appreciate it. Maybe you realize this already, but I didn't think of it until the end of my build. Your standard FF carpet pieces will no longer fit. I ordered a couple extra yards from FF and made the required new pieces. Also the standard floor mats now have a big gap. I put them in anyway, and it's no big deal.
    Build 1: Mk3 Roadster #5125. Sold 11/08/2014. Build 2: Mk4 Roadster #7750. Sold 04/10/2017. Build Thread
    Build 3: Mk4 Roadster 20th Anniversary #8674. Sold 09/07/2020. Build Thread and Video. Build 4: Gen 3 Type 65 Coupe #59. Gen 3 Coyote. Legal 03/04/2020. Build Thread and Video
    Build 5: 35 Hot Rod Truck #138. LS3 and 4L65E auto. Rcvd 01/05/2021. Legal 04/20/2023. Build Thread. Sold 11/9/2023.

  13. #53
    Senior Member 6t8dart's Avatar
    Join Date
    Apr 2015
    Location
    Irving, TX
    Posts
    545
    Post Thanks / Like
    I figured I would need more carpet, forgot about the floor mats though. I'll probably use them anyway.

  14. #54
    Senior Member 6t8dart's Avatar
    Join Date
    Apr 2015
    Location
    Irving, TX
    Posts
    545
    Post Thanks / Like
    I had another few hours today to bend up a new top panel. It took me a while to experiment with making the two inside cuts, my normal score and bend would not work, saw blades tend to wander, I don't have shear, so I played around with snips. Straight snips wold not more than a few inches deep, angled snips left a jagged edge, finally, I found that using my hand nibbler from the bottom left a very clean cut on top. It took a lot of concentration, but I got it done! Next the multiple bends in different directions left me scratching my head, but using both of my short and long brakes, a vice, bending pliers, and a section of 4x4, I finally got it done.

    image.jpeg

    image.jpeg

    image.jpeg

  15. #55
    Senior Member 6t8dart's Avatar
    Join Date
    Apr 2015
    Location
    Irving, TX
    Posts
    545
    Post Thanks / Like
    I had half a day to work on the driver's footbox today. As I did on the pass side, I want to make as much room as the small block will allow. I decided that knee/calf room was most important. As usual, I spend the first hour looking for all the tools I need, then I stare at the parts until I figur out where to start.

    I made a cardboard template of the inner footbox panel, then I cut it up to fit where I want it. I decided to make a straight line 4 inches behind the front wall, all the way to the top corner of the dash. I decided to keep the top half of the inner panel. I then cut the factory panel as straight as possible.

    image.jpeg
    image.jpeg

    I then bent up a lower piece from my original template, all the bends but one were made with my 30" brake, the top inner flange was made by clamping the piece down to the brake edge, then using a body hammer to bend it over.

    image.jpeg
    image.jpeg
    image.jpeg

    I actually ended up with about 3/4" gained at the pedal, about 2 1/4" at the knee, and still have 1/2" clearance to the header.

    image.jpeg
    image.jpeg
    image.jpeg

  16. #56
    Senior Member 6t8dart's Avatar
    Join Date
    Apr 2015
    Location
    Irving, TX
    Posts
    545
    Post Thanks / Like
    Today was a boring work day, finished fitting and drilling all the drivers side footbox panels, installed the heater box through the firewall, and installed my Whitby booster fram mod. Next time I need to drill the pass side footbox and ship them all off to a powder coater ( as soon as I can find one )

    image.jpeg

    image.jpeg

  17. #57
    2bking's Avatar
    Join Date
    Jul 2013
    Location
    Garland, Texas
    Posts
    799
    Post Thanks / Like
    Looking good! Nice sheet metal work on the foot boxes and you will enjoy the extra leg room gained on the DS each time you enter/exit.
    King
    Roadster #8127, ordered 7/12/13, received 9/11/13
    http://thefactoryfiveforum.com/showt...4-Coyote-Build

  18. #58
    Senior Member 6t8dart's Avatar
    Join Date
    Apr 2015
    Location
    Irving, TX
    Posts
    545
    Post Thanks / Like
    Tonight was an "oops" moment, I was disassembling the foot boxes, it occurred to me that I never did test fit the heater and firewall installed together, so I put it all together and found an oops, I cut the holes too far to the right side. When installed it sticks above the dash a good inch. Also the right vent out is half covered by the support tube. As I said oops!

    image.jpeg

    image.jpeg

    image.jpeg

    I figured I could either replace the firewall with a new one, I had my eye on the one made of .090 stock, or I also figured I can angle the box down and build a spacer for the inside. But the I thought about also relocating the blower to the inside of the cockpit, I mocked up a plenum to move it to the center of the dash.

    image.jpeg

    image.jpeg

    image.jpeg

    I'm not sure what to do here, perhaps I could build a plenum in between two firewalls and move the second wall forward a few inches. I need to think about a resolution to this goof a bit.
    Last edited by 6t8dart; 02-24-2016 at 10:32 PM.

  19. #59
    Not a waxer Jeff Kleiner's Avatar
    Join Date
    Feb 2011
    Location
    Bloomington, Indiana
    Posts
    8,094
    Post Thanks / Like
    With the blower inside and in the center I suspect that it will interfere with your gauges unless you plan to go with an unconventional dash layout.

    Jeff

  20. #60
    Senior Member 6t8dart's Avatar
    Join Date
    Apr 2015
    Location
    Irving, TX
    Posts
    545
    Post Thanks / Like
    I got a bunch of little jobs done today, most major project was installing the gas tank. Since I was using my donor tank, I had a bit of cleanup to do on the tank and liner, then I hit the tank with some flat black paint. I have read stories that installing the tank straps is difficult, but I had no problems. Except for finding the four black square tub ends, which I found packed with the hood and trunk bumpers, everything went in easy.

    image.jpeg

    I installed all the brake pads, calipers, brake hoses, and disassembled, painted, and reassembled the shock spacers ( since I forgot to do it before ). I did a little spring cleaning in the garage, cleaned up all the aluminum shavings, those *******s are everywhere.

  21. #61
    Senior Member 6t8dart's Avatar
    Join Date
    Apr 2015
    Location
    Irving, TX
    Posts
    545
    Post Thanks / Like
    This weekend was a short one, wife was on call and I was on toddler duty.

    I final installed the front drivers footbox panel, along with the booster, master, brake lines down to the prop block, pedal box, throttle pedal, and throttle cable. I locktited everything that needed it and considered this part of the project done.

    3.11.16.1.jpg

    I spent the better part of two hours trying to find a spot for the 95 ABS module, I wanted to get the top of it below the bleeder screws, i was able to find it fits between the rack and 4" tube down in front, but the mounting bracket it came with was just too wide. I then tried to mount it centered below and slightly in front of the PS rack, but was not happy with that either. I though about it some more, locations, and came up with either moving it a little higher in the original location, or building a custom mounting bracket to fit lower. I'm not 100% decided yet, but its next on the list.

    I then tackled the fuel system. I mounted the fuel filter and bracket up high on the rear frame rail, having to rebend some of the mustang metal lines. Finally I bent up and mounted the fuel lines from the filter all the way up to the footbox area, which is where I ran into a snag, while bending the 5/16 line on the very last bend, i overbent the turn slightly and collapsed the tube. Argh! Its always the last bend you make too...

    3.14.16.1.jpg

    3.14.16.2.jpg

    Update 3/26/16

    I finished the fuel lines up front and bent up an mounted the rear brake line, now on to the ABS module...

    image.jpeg

    image.jpeg

    image.jpeg
    Last edited by 6t8dart; 03-26-2016 at 05:26 PM. Reason: Update 3/26/16

  22. #62
    Senior Member 6t8dart's Avatar
    Join Date
    Apr 2015
    Location
    Irving, TX
    Posts
    545
    Post Thanks / Like
    I spent a few hours looking at and trying different mounting options, and I finally came up with a combination of the factory bracket, and 1/8" plate steel, and a 3/16" l bracket for stiffening.

    image.jpeg

    image.jpeg

    image.jpeg

    image.jpeg

    The setup clears the steering shaft, allows access to the rack bolt, and does not interfere with the lower A-arm.

    image.jpeg

    image.jpeg
    Last edited by 6t8dart; 03-26-2016 at 08:53 PM.

  23. #63
    Senior Member 6t8dart's Avatar
    Join Date
    Apr 2015
    Location
    Irving, TX
    Posts
    545
    Post Thanks / Like
    Another update, I have been working on my car, but family health issues have slowed my progress, as well as lack of parts.

    I have gone through the trans just to be sure, when I bought it I was told it was a fresh rebuilt performance trans. Unfortunately, the outside of it was dirty. I decided it need serious cleaning to go in my car. I cracked the trans open and inspected the insides, it was as promised, spotless inside. I put it back together, installed a new filter and front seal, and proceeded to scrape, and clean every inch of it, then painted it.

    4.07.16 1.jpg

    I put the front cover and oil pan on the engine and I'm ready to drop the trans and engine in the car for good. Unfortunately, I was missing a few pieces, so I have been waiting for a parts order. Hopefully, soon...they will,find a new home!
    Last edited by 6t8dart; 04-15-2016 at 08:40 AM.

  24. #64
    Senior Member 6t8dart's Avatar
    Join Date
    Apr 2015
    Location
    Irving, TX
    Posts
    545
    Post Thanks / Like

    Seriously Considering switching to a FITECH EFI setup

    Edit: Moved to another section of the forum.
    Last edited by 6t8dart; 04-15-2016 at 08:41 AM.

  25. #65
    Senior Member 6t8dart's Avatar
    Join Date
    Apr 2015
    Location
    Irving, TX
    Posts
    545
    Post Thanks / Like
    Last weekend I was mocking up my front drive in the chassis to make sure everything clears, and it looks like the explorer front drive works well. I still have a few issues, first is that the steering shaft and the A/C compressor want to occupy the same space. I am not going to run A/C in my car, but if I were, then another joint and a slight relocation would work.

    4.08.16 1.jpg 4.08.16 2.jpg

    Another issue I ran into was that I was missing the thermactor plugs from the heads, so the bracket would not bolt up, I need to order those from Summit. I also found out I had the wrong balancer I previously ordered. It was not even close, i really goofed that one up. Another part I am returning to Summit. I ordered a new replacement, which I hope will work.

    Hopefully, the next chunk of time I get to work on the car, I will be dropping in the engine and trans, and not pulling it back out!

  26. #66
    Senior Member 6t8dart's Avatar
    Join Date
    Apr 2015
    Location
    Irving, TX
    Posts
    545
    Post Thanks / Like
    Two weeks later and I have made some progress, just not a lot. I was recovering from a cortizone shot in my right hip, so i only worked about 4 hours last Saturday. I did get a lot of the missing stuff in. I now have a new Trans spacer plate, a new balancer, water pump, dip stick and tube, and a few new gaskets and thermactor plugs. I got the oil pan installed, timing cover and water pump installed.

    I got the front drive bolted up, however I found out that I needed to add an idler pulley below the p/s pump, luckily I had a MOD motor pulley and spacer that King gave me, and that fit perfectly, except that I now need a 6 3/4" 7/16 bolt. Which again has turned into a wild goose chase. I went to a few hardware stores and finally to a Fastenal looking for them. Nope, nada. I finally had to have fastenal order me both a 6 1/2" and a 7" long grade 8 for me, I will have to see which one fits later. I was able to get all the pulleys perfectly lined up and I chopped down a long belt to get the correct length.

    Another issue I ran into, I wanted to install the intake manifold on the engine, but the old hardware had seen better days, I had some new 5/16 bolts, but no washers. Went to the hardware store, guess what, forgot my wallet. Doh! I went to get some from Fastenal, but they dont have ehough of any black bolts or any matching washers. I think I am just going to bite the bullet and buy the more expensive ARP bolts. Which I already have for my valve covers and headers.

    AT this point, I am ready to install the engine and trans in the chassis, but my help will not be able to assist until next weekend. Not a big loss, as I have other little things I can still do until then. I hope to work on it most of the day tomorrow. I just hope I don't keep running into missing bolts and parts again. Update to follow.

  27. #67
    Senior Member Raceral's Avatar
    Join Date
    Feb 2011
    Location
    Stoneville NC
    Posts
    374
    Post Thanks / Like
    Dart, great looking build, My radiator is like yours, my kit came last Oct.
    Thanks,
    Al Adkins
    Certified "Kool Aid" drinker

  28. #68
    Senior Member 6t8dart's Avatar
    Join Date
    Apr 2015
    Location
    Irving, TX
    Posts
    545
    Post Thanks / Like
    I keep planning on working a 10 hour day on Saturdays, however, they usually end up half that, today I got 4.5 hrs in.

    image.jpeg image.jpeg

    I started off by finishing a few details to get the engine ready for install. I installed the oil filter relocating adaptor, both the oil temp and pressure sensor, and installed the engine mounts. Ready to drop in.

    Well I'm happy to reports that she is a roller...almost. I got all the rear suspension bolts tightened, installed the parking brake cables, wheel sensors, removed mustang donor upper rear arms a swapped them for FFR pieces....and pretty much finished all fuel, brake, and suspension behind the cockpit. I still have to figure out a way to secure the parking brake cables, but that can be after its on the ground

    image.jpeg image.png

    On the front I installed the ABS wheels sensors, which meant pulling the spindle to adaptor mounting nuts. I still have to torque all the front suspension mounting nuts, run front brake lines, and throw my wheels on it, to make the front suspension complete.

    Next weekend...engine and trans going in.
    Last edited by 6t8dart; 05-01-2016 at 01:04 AM.

  29. #69
    Senior Member Avalanche325's Avatar
    Join Date
    Nov 2011
    Location
    Jax Beach, FL
    Posts
    2,103
    Post Thanks / Like
    Quote Originally Posted by Jeff Kleiner View Post
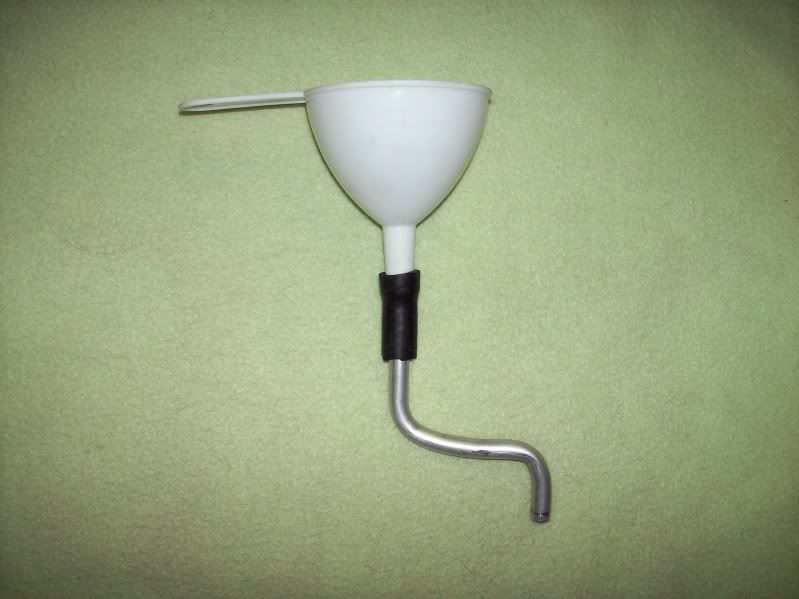
    I've built a few cars using the vacuum booster, You can easily reach under the body to remove the master cylinder cap and then to top it off I suggest that you purchase my custom fill device---only $19.95 (cash sales only, I only accept fiftys and hundreds, no change).


    Jeff
    Jeff,
    I know that is an old post, but you owe me a cup of tea and a monitor and keyboard cleanup.

  30. #70
    Senior Member 6t8dart's Avatar
    Join Date
    Apr 2015
    Location
    Irving, TX
    Posts
    545
    Post Thanks / Like
    I had planned on dropping in the engine and trans last weekend, but a bad case of bronchitis made other plans for me, however, it gave me time to gather a few parts like a set of ARP intake bolts and some extra long 7/16 bolts for the idler pulley. My buddy is coming over tomorrow at 10:00 am to help me drop in the engine and trans. However, there are a few things to do before hand.

    1. remove body from garage to make room.
    2. drop frame from dolly to the floor. First time on all four tires!
    3. remove engine from stand
    4. install rear oil seal
    5. install spacer plate
    6. install flexplate
    7. install and fill torque converter
    8. bolt trans to engine
    9. bolt flexplate to converter
    10. drop engine in frame!

    Tonight I still have to clean up the garage a bit, throw away a huge pile of summit boxes and packing, and prep parts and tools for tomorrow.

  31. #71
    Administrator David Hodgkins's Avatar
    Join Date
    Feb 2011
    Location
    Corona del Mar, CA
    Posts
    6,072
    Post Thanks / Like
    Blog Entries
    7
    Awesome! Don't forget the first start video!


    FFR 5369 Pin Drive, IRS, Trigos, Torsen, Wilwoods, FMS BOSS 302 "B" cam , Mass-flo. CA SB100 (SPCN) Registered
    Delivered 4/23/06. "Finished" 4/2012 (still not done!)


  32. #72
    Senior Member 6t8dart's Avatar
    Join Date
    Apr 2015
    Location
    Irving, TX
    Posts
    545
    Post Thanks / Like
    Quote Originally Posted by David Hodgkins View Post
    Awesome! Don't forget the first start video!

    It will have to wait for my fuel injection which is back ordered for a few more weeks

  33. #73
    Carl carlewms's Avatar
    Join Date
    May 2012
    Location
    Nokesville, VA
    Posts
    1,125
    Post Thanks / Like
    Heck take photos or a video of the installation ... and post it! You can then sit in the car and make vroom, vroom noises.
    Mk 4 Roadster
    October 25, 2012 - Kit Arrives
    April 8, 2013 - Build Starts
    August 23, 2015 - Rolling Chassis/Engine & Transmission Installed
    March 26, 2016 - Go Cart

  34. #74
    Senior Member 6t8dart's Avatar
    Join Date
    Apr 2015
    Location
    Irving, TX
    Posts
    545
    Post Thanks / Like
    image.jpeg

    We got the car into both a roller, and got the engine installed today! In all it took about two hours to get the car on the ground, engine and trans together, and installed. And we spent another fours hours getting a chain for my hoist (inexplicably went missing), getting bolts from the Hardware store (I had the wrong size), and stopping for lunch at chicken express. In the end, we got done what we expected. I am happy.

    image.jpeg

    image.jpeg
    Last edited by 6t8dart; 05-14-2016 at 05:35 PM.

  35. #75
    Senior Member 6t8dart's Avatar
    Join Date
    Apr 2015
    Location
    Irving, TX
    Posts
    545
    Post Thanks / Like

    How to get an easy 1 1/8” legroom in a roadster

    How to get an easy 1 1/8” legroom in a roadster.

    After I saw a picture of one of the buckets without foam or upholstery on it once, my gears started turning. I noticed that the only thing that kept the seat from going back any farther in the cockpit was one interference point, the rear rectangular tube where the seatbelts mount. I had seen where someone else had notched the tube itself, but that involved, cutting, welding, and modifying the rear aluminum also. I used a Big and Tall bucket, but it should be the same frame for both.


    There is a better way. Here is a picture of the seat without anything on it, simple construction, easy to modify.

    IMG_3176.JPG IMG_3178.JPG IMG_3179.JPG IMG_3180.JPG


    Here is the interference, easy to see without upholstery.
    IMG_3217.JPG

    You can see at the bottom where there is still room to go back. (Note: If the seat was on a seat track, you could gain a little more room because of the slope of the panels)
    IMG_3220.JPG

    Here is the easy fix to gain over an inch of clearance (more if on a seat track, but at the cost of sitting higher). With the seat up against the rear wall, mark the contact point on both the center and side bars with a sharpie.
    IMG_3218.JPG

    I placed the tubes against my vice and clearanced them flat on the center tube and about ½ thickness on the side tubes.
    IMG_3227.JPG

    Next you will need to push (with a hammer) the center tube forward a bit with the hammer, so that you can lay something flat across them.
    IMG_3226.JPG IMG_3228.JPG

    ...continued next post
    Last edited by 6t8dart; 06-22-2016 at 04:11 PM.

  36. #76
    Senior Member 6t8dart's Avatar
    Join Date
    Apr 2015
    Location
    Irving, TX
    Posts
    545
    Post Thanks / Like
    When you put the seat back in the car, admire you work.
    IMG_3235.JPG IMG_3230.JPG

    I marked the floor pan with a sharpie before I started and compared afterward.
    IMG_3229.JPG


    This whole process including taking the upholstery off took about an hour, and another 30 min to reinstall the upholstery, basically, 6 hog rings and a little spray glue. Zero cost.
    Last edited by 6t8dart; 06-22-2016 at 04:10 PM.

  37. #77
    Junior Member
    Join Date
    Apr 2016
    Location
    Houston, TX
    Posts
    11
    Post Thanks / Like
    Interesting mod. Does it feel different while seated? Do you feel the changed angle in your back?

  38. #78
    Senior Member 6t8dart's Avatar
    Join Date
    Apr 2015
    Location
    Irving, TX
    Posts
    545
    Post Thanks / Like
    no, I really don't feel it, but because of my back problems, I generally like more mid and lower back support. I am still planning to thin out the foam a bit on the seat back and bottom. its a little dense for my liking.

  39. #79

    Join Date
    May 2014
    Location
    Simi Valley, CA
    Posts
    567
    Post Thanks / Like
    This is a great idea - one I expect to add to my '33 Hot Rod build. I was going to pull the upholstery off to add heaters to my B/T bucket seats anyway, so it should be easy enough to incorporate this mod at the same time. Thanks for posting this!
    Keith

  40. #80
    cobra Handler skullandbones's Avatar
    Join Date
    Jul 2011
    Location
    Superstition Mtn foothills 5 miles west of Gold Canyon AZ
    Posts
    2,686
    Post Thanks / Like
    Blog Entries
    19
    Nice metal work. I think this will be one of those mods where you have to point it out to the observer. Otherwise, it would just be overlooked. Of course, you know you did it and now we know!

    Thanks,

    WEK.
    FFR MkIII 302 (ATK), EFI 75mm TB with custom box plenum chamber, 24# injectors, 4 tube BBK ceramic, cold air sys, alum flywheel, crane roller rockers, T5, Wilwood pedals, custom five link with Watt's link, 4 rotors, coil overs, power steering with Heidt valve, alum FFR rad, driver's crash bar mod, mini dead pedal mod, quick release steering wheel hub #6046

Page 2 of 3 FirstFirst 123 LastLast

Posting Permissions

  • You may not post new threads
  • You may not post replies
  • You may not post attachments
  • You may not edit your posts
  •  

Brown County Customs

Visit our community sponsor