
Visit our community sponsor

Thanks:
10

Likes:
25
-


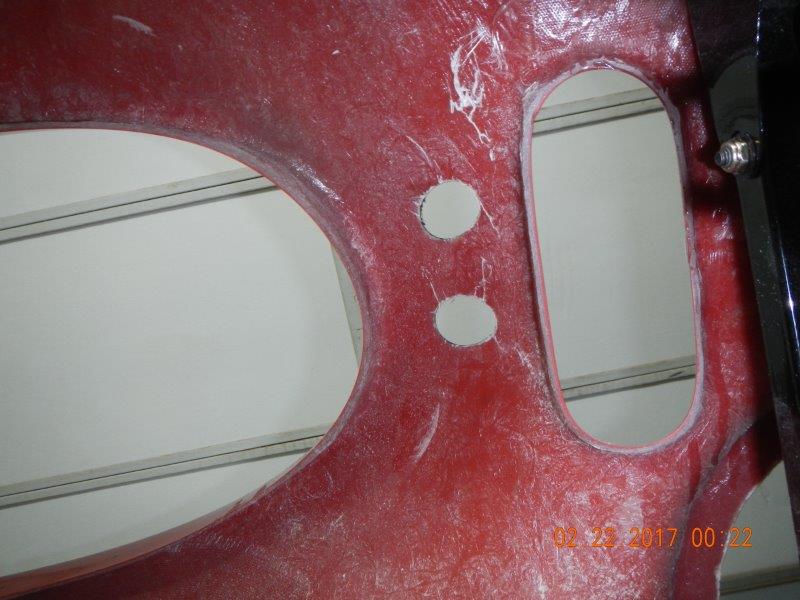
Under normal circumstances, the front overriders and/or bumper are attached through the body to the frame by 3/8" bolts. However, when you decide to do a Flip Top your overriders or bumper cannot be attached to the frame. They need to be attached to the body only. Under the best of circumstances they are decorative and not particularly functional. When only attached to the fiberglass body, they really become decorative only. They need to be solidly attached, but there is no metal to attach them to. If I were to do it again, I might see about building an attachment to the trusses that would also provide a metal attachment point for the bolts for the overriders and bumpers. The trusses are all powdercoated. It is too late to make such a modification on this build. I have to figure another method.
I realized that I did not have a method to attach the overriders when I was trying to adjust the hood relative to the body. My seam at the center top of the hood is wider than the space at the outside edges at the top. The side seam at the bottom is also wider toward the rear than it is at nearer the front. It is not too significant, certainly nothing that cannot be fixed by "Da Bat". I just want to get all the lines as straight as I can before I deliver the car to him. Looking for how to tighten up the seams led me to realize that without the bolts at the front holding the nose of the hood, the entire nose of the car sits about 3/8" too low. Frankly you would never notice it if all the seams were straight. It is too subtle for the eye to see. I am still debating if it is worth the effort to raise the nose that 3/8". It could involve making some of the attachment holes more oval so that the hinge mechanism can be slid upward. It might also involve remaking and re-powder coating a couple of pieces, relocating slightly several holes to raise them up.
This brings me back to how and where to attach the overriders. The basic design provided by 2BKing is to carve a foam box to fit into the space behind where the bolts would go through and cover it in 4-6 layers of fiberglass for strength. It sounds simple enough, but this a very complex curved area to work in.
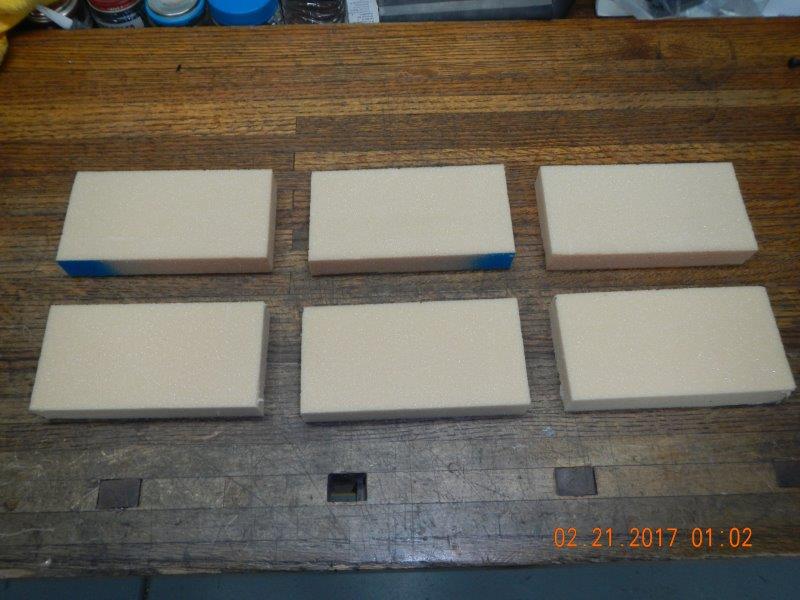
I began by gluing up two 3" thick blocks of structural foam 6" long.
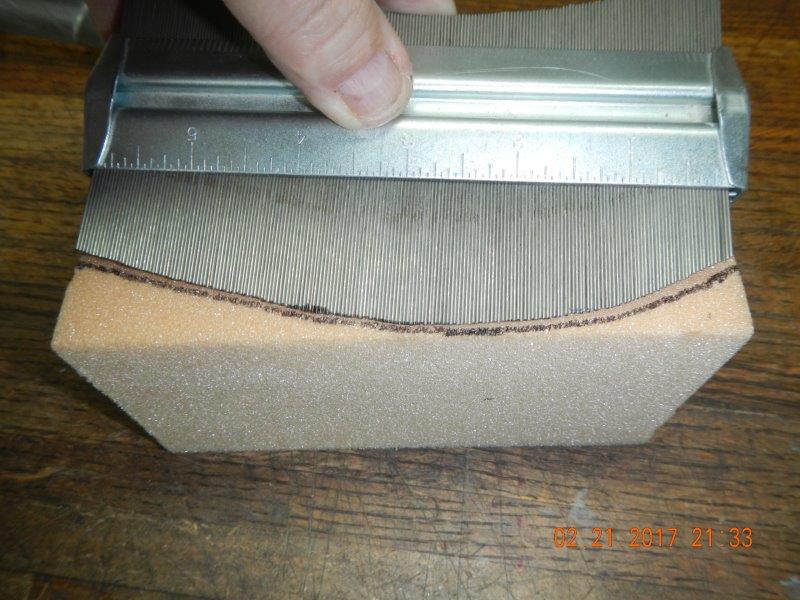
I used this tool to try to get a the shape of the space. I took measurements horizontally and vertically. I transferred the shape to the blocks of foam to get an idea of where I was going.
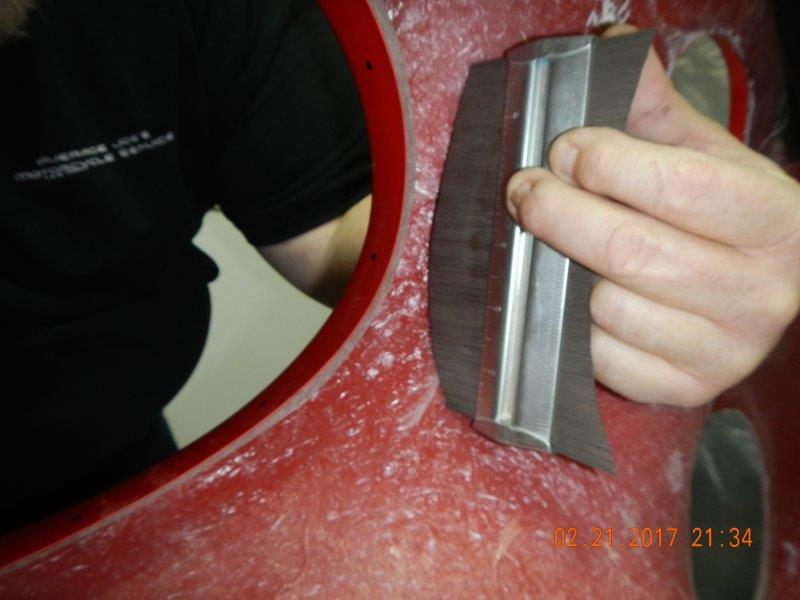
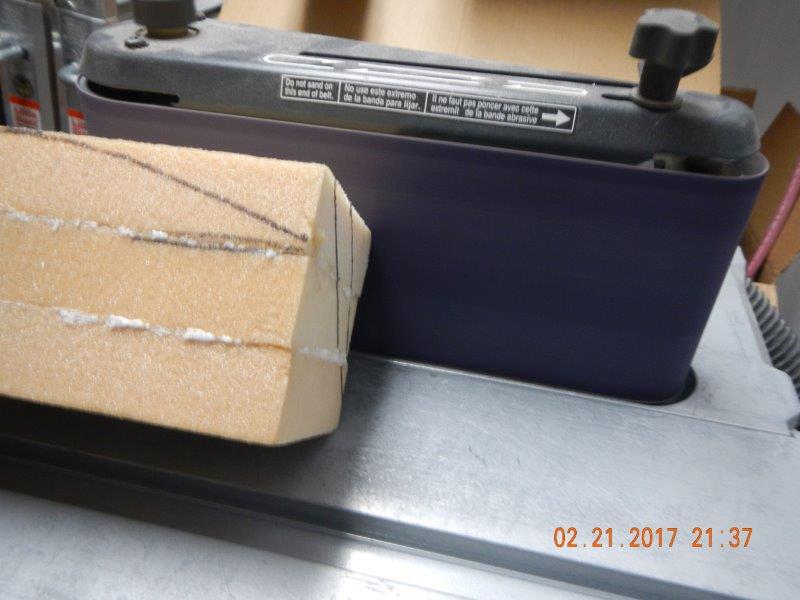
I set to work with a knife to cut away some of the excess, then worked the blocks down more with the sanding station.
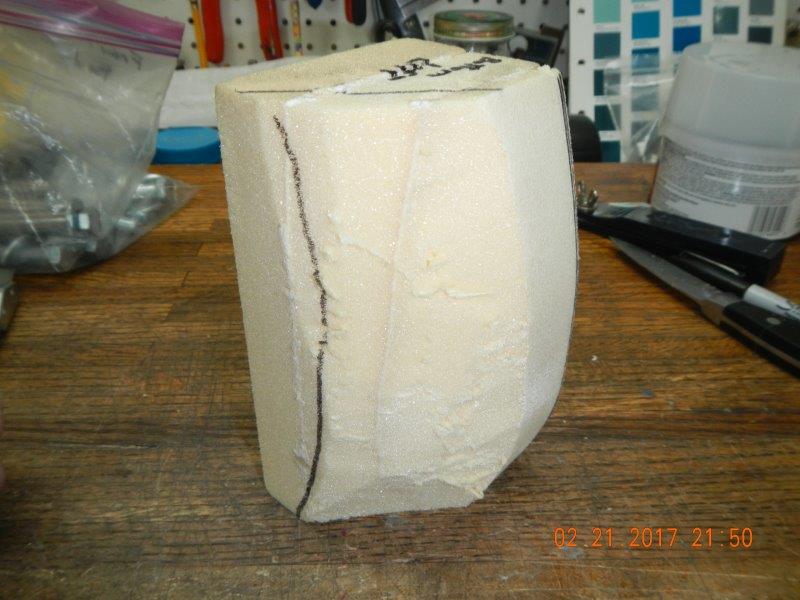
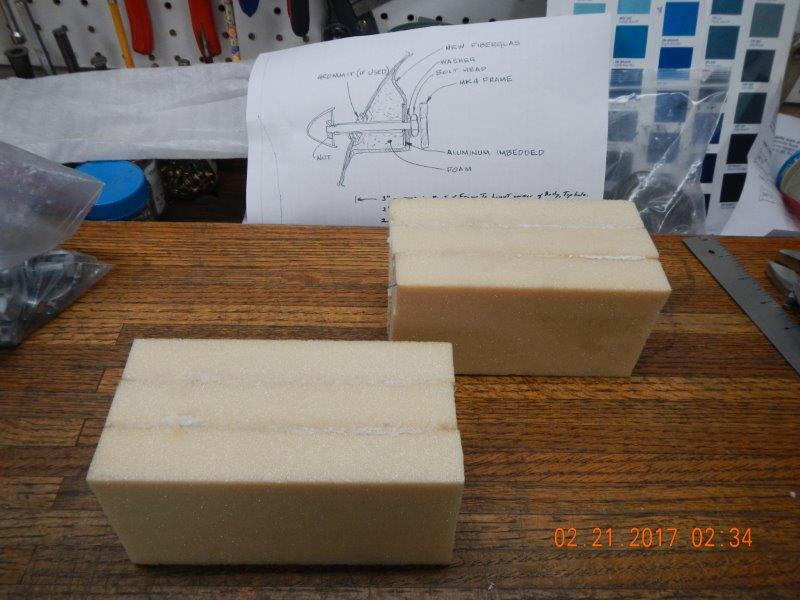
After trying to form both foam cubes, attempting to carve them to fit the curves of the hood, I remember why I always hated trying to learn to carve from my father. He is quite good at it. I am not. The foam blocks fit, but are surely not a nice fit. I could bond the blocks to the hood with HSRF, allowing the HSRF to fill the spaces that are not correctly formed. I might do that. I might make one more attempt to carve the foam blocks. Or perhaps I can come up with an alternative method of forming the foam box. Gonna sleep on it.
-

Originally Posted by
Jazzman

I began by gluing up two 3" thick blocks of structural foam 6" long.
I set to work with a knife to cut away some of the excess, then worked the blocks down more with the sanding station.
Jazzman
Love watching your thread,
The way you jump into each new aspect and conquer any obstacles gives me a nudge to move forward on my 33.
The foam blocks look like the answer to one of my projects on the 33HR. Care to share the source and any details on what type of foam works best?
Thanks
Dale
Hemi33
-
Originally Posted by
myjones
Jazzman
Care to share the source and any details on what type of foam works best? Thanks
Dale
Hemi33
Thanks for following along, Dale. I still find it overwhelming that so many people seem to find my build interesting. Doing a project like this requires an attitude of "I can do it . . . I just don't know exactly how yet!" Learning and problem solving are some of the best parts of this build. Now get back out to the shop and do than '33! If I can do it, anyone can!
I will be happy to share whatever I can!! I am not enough of an expert to be able to speak with authority that this is "the best", but it was recommended by two people that have much more experience than I do. I know it works. The foam board is from Aircraft Spruce. Part #01-12800 H45 PVC FOAM Board 1"X32"X48", cost $76.75 when I purchased it. I think they may sell it in smaller sizes. For what it is worth, this is the same stuff I used beginning in post #258. The foam board itself is solid, but has very little structural strength in and of itself. The fiberglass layers over the the top of the foam are what really give it strength.
Depending upon how much you need, I might be able to just cut off some of the excess that I have and send it to you. PM me more details of your project and how much you need if you are interested.
Last edited by Jazzman; 02-22-2017 at 12:33 PM.
-
Originally Posted by
Jazzman
Thanks for following along, Dale. I still find it overwhelming that so many people seem to find my build interesting. Doing a project like this requires an attitude of "I can do it . . . I just don't know exactly how yet!" Learning and problem solving are some of the best parts of this build. Now get back out to the shop and do than '33! If I can do it, anyone can!
I will be happy to share whatever I can!! I am not enough of an expert to be able to speak with authority that this is "the best", but it was recommended by two people that have much more experience than I do. I know it works. The foam board is from Aircraft Spruce. Part #01-12800 H45 PVC FOAM Board 1"X32"X48", cost $76.75 when I purchased it. I think they may sell it in smaller sizes. For what it is worth, this is the same stuff I used beginning in post #258. The foam board itself is solid, but has very little structural strength in and of itself. The fiberglass layers over the the top of the foam are what really give it strength.
Depending upon how much you need, I might be able to just cut off some of the excess that I have and send it to you. PM me more details of your project and how much you need if you are interested.
Thanks for the info, it sounds like a proven product based on your references above. And thanks for the offer to pass along the leftovers. BUT;
I will probably need a whole sheet to thicken the 33 hood sides before I cut several long slots/vents into them. Once they are thick enough I will
over cut the slots by 1/8" all around and glass the edges so it has a finished surface inside the openings. Then glass over the engine side to finish
the look. I need to work up a shopping list for the first time fiberglass project and jump in feet first. That's what I did with all the fabrication for the
custom suspension and hemi install but the bodywork has me intimidated for some reason. Might be the hella mess it makes but I'll get past it. 
Dale
-
Originally Posted by
myjones
Thanks for the info, it sounds like a proven product based on your references above. And thanks for the offer to pass along the leftovers. BUT;
I will probably need a whole sheet to thicken the 33 hood sides before I cut several long slots/vents into them. Once they are thick enough I will
over cut the slots by 1/8" all around and glass the edges so it has a finished surface inside the openings. Then glass over the engine side to finish
the look. I need to work up a shopping list for the first time fiberglass project and jump in feet first. That's what I did with all the fabrication for the
custom suspension and hemi install but the bodywork has me intimidated for some reason. Might be the hella mess it makes but I'll get past it.
Dale
Sounds like a plan! Let me know if there is anything I can do to help. It does make a heck of mess, but in the end, it's worth it. Talk to 2BKing and MikeinAtlanta to talk to the real experts!
-
Originally Posted by
Jazzman
Or perhaps I can come up with an alternative method of forming the foam box.
I wonder if it would work to throw together a quick mold clamped to the back side of the panel and use the low expansion spray foam that is used for insulating around windows. I bet even the normal great stuff would work if you leave one side of the form open to allow it to expand without pushing on the panel. You can always carve up the resulting block to flatten faces as needed. The only trick would be if the spray foam sticks to the panel or form. I wonder if some strategically placed plastic wrap would do the trick.
-
Originally Posted by
jceckard
I wonder if it would work to throw together a quick mold clamped to the back side of the panel and use the low expansion spray foam that is used for insulating around windows. I bet even the normal great stuff would work if you leave one side of the form open to allow it to expand without pushing on the panel. You can always carve up the resulting block to flatten faces as needed. The only trick would be if the spray foam sticks to the panel or form. I wonder if some strategically placed plastic wrap would do the trick.
I had the same thought, build a box form leaving the top open and spray it full. The box could be lined with a 1 gal ziplock bag for a bond break. Then cut off the overflow/top then remove the box, then cut away the bag and bond the piece to the body with HSRF. The spray it in a bag has been used on here before.
DB
 Posting Permissions
- You may not post new threads
- You may not post replies
- You may not post attachments
- You may not edit your posts
-
Forum Rules

Visit our community sponsor


 Reply With Quote