Ewwww
Visit our community sponsor
Ewwww
Frank
818 chassis #181 powered by a '93 VW VR6 Turbo GT3582R
Go-karted Aug 5, 2016 - Then May 19+21, 2017
Tracked May 27/July 26, 2017
Build time before being driveable on Sep 27, 2019: over 6000h
Build Completed Winter 2021
Glad to see our fellow long-rod destroked engine builder back at it!!! We missed you.
The loctite thing sounds scary. Perhaps ask a machine shop or Subaru engine specialist for assistance? I think our machine shop would have done the bearings for us for not that much more (and after doing them ourselves which took forever, we probably would have paid for the convenience). Fortunately we did not have the same problem - our lube seemed to hold on to them tight enough. I'll ask Andrew what we used since I can't remember.
Tamra
Building 818SR #297 picked up 10/25/14 with Andrew (xxguitarist)
First start 12/21/14, First "drive" 1/17/15
First Dyno at EFI Logics 3/7/15- 310whp at 15psi for break in, full spool by ~3500rpm!
First autocross 3/29/15
1st Registered 818 in Connecticut 7/24/2015. 9 months - 1 day from kit pickup!
Thanks Tamra. Feels really good to be back.
Customizing is the gift that just keeps on giving...
Move the pedal box forward 3.625" and the exiting line of side hydraulic port on the brake MC will rub the frame.
So grind out of bit of the frame and weld in a "C" so the brake lines won't rub or kink on the frame. Progress!
Last edited by Rasmus; 09-15-2015 at 03:07 PM.
Fast Cars, Fast Women, Fast Haircuts!
Good to see you back on the horse!
If you are going to make any of your own flairs, you might want to ditch the purple adapters. Just another thing to possibly leak. I always thought the noses on the purple adapters were made too long, and didn't let enough threads engage.
818S #22 Candy Blue Frame, Front Gas Tank, 2.5L Turbo, Rear radiator, Shortened Transmission, Wookiee Compatible, Console mounted MR2 Shifter, Custom ECU panel, AWIC soon
My Son Michael's Turbo ICE Build X22 http://thefactoryfiveforum.com/showt...rts-818S-Build
My Electric Supercar Build X21 (on hold until winter) http://thefactoryfiveforum.com/showt...e-Build-Thread
I see you are customizing a bit like me! lolll The only difference is that your build will weigh half of mine. lolll
Frank
818 chassis #181 powered by a '93 VW VR6 Turbo GT3582R
Go-karted Aug 5, 2016 - Then May 19+21, 2017
Tracked May 27/July 26, 2017
Build time before being driveable on Sep 27, 2019: over 6000h
Build Completed Winter 2021
Not to worry Frank. We'll do a head to head RallyX in Quebec, in January, and we'll see which car's lighter. Do I have to stud the tires myself or can I just buy a set?
The pedal box customizing gift left me with a second issue of not being able to fit the clutch master cylinder's reservoir on.
So I spent several hours building this goofy bracket.
I really should just buy a mill and convert it CNC and learn to model parts.
Reservoir out of the way of the frame. Cocked sideways just enough to make the Max & Min lines useless. Hopefully it holds fluid.
Last edited by Rasmus; 09-15-2015 at 11:04 PM.
Fast Cars, Fast Women, Fast Haircuts!
Glad to see you back at it Rasmus! I know all about the 6 month thing, happened twice now, but without the heartache, just busy working.
Adam _____ Instagram @PopesProjects____ YouTube Channel
818 SRX - #91
Arrived 01/02/2014
First Start 10/31/2016
First Drive 05/22/2017
Registered 10/25/2019 BRAP818
Rasmus,
Looks awesome.
At least you don't have the hack up the windshield surround to fill the brake master cylinder.
What is your plans for the clutch pedal to lower control arm bushing interference?
Check your rotation count on the pink fitting. As a rule of thump that I use for minimum revs: The engagement threads equal the diameter.
For instance: 1/2-13 bolt would be 1/2 times 13 = 6.5 revs.
1/4-20 bolt would be 1/4 times 20 = 5 revs.
M10 x 1.0 fitting would be 10 times 1 = 10 revs (you will not get 10) Maybe 7 or 8.
I was only getting about 3 revs on the pink adaptors.
I used these: http://store.fedhillusa.com/18nutpack.aspx
One more note. be careful when installing. I have cross threaded a few. Subaru manual says 10.8 ft-lbs.
Bob
Last edited by Bob_n_Cincy; 09-15-2015 at 10:33 PM.
818S #22 Candy Blue Frame, Front Gas Tank, 2.5L Turbo, Rear radiator, Shortened Transmission, Wookiee Compatible, Console mounted MR2 Shifter, Custom ECU panel, AWIC soon
My Son Michael's Turbo ICE Build X22 http://thefactoryfiveforum.com/showt...rts-818S-Build
My Electric Supercar Build X21 (on hold until winter) http://thefactoryfiveforum.com/showt...e-Build-Thread
I think I covered that in this post. If I didn't, I'm not understanding your question. This is as close as my clutch pedal gets to that bushing fully depressed.
Is is your recommendation to ditch the vast majority of the FFR supplied brake and clutch lines and just go full metric?
Last edited by Rasmus; 09-15-2015 at 11:15 PM.
Fast Cars, Fast Women, Fast Haircuts!
818S #22 Candy Blue Frame, Front Gas Tank, 2.5L Turbo, Rear radiator, Shortened Transmission, Wookiee Compatible, Console mounted MR2 Shifter, Custom ECU panel, AWIC soon
My Son Michael's Turbo ICE Build X22 http://thefactoryfiveforum.com/showt...rts-818S-Build
My Electric Supercar Build X21 (on hold until winter) http://thefactoryfiveforum.com/showt...e-Build-Thread
Your clutch master is from an NA?
I had the same issue. Ended up buying a used WRX one. Which is leaking badly. lolll
About rallyX, you can simply weld your studs on the rims directly, run no tire (will save weight!) and let's rally in the snow!
Frank
818 chassis #181 powered by a '93 VW VR6 Turbo GT3582R
Go-karted Aug 5, 2016 - Then May 19+21, 2017
Tracked May 27/July 26, 2017
Build time before being driveable on Sep 27, 2019: over 6000h
Build Completed Winter 2021
Ras, I used adapters on the masters and slave, the FFR hard lines, and imperial flexible brake lines. now I have extra adapters in case one fails and brake lines I can find in any autoparts store.
all metric would be nice too, shave a few grams not running the pink adapters.
A well stocked beverage fridge is the key to any successful project.
My build thread post #224 discusses my attempt to use all metric of the Subaru/Japanese style. All-metric also eliminates extra connections so you have almost half as many places for things to go wrong with the hydraulics. It means I have ditched almost all of the FFR lines. I consider this approach by FFR to be shortsighted. It's not a kit based on an American car...
"Scotty, give me all the TRACTION she's got!" Pictures of what I drive till 818R is finished
Track Car Journal on IWSTI (with build info)
This pedal box customization is taking a lot of time.
So here's where I'm at as I break for lunch today. Half(ish) of the new front firewall is done. You're looking at three custom panels. I estimate it's gonna take seven total to remake the firewall. This has taken me many hours over several days to get to this point. It's just really slow going or I just work slow. I stopped working for a several days for a family function. But I'm back at it.
Last edited by Rasmus; 09-25-2015 at 02:37 PM.
Fast Cars, Fast Women, Fast Haircuts!
Looking good. What are you using to bend the aluminum? Bends look NICE. Way better than mine (on my oil cooler shroud).
Sorry to join the conversation late here, but I see that you're moving the pedals forward to make more room for yourself. I saw that you opted to not switch the gas tank because it wouldn't give any leg room benefit due to the leanback angle of your seat. However, I would still switch the gas tank for reasons outside of leg room.
We have had a lot of issues with fuel starve due to lack of baffling, so we have to run the tank full. 15 gallons is huge and heavy, so switching to a fuel cell would save weight and get rid of the fuel starve issue. And on top of all of that, the tank is a pain to work with and tends to leak around the gaskets if you're not careful (we ended up siliconing everything and we are getting rid of the gas tank this winter, going to a fuel cell).
Anyway, hope this tip helps save you the frustration we have gone through.
Good work on the pedal box. I know it's slow and frustrating work, but you'll be happy in the long run for doing it.
Tamra
Building 818SR #297 picked up 10/25/14 with Andrew (xxguitarist)
First start 12/21/14, First "drive" 1/17/15
First Dyno at EFI Logics 3/7/15- 310whp at 15psi for break in, full spool by ~3500rpm!
First autocross 3/29/15
1st Registered 818 in Connecticut 7/24/2015. 9 months - 1 day from kit pickup!
Seems like another issue I'm going to need to address. I've got two ideas to still use the FFR supplied V1 fuel tank:
1. Cut open the top and weld in baffles with a series of trapdoors to channel the fuel to the pick up. or
2. Cut open the top and plumb in two of these:
http://www.autoperformanceengineerin...l/pickups.html. One on the right side; one left. The Offroad 4x4 guys have been using them for years to prevent fuel starvation. Then filling the tank up with:
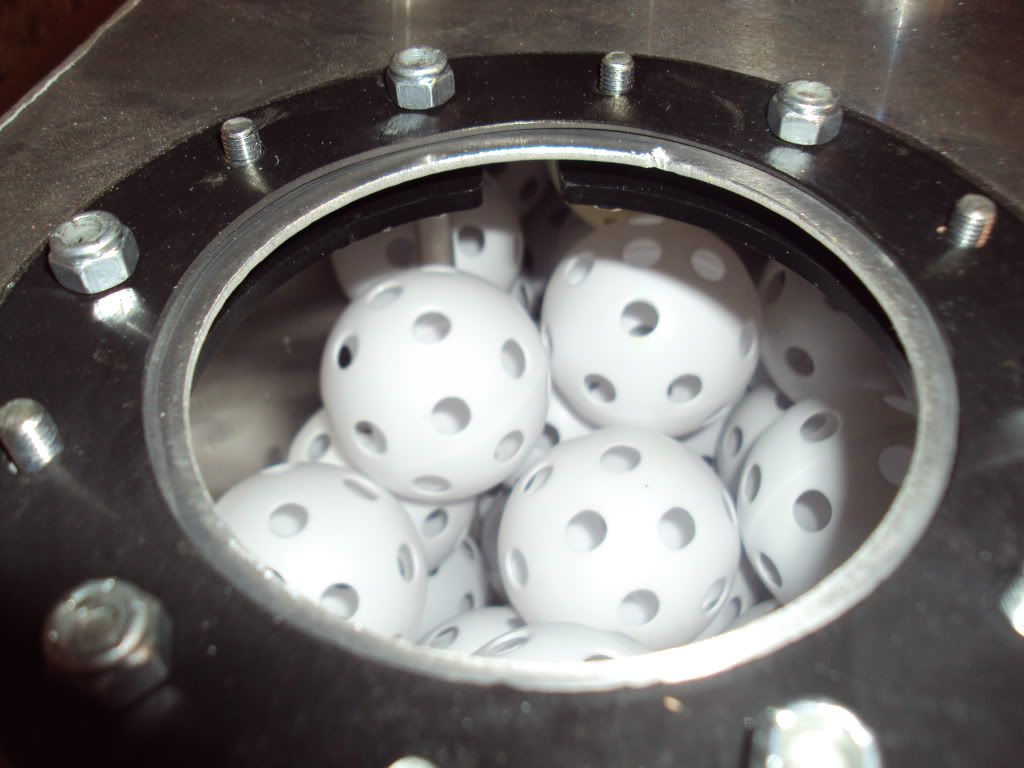
PVC Wiffle Softballs with the holes all-round to resist sloshing, or
PVC 3-4 inch pipe cut to short-ish links to resist sloshing.
Fast Cars, Fast Women, Fast Haircuts!
Yesterday I finally finished
all the panels for the new firewall. Making these actually took more time than moving the pedal box itself. What a task. Constant fitting and cutting. Stiff paper templates made and remade. Hours of work.
Today I made and welded in a pedal stop for the accelerator. Didn't want it to snap off if I pressed on it too hard.
Fast Cars, Fast Women, Fast Haircuts!
I guess your FW panels take into account the pedal stop intrusion inside the front area? Wait, I don't picture that. Is your pedal actually going to be inside the front area when floored (which will be almost all the time loll)?
Frank
818 chassis #181 powered by a '93 VW VR6 Turbo GT3582R
Go-karted Aug 5, 2016 - Then May 19+21, 2017
Tracked May 27/July 26, 2017
Build time before being driveable on Sep 27, 2019: over 6000h
Build Completed Winter 2021
Thanks for the compliment.
How to bend it like Rasmus:
Tools needed
1. Straight edge of a durable table. Mines a 3/16" thick steel top.
2. A straight bar to clamp down the work with. If you clamp right on the work you'll leave clamp marks.
3. Clamps
4. Body hammer. I like the convex faced square one. Round one leaves too many marks.
5. Hearing protection. I'm not joking. Doing it this way is loud and will damage your hearing.
6. The work. With a nice score line where you want your bend so it's easy to line up on the table.
Clamp the work down aligned on the table edge. About 10-20mm from the table edge. Too close and you just end up hitting the bar with the hammer. Clamp with enough pressure to prevent the work from walking on you while you hammer on it. Not so tight that your clamping bar makes gouges in the work. Now with your non-dominate hand put a little pressure on the work.
Tap on the work near the table edge you're lined up on. Don't try to hit the edge of the table. Hit just shy of it. Try to tap the work flat with the face of the hammer or toward the top of the hammer face. Never near the bottom of the hammer face (leaves marks). You'll be making dozens and dozens of overlapping taps from one end of the work's bend to the other. All the while, maintaining steady, light, pressure with your off-hand. Pictured above is about 8 passes. The first 30 degrees of the bend is the slowest. One pass on the piece of work pictured took about 40 taps.
Once you get to about 80 - 85 degrees you can take the clamping bar off and crisp up the edge by tapping on the side and top of the bend with table edge still under it. Hold the work steady with your off-hand. Tah-dah. Now contemplate making a bending brake.
Fast Cars, Fast Women, Fast Haircuts!
Nice! I made a bending brake... pics on my build thread. It didn't do as good a job as your technique though. I made the brake before I had a welder though. I bet I could probably make a much better one now, but then you start to look at how much time you are spending making tools vs making your car.......
Nice tip as always. Thinking I should get a big steel table to go with my BOD.
-Steve
I would not recommend filling the tank with stuff to prevent slosh. Unless it is packed very tightly it will pummel the fuel pump and wiring very quickly.
From a $100 harbor freight sale since I didn't have a metal table. I threw casters on it to roll it around. If I had a metal table (or a better workbench) I would of done what you did. Looks great.
Thanks- Chad
818R-SOLD!!!- Go Karted 7/20/14/ Officially raced NASA ST2- 2/28/15
2016 Elan NP01 Prototype Racecar Chassis #20
1969 Porsche 911ST Vintage Race Car
1972 Porsche 911T (#'s matching undergoing nut & bolt resto in my garage)
After moving the pedal box forward I got to thinking about the driver's seat. Originally I mounted it higher than I wanted so I could fit in the car a little better. But having moved the pedals...
I cut out my first set of custom sear rails and welded in lower ones. Plus I remounted the seat on it's legs (the L-brackets) 1/2" lower. So now I'll sit a total of 1.5 inches lower in the car. The lowest part of the seat bottom literally sits lower than the x-bars that make up the floor. Okay only about 1/16th" lower but still. Neiner. Considering that I weigh 220+ lbs (100 kg) that's moving a lot of mass down 1.5 inches, which will lower the C.G. a little. Bonus, the new seat rails weigh less than the old ones by 350 grams. Woot!
Last edited by Rasmus; 10-16-2015 at 06:19 PM.
Fast Cars, Fast Women, Fast Haircuts!
Final installed the new front firewall.
This modification took way longer than I ever anticipated.
Of course something's not gonna work correctly when I finally get it on the road. But I guess we'll see what bends when we get to that, because everything looks good and clear now.
Fast Cars, Fast Women, Fast Haircuts!
Also purchased a used set of empty engine case halves from a '06 STi. They're at the machine shop as I type.
Fast Cars, Fast Women, Fast Haircuts!
Looks good Rasmus! I know all about those little mods that end up snowballing and taking forever. I went through that when I moved my seats closer together and modded my tank. I'm not sure if that was the best solution, yours looks simple enough, haha
Adam _____ Instagram @PopesProjects____ YouTube Channel
818 SRX - #91
Arrived 01/02/2014
First Start 10/31/2016
First Drive 05/22/2017
Registered 10/25/2019 BRAP818
Nice work! Looks tidy and functional.
That's impressive looking. Soldier on! There's nothing the correct hammer won't fix.
"Scotty, give me all the TRACTION she's got!" Pictures of what I drive till 818R is finished
Track Car Journal on IWSTI (with build info)
Nice keep up the great work!
Nolan
65 coupe Gen 3 "Phoenix" build
http://thefactoryfiveforum.com/showt...032#post297032
818 s (with r windscreen ) 350 rwhp. Registered and street legal (SOLD)
Good eye there Frank.
In my hurry to want to take a picture I didn't bolt down the lower a arm. The nuts sit on a table when I took that photo.
That's not nylon, That's HDPE plastic. It's the same stuff many aftermarket strut spacers are made from (also most curb side trash bins, and milk jugs). Why that over aluminium? I didn't have aluminum bar stock on hand.
Fast Cars, Fast Women, Fast Haircuts!
First - awesome build.
Second - keeping your sanity when you hit major roadblocks is the supreme test of your character. At least that's what I tell myself as I slowly put down the tool I've just used to break/bend/destroy some part I've been working on for the past 4 hours..
Third - I have absolutely no experience with Subie engine cases, but there's no way a talented guy with a good tig welder could repair those gouges - and then re-machine. Sounds academic now - and I'm sure you researched that option. Damn shame.
bravo.
A well stocked beverage fridge is the key to any successful project.
Unbelievable mods Rasmus! Very impressive. I'm really sorry about the block; boy does that suck. I've walked away from the build before too, but not due to anything super major like that. I pulled out the threads on my oil pickup once and learned about helicoils and I've broken taps in holes before (that was fun) but bravo to you on coming back to it. Great Job.
I have NO DOUBT I would fit very nicely in your car. I hope someday I can try it on!
FFR 5369 Pin Drive, IRS, Trigos, Torsen, Wilwoods, FMS BOSS 302 "B" cam , Mass-flo. CA SB100 (SPCN) Registered
Delivered 4/23/06. "Finished" 4/2012 (still not done!)
Rasmus thanks for the power steering pump how to. knocked this out on Saturday, changed everything except the -17, didn't see it in the instructions until after the pump was remounted in the bracket, it was bone dry so I wasn't worried about it. thanks for saving me $600
1 hr to rebuild the pump, 2 hrs to clean up the leaky mess, 2 hours to figure out how the evap went back together lol
beers on me.
A well stocked beverage fridge is the key to any successful project.
Started this again. Hopefully this one will get to the "shortblock" stage this time.
Main Bearing (King Racing PN MB5382XPG) clearances are running looser than on the other block. I didn't have Dale from Motion Machine line hone the main line this time, 'cause I didn't want him decking down the mating faces messing with timing. But looks like I'm paying for my own capriciousness.
Calc'd Clearances:
Main #1: 0.00155" <---tight relative
Main #2: 0.00170"
Main #3: 0.00220" <---loose relative
Main #4: 0.00190"
Main #5: 0.00200"
(Bore gauge's graduation: 0.00005)
#1 is tight relative to the others; #3 is loose, relatively. I already swapped #1 and #3 bearing with each other. Before the swap they were:
Main #1: 0.00090"
Main #3: 0.00240"
Subaru's FSM Main Bearing Crankshaft oil clearance: 0.0004-0.0012". FSM Limit is 0.0016".
I've got another ses of #1 and #3 King Racing MB5382XPG bearing halves; I'll pop those in and see what they do. I might be running down to the Subaru's parts department and getting some undersize ones.
Fast Cars, Fast Women, Fast Haircuts!