Last thing was to install the ********** side grills, vents, slats, whatever ya call em. I had read about the difference in how the holes are cut vs the angle of the slats, so took this one slow because if I screw it up, it's gonna cost money.
Again used Edwardb's idea of sticks to hold them in place (thanks for all the help, man. You have no idea....) while I was working it. Made a pretty good plan...
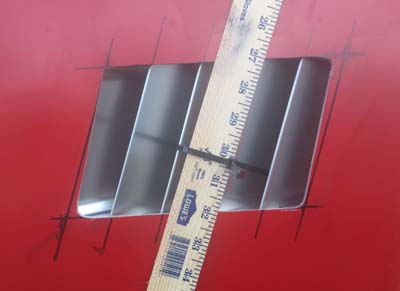
...and went at it with the 3/4" sanding drum. Cleaned the edges up a bit with some sandpaper and a flat file and I think it looks pretty good. Of course the edges need to be rounded over but I'll mention that to the pros. Maybe I do have a future as a body man....

That radius of the inside corners exactly fits the 3/4" drum. I think it looks pretty good. Not concerned with matching originality, obviously.
I'll be epoxying in some 10-32 SS studs (thanks to guess who...) to mount these, but its too cold to do here outdoors and I dont have a place to work on this inside that's heated. Will have to do that part after it comes back from paint and fitting.
Last thing I've done is remove the body from the buck and break the buck down to trailer size (the buck was a tall one, designed to roll in over the go-kart). I'm borrowing a 20x8 enclosed trailer from a buddy that moves Classic Mustangs, from hulks to completed cars, all over the East Coast. I'll mount the buck to the floor then use a few nice straps to just hold the body in place. On vacation next week, so will get this all done, get it dropped off and get back to work on the Go-Kart. Punch list is getting shorter... next up is to set ride height and work on alignment.


 Thanks:
  Likes:


Originally Posted by Papa


 Reply With Quote


