-


Terry in Las Vegas Build - 15,000 miles, standard ratio R-P installed.
I got a call from Stewert today and the driver is early. Woohoo! I promptly took the day off of work and am expecting the delivery tonight. My order is:
- MK IV Complete Kit
- Powdercoating Chassis
- 302-351 Engine/Trans Mount Kit
- 3-Link Deluxe Rear Suspension
- 302 Headers
- 31 Spline Driveshaft
- Body Cut Outs
- Power Steering
- Ultra-Lite Gauge Set
- Wind Wings
- Front Swaybar
- Heater/Defroster
- Floor Mats, Rollbar Grommet, Side Louvers
- Center Dash Support
- Trunk Gas Strut
- 8.8 solid rear axle
- Black Front/Rear Wilwood Brakes
- Delete seats ($220 Credit)
- Sun Visors
- EFI In Tank Fuel System
- 17" Halibrand tire/wheel package
I also already have from Breeze
- Solid Offset Rack mounting Kit
- White Shift Knob
- Lower Radiator Support Kit
- Russ Thompsons's Gas Pedal
- Hood Scoop Fastener Set
- Engine Compartment Battery Mounting Kit
- Hinged Radiator mounting Kit
- Radiator Cowl Opening Cover Kit
- Fan Shroud
- Dead Pedal Kit
The Firewall Forward kit from FFMetal is on the way
I also already have the Moog tie rods/balljoints with the Energy Suspension boots.
I have read and read and read many build threads and forum posts. I would be lost without the information already provided by members. Thank you so much for your information. I'm not a very inventive or creative person, but I can follow instructions. Besides the FFR Build Manual, I have two build threads printed out with handwritten notes everywhere.
My goal is to have a drive able car ready for Huntington Beach 2020. If I don't, I will be there in my bad *** Nissan Maxima.
The motor will be a 347 FI with Tremec 600. I have not made the decision yet if it will be Blue Print or Forte. I'm hoping to be able to order it in a few months. I will be going with the Kirkey Low Back Vintage 17" seats.
I am 6'6" tall and 270 lbs. I will be making a few modifications already described by others to allow me to fit into the car as comfortably as possible. I've always loved cars. My favorite past car is a 96 Chevy Impala that I put a lot of money into. I assisted a friend of mine with an engine pull and head/cam swap on it. I have done CV shafts, brake jobs, exhaust installs, drive axle replacement, header installs, rear main seal replacements, and a bit of automotive electrical work myself. I'm not a newbie, but I am definitely diving in a lot deeper in mechanical work that I have ever done with this car. My mechanical ability is that if I can see a good YouTube video of how something is done, I can probably do it myself.
Funds are certainly not unlimited, and I do need to keep to a budget. I can upgrade parts that are important to me, but not everything. If I didn't have alimony and child support to pay, it would be a different story.
Terry
Last edited by TMartinLVNV; 08-07-2019 at 12:00 PM.
-
Post Thanks / Like - 1 Thanks, 0 Likes
-
-
Welcome to the Wookiee club. Glad to have another XL builder in the group. You will be surprised at how creative you become with these projects. When you think about something every moment of the day, ideas tend to pop up. You are going to have a blast.
-Steve
-
Post Thanks / Like - 0 Thanks, 1 Likes
-
Thanks Steve. I prefer the term "Freak Sized" myself.
-
Senior Member

Congratulations - I’m just a couple hours away in Lake Havasu should you need anything.
Chris
Generation 3 Type 65 Daytona Coupe Complete Kit #151885 received May 6, 2022. Gen 3 Coyote, IRS, Tremec TKX, American Powertrain hydraulic throwout bearing & Wilwood brakes.
MK4 Basic Kit #7404, 347 EFI - Pro M Racing ECM, 30# injectors, 70 mm throttle body, 80 mm MAF, Edelbrock Performer aluminum heads & RPM II intake, all new G-Force T5, 3:55 gears, Pro 5.0 shifter, 3-link, carbon fiber dash/custom Speedhut gauges and paint by Da Bat.
-
-
The first night was an inventory frenzy. I started with this.
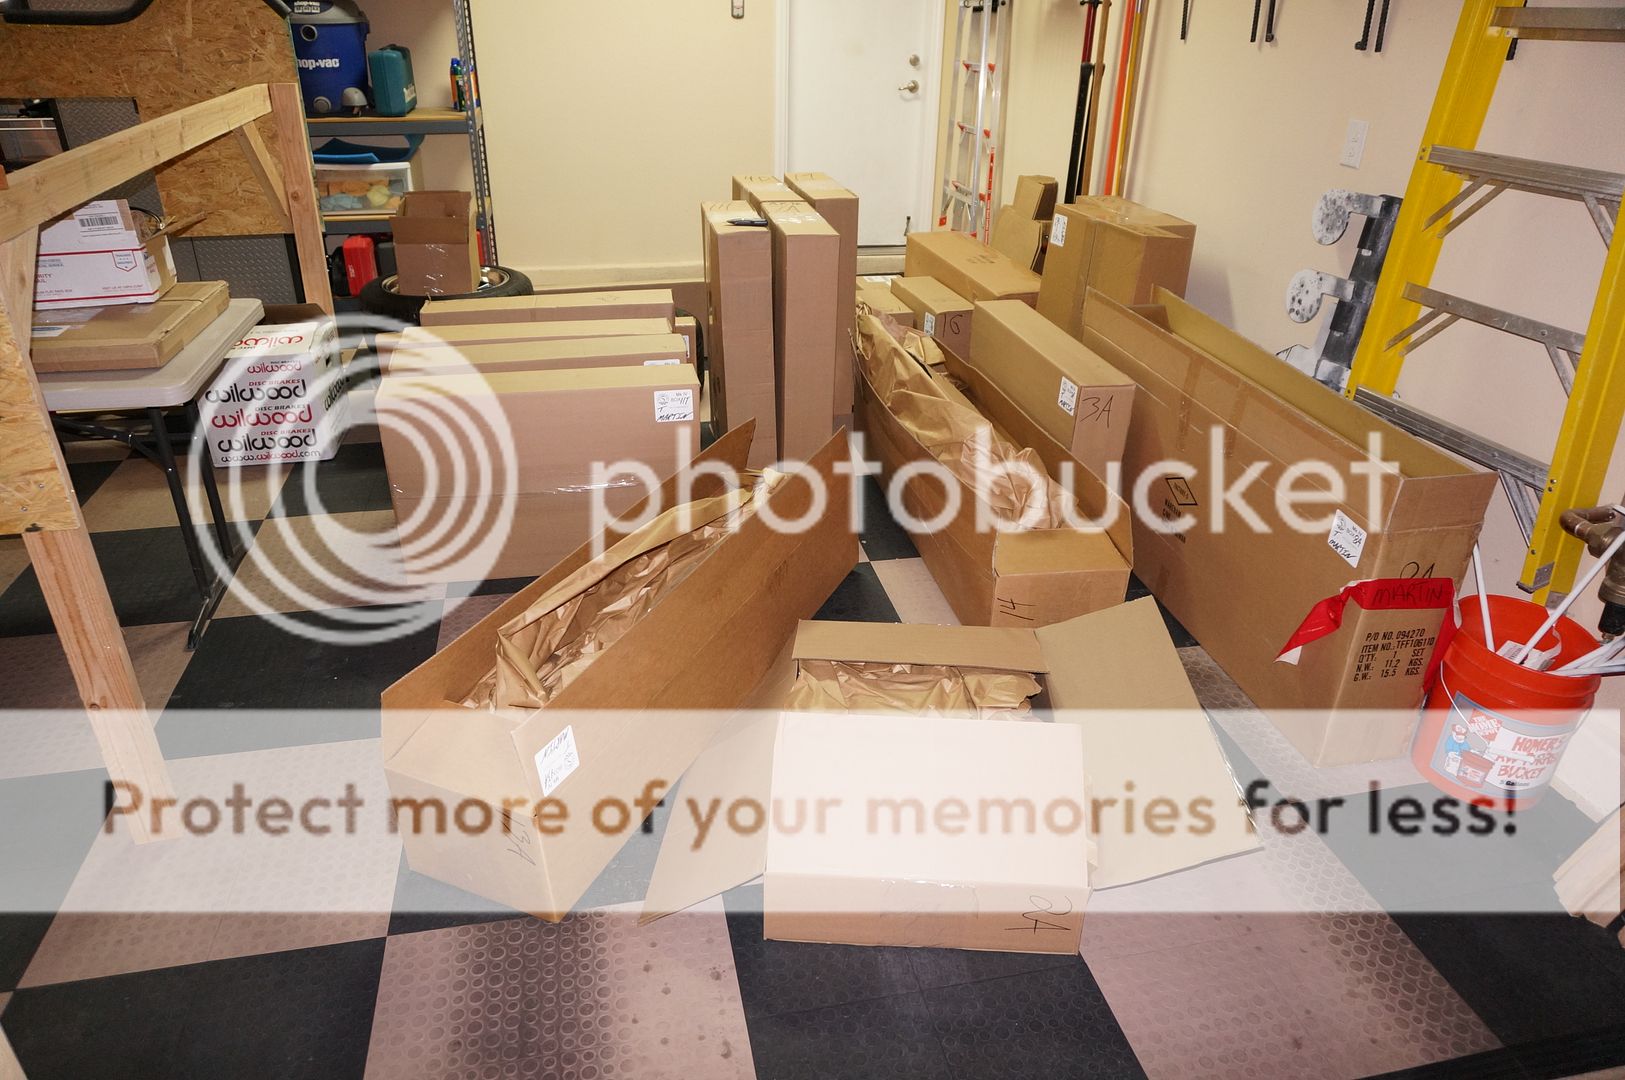
And ended with this.
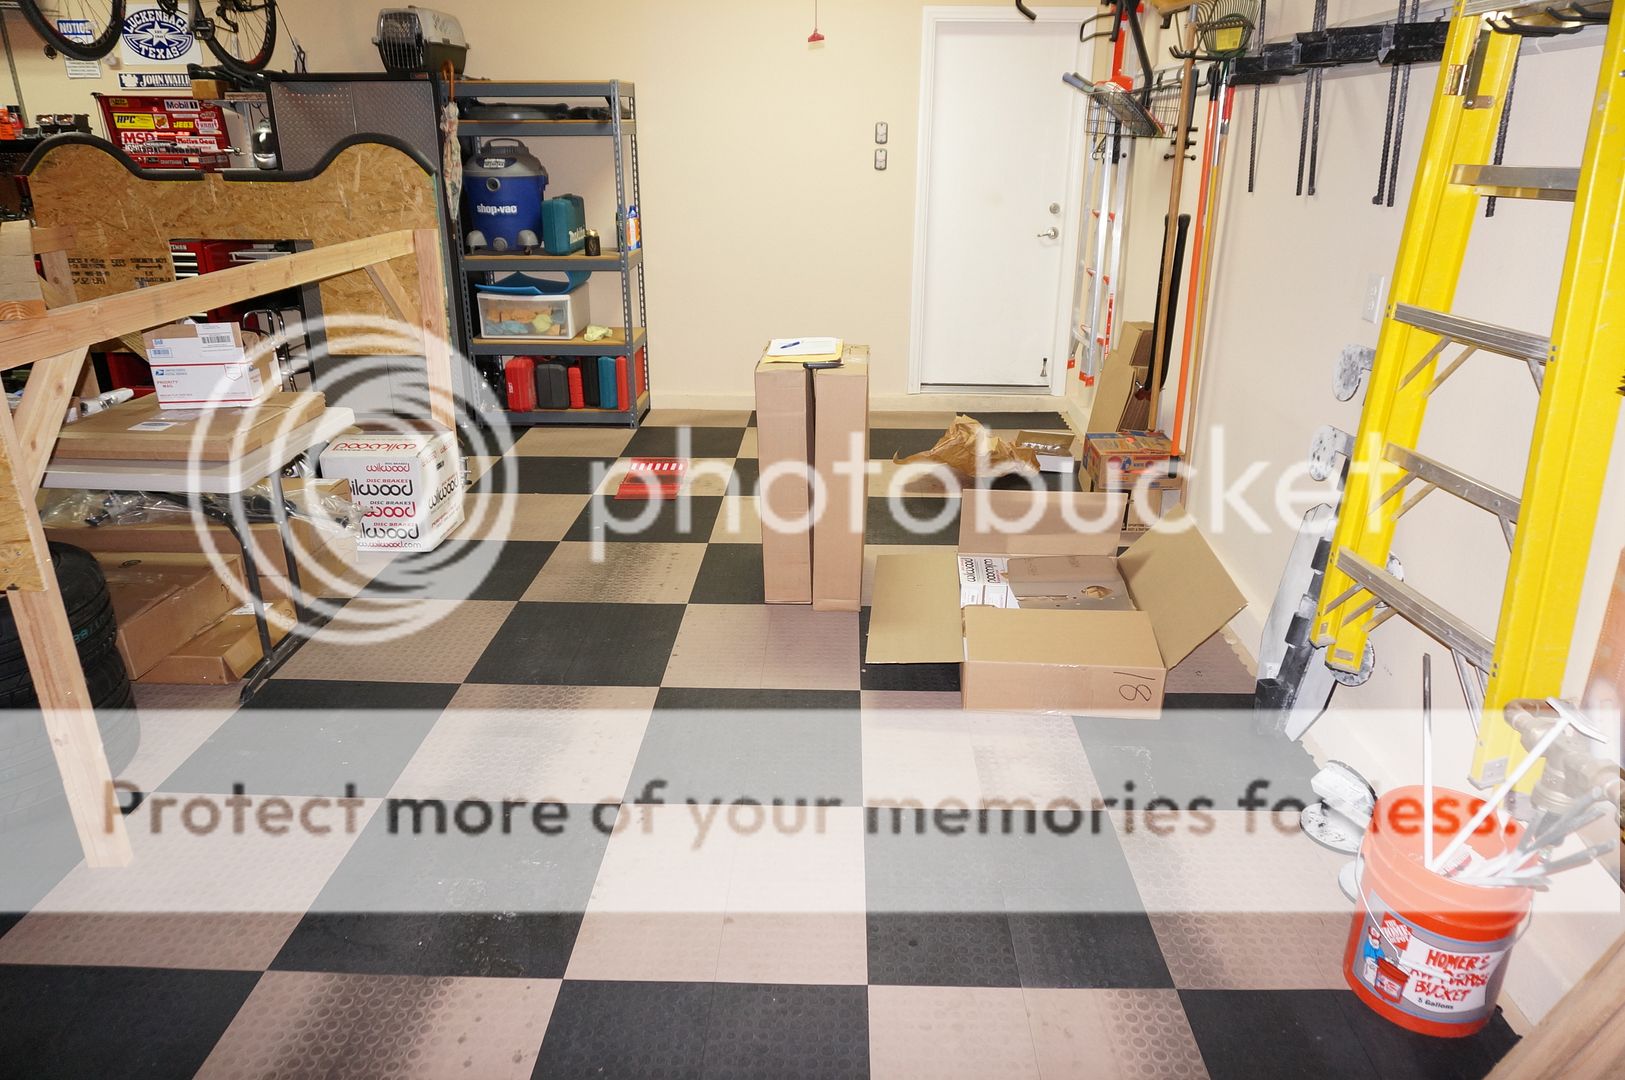
It was about 1:30 in the morning and I was exhausted. I wanted to get all of the boxes inventoried. But I opened up the box containing the wiring harness and a lot of individual parts and realized that it was time to go to bed. I turned off my alarm clock and slept in late.
-
Senior Member

Congrats Terry!!!! Have fun!!!!!
1:30 is the perfect work time. It was 82 here last nite at 1:30. Similar weather here. Hundred and something yesterday.
Kurt
If everything seems under control, youre just not going fast enough....
Build thread
MKIV complete kit # 9395 delivered 7/31/18
-
-
Making use of an extra bedroom. All of the tins are in the closet.

-
Senior Member

Terry,
Post pictures of your ball joint plates, one of them is up-side-down (per your description). The ball joint "ring" should be facing out. Go here --> https://thefactoryfiveforum.com/show...te+orientation post #20 by Jeff Kleiner.
Hope you didn't use any RED locktite during installation . . .
Doc
Last edited by Big Blocker; 08-12-2019 at 09:49 PM.
FFR3712K (MKII) in Lost Wages Nevada.
5.0 w/tubular GT-40 EFI, E303 cam, Custom 4 into 4 headers, T5, 3-Link 3.73 rear. Full F5 tubular suspension. Drop Butt mod, Dash forward mod, custom foot box air vents, custom turn signal system. 13" PBR brakes, Fiero E-Brake mod, Flaming River 18:1 rack w/ F5 bump steer kit on Breeze bushings. 17" Chrome Cobra "R's" w/ 275 fronts and 315 rears. MKIV seats. FORD Royal Blue w/ Arctic White stripes.
-
Senior Member

Your are flying right along. At this pace you should easily make Huntington Beach in April. Her twin sister here in Ca. is not moving nearly as fast.
Bob
-
Bob, I hope so. I'm taking a week off of work at the end of the month and plan to get as much done as possible. Have you done anything yet?
-
-
Kurt, I am so ready for the end of Sept. I'm over this summer.
-
Thanks Chris. Maybe I need to make a 4 wheeling trip down in your area as an excuse to look at your car in person?
-
Senior Member
Terry,
Guess I was thinking that you had one ball joint plate up-side-down but they are installed correctly from the latest pictures. I was thinking you were saying that one ball joint stud was pointing in and the other outward . . . But to get back to your original question, after reading it again, yes, that is normal and will change once you get the front end aligned. Right now you are working with a full droop condition and setting things to a somewhat "generic" alignment. Once you have the car on the ground, things will sit differently. This "not symmetric" issue is mostly caused by the fact that the ball joint plates are universal and one will have the welded lug forward, the other rearward - perfectly normal.
That being said . . . Damn man, you are moving right along at a blinding pace. You'll be at "roller stage" really soon. Don't go sooo fast as to where you are "skipping" ahead with some parts of the build only to have to disassemble stuff later cuz its in the way of another part of the build. It's like chess - think ahead a few moves to see where you are and how it will effect what's next.
You are marking every bolt that you have torqued, right? Nothing worse than having to second guess yourself.
Doc
FFR3712K (MKII) in Lost Wages Nevada.
5.0 w/tubular GT-40 EFI, E303 cam, Custom 4 into 4 headers, T5, 3-Link 3.73 rear. Full F5 tubular suspension. Drop Butt mod, Dash forward mod, custom foot box air vents, custom turn signal system. 13" PBR brakes, Fiero E-Brake mod, Flaming River 18:1 rack w/ F5 bump steer kit on Breeze bushings. 17" Chrome Cobra "R's" w/ 275 fronts and 315 rears. MKIV seats. FORD Royal Blue w/ Arctic White stripes.
-
Ok, that is good to hear. The plates not being symmetrical was really bothering me. It just seemed weird. I have learned one big lesson. Only work on one system at a time, or keep your hardware completely separate if working on two systems. I got hung up on missing spacers for the front shocks (found them in box 21 when they were supposed to be in box 3) and I started working with the rear axle install. I got some of the hardware mixed up and used the bolts for the steering arms on something else. All fixed now.
Yes, I have a yellow paint pen that I'm marking the bolt head with when torqued. When I have something that I'm worried about turning in place when it should not (ball joint), I mark the edge and part it is screwed into.
-
Senior Member

Originally Posted by
TMartinLVNV

Bob, I hope so. I'm taking a week off of work at the end of the month and plan to get as much done as possible. Have you done anything yet?
I finished inventory last weekend and my wife and I lifted the body off tonight.
-
I talked to Russ Thompson yesterday. I'm sending him my steering boss to do his turn signal magic and also ordering the drop trunk kit. Thankfully, this is a three paycheck month!
Terry
-
Senior Member

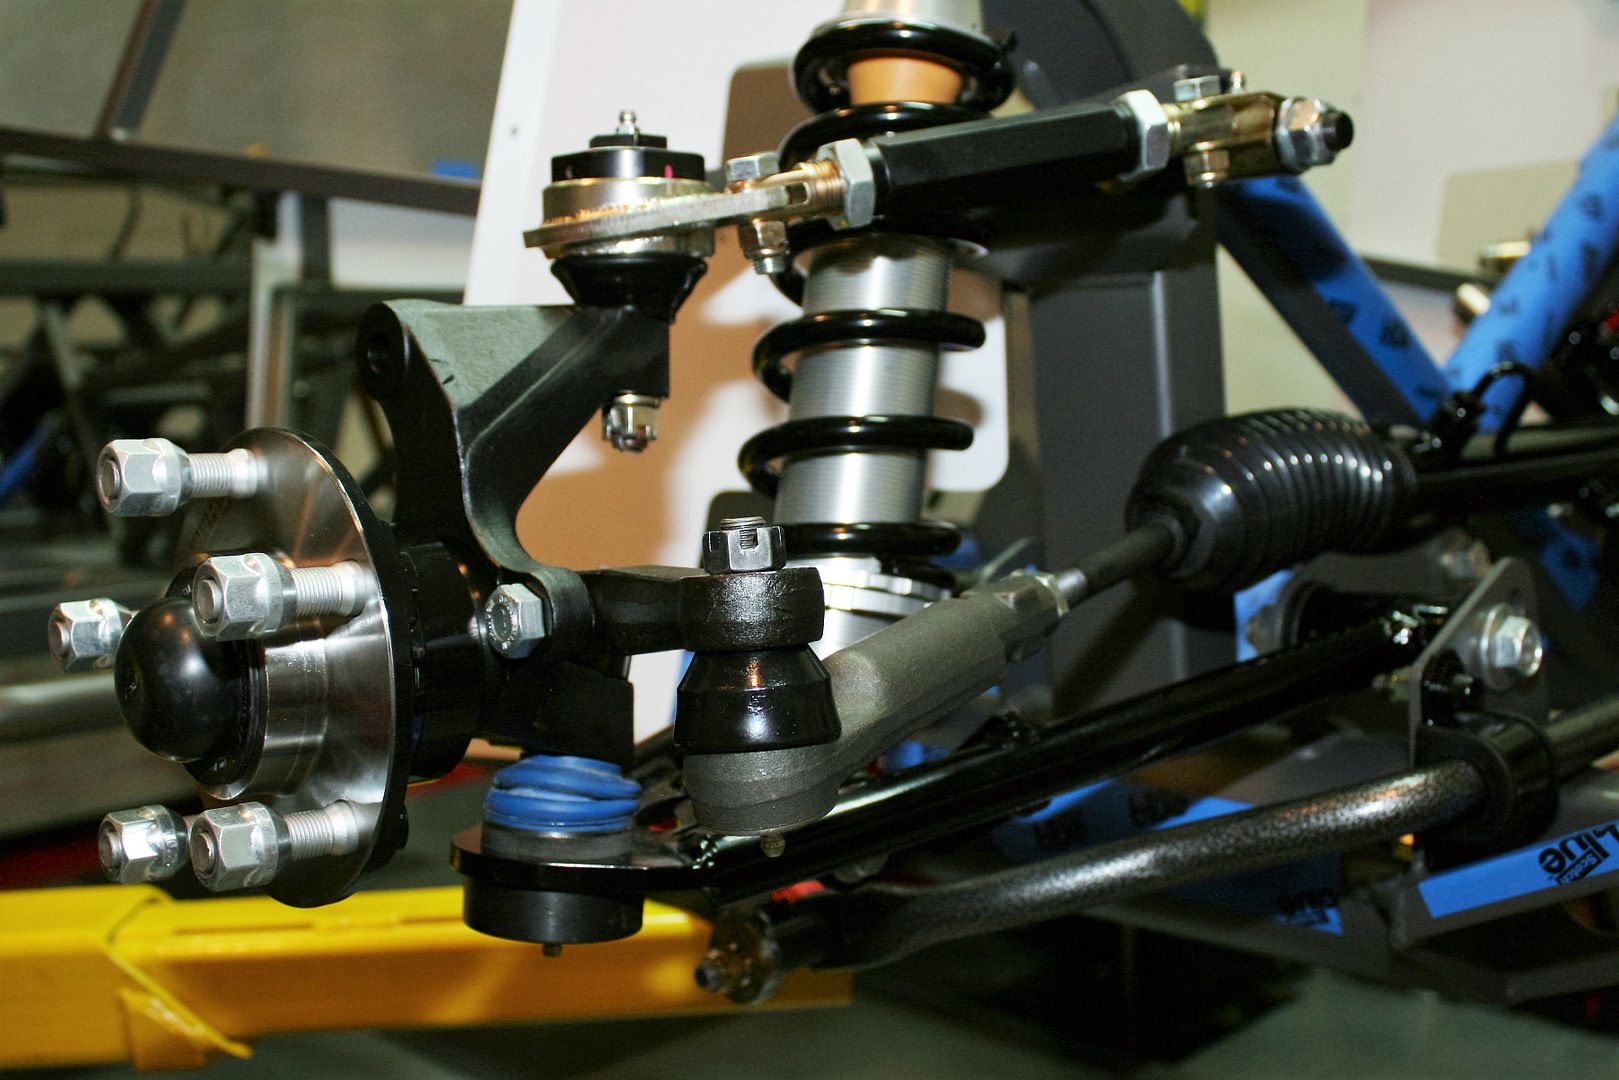
Your ball joint installation is correct as mentioned. The UCA configuration (fixed end on the front on one side, on the back on the other) you're concerned about is normal and works fine. The Energy Suspension upper ball joint boots don't attach to anything. They fit around the ball joint and UCA and when at ride height everything closes up just fine. But I'm a little unsure about what you pictured. This is the front suspension with the Energy Suspension 5.13102G boots. They only come as a set of four, but fortunately not expensive. The uppers that you use are the smaller pair provided. Yours don't seem to be fitting like this.
Build 1: Mk3 Roadster #5125. Sold 11/08/2014.
Build 2: Mk4 Roadster #7750. Sold 04/10/2017.
Build Thread
Build 3: Mk4 Roadster 20th Anniversary #8674. Sold 09/07/2020.
Build Thread and
Video.
Build 4: Gen 3 Type 65 Coupe #59. Gen 3 Coyote. Legal 03/04/2020.
Build Thread and
Video
Build 5: 35 Hot Rod Truck #138. LS3 and 4L65E auto. Rcvd 01/05/2021. Legal 04/20/2023.
Build Thread. Sold 11/9/2023.
-
Ed thank you. A picture is worth a thousand words. I had put the ES boots on the tie rods even before the car arrived. I thought that I had done the ball joints too. I had actually ordered two sets of the boots because I though that each box was good for only one side. I just swapped out the ball joint boots for real this time and it works great.
-
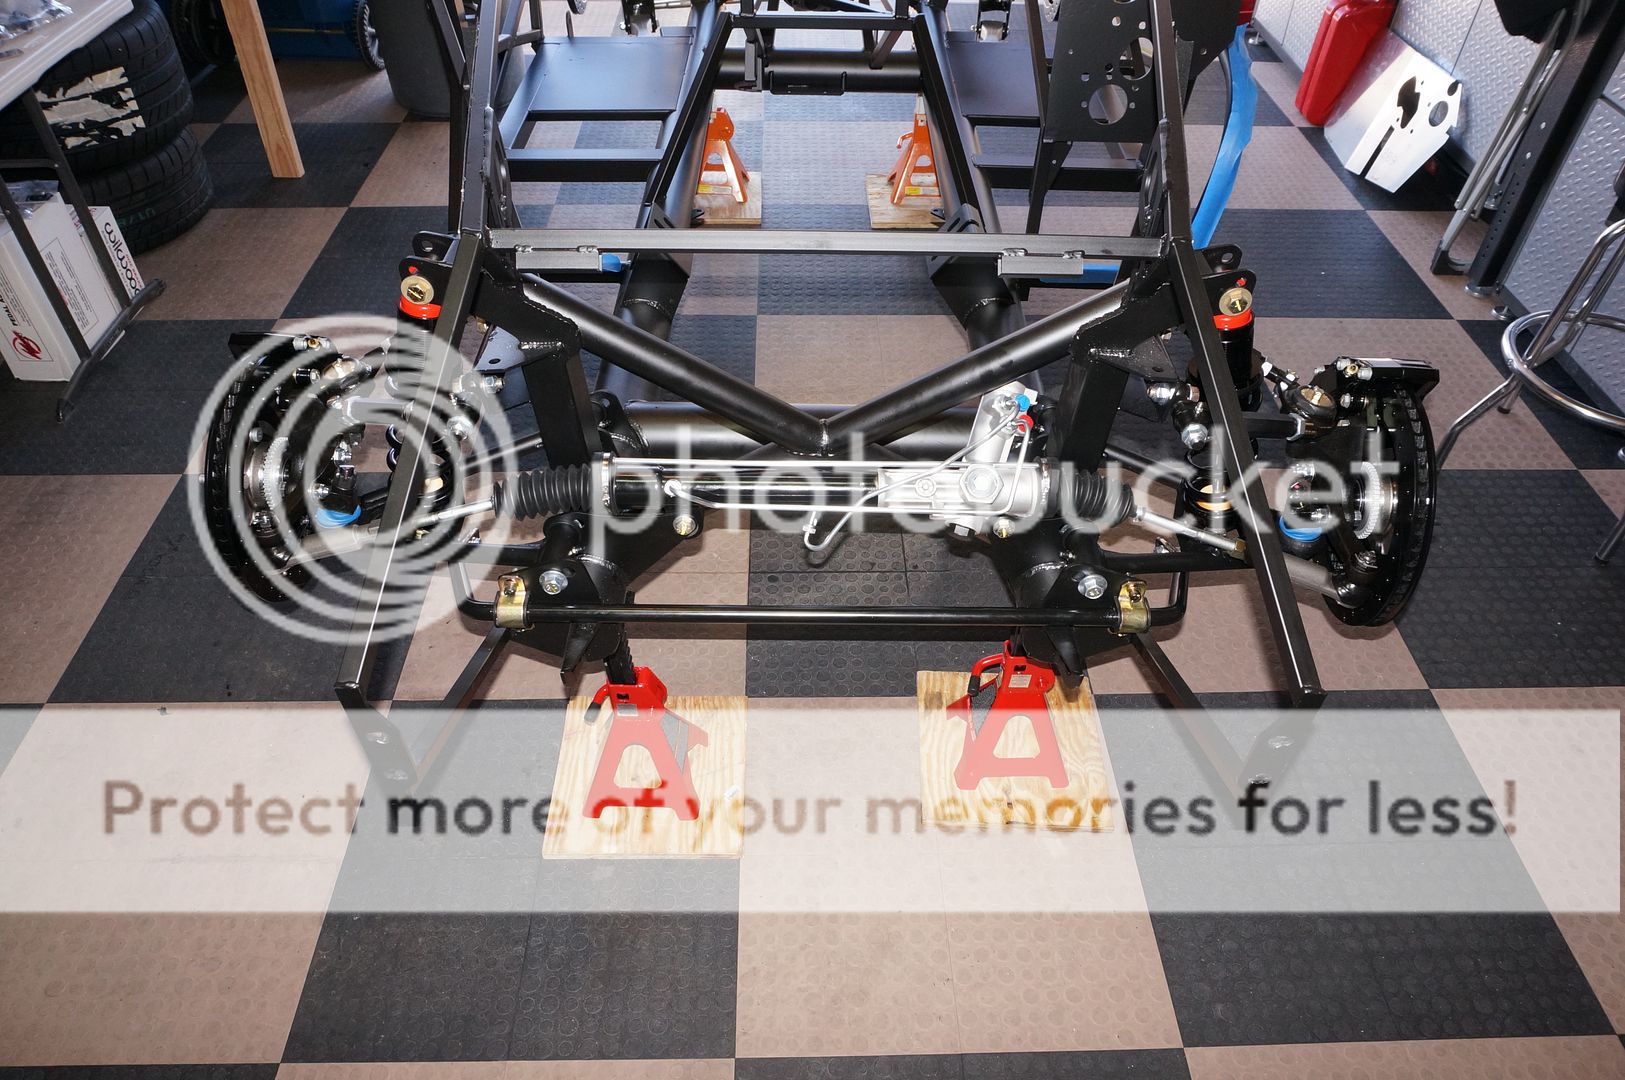
Good day today and made a lot of progress. Although, it was 109 degrees!
I got the sway bar, power steering rack, and front brakes mounted. I finally rented a torque wrench from Auto Zone to do the 250 ft lbs on the spindle nuts (or whatever they are called). Damn! That took some effort!

-
Now is the time to run the brake and fuel lines. I did my brake lines before I riveted anything in place. We were able to rotate the frame on the chassis dolly so it was standing on it's side. Made it a lot easier. 109 degrees. That makes for some sweat in the eyes for sure. You're doing awesome.
Scott
Built FFR9457. 351 Windsor, TKO600, 3.73. Fitech EFI. Russ Thompson throttle pedal, turn signal, and trunk pan. Carbon Fiber dash with Speedhut Revolution gauges. Paint by Jeff Kleiner.
-
Today was a light day. I got the steering shafts installed and the FFMetal firewall forward panel in place.
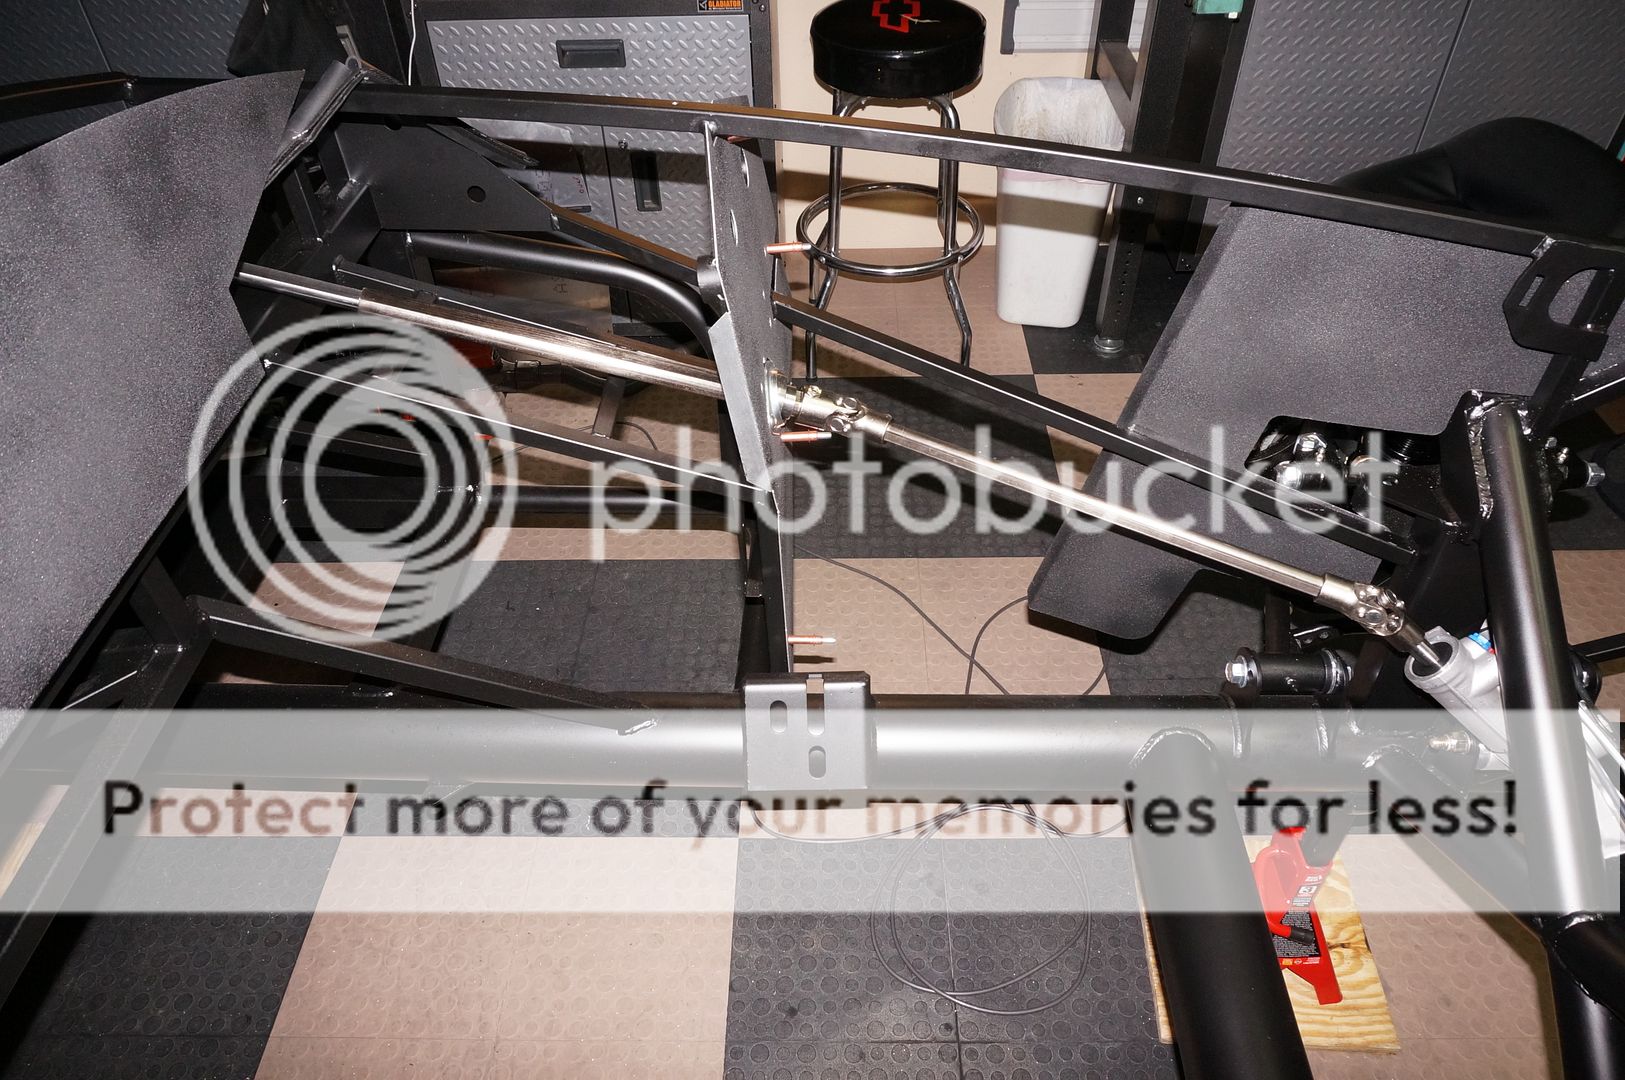
Do you like my custom steering wheel? My steering boss is on the way to Ron Francis for him to do his magic!

-
Thanks Scott. Don't you feel like being able to flip the whole chassis on its side is cheating? ")
-
Hey Terry... a thought for you at this point in your build that will make life a lot easier later in your build. This LINK is to a form entry that shows how to properly "center" your steering rack to the frame of the car. Hint, it's not just turning left to right and finding the center with your steering wheel. Check it out. What I did after I found the true center was I put a little black paint on the input shaft of the rack and on the bearing boss next to it and then I scribe a line in to the black so that anytime I need, I can turn my wheel and put the rack to dead center. This was especially handy later when it was time to do the alignment. Hope this helps.
IMG_3733.jpg
-
Thank you Karl. I had not seen that post before. This is what is so great about this forum! I was planning on doing the centering the way the FFR video shows. Now it seems like the "kindergarten" way of doing it.
As soon as I get my steering boss back from Russ Thompson, I will install my steering wheel and give it a go! Russ should be getting it today and I know that he turns them around very quickly.
Terry
-
Today I started at 8 and called it quits at 1:00. It started to get too hot. A little bit of frustration occurred. I was cutting the firewall for the heater. I bought the FFMetal firewall forward kit. The template for the heater has you mount it 2" from the bottom of the firewall. Cool, drill, cut, looks good. Except, the FFMetal firewall has a 90 degree bend and mounts on the horizontal part of the frame tube. The FFR firewall, for which the template was made, mounts to the vertical portion of the frame tube and is taller. So, the holes I just cut ruined the FFMetal part because I had inadvertently mounted the heater too high. After a few bad words, I pitched the beautiful FFMetal hunk of aluminum in the recycling bin and drug out the stock firewall. Moving forward....
I got most of the passenger side tins premounted and drilled.


-
Originally Posted by
TMartinLVNV
As soon as I get my steering boss back from Russ Thompson, I will install my steering wheel and give it a go! Russ should be getting it today and I know that he turns them around very quickly.
Terry
You do not need the steering wheel for this part.... all you are doing is finding the dead center of the rack. If you mark it in some fashion, you will be able to go back to center each and every time as needed.
Sorry to hear about your firewall.
-
I have not had time to work on the car this week. I will have plenty of time this weekend to catch up. I did get my first round of parts back from powder coating though. I'm very happy with their work.

-
Senior Member
Terry, They did a real nice job on the powder coating - don't mess it up installing it. Ha Ha Ha, just kidding. You're doing an excellent job so far, keep up the GREAT! work.
Doc
FFR3712K (MKII) in Lost Wages Nevada.
5.0 w/tubular GT-40 EFI, E303 cam, Custom 4 into 4 headers, T5, 3-Link 3.73 rear. Full F5 tubular suspension. Drop Butt mod, Dash forward mod, custom foot box air vents, custom turn signal system. 13" PBR brakes, Fiero E-Brake mod, Flaming River 18:1 rack w/ F5 bump steer kit on Breeze bushings. 17" Chrome Cobra "R's" w/ 275 fronts and 315 rears. MKIV seats. FORD Royal Blue w/ Arctic White stripes.
-
Thanks Pete. I have another round of small parts getting powder coated right now.
-
-
It is starting to look like a car now.


-
-
-
-
Part of my POL arrived today. Most importantly, my brake and clutch pedal switches arrived. Now I can finish up that area. My 302 headers were part of this shipment. It looks like FF is sending out the new style adjustable headers and they have O2 brings already welded in. This was a very pleasant surprise.
I'm going to be in the garage tonight.

-
Post Thanks / Like - 0 Thanks, 1 Likes
-


 Thanks:
  Likes:


 Reply With Quote


