-
06-29-2019, 06:35 PM
#361
Senior Member

John D. - Minneapolis 'Burbs
1965 El Camino - LT-1, 4L60e, 4wh discs, SC&C susp.
2013 F-150 Platinum - Twin Turbo 3.5
2018 Mk4 Roadster w/ Coyote - #9365 - Build Thread Delivery 7/3/18, 1st Start 1/4/19, 1st Road Mile 5/5/19, Legal 6/18/19, In Paint 2/25/21, Done (?) 4/2021
-
07-01-2019, 10:32 AM
#362
Senior Member

I put quite a bit of thought into the fresh air pulls this weekend. I hope I didn't overlook something. I'm pretty happy with them so far...
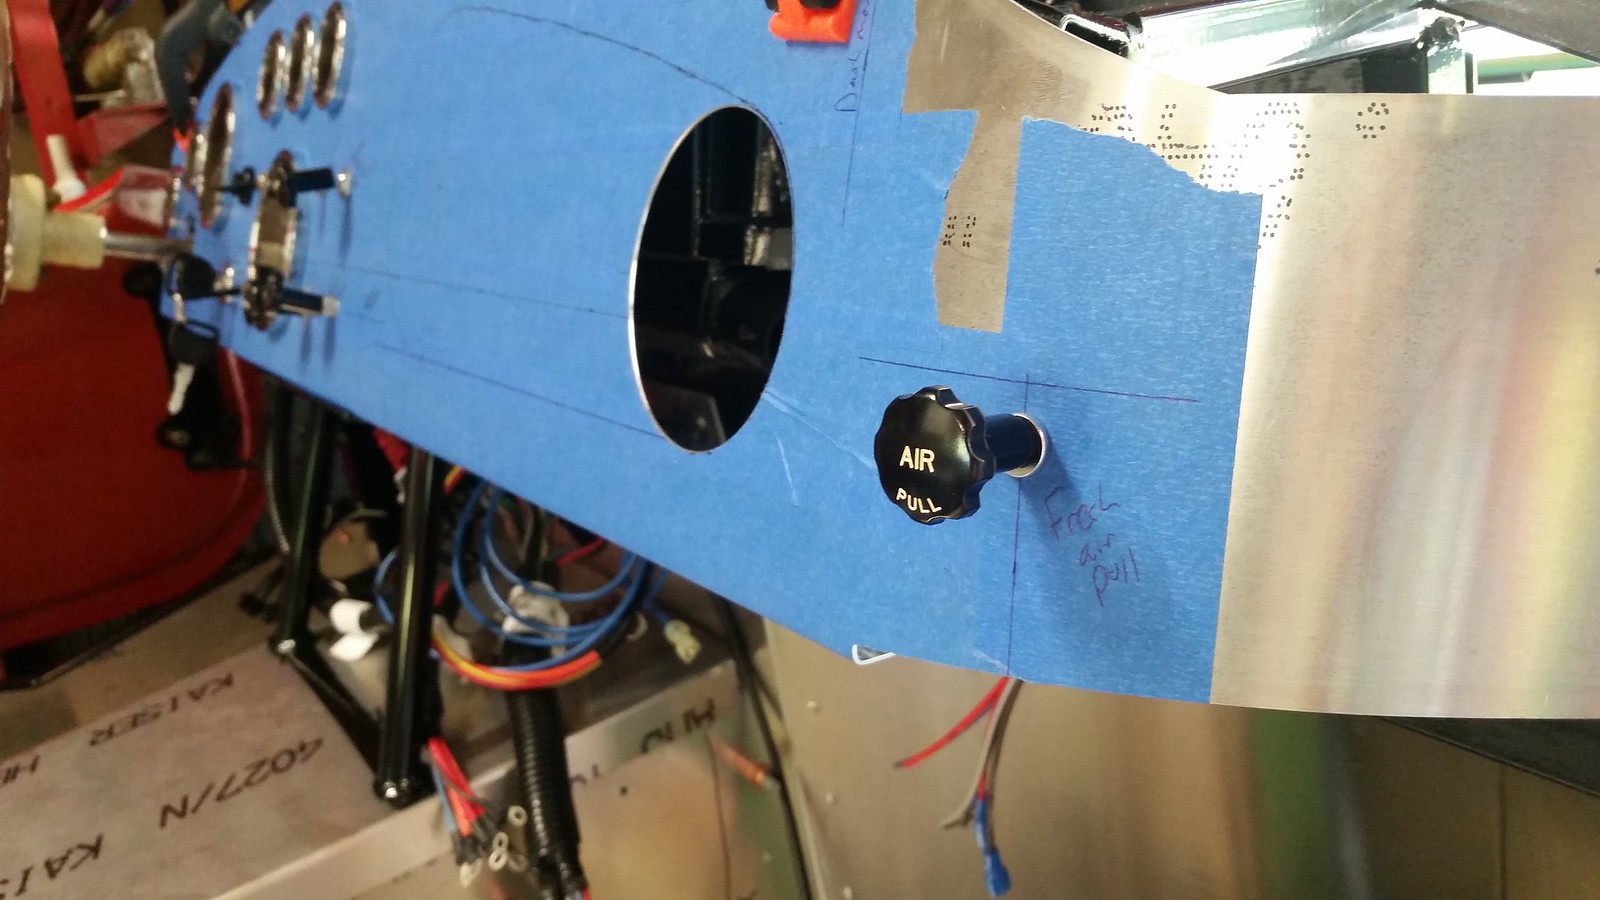
I bought two cheap Dorman Choke cables from Summit for $5.99 each, p/n: 55196...Here I asked the Summit techs if they had any choke cables that have replaceable knobs. They said "no". So, I took a chance on these cheap cables, hoping there's a way to get my vintage knob on the shaft of the pull. After I got the cable I realized the knob is part of the rod that's attached to the cable, so I cut off the knob. It didn't affect the cable motion or it's attachment to the shaft, so I think It's going to work. I haven't attached my knob to the shaft yet, but I don't think it will be an issue...

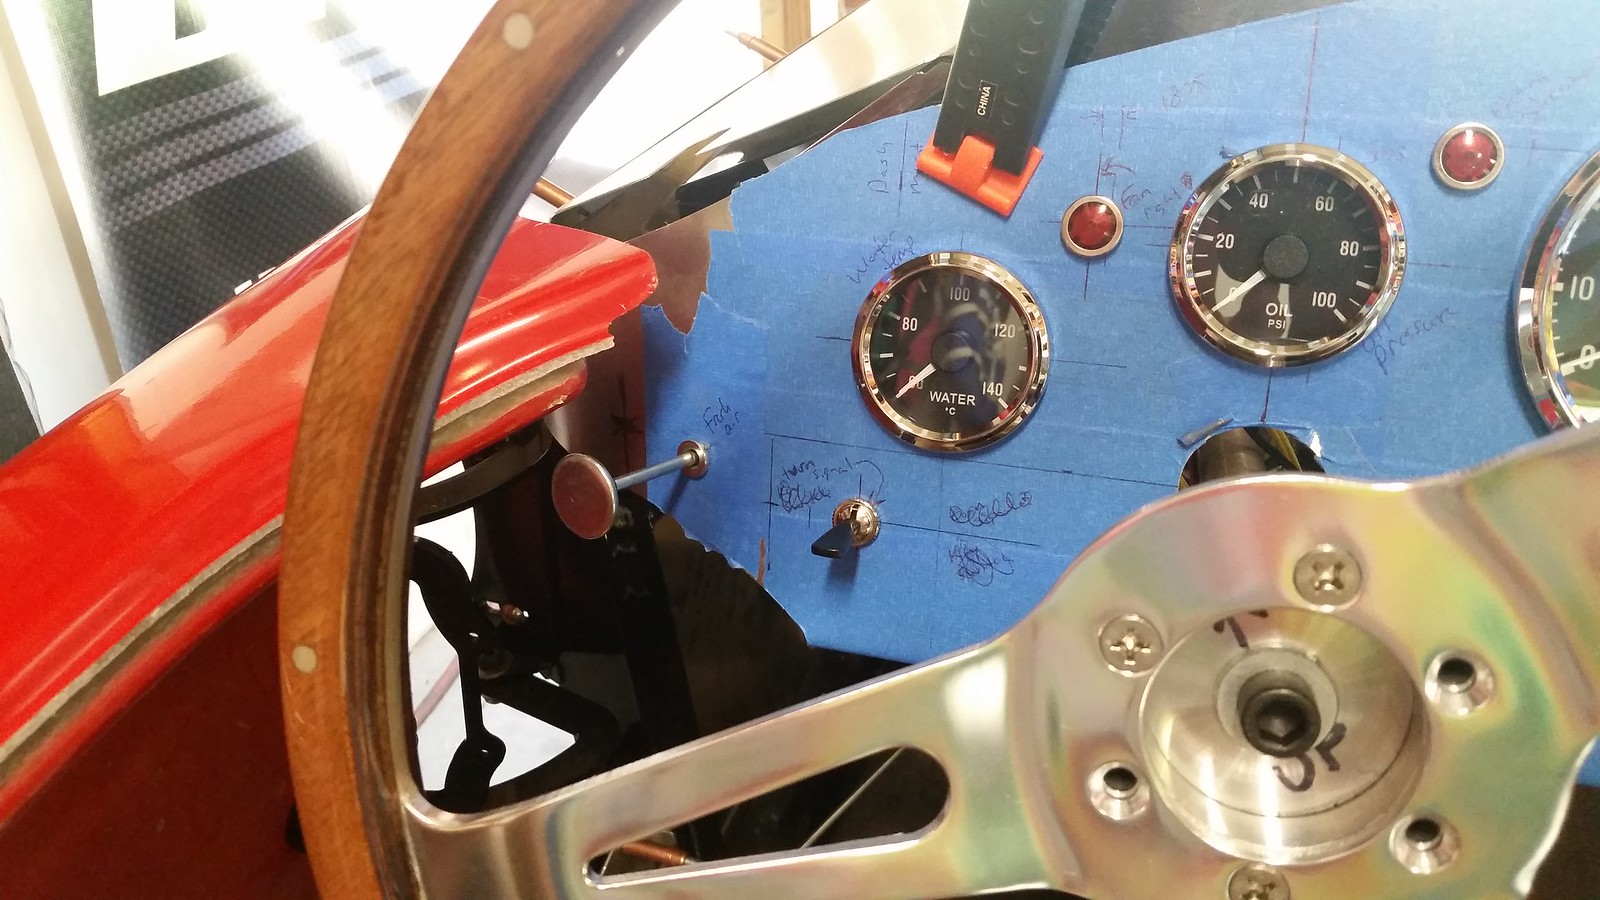
I took the other cable and came up with a place on the dash that'll work for the pull and knob. I tried to make sure they would clear the doors, not get caught by people getting in and out of the car (on either side) and make sure that it wouldn't interfere with the turn signal switch on the driver's side. The location I found is tight, but I think it'll meet all my criteria. The mock up positions of the dash and doors should be showing me a worst case scenario (I believe the dash to be too high and the doors are hanging to low), so hopefully once I's done I'll have this much clearance or more.

Here's the passenger side looking down from the top. The cables were 6 feet long. They were very tough to actuate when I took them out of the package. After straightening them out and cutting off 2-3', they operate very smoothly. I'm happy with these cheap cables.

Here's the knob temporarily sitting on the shaft. This is the look I'm after...
Last edited by Yama-Bro; 07-01-2019 at 10:38 AM.
Started dreaming of a Cobra around 1987
Purchased Complete Kit 6/9/2017, Delivered 9/4/2017, Rolling Chassis 3/30/2018, Engine Dyno'ed 3/4/2022, Engine installed 8/27/2022
Click here for my build thread
Serial #9158
Design Engineer at BluePrint Engines
-
07-01-2019, 12:38 PM
#363
David aka Ducky2009


Originally Posted by
Yama-Bro

I put quite a bit of thought into the fresh air pulls this weekend....
What are you using for the fresh air doors? Are you going to use fans too? I don't have air vents at this time, thinking about adding. Would like to find a Pull/fan switch combination.
Last edited by Ducky2009; 07-01-2019 at 12:53 PM.
MK4 Build #9035 Delivered 2/17/17, First Start & Go-Kart 6/2/17, Licensed 9/1/17
Paint - Lightning Blue Metallic, No Hood Scoop, No Stripes
Gen 2 Coyote Engine & TKO-600. Solid Axle, 8.8-3.55, Power Steering, Power Brakes, Dual Roll Bars
Heater and Glove Box, Drop Trunk, Wipers, Radio, FFR Vintage Gauges, Custom Dash
Build Thread:
http://thefactoryfiveforum.com/showt...MK4-Build-9035
-
07-01-2019, 12:46 PM
#364
David aka Ducky2009
Originally Posted by
Yama-Bro
Fixit, We are definitely heading down the same path as far as the dash and glove box are concerned. I sent you a PM.
Here's the layout that I started with. I found this in a folder on my computer. I've been downloading build stuff for over a decade, otherwise I would've been scouring the net like you.

. I have no idea where this file originated, so if anyone knows who made it originally, post up and give them some credit. Thanks!
The changes I made were mostly around the steering wheel:
-Moved the speedo to the left .75" and down about .375"
-Moved the oil pressure gauge to the left .375" (centered above the wheel)
-Moved the fan light to the left .1875"
-I moved hole for the keyswitch to the right and made it the hole for the turn signal switch.
-The rest of the changes were just rearranging switches and controls in the locations. They should all be explained above.
Also, just a warning to anyone using this...I haven't verified any of the hole sizes, so proceed with caution if you use the layout.

FFR says you can't have a heater and a glove box... occupies the same space. I pushed the heater 2 1/4" into the engine compartment and make my own glove box.
See my post #39. https://thefactoryfiveforum.com/show...l=1#post276292
If you don't, the box will be only an inch or two deep. Just a suggestion.
MK4 Build #9035 Delivered 2/17/17, First Start & Go-Kart 6/2/17, Licensed 9/1/17
Paint - Lightning Blue Metallic, No Hood Scoop, No Stripes
Gen 2 Coyote Engine & TKO-600. Solid Axle, 8.8-3.55, Power Steering, Power Brakes, Dual Roll Bars
Heater and Glove Box, Drop Trunk, Wipers, Radio, FFR Vintage Gauges, Custom Dash
Build Thread:
http://thefactoryfiveforum.com/showt...MK4-Build-9035
-
07-01-2019, 12:57 PM
#365
Senior Member
Originally Posted by
Ducky2009
What are you using for the fresh air doors? Are you going to use fans too? I don't have air vents at this time, thinking about adding. Would like to find a Pull/fan switch combination.
Looks like your PS pull is close to where your wiper motor will be mounted.
The place in the UK that I bought the knobs from, Ashley Hinton, also has reproduction vents. They are about $70 a piece. That's pretty reasonable compared to the $250 or so on CobraRestorers.com or **********. I am leaning towards going with those. If I don't, I'll make something. Originally I wasn't going to have fans, but I have been reading on the forum and I'm beginning to change my mind (kinda reminds me of how a few other unplanned upgrades took place LOL). I like the switch and the pull combined idea.
Thanks for the heads up on the wiper motor. I was thinking that the wiper would be located on the big panel of the firewall next to the heater, but I'll have to look at other's pictures again. Not a big deal either way, as the cables is flexible enough to snake where ever it needs to go. I just have it temporarily routed thru that area in the picture.
Started dreaming of a Cobra around 1987
Purchased Complete Kit 6/9/2017, Delivered 9/4/2017, Rolling Chassis 3/30/2018, Engine Dyno'ed 3/4/2022, Engine installed 8/27/2022
Click here for my build thread
Serial #9158
Design Engineer at BluePrint Engines
-
07-01-2019, 01:00 PM
#366
Senior Member
Originally Posted by
Ducky2009
FFR says you can't have a heater and a glove box... occupies the same space. I pushed the heater 2 1/4" into the engine compartment and make my own glove box.
See my post #39.
https://thefactoryfiveforum.com/show...l=1#post276292
If you don't, the box will be only an inch or two deep. Just a suggestion.
Thanks, I was actually reading your build thread earlier today. =) I'm planning to make a shallow glove box to get away from the heater interference issue.
Started dreaming of a Cobra around 1987
Purchased Complete Kit 6/9/2017, Delivered 9/4/2017, Rolling Chassis 3/30/2018, Engine Dyno'ed 3/4/2022, Engine installed 8/27/2022
Click here for my build thread
Serial #9158
Design Engineer at BluePrint Engines
-
07-01-2019, 01:04 PM
#367
David aka Ducky2009
Originally Posted by
Yama-Bro
The place in the UK that I bought the knobs from, Ashley Hinton, also has reproduction vents.....
Thanks for the heads up on the wiper motor. I was thinking that the wiper would be located on the big panel of the firewall next to the heater, but I'll have to look at other's pictures again. Not a big deal either way, as the cables is flexible enough to snake where ever it needs to go. I just have it temporarily routed thru that area in the picture.
Thanks for the vent info. I'll look them up.
OK, after looking, maybe my wiper motor is closer to the heater then I was remembering. (not as far to the PS as I thought).
Wiper Motor Mount.jpg
MK4 Build #9035 Delivered 2/17/17, First Start & Go-Kart 6/2/17, Licensed 9/1/17
Paint - Lightning Blue Metallic, No Hood Scoop, No Stripes
Gen 2 Coyote Engine & TKO-600. Solid Axle, 8.8-3.55, Power Steering, Power Brakes, Dual Roll Bars
Heater and Glove Box, Drop Trunk, Wipers, Radio, FFR Vintage Gauges, Custom Dash
Build Thread:
http://thefactoryfiveforum.com/showt...MK4-Build-9035
-
07-01-2019, 01:17 PM
#368
Senior Member
Originally Posted by
Ducky2009
Thanks for the vent info. I'll look them up.
OK, after looking, maybe my wiper motor is closer to the heater then I was remembering. (not as far to the PS as I thought).
Wiper Motor Mount.jpg
I found the vendor on eBay UK and added their stuff to my cart. The next time I visited the eBay US site the same items were in my cart there as well, but in dollars instead of pounds. I tried messaging them and emailing them, but never got a response, however when I purchased the knobs, they were shipped promptly.
Good picture of the wiper and heater relationship. I should be able to run my cable to the left of the wiper motor in your picture.
Started dreaming of a Cobra around 1987
Purchased Complete Kit 6/9/2017, Delivered 9/4/2017, Rolling Chassis 3/30/2018, Engine Dyno'ed 3/4/2022, Engine installed 8/27/2022
Click here for my build thread
Serial #9158
Design Engineer at BluePrint Engines
-
07-05-2019, 08:54 AM
#369
Senior Member
I did a little more cutting on the dash yesterday. I saved the trickiest hole for last...the glove box opening. Thanks to my friend Lance for helping me with the big radius. I cut the radii with the circle cutter, cut between them with the jigsaw, then smoothed it all out with my DA sander. It turned out pretty nice. There a several small mounting holes left to drill, but I'll add those later as I figure out where they go. Now onto the glove box and door.


Last edited by Yama-Bro; 07-05-2019 at 08:57 AM.
Started dreaming of a Cobra around 1987
Purchased Complete Kit 6/9/2017, Delivered 9/4/2017, Rolling Chassis 3/30/2018, Engine Dyno'ed 3/4/2022, Engine installed 8/27/2022
Click here for my build thread
Serial #9158
Design Engineer at BluePrint Engines
-
07-05-2019, 11:21 AM
#370
David aka Ducky2009
Frank, Just a suggestion for your GB door. Hopefully this will give you some ideas and you'll come up with something that suits you.
I made a door a hair smaller than the opening and one 1/8" per side larger (both from 3/32" alum). I used the larger one as the actual door, but with no padding. I made the "dash" padding around the opening the same size as the larger door, 1/8" larger that the opening. After wrapping the door in leather, I used the smaller/inner door to hold the leather in place. This design make my door stand out--- off the dash surface a little bit.
I c'sank the outer door hinge holes so the flat head bolts were flush with the face and used JB weld to secure them. Had to c'sink the inner door a little for the bolts too. Also added RTV to fill the allen wrench holes. Used JB weld to hold the doors together, besides the hinge bolts and latch. Polished the inside and sprayed with clear.
Glovebox Door.jpg Glovebox Door - Fit.jpg Glovebox Door - Outward.jpg
MK4 Build #9035 Delivered 2/17/17, First Start & Go-Kart 6/2/17, Licensed 9/1/17
Paint - Lightning Blue Metallic, No Hood Scoop, No Stripes
Gen 2 Coyote Engine & TKO-600. Solid Axle, 8.8-3.55, Power Steering, Power Brakes, Dual Roll Bars
Heater and Glove Box, Drop Trunk, Wipers, Radio, FFR Vintage Gauges, Custom Dash
Build Thread:
http://thefactoryfiveforum.com/showt...MK4-Build-9035
-
Post Thanks / Like - 0 Thanks, 1 Likes
-
07-05-2019, 07:00 PM
#371
Senior Member
Thanks for the ideas. I may end up doing the same thing. I like the idea of having the door sitting past the dash. It should add some depth to the dash.
Started dreaming of a Cobra around 1987
Purchased Complete Kit 6/9/2017, Delivered 9/4/2017, Rolling Chassis 3/30/2018, Engine Dyno'ed 3/4/2022, Engine installed 8/27/2022
Click here for my build thread
Serial #9158
Design Engineer at BluePrint Engines
-
07-05-2019, 08:29 PM
#372
Senior Member

Originally Posted by
Yama-Bro
I did a little more cutting on the dash yesterday. I saved the trickiest hole for last...the glove box opening. Thanks to my friend Lance for helping me with the big radius. I cut the radii with the circle cutter, cut between them with the jigsaw, then smoothed it all out with my DA sander. It turned out pretty nice. There a several small mounting holes left to drill, but I'll add those later as I figure out where they go. Now onto the glove box and door.
Nice work on the layout! I’ll be planning the dash work soon and following along.
-
Post Thanks / Like - 1 Thanks, 0 Likes
-
07-21-2019, 10:04 PM
#373
Senior Member
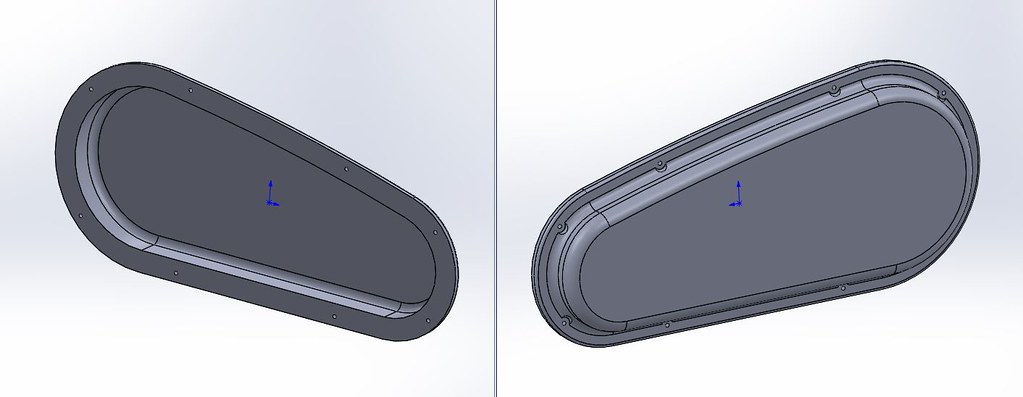
I got a start on the 3D model of the glove box. I'm waiting for my hinges to figure out where they'll go, but here's a sneak peak...
Started dreaming of a Cobra around 1987
Purchased Complete Kit 6/9/2017, Delivered 9/4/2017, Rolling Chassis 3/30/2018, Engine Dyno'ed 3/4/2022, Engine installed 8/27/2022
Click here for my build thread
Serial #9158
Design Engineer at BluePrint Engines
-
Post Thanks / Like - 0 Thanks, 2 Likes
-
07-25-2019, 09:02 AM
#374
Originally Posted by
Yama-Bro
Fixit, We are definitely heading down the same path as far as the dash and glove box are concerned. I sent you a PM.
Here's the layout that I started with. I found this in a folder on my computer. I've been downloading build stuff for over a decade, otherwise I would've been scouring the net like you.
. I have no idea where this file originated, so if anyone knows who made it originally, post up and give them some credit. Thanks!
The changes I made were mostly around the steering wheel:
-Moved the speedo to the left .75" and down about .375"
-Moved the oil pressure gauge to the left .375" (centered above the wheel)
-Moved the fan light to the left .1875"
-I moved hole for the keyswitch to the right and made it the hole for the turn signal switch.
-The rest of the changes were just rearranging switches and controls in the locations. They should all be explained above.
Also, just a warning to anyone using this...I haven't verified any of the hole sizes, so proceed with caution if you use the layout.
Yama Bro,
Could I get this cad file emailed to me so I cna play around with how I want my gauges? I have cad 2013 if you could save it in that format. [email protected]
I'm digging your detail in work sir!
-
Post Thanks / Like - 1 Thanks, 0 Likes
-
07-25-2019, 11:59 AM
#375
Senior Member
Hi J Bell, That particular picture is someone else's layout I found online a long time ago. I don't have the dash completely done in CAD yet, although I'm working on it.
Started dreaming of a Cobra around 1987
Purchased Complete Kit 6/9/2017, Delivered 9/4/2017, Rolling Chassis 3/30/2018, Engine Dyno'ed 3/4/2022, Engine installed 8/27/2022
Click here for my build thread
Serial #9158
Design Engineer at BluePrint Engines
-
08-02-2019, 04:46 PM
#376
Senior Member
I spent the day designing and 3D modeling the glove box. This ended up taking a lot more time than I expected. My goal was to have it ready for 3D printing by the end of the day and I made it. As everyone says...there's not much room for a glove box, when you have the heater in it's intended location. I stole ideas from a lot of other build threads, so if you recognize something...thanks! Check out the pictures and let me know what you think...
Here's a shot with the door closed. I intended to use the VW latch. Unfortunately, it's too deep to work, so I switched to a shallower cam latch. I'll get one of the stainless cabinet pulls to go in this. If any one wants the VW latch, let me know, we can work out a deal...

Here's with the door open. I plan to put a small cable or wire to keep the door from opening past 90 degrees. The hole on the inside left side of the glove box is for the attachment of that feature.

Here's the glove box by itself. The notches in the bottom are clearance for the hinges. The pockets around the mounting holes will be clearance for the nuts that lock the screws that go thru the dash panel itself. The large cut out on the top left, is for clearance to my dash mounting brackets.

Here's a picture from the back of the glove box. You can see the groove in the top. That's where the pawl of the lock will travel thru. I'll have an adjustable metal strike plate screwed to the plastic that is accessible from the inside.

This is a section view showing the depth of the box and how close it is to the heater. My glove box ended up being about .75" deep at the top and 1.25" deep at the bottom. It's so small I was really questioning if I should have just made a faux glove box door and called it good. LOL

Last edited by Yama-Bro; 08-02-2019 at 04:49 PM.
Started dreaming of a Cobra around 1987
Purchased Complete Kit 6/9/2017, Delivered 9/4/2017, Rolling Chassis 3/30/2018, Engine Dyno'ed 3/4/2022, Engine installed 8/27/2022
Click here for my build thread
Serial #9158
Design Engineer at BluePrint Engines
-
Post Thanks / Like - 0 Thanks, 4 Likes
-
08-02-2019, 05:14 PM
#377
I'm still amazed by 3-D printing. Part science, part voodoo.
Very cool work Yama. Look forward to seeing the completed assembly.
-Steve
-
08-02-2019, 06:26 PM
#378
That is just about exactly what I have... Just deep enough to hold your insurance and registration papers... Here is my Glove Box Mod
-
08-03-2019, 04:53 PM
#379
Senior Member
Very cool!!
Not to stir the pot, but the last 3 or so inches of the area toward the PS garners some depth. I put a USB charger socket here... you may want to consider.
Glovebox16.jpg Glovebox25.jpg
John D. - Minneapolis 'Burbs
1965 El Camino - LT-1, 4L60e, 4wh discs, SC&C susp.
2013 F-150 Platinum - Twin Turbo 3.5
2018 Mk4 Roadster w/ Coyote - #9365 - Build Thread Delivery 7/3/18, 1st Start 1/4/19, 1st Road Mile 5/5/19, Legal 6/18/19, In Paint 2/25/21, Done (?) 4/2021
-
08-04-2019, 05:01 PM
#380
Senior Member
Originally Posted by
Straversi
I'm still amazed by 3-D printing. Part science, part voodoo.
Very cool work Yama. Look forward to seeing the completed assembly.
-Steve
Thanks Steve! I've been working around 3D printing for a long time and it was magical for me as well for quite a while. There were two events that made it loose it's magic for me. One was when I had to spend a whole day repairing a 3D printer that had a major failure. I really got to understand the inner workings of it. The second event was when my son bought his own printer and we had to build the whole thing from a box of parts with horrible instructions. LOL. I still think 3D printing is super cool and it's an extremely handy tool for prototyping and manufacturing parts. I'll try to get a video of the glove box printing in my son's printer and post it on here. It's a open air printer, so it's easy to see what is going on with it.
Originally Posted by
BadAsp427
That is just about exactly what I have... Just deep enough to hold your insurance and registration papers...
Here is my Glove Box Mod
Yep, I looked at your build thread several times while coming up with ideas for mine. Thanks! In fact I studied and talked to so many people about the glove box and related parts that I've gotten confused on who did what. haha.
Originally Posted by
Fixit
Very cool!!
Not to stir the pot, but the last 3 or so inches of the area toward the PS garners some depth. I put a USB charger socket here... you may want to consider.
Glovebox16.jpg Glovebox25.jpg
Thanks Fix it! I studied your build thread as well when I was coming up with ideas. I considered doing the bump out like you did, but thought I'd keep it simple for my son's 3D printer. I really like what you did though. Do you show what you did with your glove box door in your build thread? It seems like I couldn't find that in yours.
Last edited by Yama-Bro; 08-04-2019 at 05:06 PM.
Started dreaming of a Cobra around 1987
Purchased Complete Kit 6/9/2017, Delivered 9/4/2017, Rolling Chassis 3/30/2018, Engine Dyno'ed 3/4/2022, Engine installed 8/27/2022
Click here for my build thread
Serial #9158
Design Engineer at BluePrint Engines
-
08-07-2019, 08:33 PM
#381
Senior Member
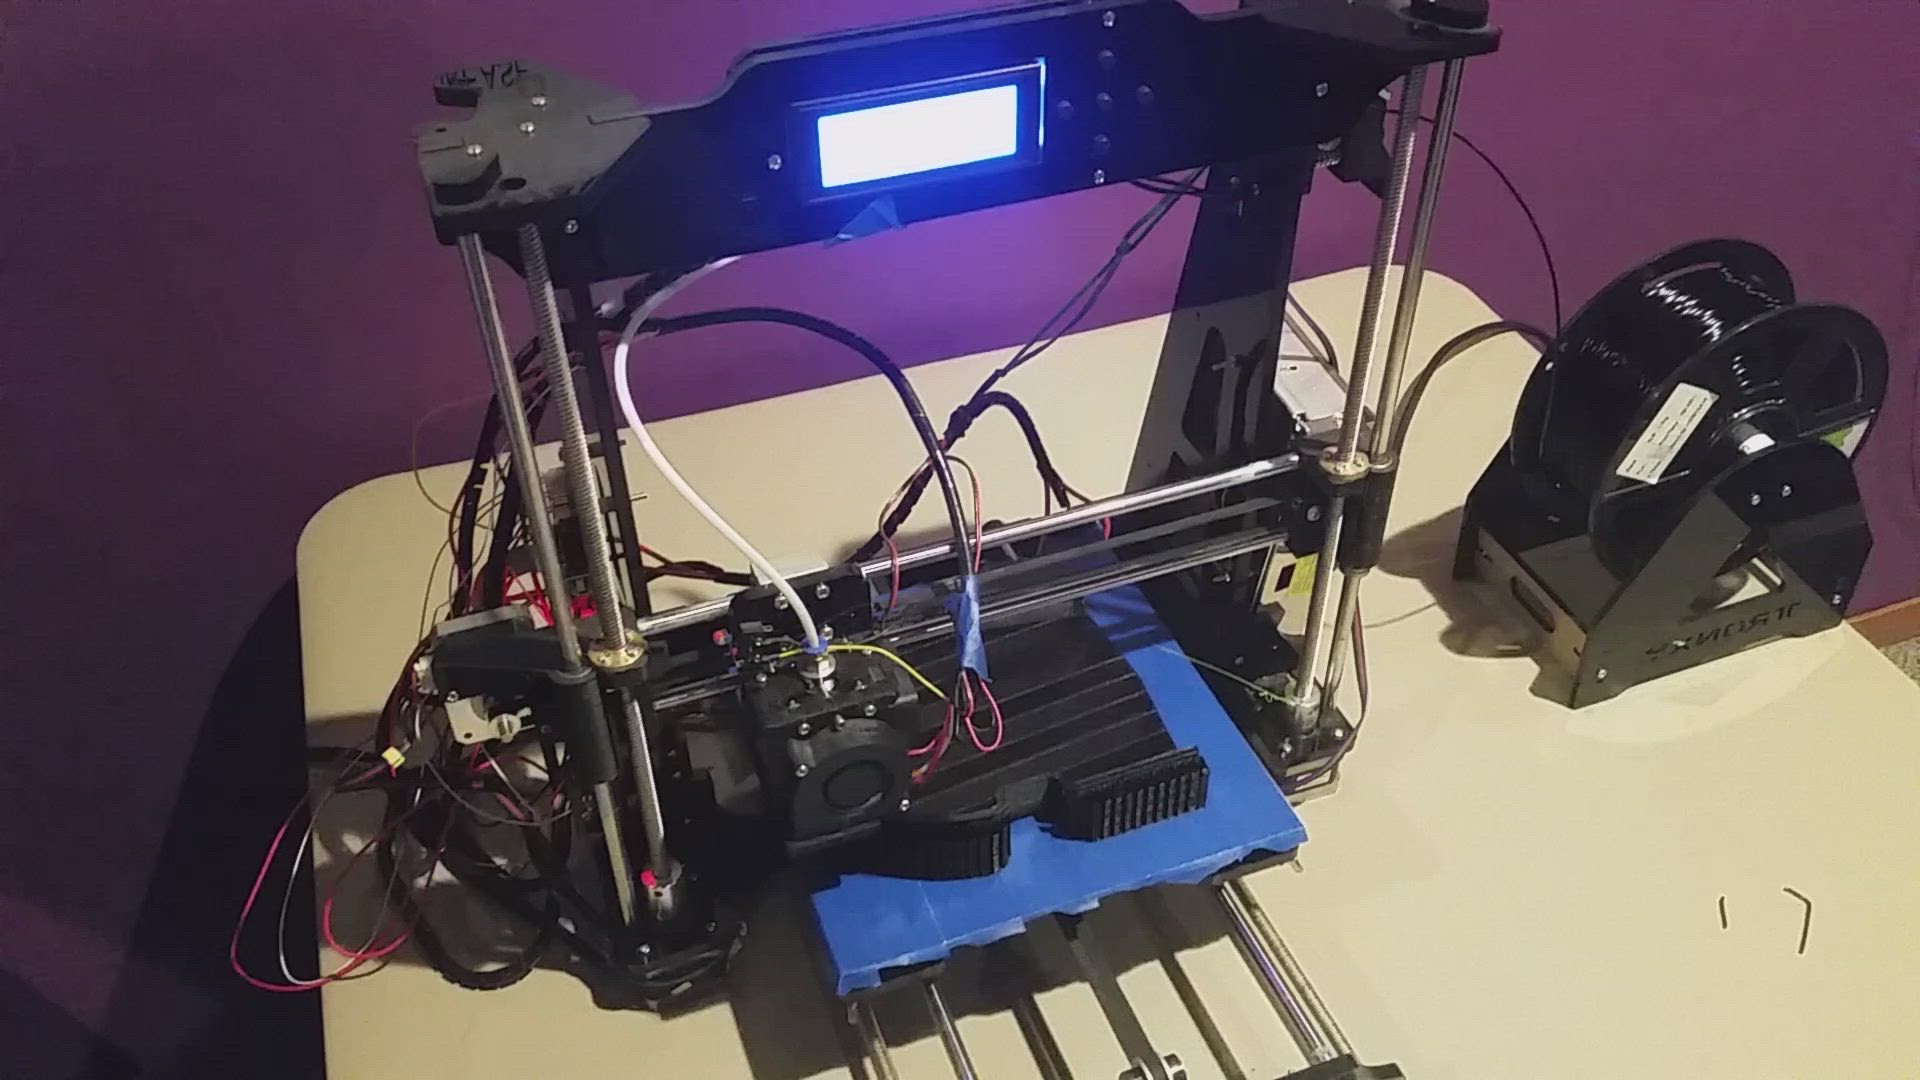
Here's a video of the 3D printer in action, printing the first half of the glovebox. Click on the picture to play the video. Let me know if you have any questions about 3D printing.
Last edited by Yama-Bro; 08-07-2019 at 08:39 PM.
Started dreaming of a Cobra around 1987
Purchased Complete Kit 6/9/2017, Delivered 9/4/2017, Rolling Chassis 3/30/2018, Engine Dyno'ed 3/4/2022, Engine installed 8/27/2022
Click here for my build thread
Serial #9158
Design Engineer at BluePrint Engines
-
Post Thanks / Like - 0 Thanks, 2 Likes
-
08-08-2019, 06:33 PM
#382
-
Post Thanks / Like - 0 Thanks, 1 Likes
-
08-11-2019, 03:13 PM
#383
Senior Member
I got the glove box assembled this weekend. It turned out nice. It's ready to be fit into the dash.
Here are the two halves of the glove box after coming off the 3D printer. My son, Cody, manually broke off all the support that he could. This is the side that didn't need the support...

Here's the backside of one of the parts. The waffle shaped stuff is the support material. There's quite a bit to sand off.

The part on the left is after one round of sanding. The dual action sander made quick work of the support...

Here are both parts sanded and ready for gluing.

I glued the parts together with super glue and then did more sanding by hand to blend them together perfectly. This is the business side of the box.
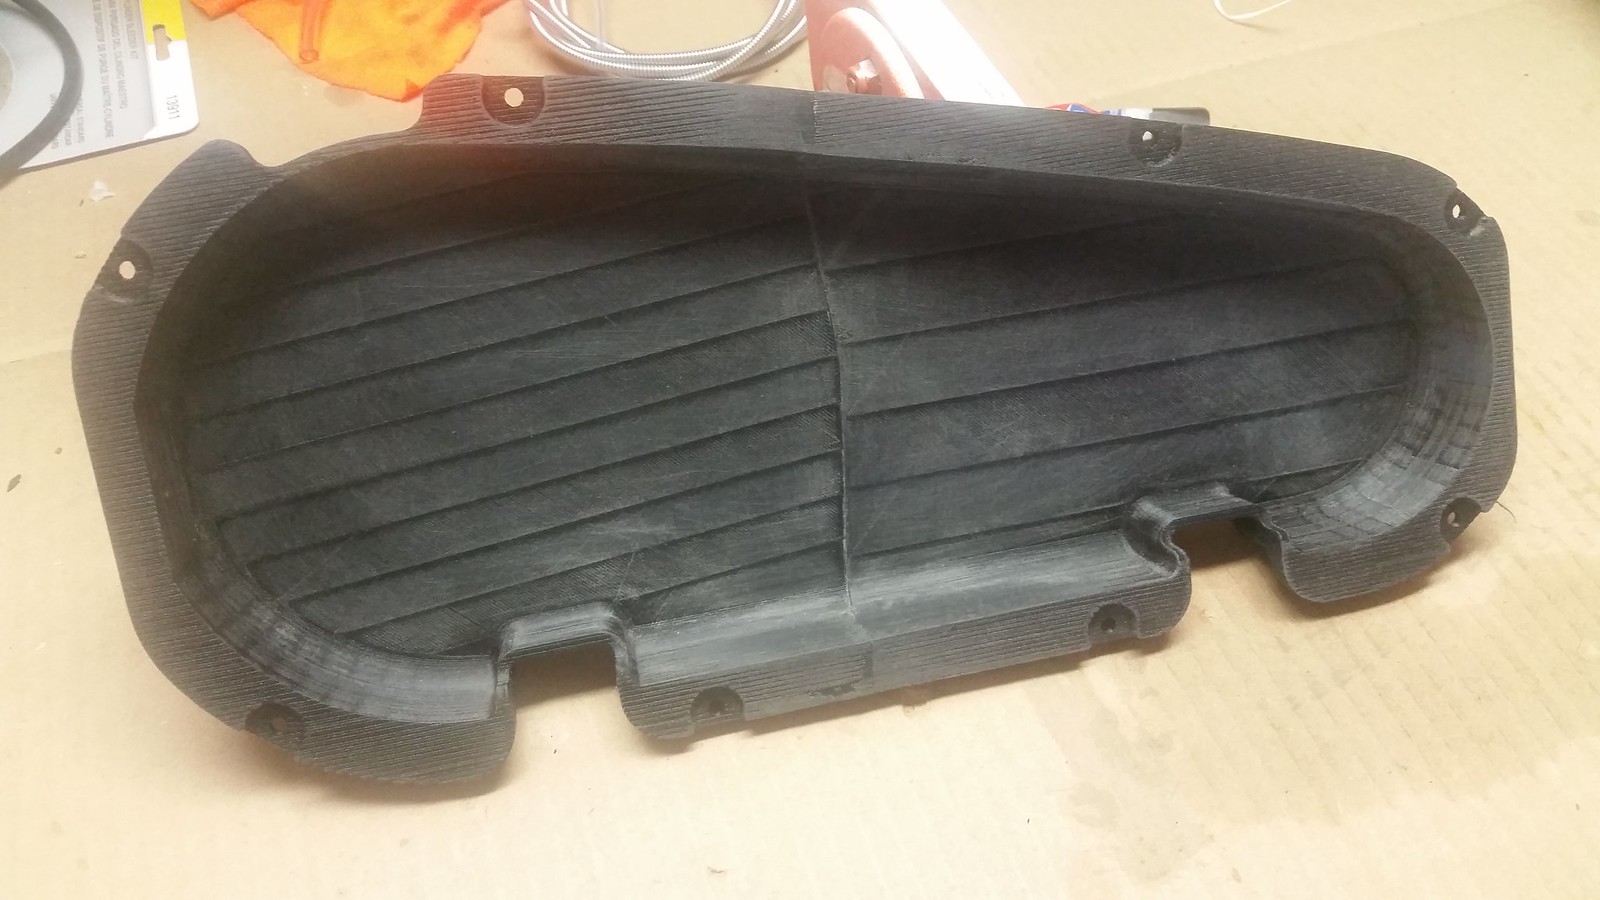
And here's the back side, the side no one will ever see. I plan on hitting the whole glove box with a coat of paint before the final assembly to the dash.

Started dreaming of a Cobra around 1987
Purchased Complete Kit 6/9/2017, Delivered 9/4/2017, Rolling Chassis 3/30/2018, Engine Dyno'ed 3/4/2022, Engine installed 8/27/2022
Click here for my build thread
Serial #9158
Design Engineer at BluePrint Engines
-
Post Thanks / Like - 0 Thanks, 1 Likes
 Papa
Papa liked this post
-
08-11-2019, 04:41 PM
#384
Very nice! I’m sure there are a lot of people that would be interested in something like that.
MKIV #9542 Complete Kit, Coyote, IRS - Delivered - 2/19/19, First start - 9/8/19, Go Cart - 9/14/19
1965 Mustang Convertible 4v 289
Build Thread
HERE
-
08-11-2019, 06:00 PM
#385
Very cool that you made your own glovebox. Nice work.
-
08-11-2019, 07:27 PM
#386
Nice work on the glove box. Pretty cool stuff!
Dave
-
08-12-2019, 05:33 AM
#387
Senior Member
How many hours to print??
John D. - Minneapolis 'Burbs
1965 El Camino - LT-1, 4L60e, 4wh discs, SC&C susp.
2013 F-150 Platinum - Twin Turbo 3.5
2018 Mk4 Roadster w/ Coyote - #9365 - Build Thread Delivery 7/3/18, 1st Start 1/4/19, 1st Road Mile 5/5/19, Legal 6/18/19, In Paint 2/25/21, Done (?) 4/2021
-
08-12-2019, 07:20 AM
#388
Senior Member
Originally Posted by
Fixit
How many hours to print??
Each piece was about 20 hours.
Started dreaming of a Cobra around 1987
Purchased Complete Kit 6/9/2017, Delivered 9/4/2017, Rolling Chassis 3/30/2018, Engine Dyno'ed 3/4/2022, Engine installed 8/27/2022
Click here for my build thread
Serial #9158
Design Engineer at BluePrint Engines
-
08-12-2019, 07:45 AM
#389
Senior Member
Originally Posted by
Cruzzz
Very nice! I’m sure there are a lot of people that would be interested in something like that.
Originally Posted by
Boydster
Very cool that you made your own glovebox. Nice work.
Originally Posted by
Papa
Nice work on the glove box. Pretty cool stuff!
Dave
Thanks Guys!
Started dreaming of a Cobra around 1987
Purchased Complete Kit 6/9/2017, Delivered 9/4/2017, Rolling Chassis 3/30/2018, Engine Dyno'ed 3/4/2022, Engine installed 8/27/2022
Click here for my build thread
Serial #9158
Design Engineer at BluePrint Engines
-
08-13-2019, 09:48 AM
#390
Senior Member
Between running my oldest son around to activities and appointments, I managed to get some work done on my glove box door yesterday.
I transferred my design from CAD to the aluminum with 1 to 1 scale prints. The door is made up of two pieces. One slightly smaller than the opening and one slightly bigger.

I drilled the holes into the hinges, then transferred those holes to the inner door and the dash. I used the location of the hinges that I came up with in CAD (also transferred over by the 1 to 1 prints).

We lined the glove box up with the opening in the dash and transferred the hole locations to the dash. Wyatt helped me install some temporary screws to put it all together.

The outer door will go over the top of this inner door and cover up the gap between the dash and the glove box door. All the screws will be flat heads and countersunk, so you won't see them from the outside when the door is closed. The dash and the outer door will be wrapped with black vinyl.

Here's the door opened and the glove box installed.

Last edited by Yama-Bro; 08-13-2019 at 09:53 AM.
Started dreaming of a Cobra around 1987
Purchased Complete Kit 6/9/2017, Delivered 9/4/2017, Rolling Chassis 3/30/2018, Engine Dyno'ed 3/4/2022, Engine installed 8/27/2022
Click here for my build thread
Serial #9158
Design Engineer at BluePrint Engines
-
Post Thanks / Like - 0 Thanks, 2 Likes
-
08-21-2019, 01:04 PM
#391
Senior Member
I didn't have a lot of time to work on the FFR this weekend. I was busy doing yard work, fixing a dryer (fun) and a treadmill (double fun), and then spending some time with my wife's family. But...I received the rest of my hardware and managed to sneak out to the garage for a few hours. I replaced the round headed screws in the pics above with the 100° flat head screws that I am planning to use in the final assembly. I used my 100° countersink to cut the seat for the flat head screws in the dash and inner glove box door. I'm following the basic steps that EdwardB did for his glove box attachment. I'll fill the heads and countersinks with JB weld and sand smooth so it doesn't show thru in the vinyl. I also added the cam lock (McMaster Carr p/n: ), finger pull (got from Amazon), and the outer glove box door.


Last edited by Yama-Bro; 08-21-2019 at 03:24 PM.
Started dreaming of a Cobra around 1987
Purchased Complete Kit 6/9/2017, Delivered 9/4/2017, Rolling Chassis 3/30/2018, Engine Dyno'ed 3/4/2022, Engine installed 8/27/2022
Click here for my build thread
Serial #9158
Design Engineer at BluePrint Engines
-
09-03-2019, 10:05 AM
#392
Senior Member
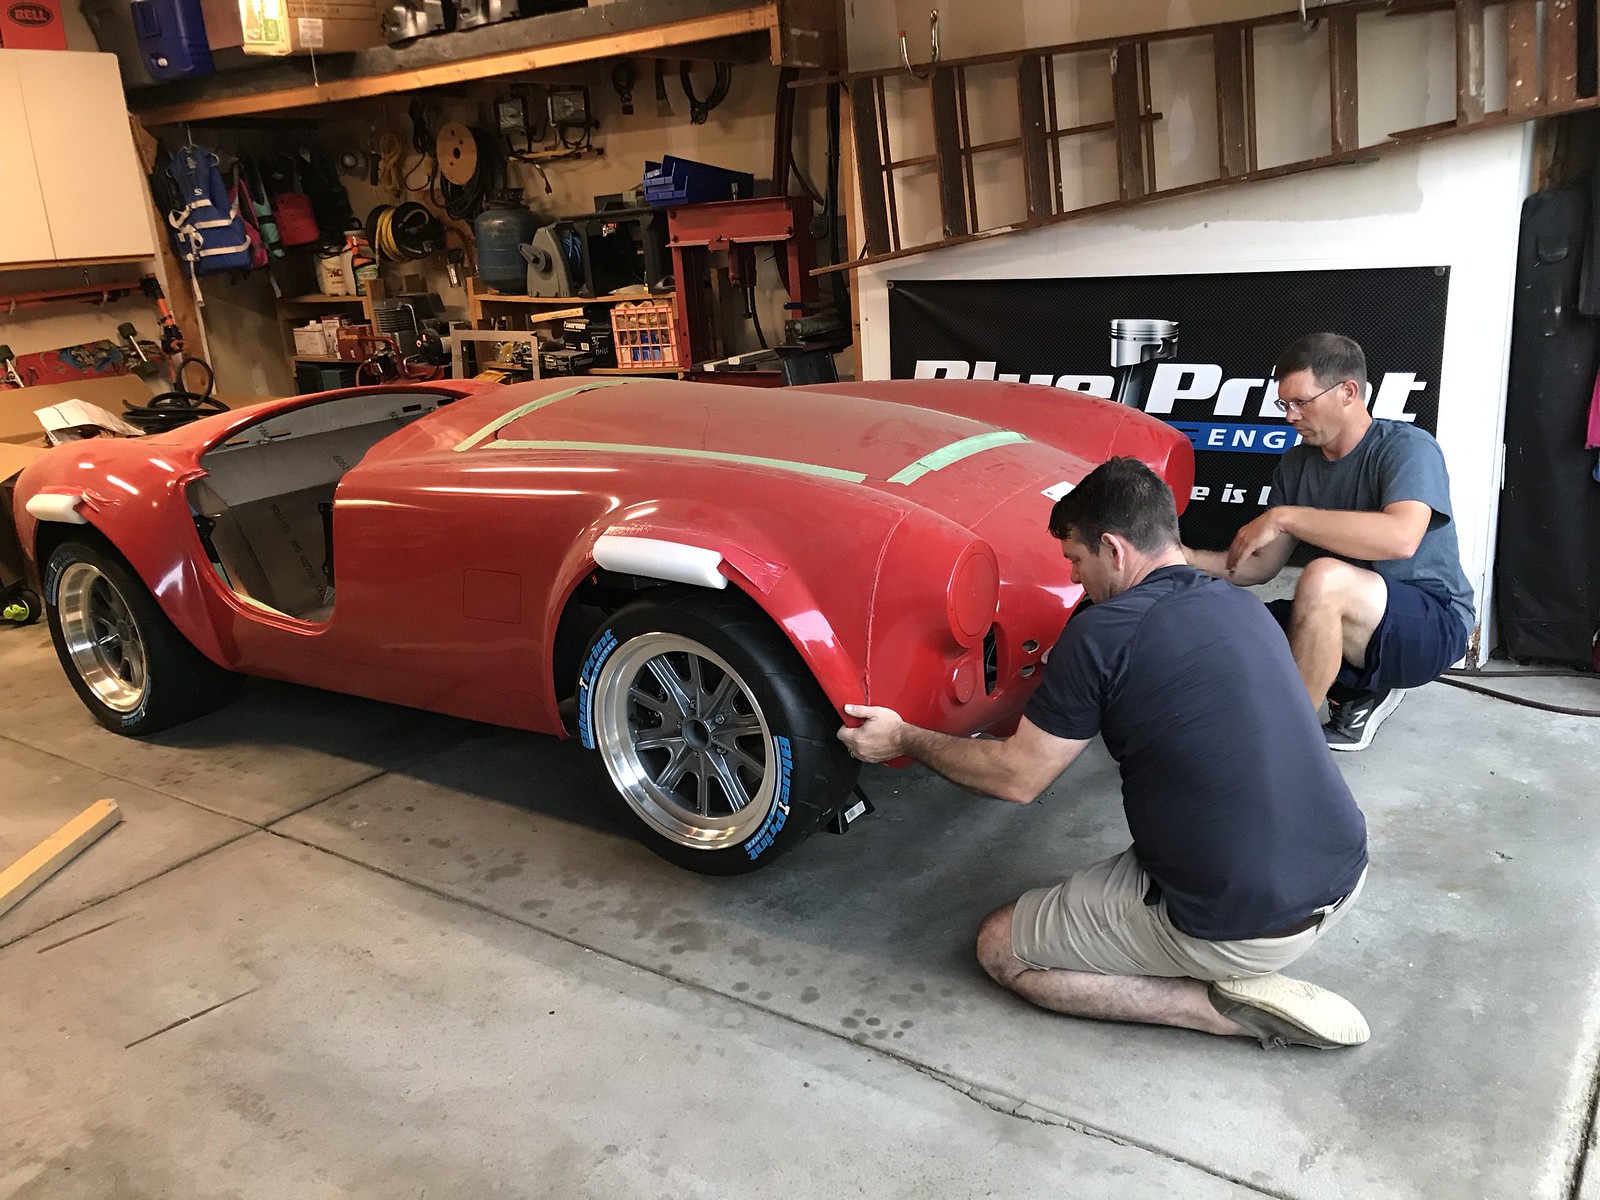
Last weekend I had some friends over to drop the body on the frame so I could determine the final mounting location for the dash. I followed the advice of fellow forum members in this post...Click here & Here
To locate the body properly, we added the bulb seal to the trunk side aluminum panels, the firewall, and the rear cockpit wall. We covered it with tape to avoid tearing it up.
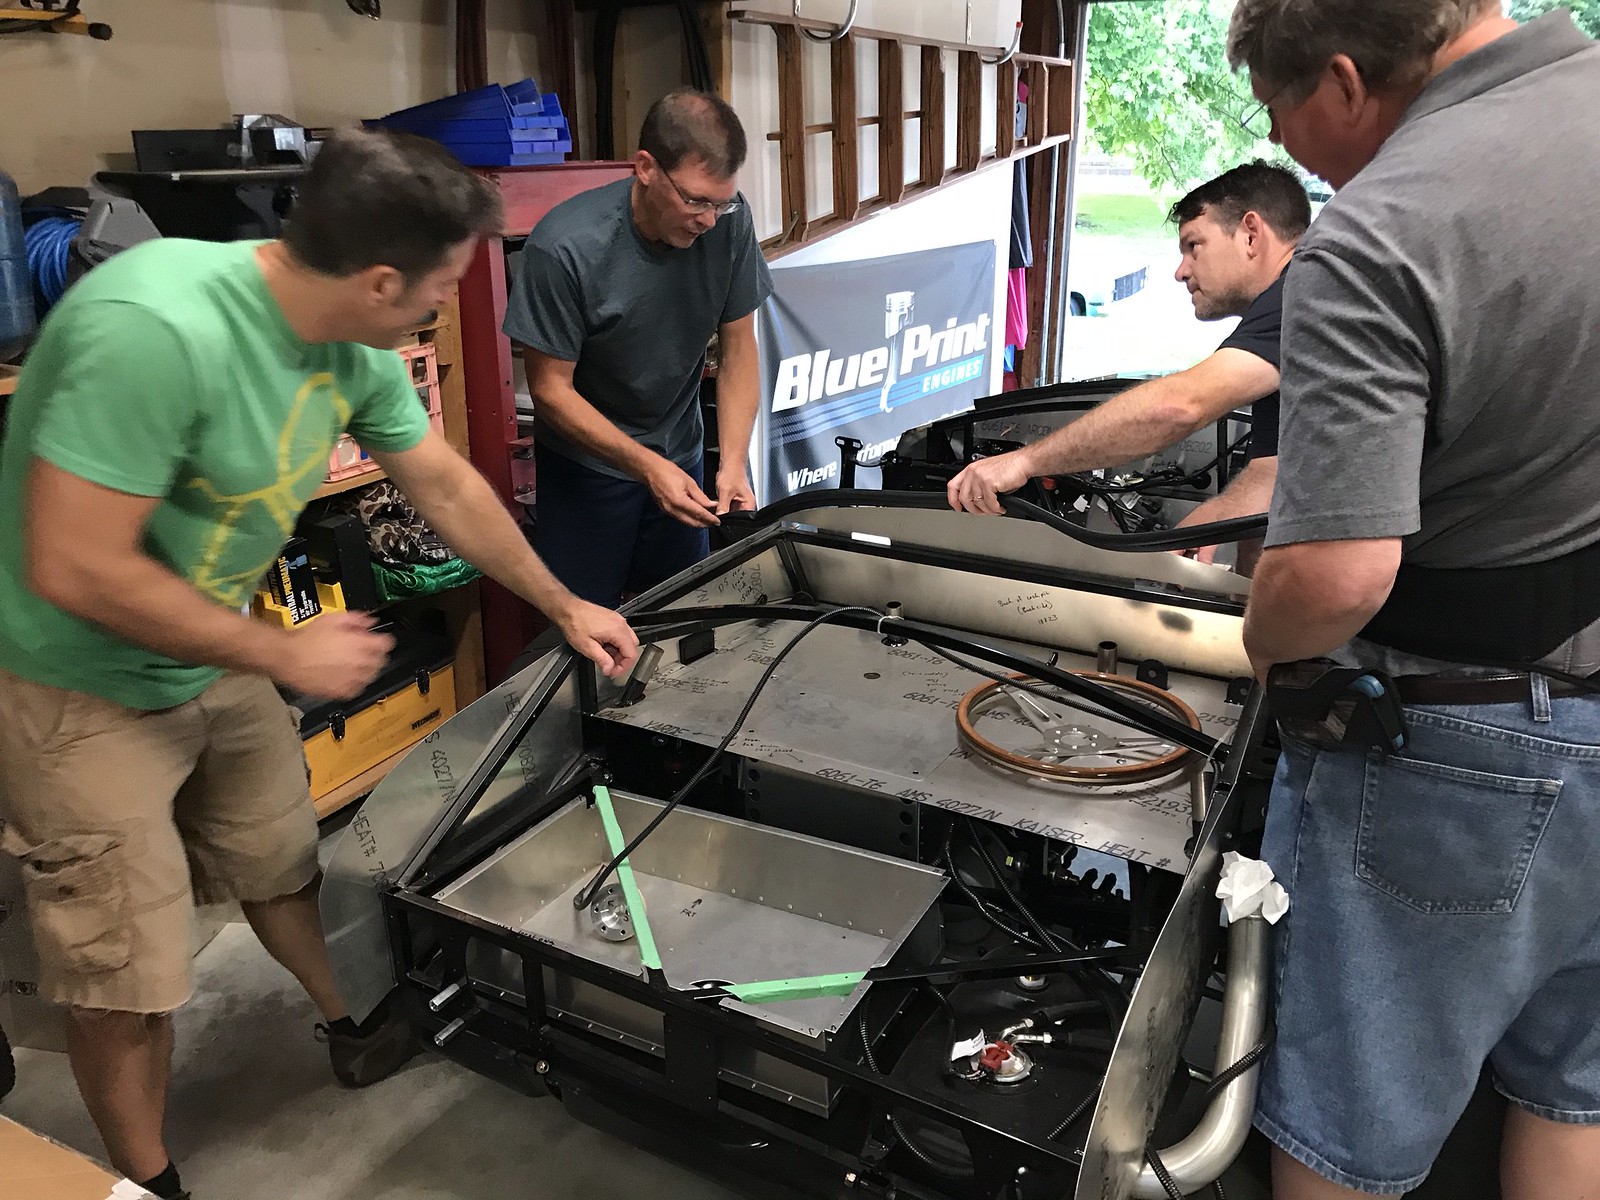
Then we lowered the body on and installed the bolts for the front and rear quick jacks.
We wiggled the dash into place. This works a lot better if you take the upper steering shaft out...

Here's where it ended up. I traced the bottom of the rolled edge onto the dash so I can locate the screws and brackets that mount the dash. I'm planning on having my screws visible on the dash. I also took measurements from the cockpit floor up to the bottom of the dash so I can confirm my location, once we took the body back off. I made sure that we centered the dash on the steering shaft.

Last edited by Yama-Bro; 09-03-2019 at 10:18 AM.
Started dreaming of a Cobra around 1987
Purchased Complete Kit 6/9/2017, Delivered 9/4/2017, Rolling Chassis 3/30/2018, Engine Dyno'ed 3/4/2022, Engine installed 8/27/2022
Click here for my build thread
Serial #9158
Design Engineer at BluePrint Engines
-
09-03-2019, 10:10 AM
#393
Senior Member
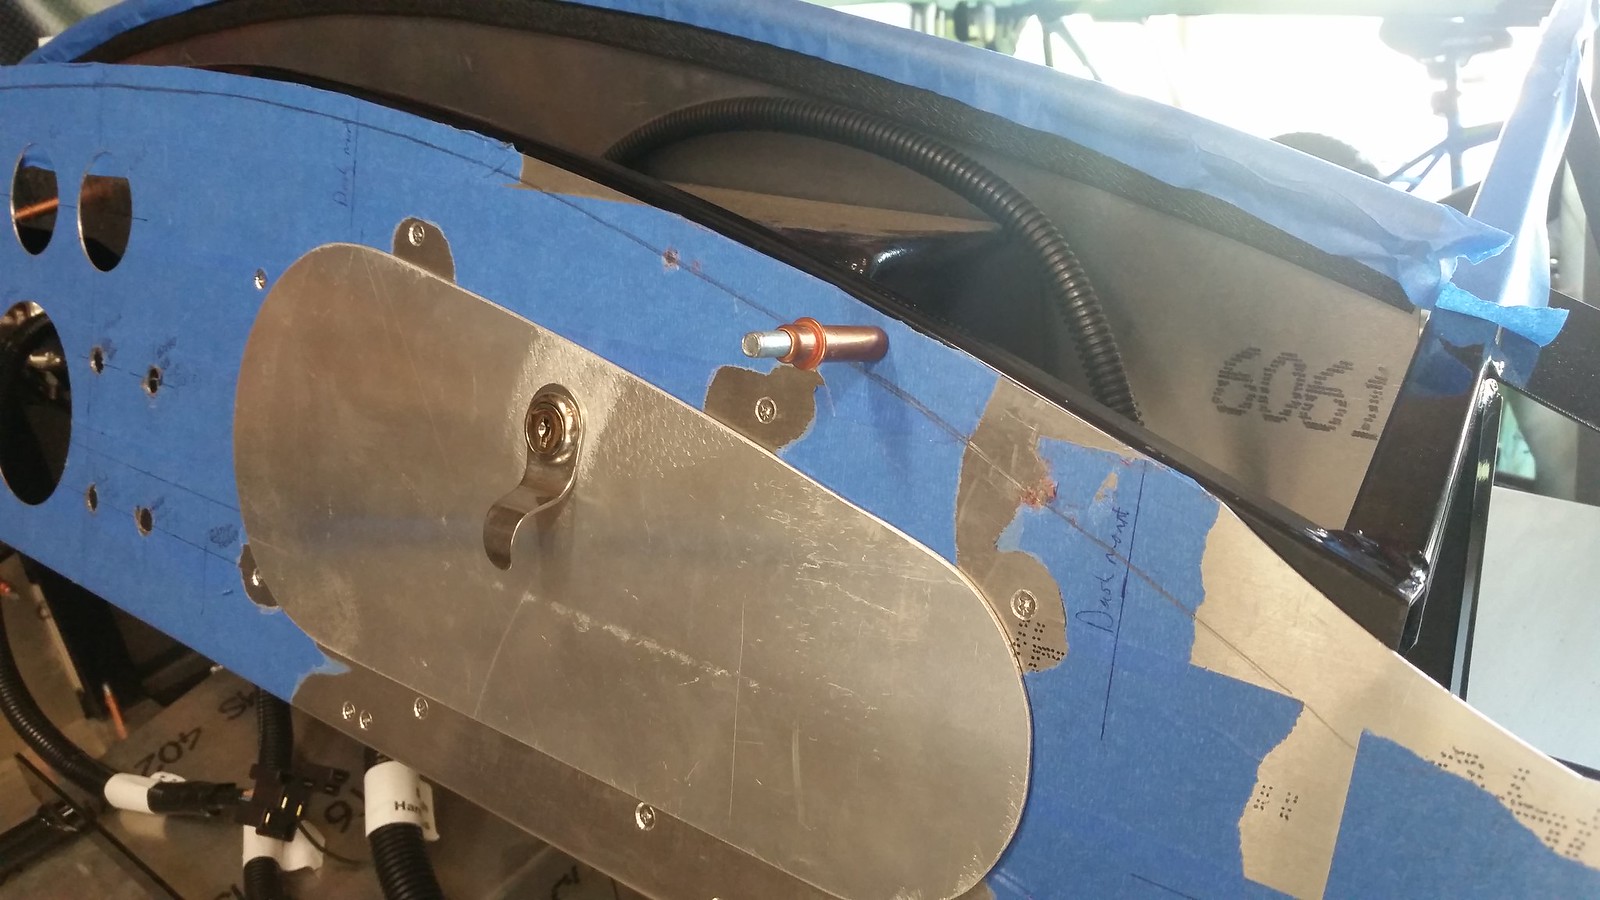
This weekend I located the dash using my measurements from last week. I marked the back of the dash where the tube overlaps the dash similar to what I did with the front with the body roll. I trimmed and bent the dash ends, and drilled some temporary mounting holes to hold the dash in place while I fabricate my dash mounting brackets.
This is after the body was taken back off. I drilled a hole on each end and added a cleco to hold the dash in place while I fabricate the dash brackets. You can see the pencil mark from the previous step just under the upper edge of the dash. That's how much the body hangs over the dash.
Here's the passenger side of the dash after I bent it. I used a coffee can to get the radius. I didn't bend it a full 90 degrees because I want it to tuck under the body and hide the hinges as opposed to bending back farther and attaching to the frame. Most guys just tuck it back like this. I also trimmed off 2.5 inches from this end of the dash for a better fit.

Here's the driver's side. Same deal as the passenger side, but I only trimmed an inch off this side.

Here it is from the cockpit with the bends...

Last edited by Yama-Bro; 09-03-2019 at 10:14 AM.
Started dreaming of a Cobra around 1987
Purchased Complete Kit 6/9/2017, Delivered 9/4/2017, Rolling Chassis 3/30/2018, Engine Dyno'ed 3/4/2022, Engine installed 8/27/2022
Click here for my build thread
Serial #9158
Design Engineer at BluePrint Engines
-
Post Thanks / Like - 0 Thanks, 1 Likes
-
09-03-2019, 06:50 PM
#394
Senior Member

Good progress. Two comments. (1) I guess I get you're trying to partially hide the hinges with the end of the dash. Not sure how effective or what difference that really makes since IMO they're not obvious at all back under the dash with the doors and body installed. Where you're covering really isn't all that visible. Not the best picture below, but gives an idea. I (like most) just tuck them behind the hinges. But mainly just make sure wherever you put them that the ends aren't touching the underside of the body. If they are, you'll interfere with the body to door fit. Doesn't take much. (2) There's no bulb seal on the rear cockpit wall between the trunk sides. That area should be left plain. With the carpet attached, tucks up under the body roll. The only bulb seal is from the trunk sides down to the door latch area on each side.

Last edited by edwardb; 09-03-2019 at 06:57 PM.
Build 1: Mk3 Roadster #5125. Sold 11/08/2014.
Build 2: Mk4 Roadster #7750. Sold 04/10/2017.
Build Thread
Build 3: Mk4 Roadster 20th Anniversary #8674. Sold 09/07/2020.
Build Thread and
Video.
Build 4: Gen 3 Type 65 Coupe #59. Gen 3 Coyote. Legal 03/04/2020.
Build Thread and
Video
Build 5: 35 Hot Rod Truck #138. LS3 and 4L65E auto. Rcvd 01/05/2021. Legal 04/20/2023.
Build Thread. Sold 11/9/2023.
-
09-03-2019, 07:13 PM
#395
Not a waxer

Yama,
No bulb seal across the top of the rear bulkhead:

Cheers,
Jeff
-
09-03-2019, 09:33 PM
#396
Senior Member
Originally Posted by
edwardb
Good progress. Two comments. (1) I guess I get you're trying to partially hide the hinges with the end of the dash. Not sure how effective or what difference that really makes since IMO they're not obvious at all back under the dash with the doors and body installed. Where you're covering really isn't all that visible. Not the best picture below, but gives an idea. I (like most) just tuck them behind the hinges. But mainly just make sure wherever you put them that the ends aren't touching the underside of the body. If they are, you'll interfere with the body to door fit. Doesn't take much. (2) There's no bulb seal on the rear cockpit wall between the trunk sides. That area should be left plain. With the carpet attached, tucks up under the body roll. The only bulb seal is from the trunk sides down to the door latch area on each side.
Originally Posted by
Jeff Kleiner
Yama,
No bulb seal across the top of the rear bulkhead:
Cheers,
Jeff
Point taken! Thanks for checking in on me and steering me in the right direction! I appreciate it!
Started dreaming of a Cobra around 1987
Purchased Complete Kit 6/9/2017, Delivered 9/4/2017, Rolling Chassis 3/30/2018, Engine Dyno'ed 3/4/2022, Engine installed 8/27/2022
Click here for my build thread
Serial #9158
Design Engineer at BluePrint Engines
-
09-08-2019, 09:26 PM
#397
Senior Member
I fabricated some dash mounting brackets yesterday. As most of you know, the kit is designed so that the dash is screwed directly to the frame and then the screws are covered up by the body. This works fine, but if you ever need to remove the dash, you have to remove the body first, which is not easy. With these brackets, the screws are lowered so that you can access them from the front of the dash and easily remove the dash with the body in place. The screws will be visible now, but I am fine with that, being that I've seen pictures of original cars this way and that's the look I am going for.
A close up of one of the brackets on the driver's side. I made the brackets from 1.5 x 1.5 x .125 thick angle iron. They'll be attached to the frame with rivets. I painted these after this pic, but unfortunately due to the high Nebraska humidity, drying has been slooow. I decided to use pal-nuts to thread the screws into. These allow for some adjustment and are easy to replace if stripped or damaged.

The same location with the dash in place. I sourced #10 stainless round head screws and flanged finishing washers from Mcmaster Carr for a decorative effect once it's done.

Overview of the dash with the brackets, screws and washers installed.

Here's a back view of the dash bracket near the glove box. When I designed the glove box, I had a general idea where my mounts would be, so I cut a clearance notch in the glove box. Here's how it ended up. Looks like I guesstimated fairly well. The other tight area was the screw on the driver's side closest to the door. I had to get one of the gauges out and double check there was no interference with the bracket.

Last edited by Yama-Bro; 09-08-2019 at 09:34 PM.
Started dreaming of a Cobra around 1987
Purchased Complete Kit 6/9/2017, Delivered 9/4/2017, Rolling Chassis 3/30/2018, Engine Dyno'ed 3/4/2022, Engine installed 8/27/2022
Click here for my build thread
Serial #9158
Design Engineer at BluePrint Engines
-
09-09-2019, 06:50 PM
#398
Very nice... really like the way you mounted the dash... Cool....
-
09-09-2019, 07:24 PM
#399
Looks good Yama Bro...I did roughly the same thing and it came out great.
-
09-11-2019, 09:07 AM
#400
Senior Member
Originally Posted by
BadAsp427
Very nice... really like the way you mounted the dash... Cool....
Originally Posted by
cv2065
Looks good Yama Bro...I did roughly the same thing and it came out great.
Thanks guys!
Started dreaming of a Cobra around 1987
Purchased Complete Kit 6/9/2017, Delivered 9/4/2017, Rolling Chassis 3/30/2018, Engine Dyno'ed 3/4/2022, Engine installed 8/27/2022
Click here for my build thread
Serial #9158
Design Engineer at BluePrint Engines


 Thanks:
  Likes:


 Reply With Quote


