-
Senior Member

Electrical Started...Oh, the little things!
Finally finished my firewood for this winter, so able to get back on the build. I'm starting electrical, so spending some time reading the F5 chassis and Ford Performance instructions, as well as several build threads.
I'm starting with the main Coyote power wiring in the engine bay. I also wanted to get the RF fuse panel installed. This meant I would need another powder coating session. When I get out all the supply/gear to powder coat, it's nice to be able to keep the momentum going and do as many parts as I can before putting it all away. So, I PC'd the fuse panel bracket, as well as all the hood and trunk hinge pieces. Takes some time, but worth it IMHO.
Before PC-ing the fuse panel bracket I test fit it, and drilled all of the 1/8" rivet holes. I found the front PS side of the RF fuse bracket overlapped (read interfered) with the 1/4"-20 socket head that bolts the rear bracket of the brake/clutch MCs to the 1/4" tube. Not a big problem to drill a hole, and incorporate it as a fastener for the fuse panel bracket.
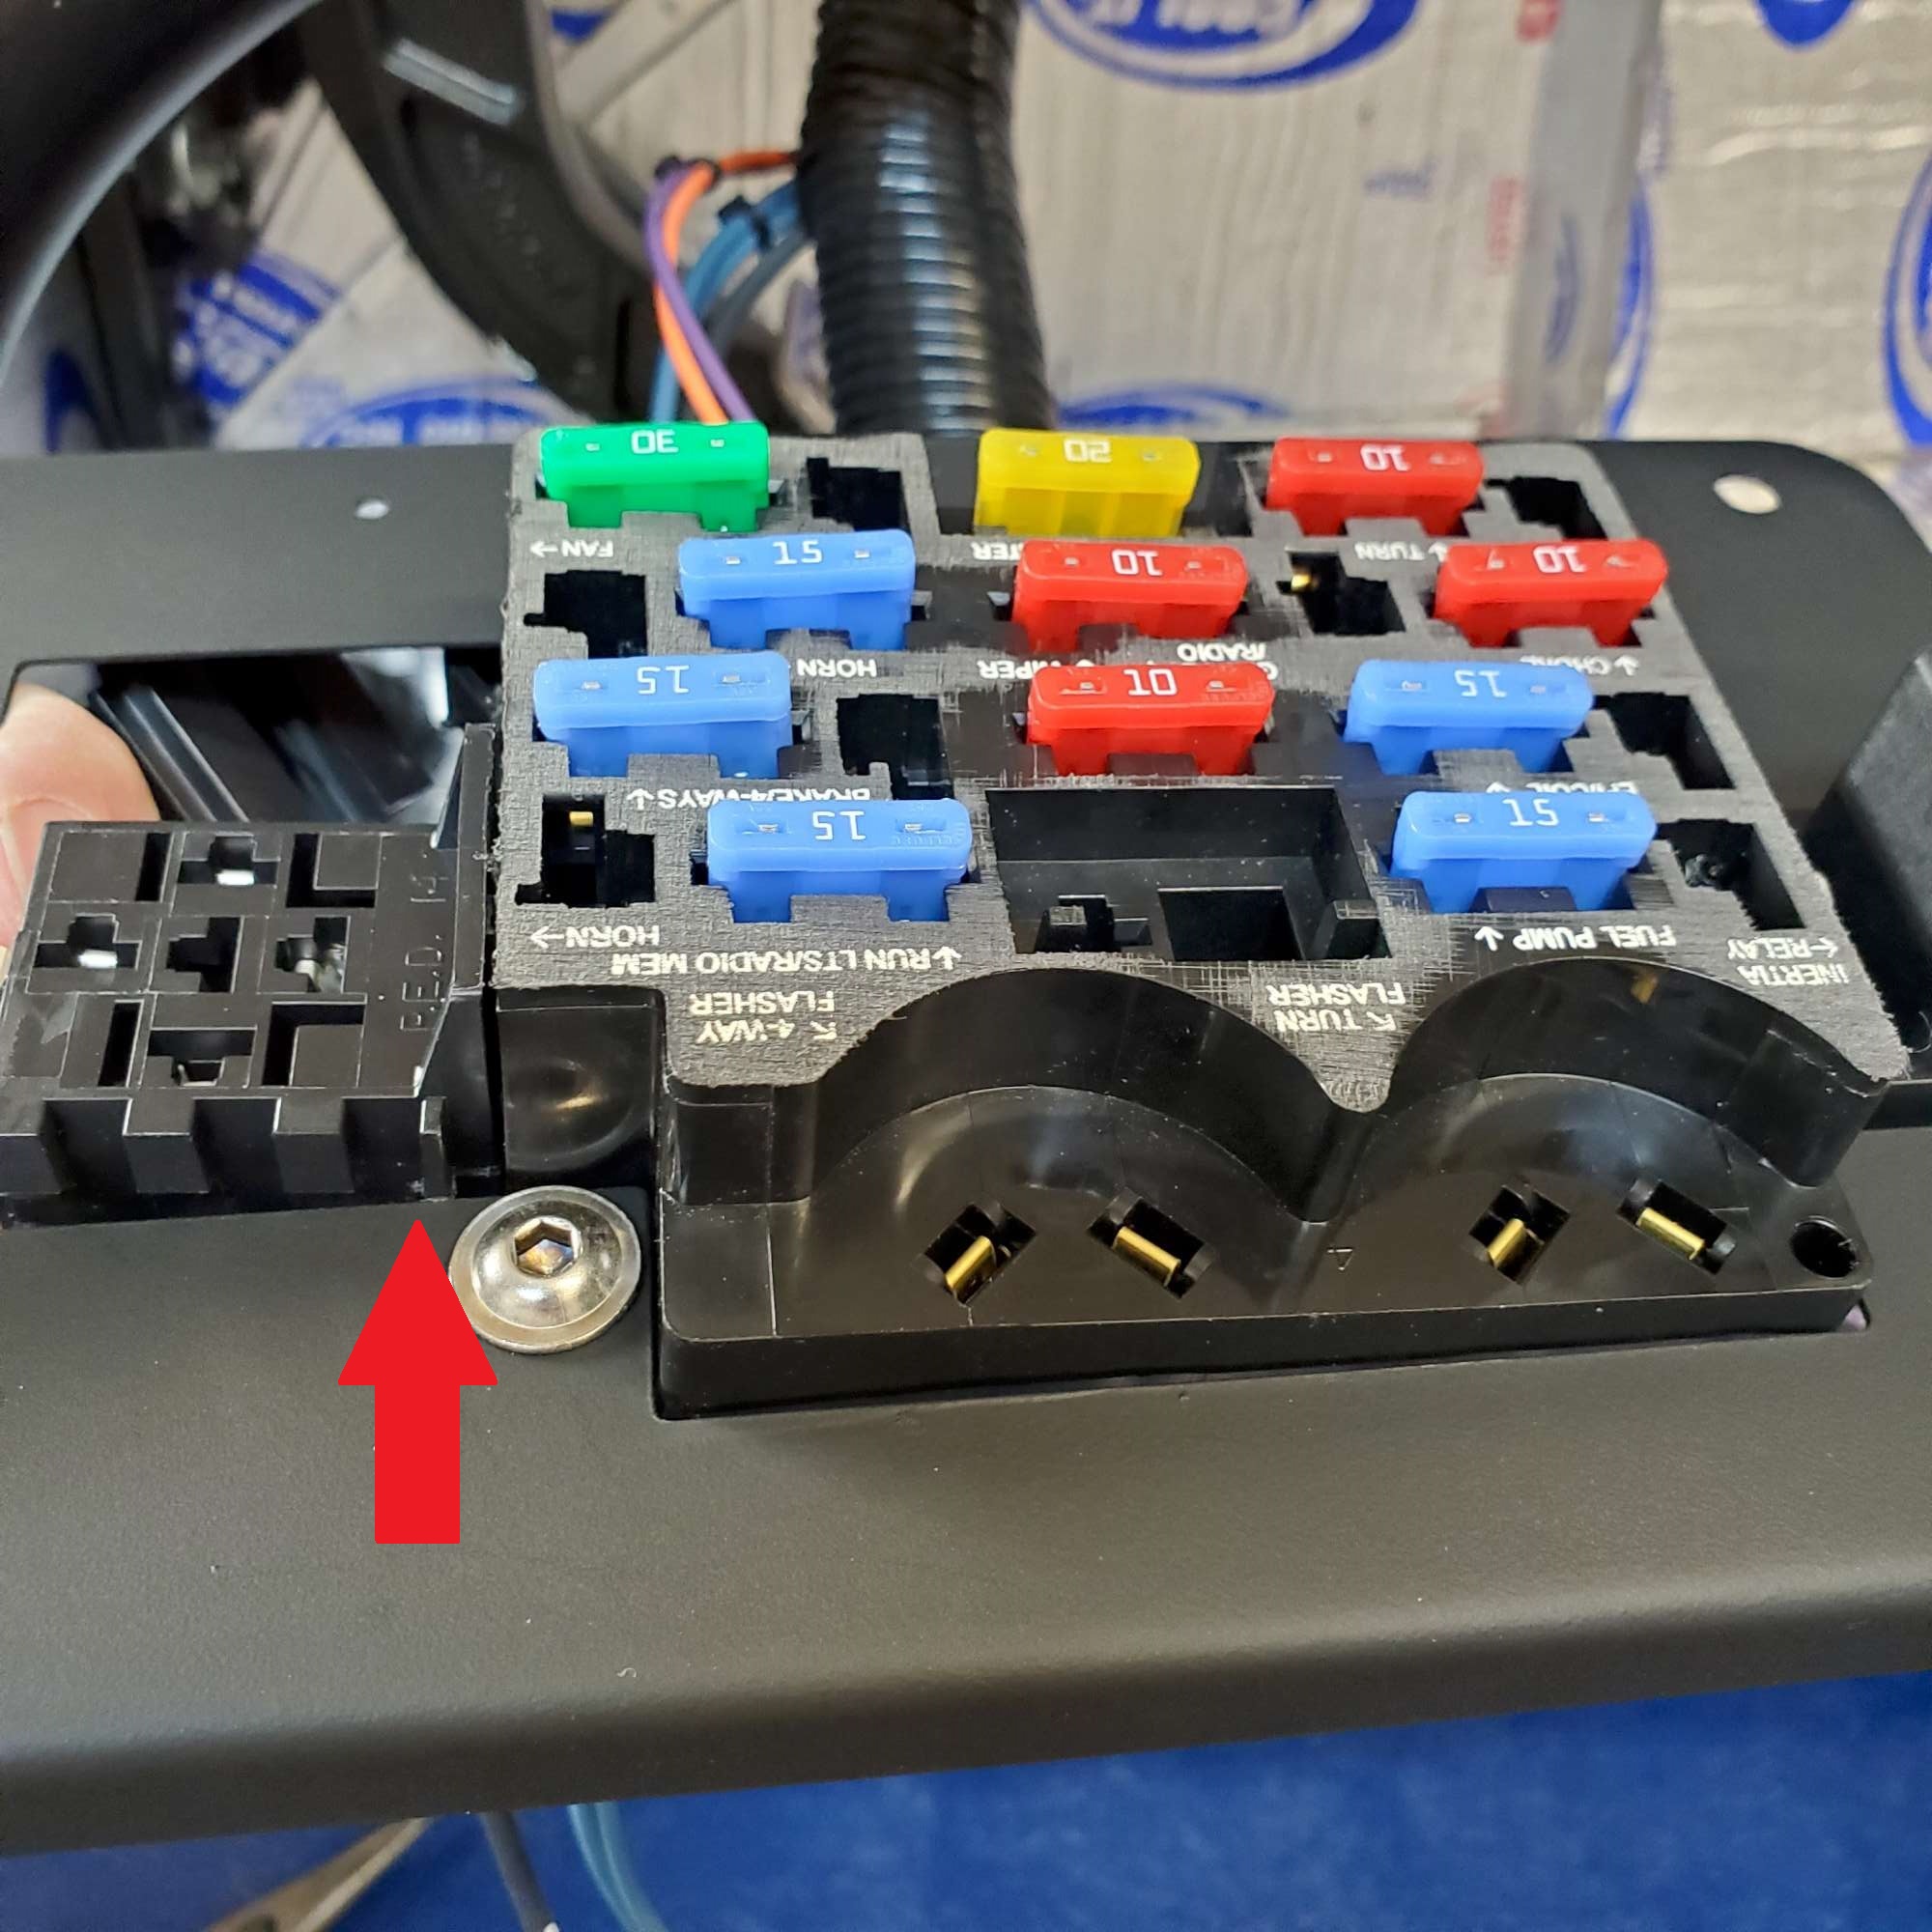
Thought by test fitting I was good-to-go. Nope. I missed something. The rear relay sockets (horn and fan) prevented the fuse panel from fully sliding/seating into the bracket. What to do? I disassembled it (again!), and removed just enough material from the side of the relay socket so it would fully seat.
Here's the point of interference:
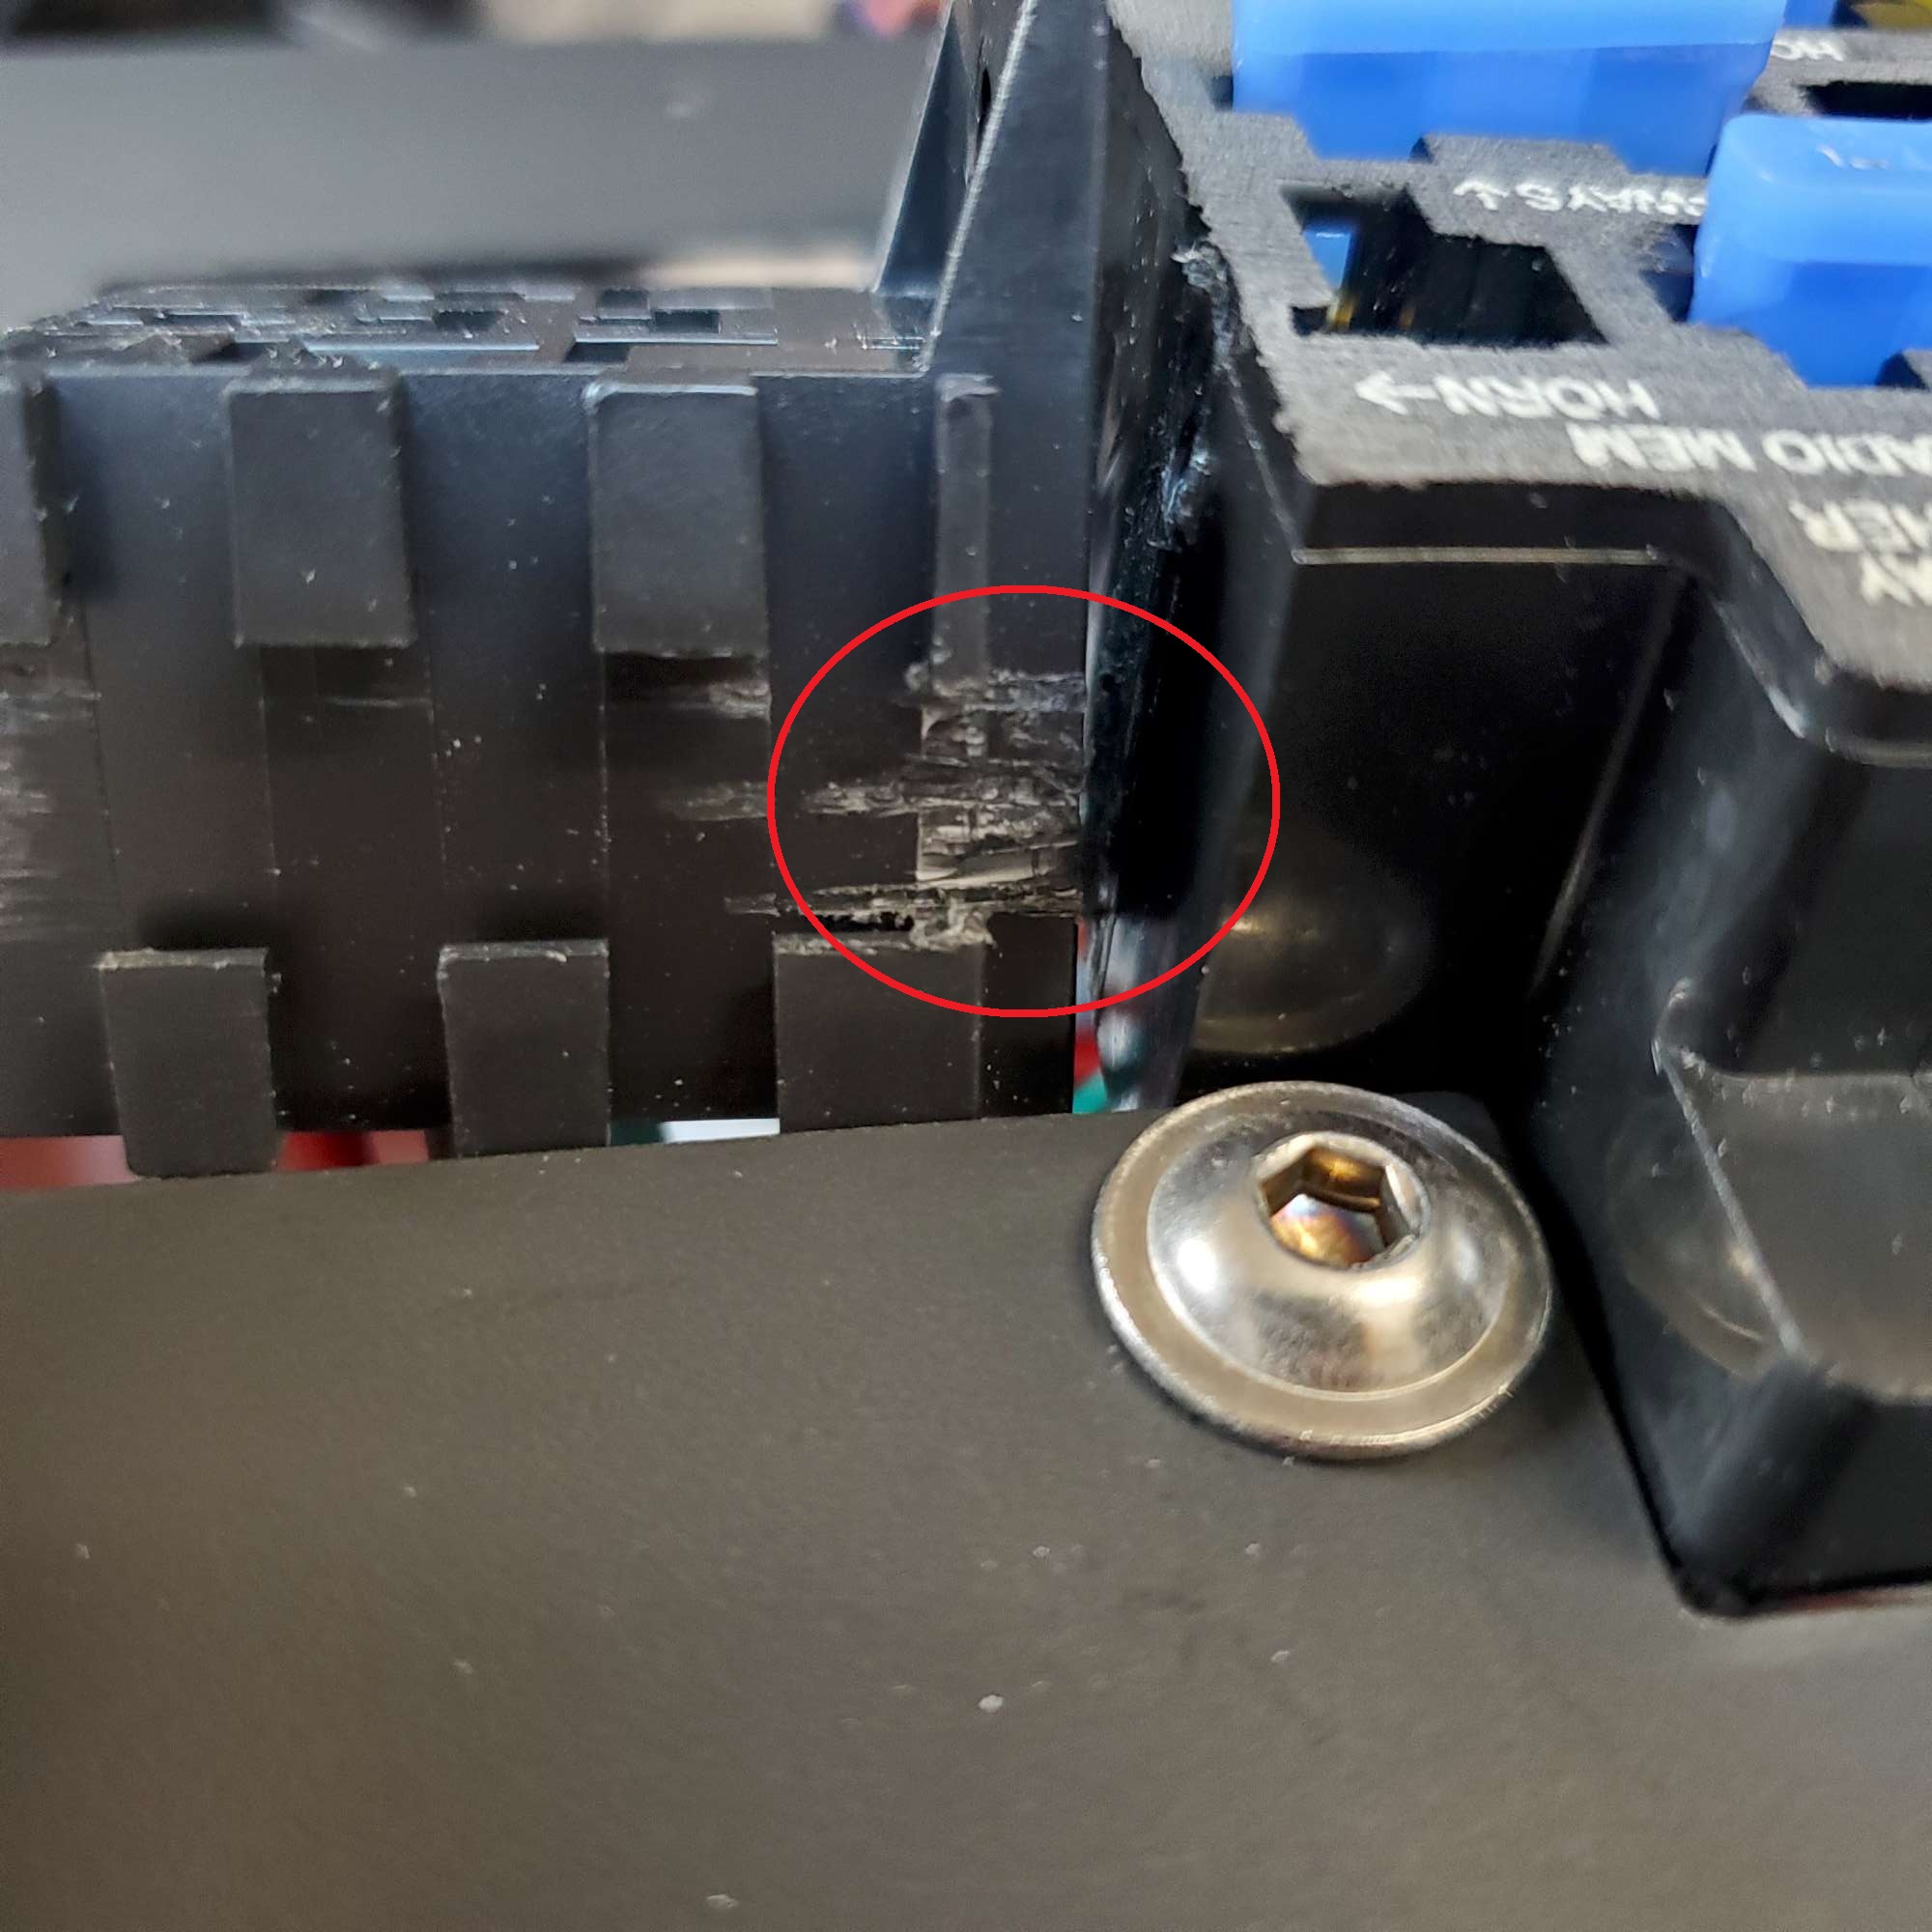
Close-up of the interference. You can see my first slice starting the material removal.

Material pretty much removed here.
Made it past that hurdle, so now it was just a matter of making it permanent with rivets. Not quite. The front mounting post of the panel interfered with the 3/4" tube. Sheesh! Again, not a huge deal. Was able to slice away a vertical strip from the post to clear the interference. You can see how I incorporated the 1/4"-20 socket head bolt as a fastening point (bottom left of picture). I liked that idea better than cutting a square out of the bracket to avoid it.

(You can see I nicked the PC in a few spots, but I ain't going to fix it today).
Finally, here is a homemade support bracket for the DS front corner. Have seen quite a few builders do this, as this corner is otherwise unsupported.

Today's update isn't really much of an update, but I sure feel good getting a couple little things off my chest. Thanks for "listening"!
A bit of frustration, but a "bad" day on the build is still a good day.
P.S. Coyote (Gen 3) computer, PDB, and Mega fuse mounted; picked up a battery and master batt cutoff switch, but not ready for pictures. Hope to finish that soon and update with pictures.
Last edited by 460.465USMC; 08-16-2021 at 10:31 PM.
Reason: Spelling
Chris
Coupe complete kit delivered: 4/22/24.
Build Thread. Coyote. T-56. IRS w/3.55. Wilwoods. PS. HVAC. Side windows.
MK4 Complete kit.
Build Thread Index. Delivered: 10/15/2020. Legal: 7/25/23. Coyote Gen3. TKO600 (0.64 OD). IRS w/3.55. PS. Wilwoods. Sway bars. This build is dedicated to my son, Benjamin.
Build Thread.
-
Post Thanks / Like - 0 Thanks, 1 Likes


 Thanks:
  Likes:


 Reply With Quote
