-
02-27-2022, 12:58 PM
#521
Senior Member


Originally Posted by
Mike.Bray

Do you know if there is a Tilton that is a direct replacement for the Wilwood? From the website it looks like a 75 series might be it. To my the Tilton MC is a better quality piece than the Wilwood so I might change them out during my build.
Unfortunately I am not sure on what MC Tilton would use for the Wilwood pedal box. You might try giving them a call to see if they can help you out or maybe someone else on can chime in. Definitely want to make sure it is the same cylinder diameter to keep pressure and throw the same as Wilwood.
-
Post Thanks / Like - 0 Thanks, 1 Likes
-
03-14-2022, 10:04 AM
#522
Senior Member
Winter projects
Hope everyone has had a nice winter and ready for the spring. In Nor-Cal we had a very wet Nov/Dec followed by a bone dry Jan/Feb which is not great for our drought but really nice for Cobra driving weather. I have been racking up some good miles on the car rapidly approaching 3k miles. Have done a few little items on the car and had a couple problems to resolve. My clutch MC started leaking and was replaced (not a fun process BTW) along with recently my starter solenoid stuck and smoked the starter. Replaced the starter and tested the ignition switch and all seems good now, not sure why this happened. I also added a heat shield/wrap to the new starter to avoid heat soak. Overall the car has been performing well, the Edelbrock PF4 EFI system has been spot on, starts up and runs good every time I drive the car. Have been very pleased with the EFI system and hopeful (fingers crossed) I continue to get good performance from it. As with all EFI systems they have computers/sensors and anything can happen.
Thought I would add a few photos to my build thread of some additional bling and final touches I have added to the car.
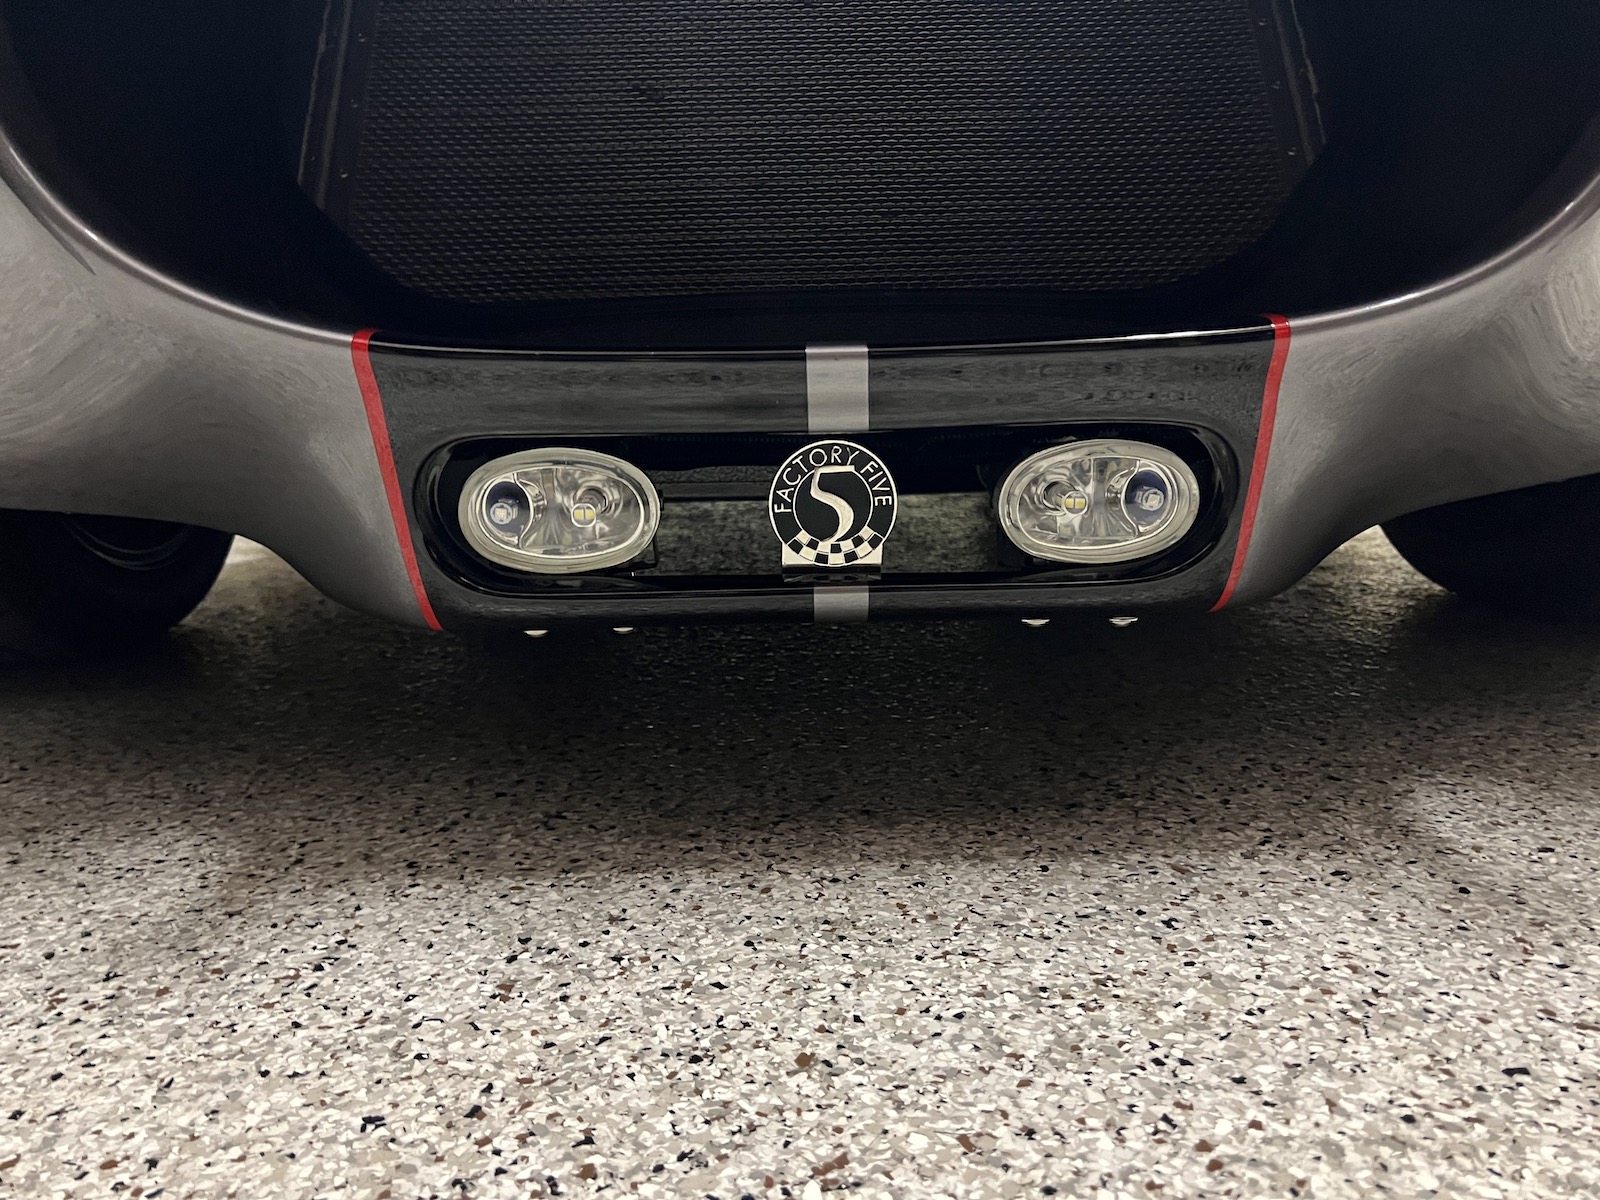
I wanted to purchase the Tangent light kit but they are no longer available. I ended up buying these similar fog lights on eBay, replaced them with LED lights and added the Factory 5 logo to complete the lower front section of the car. The fog lights use H3 bulbs for the driving light and T10 bulbs for the small outside bulbs (which can be colored). Below is what I ordered and they are working well, definitely a step up from the yellow-ish halogen bulbs.
T10 colored bulb: (I went with red to match my stripes)
https://www.amazon.com/gp/product/B0...e?ie=UTF8&th=1
H3 bulb:
https://www.amazon.com/BRISHINE-Extr...86&sr=8-7&th=1
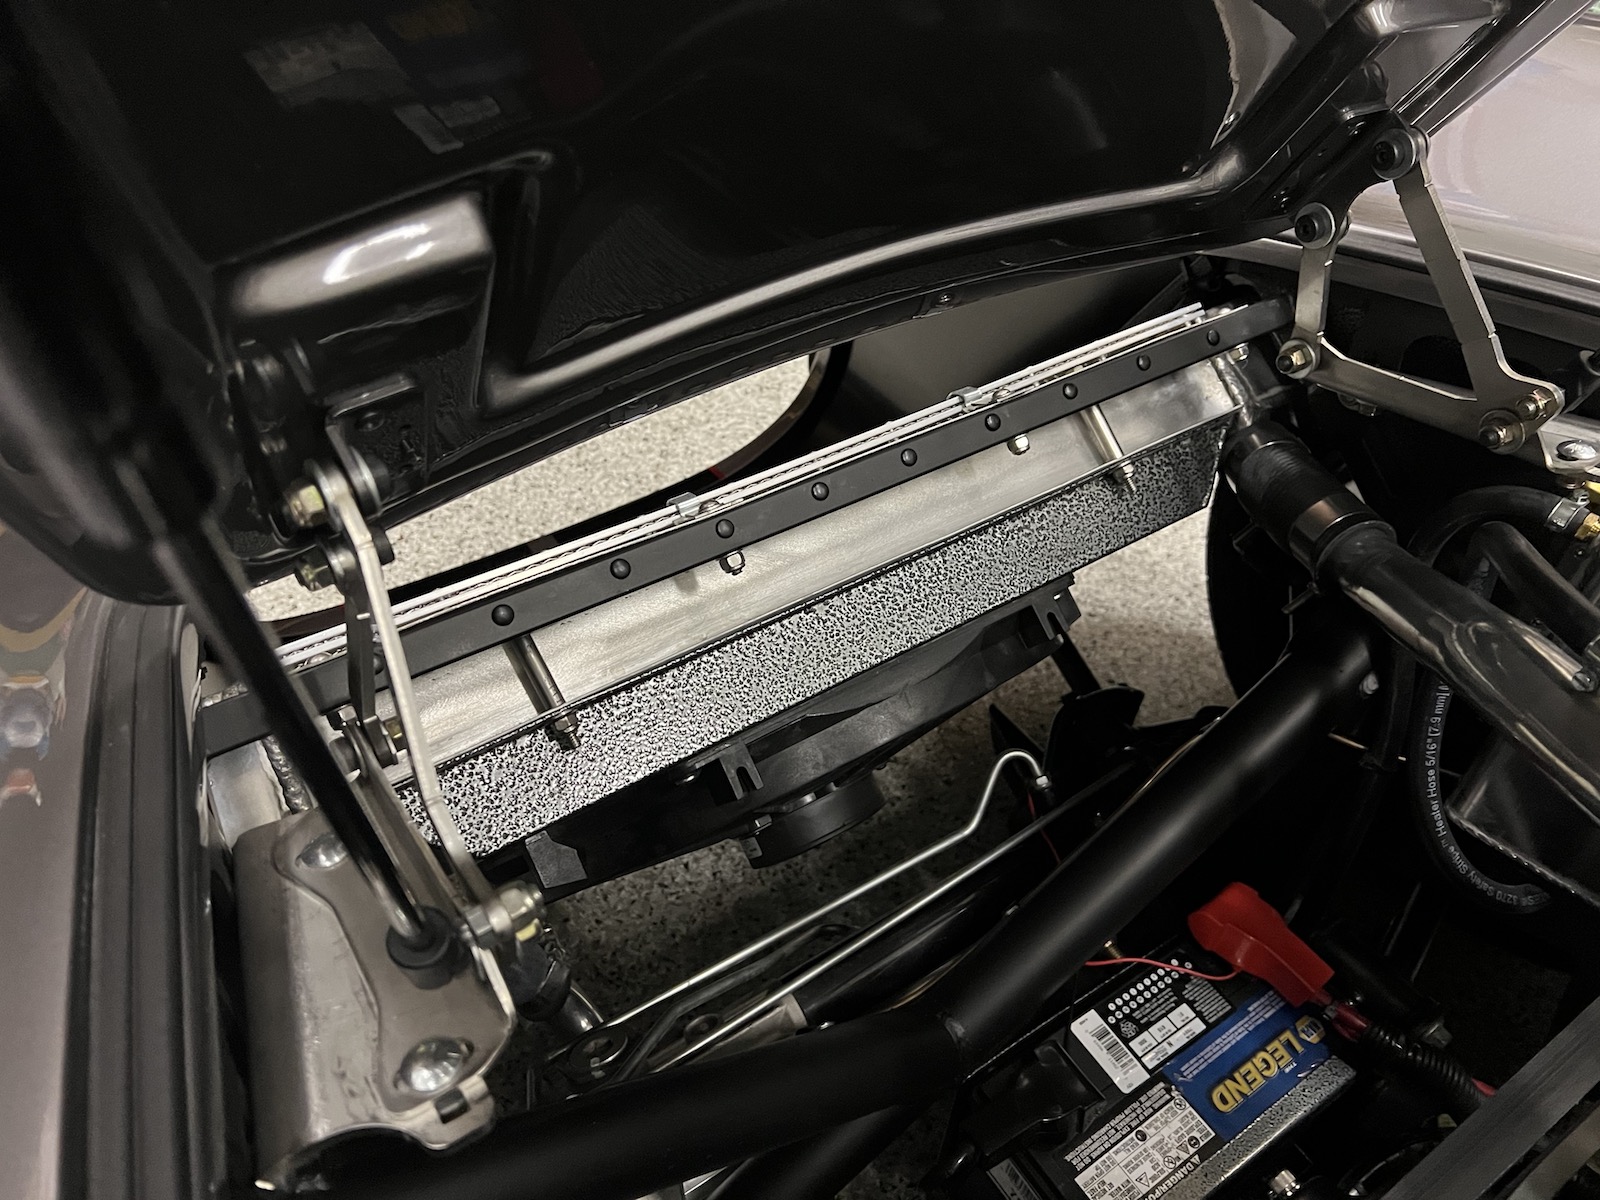
I am a big fan of Breeze products however I decided to remove the Breeze upper radiator cover. The cover seemed to prevent airflow from entering the engine compartment when the car is moving. It is a large area when removed, you do have the hood scoop but this really opens it up. Had a drive the other day in 73 degree weather and I can already tell the difference with the cover removed allowing much better air flow in engine compartment when driving. I am going to run it off this summer to see how it performs in warmer weather.
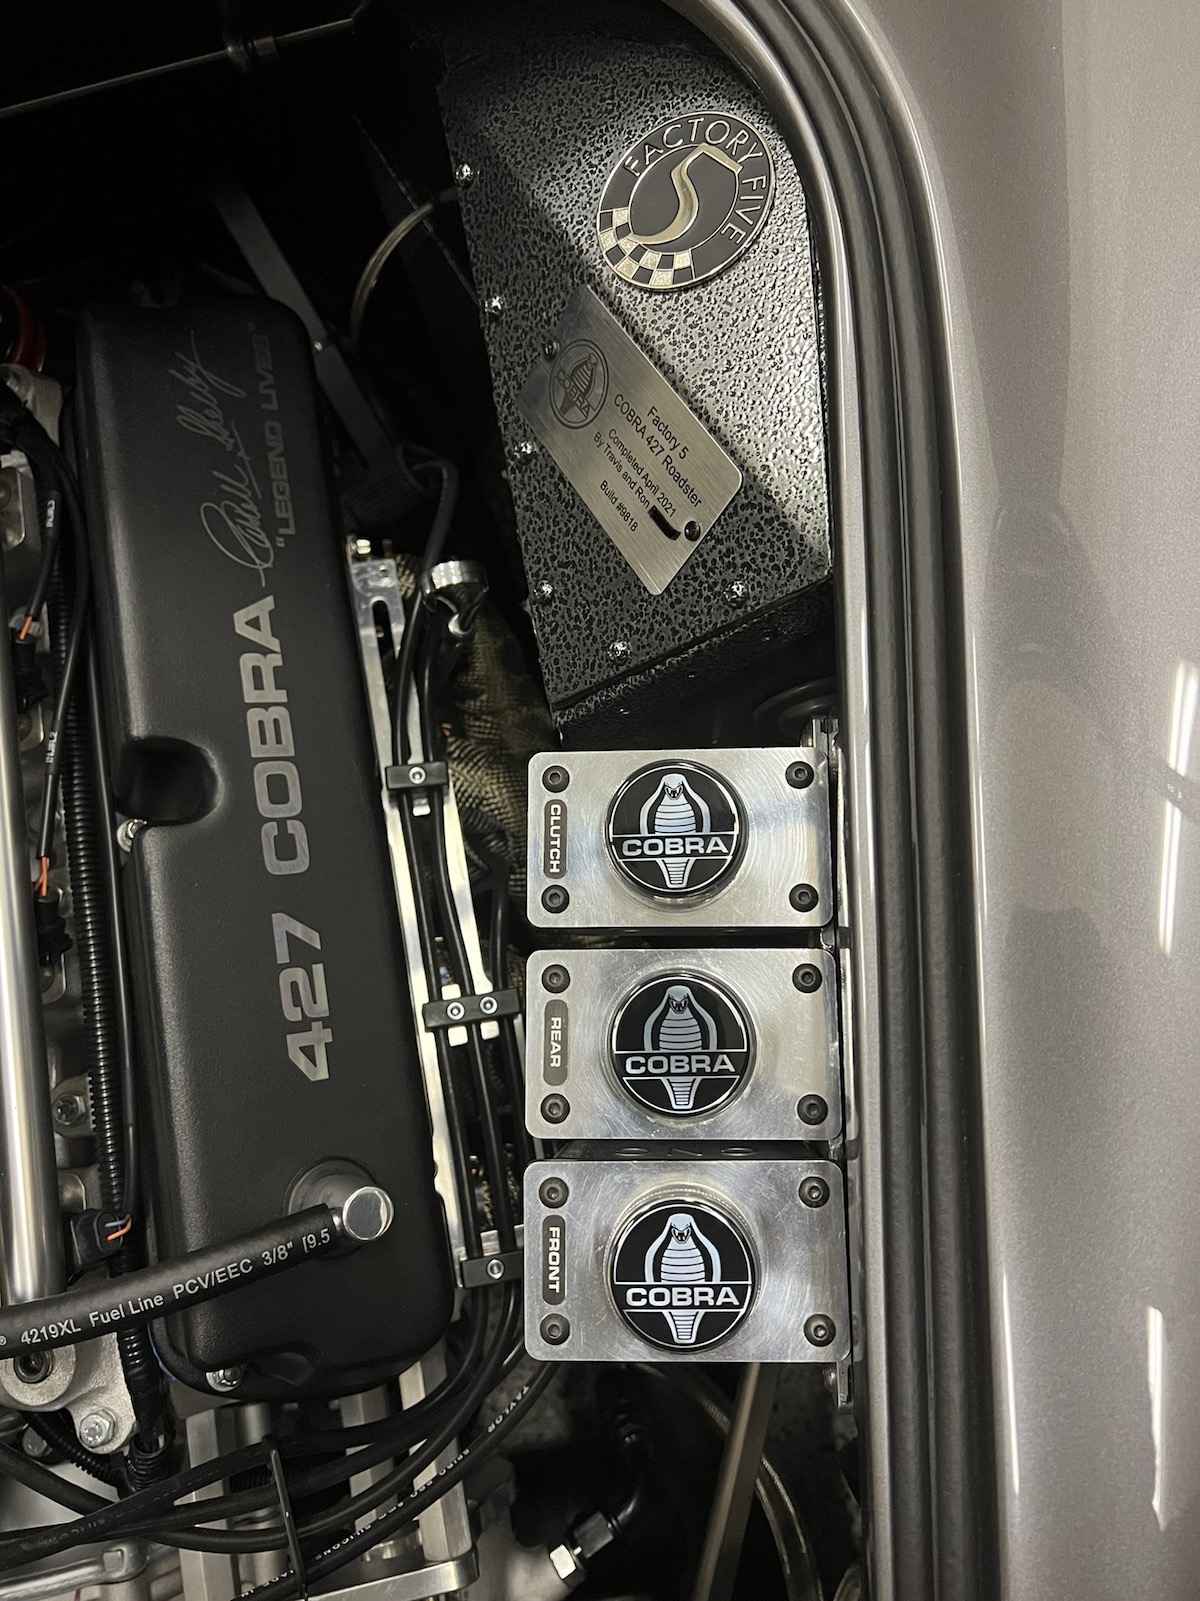
I added a few more bling items under the hood, some Cobra wheel caps on the brake reservoirs, completion ID plate and FFR logo. I built this car with my Dad so I wanted to have his name badged on the car with the build.
Also a few more final touches to my lower vintage toggle bezel, on/off indicators, Joe's Racing battery switch cover and Cobra coin emblem on my dash above my light switch. The Cobra coin emblem actually has some sentimental value unfortunately we had a member in our local Cobra group pass away of pancreatic cancer early this year and he had made these Cobra coins and often handed them out to people. We decided to all put them on our dash to remember Greg Bagwell RIP my friend. I also started wearing ear plugs, I must be getting old! I found the noise reducing plugs seem to be working well you can still hear the side pipe harmony but not quite as hard on the ears. I do have the Gas'n touring pipes but at 3k rpm+ it still gets hard on the ears.
Ear plug link:
https://www.amazon.com/dp/B07GYXJZRY...roduct_details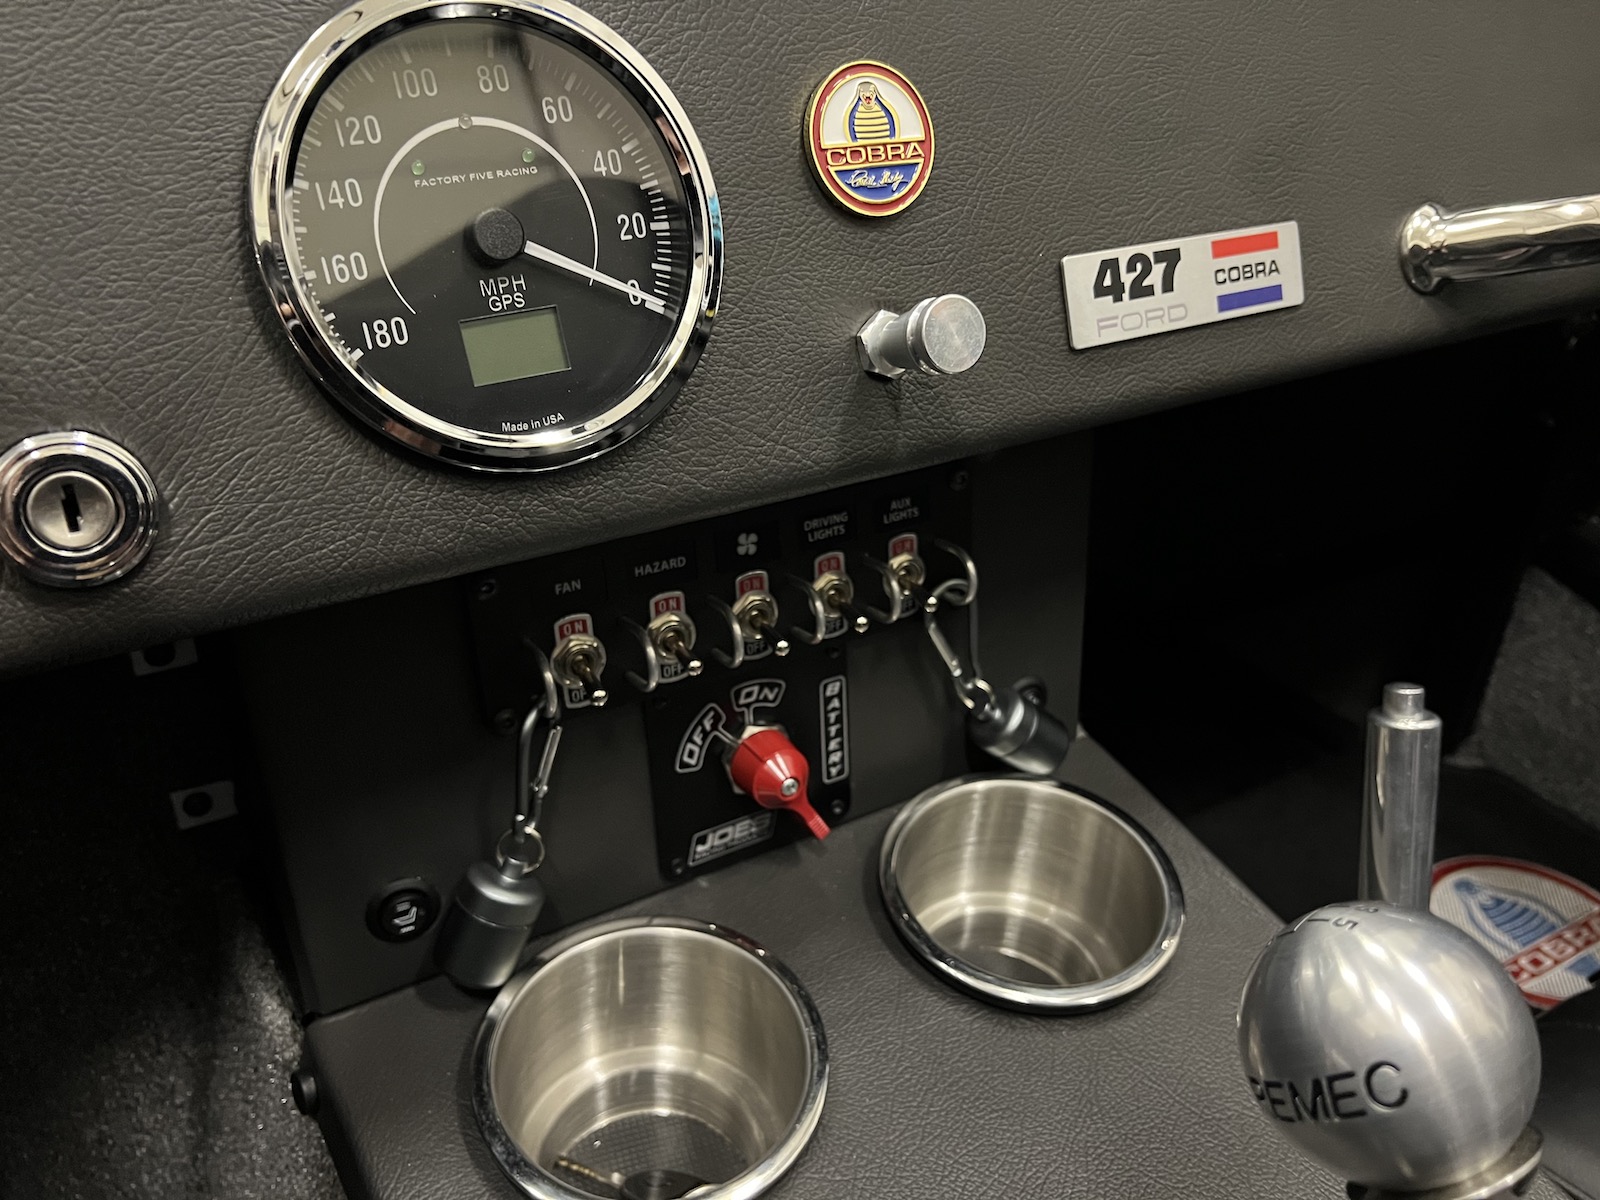
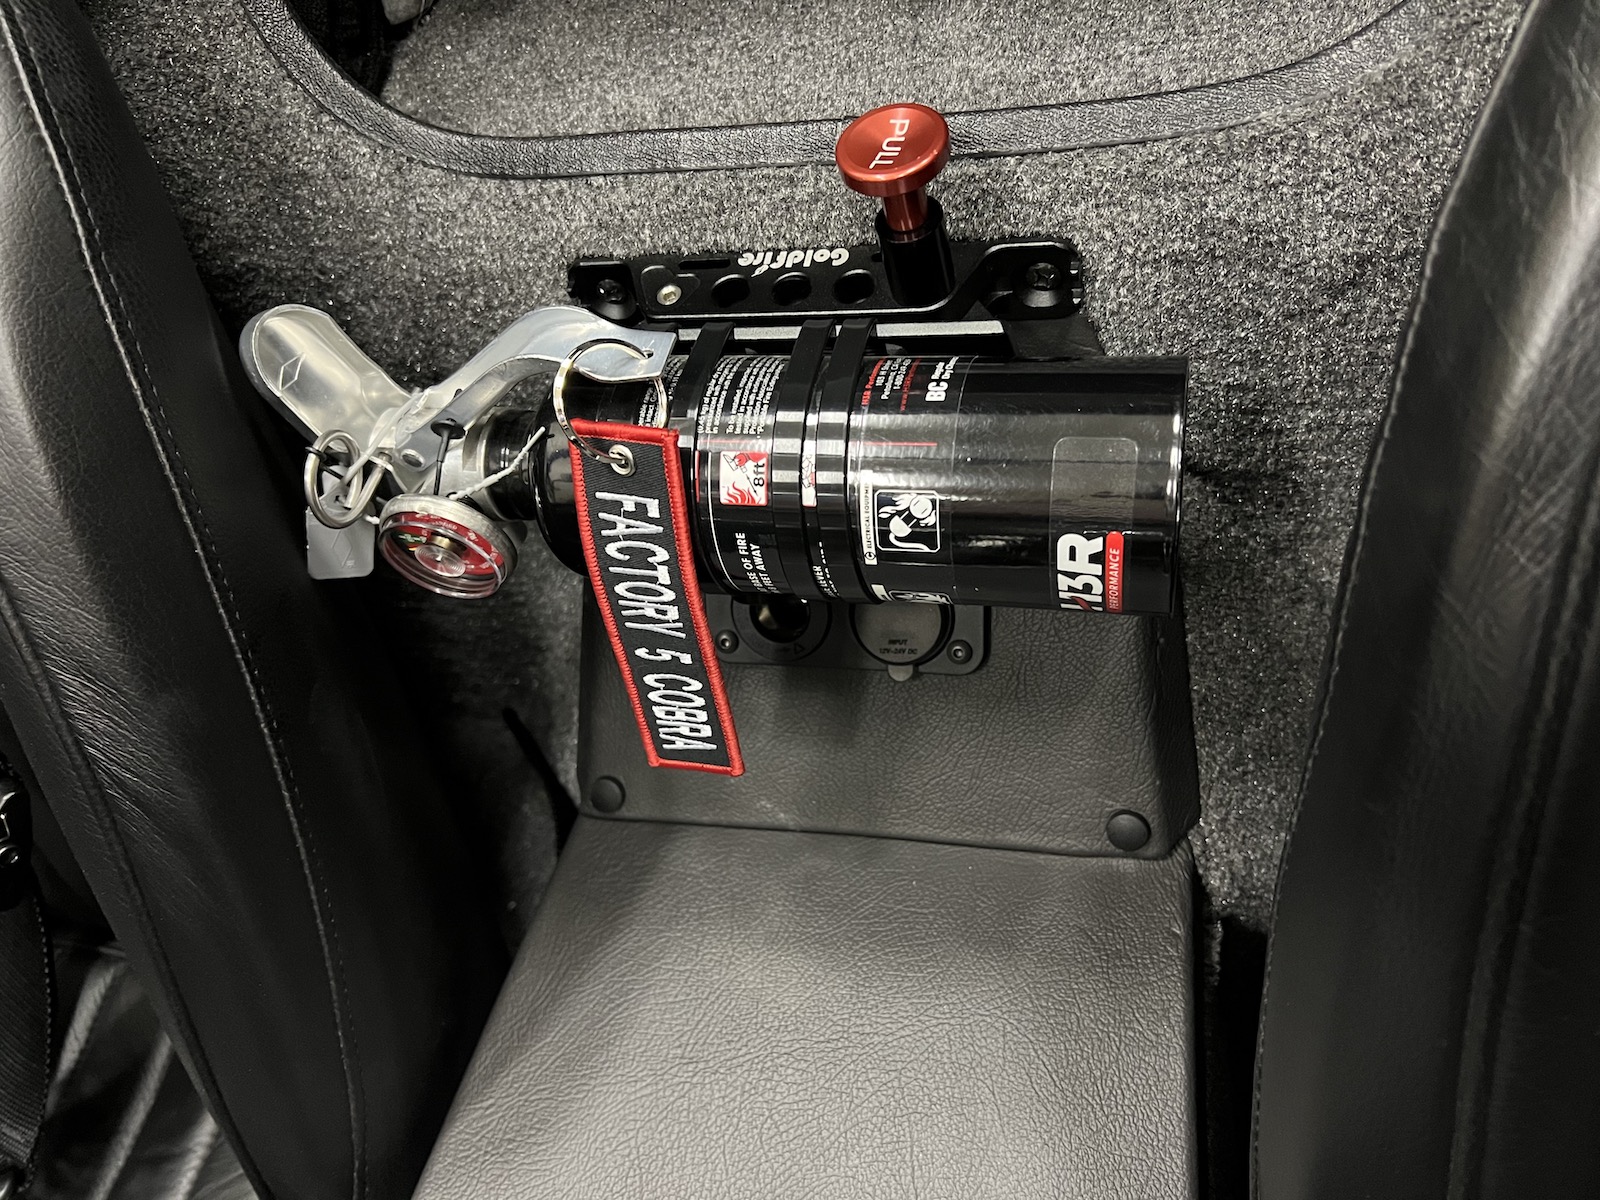
And a little fire extinguisher tag bling
The car never gets old to drive, I was thinking by now it would loose some of the fun factor but not the case still puts a smile on my face every time I turn the key. The sound of a healthy pushrod engine just never seems to get old. My wife and I really enjoy taking a Sunday afternoon drive together. Hope everyone is out enjoying there cars and if you are in the build process continue to make progress you won't be disappointed with the end result!
Last edited by Fman; 02-29-2024 at 10:36 PM.
-
Post Thanks / Like - 1 Thanks, 4 Likes
-
03-14-2022, 12:19 PM
#523
#10333 Complete Kit, Carbed 427w, TKX, IRS and many other upgrades
- Order Date: September 11, 2021 - 20th Anniversary of 9/11
- Delivery Day: April 1, 2022 - April Fool's Day
- First Start and Go-Kart: January 20th, 2023
- Graduation Date: July 4th, 2023 - Independence Day!!
- Legal Registration Date: October 4, 2023 - My Birthday!!
Visit my MKIV Build Thread (#10333)
-
Post Thanks / Like - 1 Thanks, 0 Likes
 Fman
Fman thanked for this post
-
03-14-2022, 07:38 PM
#524
Senior Member

Very nice! I can't wait for the nice weather to settle in here in Northern Virginia. Shouldn't be much longer.
MKIV Complete Kit #9822 l BluePrint 347 EFI l TKO600 l Power Steering l Heater/Defrost l
Build Thread
-
Post Thanks / Like - 1 Thanks, 0 Likes
Fman thanked for this post
-
04-07-2022, 11:45 PM
#525
Senior Member
-
Post Thanks / Like - 3 Thanks, 6 Likes
-
04-08-2022, 04:13 AM
#526
-
Post Thanks / Like - 1 Thanks, 0 Likes
Fman thanked for this post
-
04-08-2022, 04:45 AM
#527
That really looks good with your paint and other accents. Nice job.
-
Post Thanks / Like - 1 Thanks, 0 Likes
Fman thanked for this post
-
04-08-2022, 07:56 AM
#528
Senior Member

Thank you for the links Travis! Just ordered everything to swap mine out as well. Appreciate your effort and documentation.
FFR MK4 Roadster (9945) complete kit, delivered 12/4/2020, First start and go kart 5/7/2021. Legal 8/14/2021, Paint finished 7/18/2022 (Viking Blue). 347BPE CI, TKO600, Moser 8.8 3link 3.55, Halibrand 17x9 17x10.5, power steering. Carbon Fiber Dash. Carbon Fiber trans tunnel, adjustable Kirkey Lowback Vintage seats, Vintage gauges, RT drop trunk mod, FFmetal drop battery mod and trans tunnel, Forte front sway bar. Forte mechanical throttle linkage, RT gas pedal.
www.covespringsfarm.com
-
Post Thanks / Like - 1 Thanks, 1 Likes
Fman thanked for this post
 Fman
Fman liked this post
-
04-12-2022, 09:45 AM
#529
Senior Member

I did too, they fit much better. I bet the Rogers' are wondering why the spike in sales of turn signal lenses.
Bradley
Build thread - Mk4, Coyote, IRS, Wilwood brakes, old-style soft top and accessories.
The distance between "finished" and finished is literally infinite.
-
Post Thanks / Like - 0 Thanks, 2 Likes
-
04-12-2022, 02:26 PM
#530
Senior Member

Originally Posted by
Fman
Unfortunately I am not sure on what MC Tilton would use for the Wilwood pedal box. You might try giving them a call to see if they can help you out or maybe someone else on can chime in. Definitely want to make sure it is the same cylinder diameter to keep pressure and throw the same as Wilwood.
I'm going with Tilton 76 series master cylinders, they bolt right in place of the FFR supplied Wilwood units. A few quick calculations and I came up with:
TIL-76-750 0.75" bore for 6 piston Wilwood calipers (front brakes)
TIL-76-812 0.812" bore for Tilton hydraulic throwout bearing
TIL-76-1000 1.00" bore for 4 piston Wilwood calipers (rear brakes)
-
Post Thanks / Like - 1 Thanks, 1 Likes
Fman thanked for this post
Fman liked this post
-
04-12-2022, 09:53 PM
#531
Senior Member
Originally Posted by
Mike.Bray
I'm going with Tilton 76 series master cylinders, they bolt right in place of the FFR supplied Wilwood units. A few quick calculations and I came up with:
TIL-76-750 0.75" bore for 6 piston Wilwood calipers (front brakes)
TIL-76-812 0.812" bore for Tilton hydraulic throwout bearing
TIL-76-1000 1.00" bore for 4 piston Wilwood calipers (rear brakes)
Mike, Thanks for posting this for references. So far my new Wilwood I replaced has been holding up, I have about 1000 miles on it now. Fingers crossed!
-
Post Thanks / Like - 0 Thanks, 1 Likes
-
04-12-2022, 10:17 PM
#532
Senior Member
-
Post Thanks / Like - 0 Thanks, 4 Likes
-
06-19-2022, 10:54 PM
#533
Senior Member
Moroso catch can/Pro Flo 4 update
I am up to 3700 miles now on the roadster, I have had a couple people inquire about the Edelbrock Pro-Flo 4 EFI system and how it is treating me. Truth is I was really struggling what EFI system I was going to install when building my car, Sniper and FiTech were definitely also at the top of my list. I decided on the PF4 system and up to this point the PF4 system has been spot on. I installed the system, ran the wizard and used the 500 mile learning mode, set the IAC (idle air control), set base/advanced timing and that is all I have done to it. I have not had it tuned professionally the PF4 system by design was meant to be a set it and forget it system. Really have no complaints about it, car runs great and it starts right up every time I turn the key. I get no exhaust fuel smells and it runs clean. I am averaging about 13-15 MPG around town, for a 500+ HP 427 is not bad. I also did add a MSD box with the initial install which came recommended to do this by Gordon Levy. There are some features about the PF4 system I do really like... comes with a tablet, ECM is located out of the heat behind my dash, true multi port EFI, can adjust base/advanced timing on tablet, complete system which includes intake manifold (with two temp sensor ports), TBI, distributor, ECM and good installation instructions. Throttle response in this car is instant with zero lag. I do get some mild down shift exhaust popping between 1400-1100 rpms, I actually don't mind it so I have just left it alone. So at this point (knock on wood) I would have to definitely recommend the system for anyone interested in installing EFI on there SBF. Nothing is 100% so hopefully this system will continue to perform for the long term future.
https://www.speedwaymotors.com/Edelb...oaAlOHEALw_wcB
One other item I added a few months back is an oil catch can. I did some research on this and figured better to have one than not. I do have baffled good quality valve covers and I would consider myself to be more on the chill side of driving. I don't hammer the throttle much and usually just cruise the car. RPMs are typically 3-4k shifts. I was not sure how much oil (if any) I would collect from a catch can. To my surprise after checking after 500 miles I did have enough oil in the catch can to steadily flow out for a few seconds, probably 1-2 ounces. Not an overwhelming amount but enough to make me realize I am glad I do have the can installed and that oil is not going into my valves/intake system.
I went with a Moroso catch can, not the cheapest on the market but the quality is there. It is a nice can with a large holding reservoir and quarter turn ball valve to easily open and close for draining. Installation was easy and I as able to install it right next to my PS reservoir.
For anyone interested this is where I picked up the catch can:
https://www.amazon.com/gp/product/B0...?ie=UTF8&psc=1
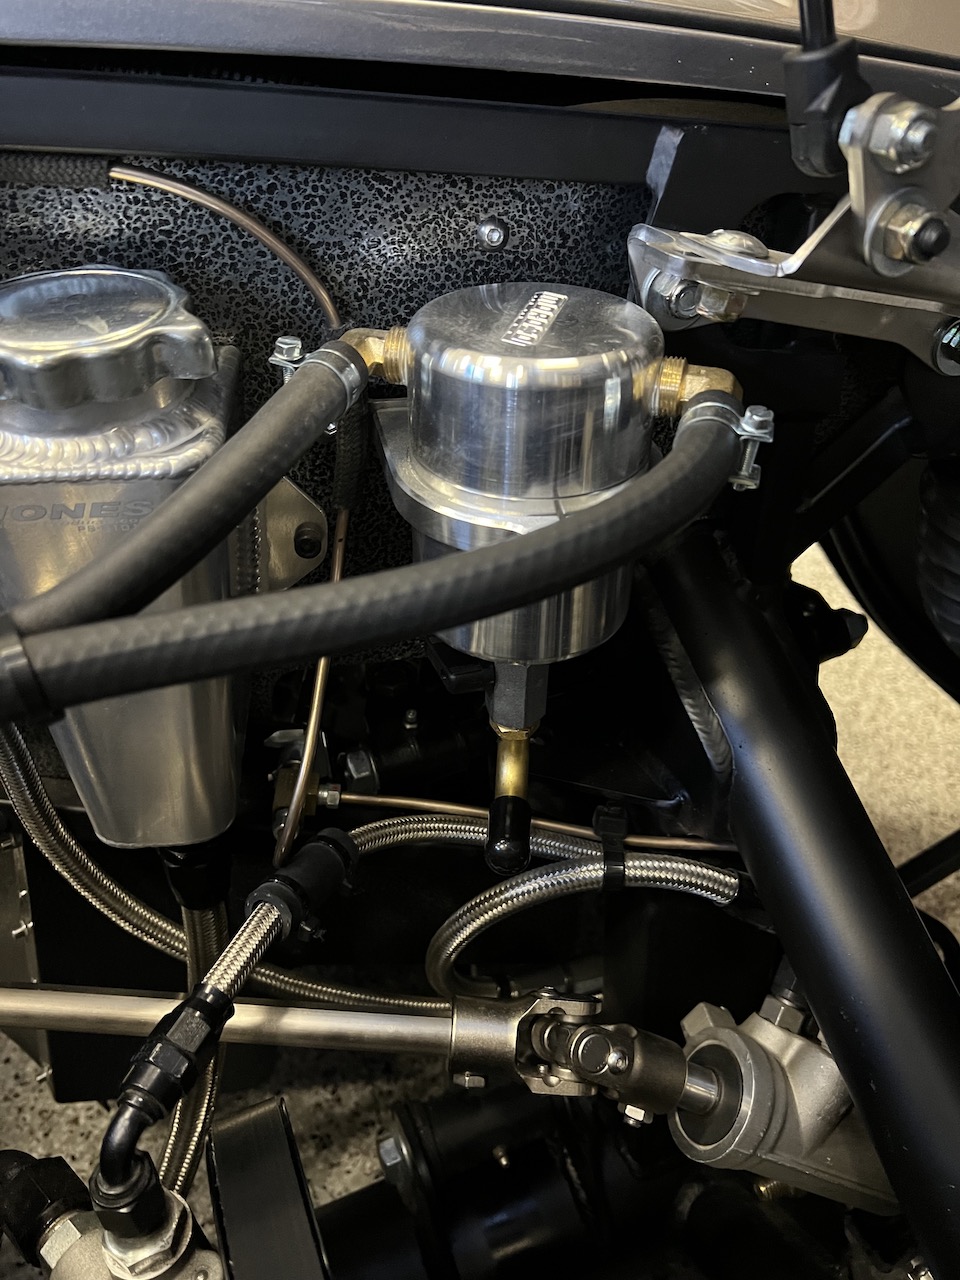
Installation of the lines goes from PCV valve to catch can back into your intake manifold, simple.

Happy motoring... hope everyone is out enjoying there roadster and if you are building one enjoying the build journey!
Last edited by Fman; 06-19-2022 at 11:09 PM.
-
Post Thanks / Like - 1 Thanks, 5 Likes
Moniz thanked for this post
-
06-20-2022, 07:49 AM
#534
Senior Member

Thanks for the update! I used the same oil separator with a 347 I built. Also added this adjustable PCV from ME Wagner http://mewagner.com/?p=444 . Made a difference in amount of oil in the separator and main seal seeping I had developed (resolved it). Thanks for the review of the PF4. I run a sniper and finally have it tuned right, but the PF4 is always whispering in my ear.
Geoff
Mk III 4880: 3:55 - 3 link, T-5, 347, Holley Sniper/dual sync distributor, Comp Cams XE274HR, Edelbrock RPM Heads
-
06-20-2022, 09:56 PM
#535
Senior Member
Originally Posted by
Geoff H
Thanks for the update! I used the same oil separator with a 347 I built. Also added this adjustable PCV from ME Wagner
http://mewagner.com/?p=444 . Made a difference in amount of oil in the separator and main seal seeping I had developed (resolved it). Thanks for the review of the PF4. I run a sniper and finally have it tuned right, but the PF4 is always whispering in my ear.
Geoff
Geoff, that PCV valve is trick, thanks for the link. I also noticed the PF4 system has jumped up in price about $500 since I installed mine 18 months ago. Even the Moroso catch can went up $20 in last couple months. No surprise I guess, par for the course with everything else getting more expensive.
-
08-10-2022, 09:21 AM
#536
Senior Member

Originally Posted by
Fman
Performance coatings finished my wheels this week, another perfect PC job from them! highly recommend them... my son talked me into going with gloss black I was a hesitant at first but I have to admit I am liking the look of them mounted up. I had them mounted up at Americas Tire Co. today those guys always do a good job, great customer service and have good pricing. I guess I officially have a rolling chassis car now or at least close to it. One thing for sure my IRS and front end is way out alignment, I am going to need to do some research on this on how I get it "close" enough for go-karting down the road before I can get it to alignment shop once the car is finished.
I was also able to install my Powerstop brake kit for the front end with drilled and slotted rotors and upraded pads. They claim 30% better braking over stock Mustang GT setup, time will tell. It is definitely affordable well priced upgrade and I do think the rotors look a lot better than the factory oem setup. Hoping to see the rear kit arrive next week.
Powerstop front brake kit, anyone interested here is link to where I purchased.
https://www.summitracing.com/parts/PWR-K1301-26
Just double checking the p/n of the power stop kit you purchased. When i add it to my summit cart and confirm fitment, the K1301-26 comes back as not compatible with a late 90s mustang GT front brakes. I thought the complete kit used the front brakes from that era mustang - is that the wrong assumption? Thanks!
-
08-10-2022, 09:26 AM
#537
Senior Member
Originally Posted by
mmklaxer
Just double checking the p/n of the power stop kit you purchased. When i add it to my summit cart and confirm fitment, the K1301-26 comes back as not compatible with a late 90s mustang GT front brakes. I thought the complete kit used the front brakes from that era mustang - is that the wrong assumption? Thanks!
This is the correct Power stop kit for the Mustang GT brakes that come from FFR. I believe the FFR kit is from a 2015 Mustang GT not late 90's but I could be mistaken.
-
Post Thanks / Like - 1 Thanks, 0 Likes
-
01-16-2023, 07:02 PM
#538
Member

Hey Travis
Love the build thread and have been stealing ideas for my own build (#10268)
Question for you regarding your Fragola fuel lines. Do you remember roughly how much line you used? I am looking to order mine ASAP and with being in Canada I don't want to under order and have to pay the very high shipping twice....
Thanks again for documenting everything!
Braden
-
01-16-2023, 08:14 PM
#539
Hi Braden
I agree this a great build thread...I intend to copy some of his ideas...as well as your user name for my build! (Off topic: that was such a darkly inspirational song for a kid like me who loved to escape by driving) 
Craig C
-
01-17-2023, 07:32 PM
#540
Senior Member
Originally Posted by
red.barchetta
Hey Travis
Love the build thread and have been stealing ideas for my own build (#10268)
Question for you regarding your Fragola fuel lines. Do you remember roughly how much line you used? I am looking to order mine ASAP and with being in Canada I don't want to under order and have to pay the very high shipping twice....
Thanks again for documenting everything!
Braden
Braden, thanks for the kind words... I took just about everything on my build thread from others on this forum so can't take credit for much of it. I was trying to find my receipt for the Fragola fuel lines and I can't locate it anywhere. I think it was 20 ft but I can't confirm this. With Pro Flo 4 EFI I had to double it up because of the return line needed. If you are running a carb you will not need the second return line. Maybe someone else can chime in and help you out on the length needed. Whatever you do make sure and buy name brand PTFE fuel line (Fragola is really good) and not some off brand on Amazon.
-
01-18-2023, 12:08 PM
#541
Senior Member

Braden, I ordered my braided stainless fuel lines from Breeze (with fittings). He provided 23' with the kit. This was enough for supply and return lines, and a few feet between the fuel pressure regulator (mounted on lower center of firewall) and the Coyote fuel rail (PS of motor). I ended up with a couple feet left over. Hope this helps.
Chris
Coupe complete kit delivered: 4/22/24.
Build Thread. Coyote. T-56. IRS w/3.55. Wilwoods. PS. HVAC. Side windows.
MK4 Complete kit.
Build Thread Index. Delivered: 10/15/2020. Legal: 7/25/23. Coyote Gen3. TKO600 (0.64 OD). IRS w/3.55. PS. Wilwoods. Sway bars. This build is dedicated to my son, Benjamin.
Build Thread.
-
Post Thanks / Like - 2 Thanks, 0 Likes
-
02-19-2023, 07:32 PM
#542
Senior Member
-
Post Thanks / Like - 0 Thanks, 3 Likes
-
02-19-2023, 09:56 PM
#543
I like the dedicated earplug cases there
-
Post Thanks / Like - 0 Thanks, 2 Likes
-
02-20-2023, 10:58 AM
#544
Originally Posted by
mladen
I like the dedicated earplug cases there
I thought they might be for Amyl Nitrate, LOL.
20th Anniversary Mk IV, A50XS Coyote, TKO 600, Trunk Drop Box, Trunk Battery Box, Cubby Hole, Seat Heaters, Radiator hanger and shroud.
-
Post Thanks / Like - 0 Thanks, 1 Likes
Fman liked this post
-
02-20-2023, 12:23 PM
#545
I was wondering what those were, too! 
Craig C
-
Post Thanks / Like - 0 Thanks, 1 Likes
Fman liked this post
-
03-02-2023, 05:45 PM
#546
Senior Member
-
Post Thanks / Like - 0 Thanks, 4 Likes
-
03-02-2023, 05:54 PM
#547
Senior Member

Travis,
Looks great man! The coconuts it takes to drill into a completed paint job. I got anxious reading through this update. Lol. Your car look fantastic. I really like the upgrades and my wife thanks you for the electric blanket idea.
Jesse
MK4 #10008 - Ordered 10/06/20, Delivered 03/03/21, First Start 7/22/21, First Go Kart 7/24/21
Paint by Metal Morphous 5/14/22, Legally registered 6/8/22, Graduated 7/20/22
Build Thread
https://thefactoryfiveforum.com/show...been-delivered
Complete Kit, Ford 306, Sniper/Dual Sync, T5, Hydraulic clutch
-
Post Thanks / Like - 1 Thanks, 2 Likes
Fman thanked for this post
-
03-02-2023, 06:28 PM
#548
Great job! Looks great and now I think I'm going to do it. Btw, did you tap those holes or just screw them in? Also, where'd you get the Carrol Shelby sticker? I want one for my tool box
#10333 Complete Kit, Carbed 427w, TKX, IRS and many other upgrades
- Order Date: September 11, 2021 - 20th Anniversary of 9/11
- Delivery Day: April 1, 2022 - April Fool's Day
- First Start and Go-Kart: January 20th, 2023
- Graduation Date: July 4th, 2023 - Independence Day!!
- Legal Registration Date: October 4, 2023 - My Birthday!!
Visit my MKIV Build Thread (#10333)
-
03-02-2023, 06:48 PM
#549
Senior Member
Originally Posted by
Ted G
Great job! Looks great and now I think I'm going to do it. Btw, did you tap those holes or just screw them in? Also, where'd you get the Carrol Shelby sticker? I want one for my tool box
Thank you Ted, it actually turned out like I was hoping and added some pop to the hood. This is where I ordered the Carrol Shelby decal from, I picked the silver color. It takes about 3 weeks for it to arrive but it is a good quality vinyl peel off decal.
https://www.ebay.com/itm/275168439449
-
Post Thanks / Like - 0 Thanks, 1 Likes
-
03-02-2023, 07:25 PM
#550
That's very cool! Nice work Travis. I hope I get to see it in person one day.
-John
MkIV Roadster build: Gen 2 Coyote, IRS, TKO600. Ordered 10/24/18. Delivered 1/29/19. Engine installed 8/8/21. First start 9/12/21. First go-kart 9/17/21. Off to paint 4/11/22. Back from paint 12/30/22.
Build thread here.
-
Post Thanks / Like - 1 Thanks, 0 Likes
Fman thanked for this post
-
03-02-2023, 07:28 PM
#551
How does the bottom of the hood look after screw/rivet install?
thanks,
20th Anniversary Mk IV, A50XS Coyote, TKO 600, Trunk Drop Box, Trunk Battery Box, Cubby Hole, Seat Heaters, Radiator hanger and shroud.
-
03-02-2023, 08:06 PM
#552
Senior Member
Originally Posted by
Railroad
How does the bottom of the hood look after screw/rivet install?
thanks,
All the screw heads are inside the rib of the hood, you cant see any of them.
-
Post Thanks / Like - 0 Thanks, 1 Likes
-
03-03-2023, 10:49 AM
#553
25th Anniversary #9772

seriously amazing work Travis! looks awesome!
-
Post Thanks / Like - 1 Thanks, 0 Likes
Fman thanked for this post
-
03-03-2023, 11:47 AM
#554
Senior Member

Yeah Travis, your car is absolutely gorgeous! The red accents on the oil cooler - Brilliant! Gutsy move on the hood mod too! Brave one you are! I might have to follow that, but will do so prior to paint. Nicely done and beautifully executed with the theme!
Doug
Dj or Doug or TheLateDude
----- #19 of 25th Anniversary MKIV 9769 -----
Build Link:
https://thefactoryfiveforum.com/show...-Slow-Progress
Ordered: Oct 07, 2019 / Production: Dec 28th, 2019 / Shipped: Jan 19th, 2019 First Start: In the future... / Graduation: Even further in the future...
-
Post Thanks / Like - 1 Thanks, 0 Likes
Fman thanked for this post
-
03-03-2023, 12:07 PM
#555
Senior Member

Originally Posted by
Fman
I won't have a glovebox, but I will have a grab bar. Still, I was concerned about the empty look on that side of the dash, and your Carrol Shelby decal is the perfect solution! I have thoroughly enjoyed your thread and drooling over your car--it is beautiful, with about a zillion other ideas worth stealing. Thanks for all your posts.
-
Post Thanks / Like - 1 Thanks, 0 Likes
Fman thanked for this post
-
03-03-2023, 03:01 PM
#556
Senior Member

Beautiful car and it really shows your dedication to your vision of your car that works for you. I applaud it. The color scheme is very close to my old MKII.
FFR #4402 MKII Supercharged 308 445 RWHP Sterling Grey W/ Black Sapphire Stripes, Purchase 8/22/2008 Sold 12/04/2018
FFR #8249 MK IV "Milano" Kit purchased 10/5/2018 - In-Process with 3.27 IRS, Multiport, Fuel Injected Supercharged 347 Big bore with Coil On Plug running Holley HP engine management, 576 RWHP, 510 Torque
https://thefactoryfiveforum.com/showthread.php?29980 Milano thread
-
Post Thanks / Like - 1 Thanks, 0 Likes
Fman thanked for this post
-
03-03-2023, 08:02 PM
#557
Senior Member
-
Post Thanks / Like - 0 Thanks, 3 Likes
-
04-14-2023, 09:47 AM
#558
Senior Member
-
Post Thanks / Like - 0 Thanks, 4 Likes
-
04-14-2023, 09:59 AM
#559
Good call on the protecting paint. I noticed the fumes are pretty strong from this stuff on my second use; who knows what it would do to paint.
-
Post Thanks / Like - 0 Thanks, 1 Likes
Fman liked this post
-
05-08-2023, 10:05 PM
#560
Senior Member
-
Post Thanks / Like - 0 Thanks, 5 Likes


 Thanks:
  Likes:


 Reply With Quote

