-
Member

Jvfitz - Colorado Build
I was not going to do a build thread because I don't think I can match the detail of so many wonderful threads. But I changed my mind and thought I would give it a go. This is a family project (mostly my son, grandson and I, with input from the extended family). I had a 64 1/2 mustang convertible in high school and being a hot rodder, I always had some car in pieces in my parents garage. So in addition to the 65, my son and I have completed (rest-o-mod) a 66, 67, 68. The 66 was a complete project all the way down to soda blasting and all the way back up. I had to sell it when my wife and I moved into a retirement community with a two car garage. The 67 was built for my son's first car. He drove it all thru high school. The 68 we built for my grandson and he drove it thru high school and passed it on to his sister to enjoy in high school. That car is still in my son's garage and he takes it out for a spin when the weather is good. Earlier this year we got the bug to build again and Factory Five Mk4 seemed like the best next step in our evolution. We order the kit in Nov 2022. Eric from Stewart delivered it last Sunday (April 23, 2023). GREAT DAY. We are squeezed into a two car garage but we will figure it out.
After nine months of family discussion we have decided to go "Black Out". I didn't even know what that was before this project. So the Pipes, Wheels, etc are going to be ordered separate from the kit.
Mk4 complete kit
Blue Print 347, Sniper EFI with TKX-600
HYD Clutch
IRS - 3.55 Center Section
PWR steering
FFR GPS Gauge set
Leather Seats
Two Rollbars (Black)
Leather Steering wheel
Wind Wing, Sun Visor
Trunk Gas Strut
Wiper Kit
Battery Cut off Sw
EFI In-Tank Fuel System
Center Dash Support
Assembled Side Louvers
I don't see how to add picture.
Last edited by jvfitz; 04-28-2023 at 10:48 AM.
Reason: spelling error
-
Post Thanks / Like - 0 Thanks, 2 Likes
-
Senior Member

Welcome! Lot of Colorado people here. Where abouts in Colorado?
-
Senior Member

Yeah, welcome to the fun! And yes, lots of Colorado enthusiasts and builders out here!
Reachout to David Hodgkins (Administrator) on any permissions issues you may have. He can (expedite) and grant you the ability to post pics.
Check this link and others under: Links > Welcome and Introductions.
https://thefactoryfiveforum.com/show...tures-in-posts
Also, if you're up north, this has a great turnout:
https://thefactoryfiveforum.com/show...ra-in-Loveland
Anyway, again welcome to the family. Have a great time on your build journey and we'll be watching...
Doug
Dj or Doug or TheLateDude
----- #19 of 25th Anniversary MKIV 9769 -----
Build Link:
https://thefactoryfiveforum.com/show...-Slow-Progress
Ordered: Oct 07, 2019 / Production: Dec 28th, 2019 / Shipped: Jan 19th, 2019 First Start: In the future... / Graduation: Even further in the future...
-
Senior Member

Welcome aboard. You bring a lot of wrenching experience into your build. Will be fun to watch it come together. Congrats.
Chris
Coupe complete kit delivered: 4/22/24.
Build Thread. Coyote. T-56. IRS w/3.55. Wilwoods. PS. HVAC. Side windows.
MK4 Complete kit.
Build Thread Index. Delivered: 10/15/2020. Legal: 7/25/23. Coyote Gen3. TKO600 (0.64 OD). IRS w/3.55. PS. Wilwoods. Sway bars. This build is dedicated to my son, Benjamin.
Build Thread.
-
Member
We are in Aurora/Parker. our zip code is Aurora but we live right on the Aurora/Parker line. Very close to Papa Dave
-
Senior Member

That is an impressive resume to start, should be a breeze!
-
Member

STEWART TRANSPORT ARRIVAL
-
Member
It took all of 30 minutes to unload the inventory and the kit its self

-
Member
We lifted the body up into it's temporary home for safe keeping.


-
Post Thanks / Like - 0 Thanks, 1 Likes
-
Member
We inventoried the kit and had no MIK (Missing in Kit) and a short list of POL. Today we received a box from FFR with 6 POL items, the packing list was included and it was a breeze to match up to the POL list.
this weekend we start on the suspension system. Let the work begin!!
-
Sub'ed! Looking forward to following along.
Congrats on starting a new build.
-
Hi everyone - second picture above - guy on the right - that's me - the son  .
.
building cars with my dad, come on - best life ever.
This one is going to be a great time!
Thanks in advance to all the help and support you all provide here on this forum, such an amazing group of people.
-
Post Thanks / Like - 0 Thanks, 2 Likes
-
Member
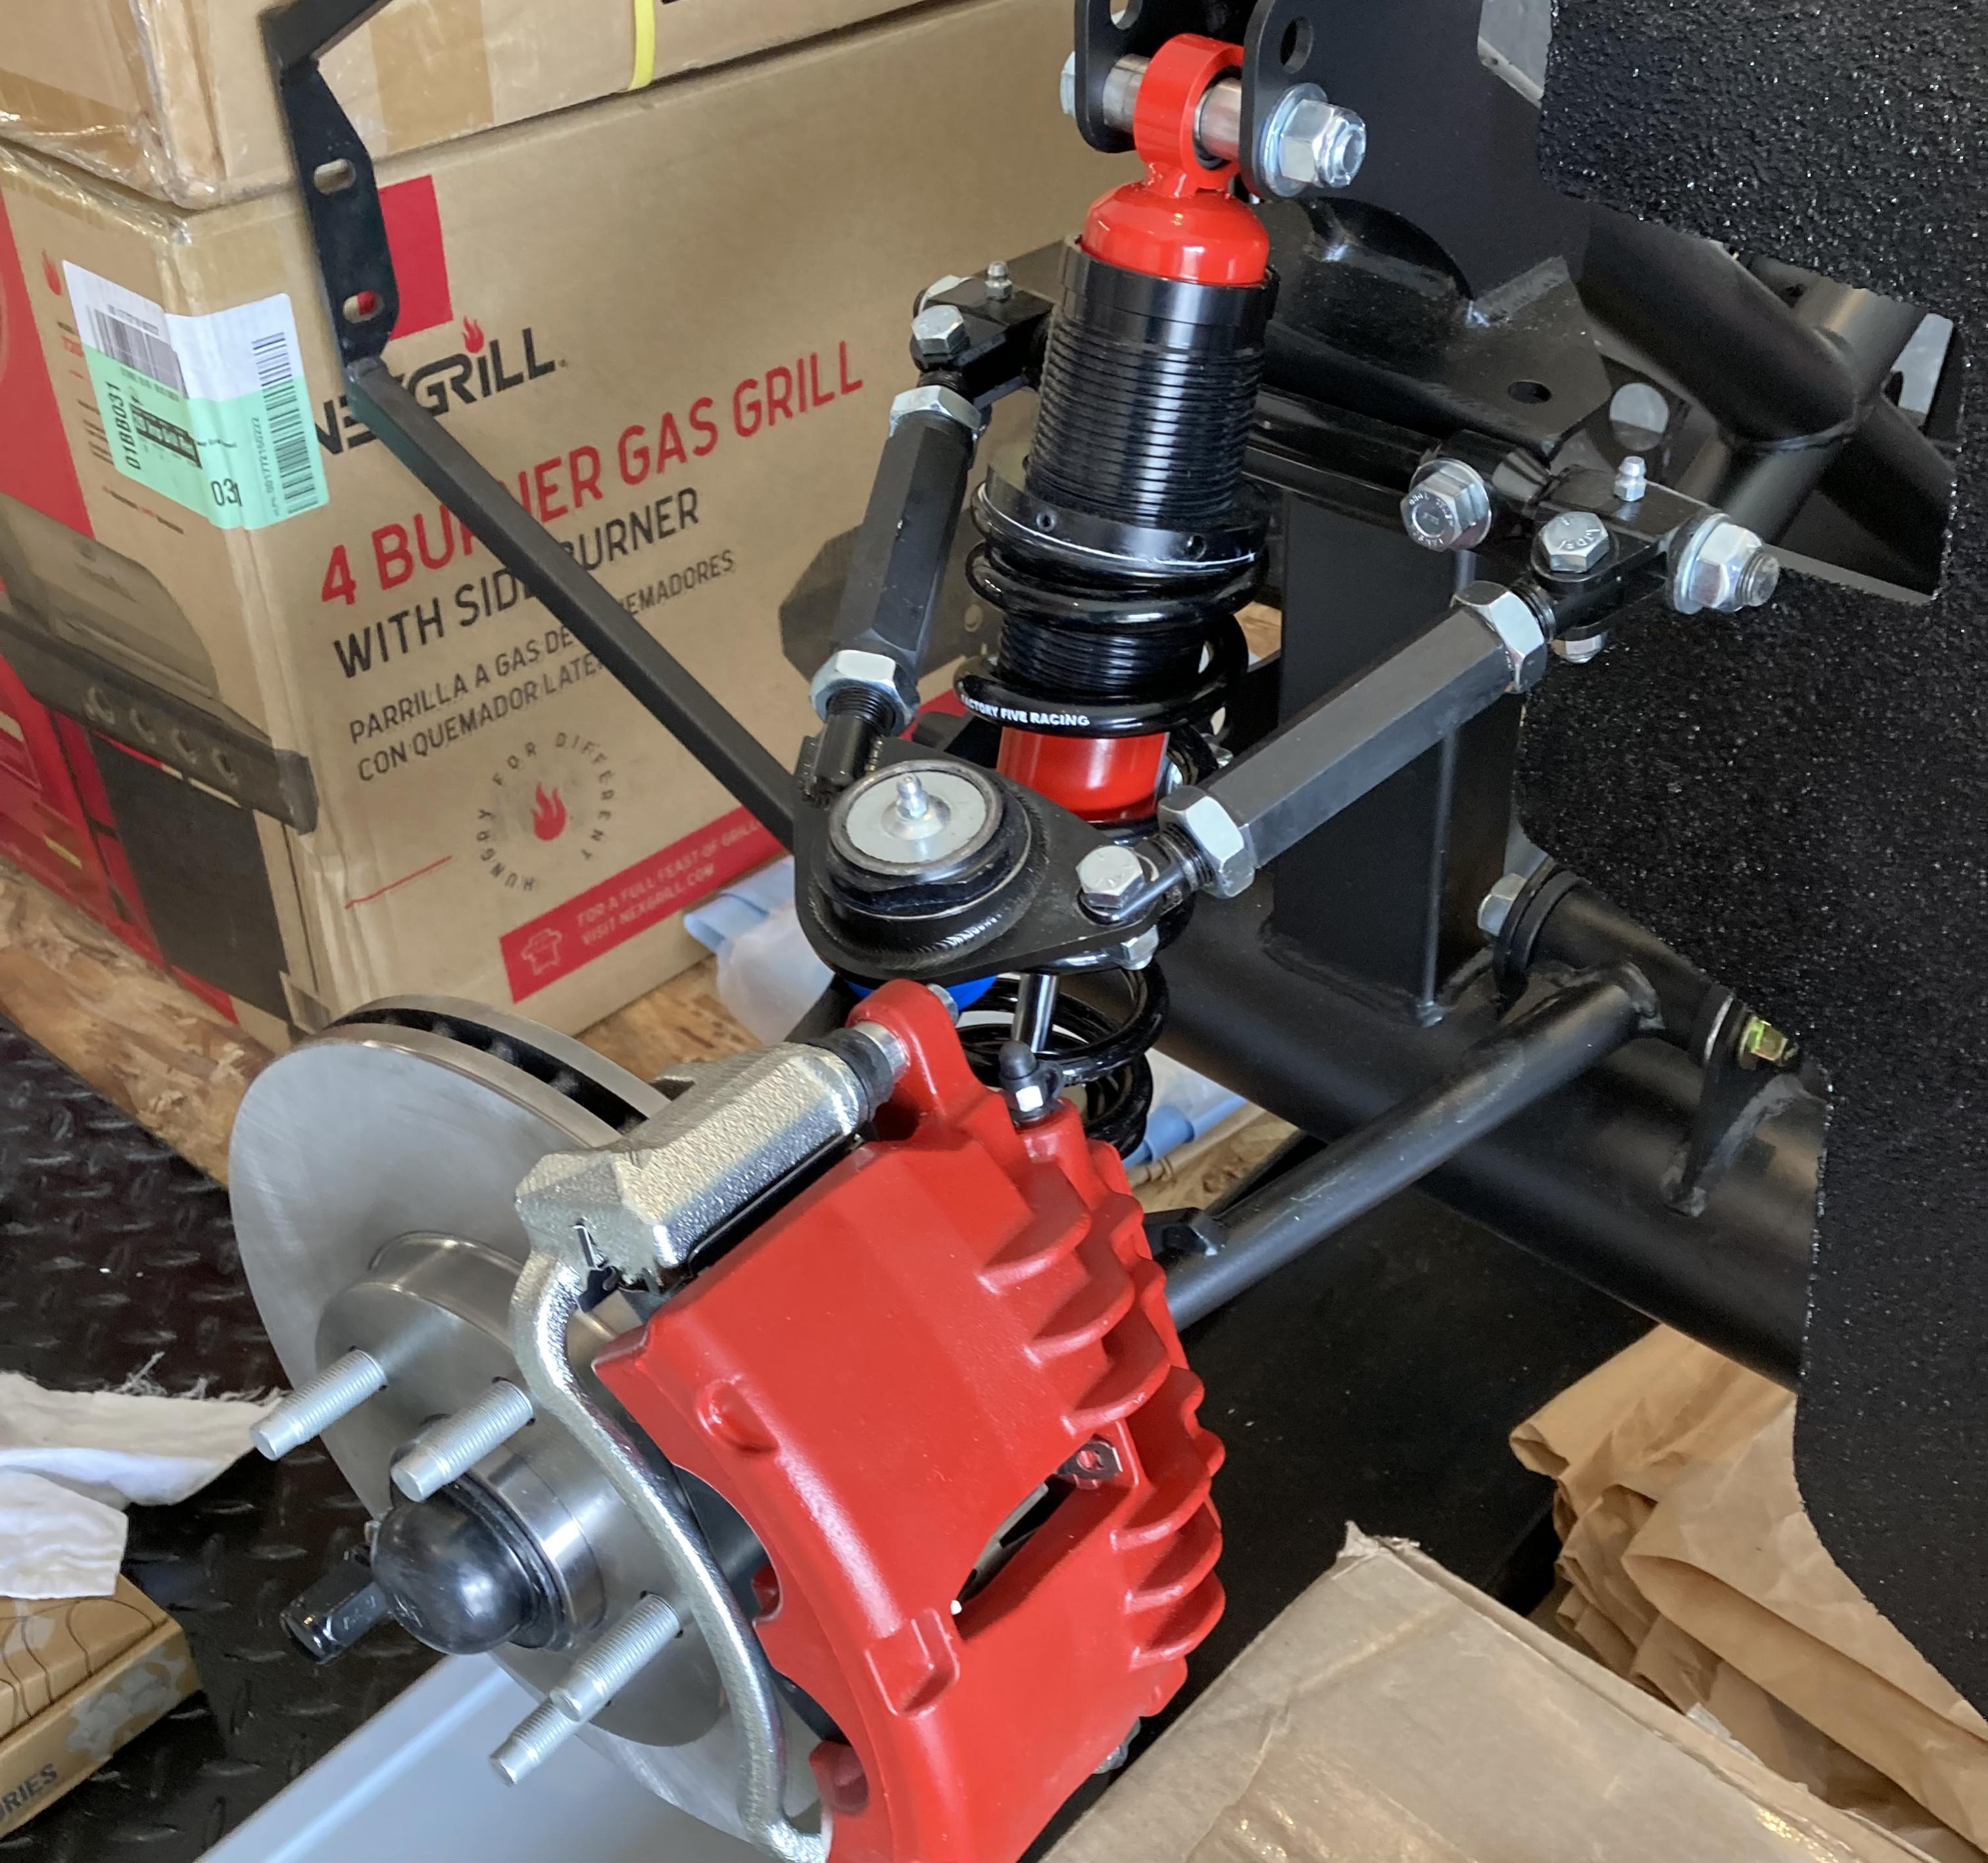
This weekend we started on the Front Suspension. Things went pretty much as planned. We had to stop at the Spindle hub nut because I did not have a 36mm socket. Amazon sent me one the next day. The team, myself - Steven (my son) and Brandon (my grandson) had a great day working on the project.


Last edited by jvfitz; 04-30-2023 at 09:30 PM.
-
Post Thanks / Like - 0 Thanks, 1 Likes
-
John,
If you ever need something like that socket again, let me know. I also have the 300 ft. lb. torque wrench you're going to need to torque that nut to 250 lbs. Give me a shout!
Dave
-
Member
Irs spinle modification
It was a bit of a challenge but I managed to make the modifications to the IRS spindle today. Three saws-all blades later I had the spindles cut. Drilling out the holes went fairly easy. I started with a ream from both sides, then followed with a 1/2" bit, and finally cleaned it all up with the 5/8" bit. No drill grabbing and went thru the spindle easily. I am glad to have that job done.


Last edited by jvfitz; 04-30-2023 at 09:38 PM.
-
Member
Thanks Dave, I will need the torque wrench for sure. My torque wrench only goes to 150 lbs.
-
Senior Member

Welcome and happy building! I’m a few months ahead of you, my kit was delivered in January but you might have a few more hands helping out! Please reach out if you have any questions there is a great Cobra community here in Colorado!
-
Member
Will do Junbug. We are pretty much weekend builders. I like to keep the three of us involved. I work on small things while those two are working on making a living. I'm retired and have a lot of free time to tinker. Today I took a stab at painting some panels. Bed liner is sticky stuff.
-
Hey Jvfitz. A lot of the special tools can be borrowed from some of the brand name part stores. I borrowed an axle nut socket set. Already had a 100-250fllb wrench. Took it back 30 minutes later. Look forward to following your build. Tom
-
Member
We finished up the front suspension and brakes. I texted Papa Dave and asked to borrow his torque wrench (250 ft lbs), but he was in Hawaii. Hard life. I was able to get a loaner tool from O'Rielly. With a lot of elbow grease we pulled the hub nuts down and torqued them.
Last edited by jvfitz; 05-08-2023 at 10:32 AM.
-
Member
Steven came over to help with finishing the front suspension. We decided to go ahead and start the IRS. In the past mustang projects we had never done an IRS, so this was new to us. I had done the preliminary work on assembly of the upper arms and toe arms, which still needed some adjustment. With the convenience of the lift we were able to get the pumpkin in with little effort. I was a good day to be working together on the roadster.


Last edited by jvfitz; 05-08-2023 at 10:31 AM.
-
Member
By the way. Thanks to Mike Bray's post on Mister Val's thread which listed all the bolts for IRS. We were shaking our heads with the manual stating to use the long bolts here and the short bolts there (????) The list was most helpful
Here it is again for those who might be looking for this information
The Differential calls for the following:
2 - M14-2mm x 100mm flange head bolts
2 - M16-2mm x 130mm flange head bolts
4 - M16-2mm deformed thread flanged lock nuts
Upper control arms:
2 - 5/8"-11 x 4 1/4" bolts
2 - 5/8"-11 lock nuts
2 - 5/8" washers
4 - M16-2mm x 110mm flanged head bolts
4 - M16-2mm deformed thread flanged lock nuts
Lower control arm:
2 - M16-2mm x 90mm flanged head bolts
4 - M16-2mm x 110mm flanged head bolts
6 - M16-2mm deformed thread flanged lock nuts
Toe arms:
2 - 5/8"-11 x 2 1/4" bolts
2 - 5/8"-11 lock nuts
2 - M14-2mm x 80mm bolts
2 - M14-2mm lock nuts
IRS Shocks
2 - 1/2"-13 x 3 1/4" bolts
2 - 1/2"-13 x 4" bolts
4 - 1/2"-13 nylon lock nuts
Last edited by jvfitz; 05-08-2023 at 10:44 AM.
-
Post Thanks / Like - 0 Thanks, 1 Likes
-
Member
In regards to the Wilwood front panel. I read the instructions to use the Wilwood panel that came with the Wilwood pedal box kit. I did not get a panel with the pedal box kit and it is not on the POL. I looked at Papa (Dave's) post and i'm pretty sure he has Wilwood pedals. His panel look exactly like the panel attached to the frame as shipped from FFR. I assume (opps) FFR has now shipped the frame with the correct panel. Does anyone have an opinion or knowledge on this?


-
My panel looks like the one you have. My car delivered in 10/22 only had one panel I don't think they ship out with two anymore.
-
Post Thanks / Like - 1 Thanks, 0 Likes
-
Senior Member

That is the panel for the Wilwood set up.
Higgy
MK4 #11012 picked up 04/16/24
351W, 3 link, single roll bar
MK4 #10616 picked up 4/10/23
302w, 4 link, 17's, dual roll bar SOLD
MK4 #9759 picked up on 4/3/19
351C, 3 link, 17's, dual roll bars SOLD
-
Member
It has been a long time since i posted a progress report. Summer activities keep getting in the way of the project car. Anyway, we completed the IRS system with little difficulty. This is a really sweet system. The e-brake cable installation took several attempts till we finally felt we had a good solution in place. We discovered that as we tightened the caliper to the spindle the outer (fixed) disc pad pushed against the rotor. The spacer was just about a 1/8" too short to provide the wheel hub to turn when the caliper was fully tight. We added a washer to the spacer and the system now responds as expected. We can spin the wheel freely without any drag of the brake pads.


-
Post Thanks / Like - 0 Thanks, 1 Likes
-
Member
We installed the steering box and steering rods. the steering box was a bit of a puzzle on how to get it into position, but it became obvious and we had no difficulty. The steering wheel is simply sitting there not tightened down. We made the initial front toe in/out adjustment with the tie rods. The tire and wheels are temporary on loan from Steven's mustang (winter tires). Looks better sitting on wheels and tires.


-
Member
Tackled the pedal box assembly. That is a nice product. We are modifying the accelerator pedal to match the brake and clutch. Steven is working on that. I will post a pix when he is done. We are going with hydrophilic clutch so that hole assembly in the instruction book we were able to skip.


-
Post Thanks / Like - 0 Thanks, 1 Likes
-
John,
You're making great progress. Looking at your pedals, be sure that the brake pedal is at full rest without touching the cross bar or your brakes will not fully release. You may need to shorten the pushrods a bit to get there. It only takes a small amount, so sneak up on it.
Dave
-
Post Thanks / Like - 0 Thanks, 1 Likes
-
Member
Thank Dave, I will check that out.
-
Member
It has been a while since our last post. It's cold in the two car garage this winter. But we have managed to get some things done.
After the pedal assembly was completed we installed the Master cylinders. We are using a Hydraulic Clutch so we have three Master cylinders. The hoses from the front and rear cylinders “y” together to connect to one brake reservoir. The Clutch cylinder has a single hose connected to the 2nd Reservoir. Reservoir height is adjustable so we will see how much clearance is necessary when the body is in place.


-
Member
-
Post Thanks / Like - 0 Thanks, 1 Likes
-
Senior Member
Everyone has something to add, great conversion of the supplied gas pedal, looks like it was made for that!
-
Member
-
Member
The panel on the inside of the driver’s side foot box left a gap between the panel and the tubular frame. Steven made a pattern out of cardboard and cut a piece of aluminum to cover the cap. It took some tweaking but he got it to fit nicely.


-
Member
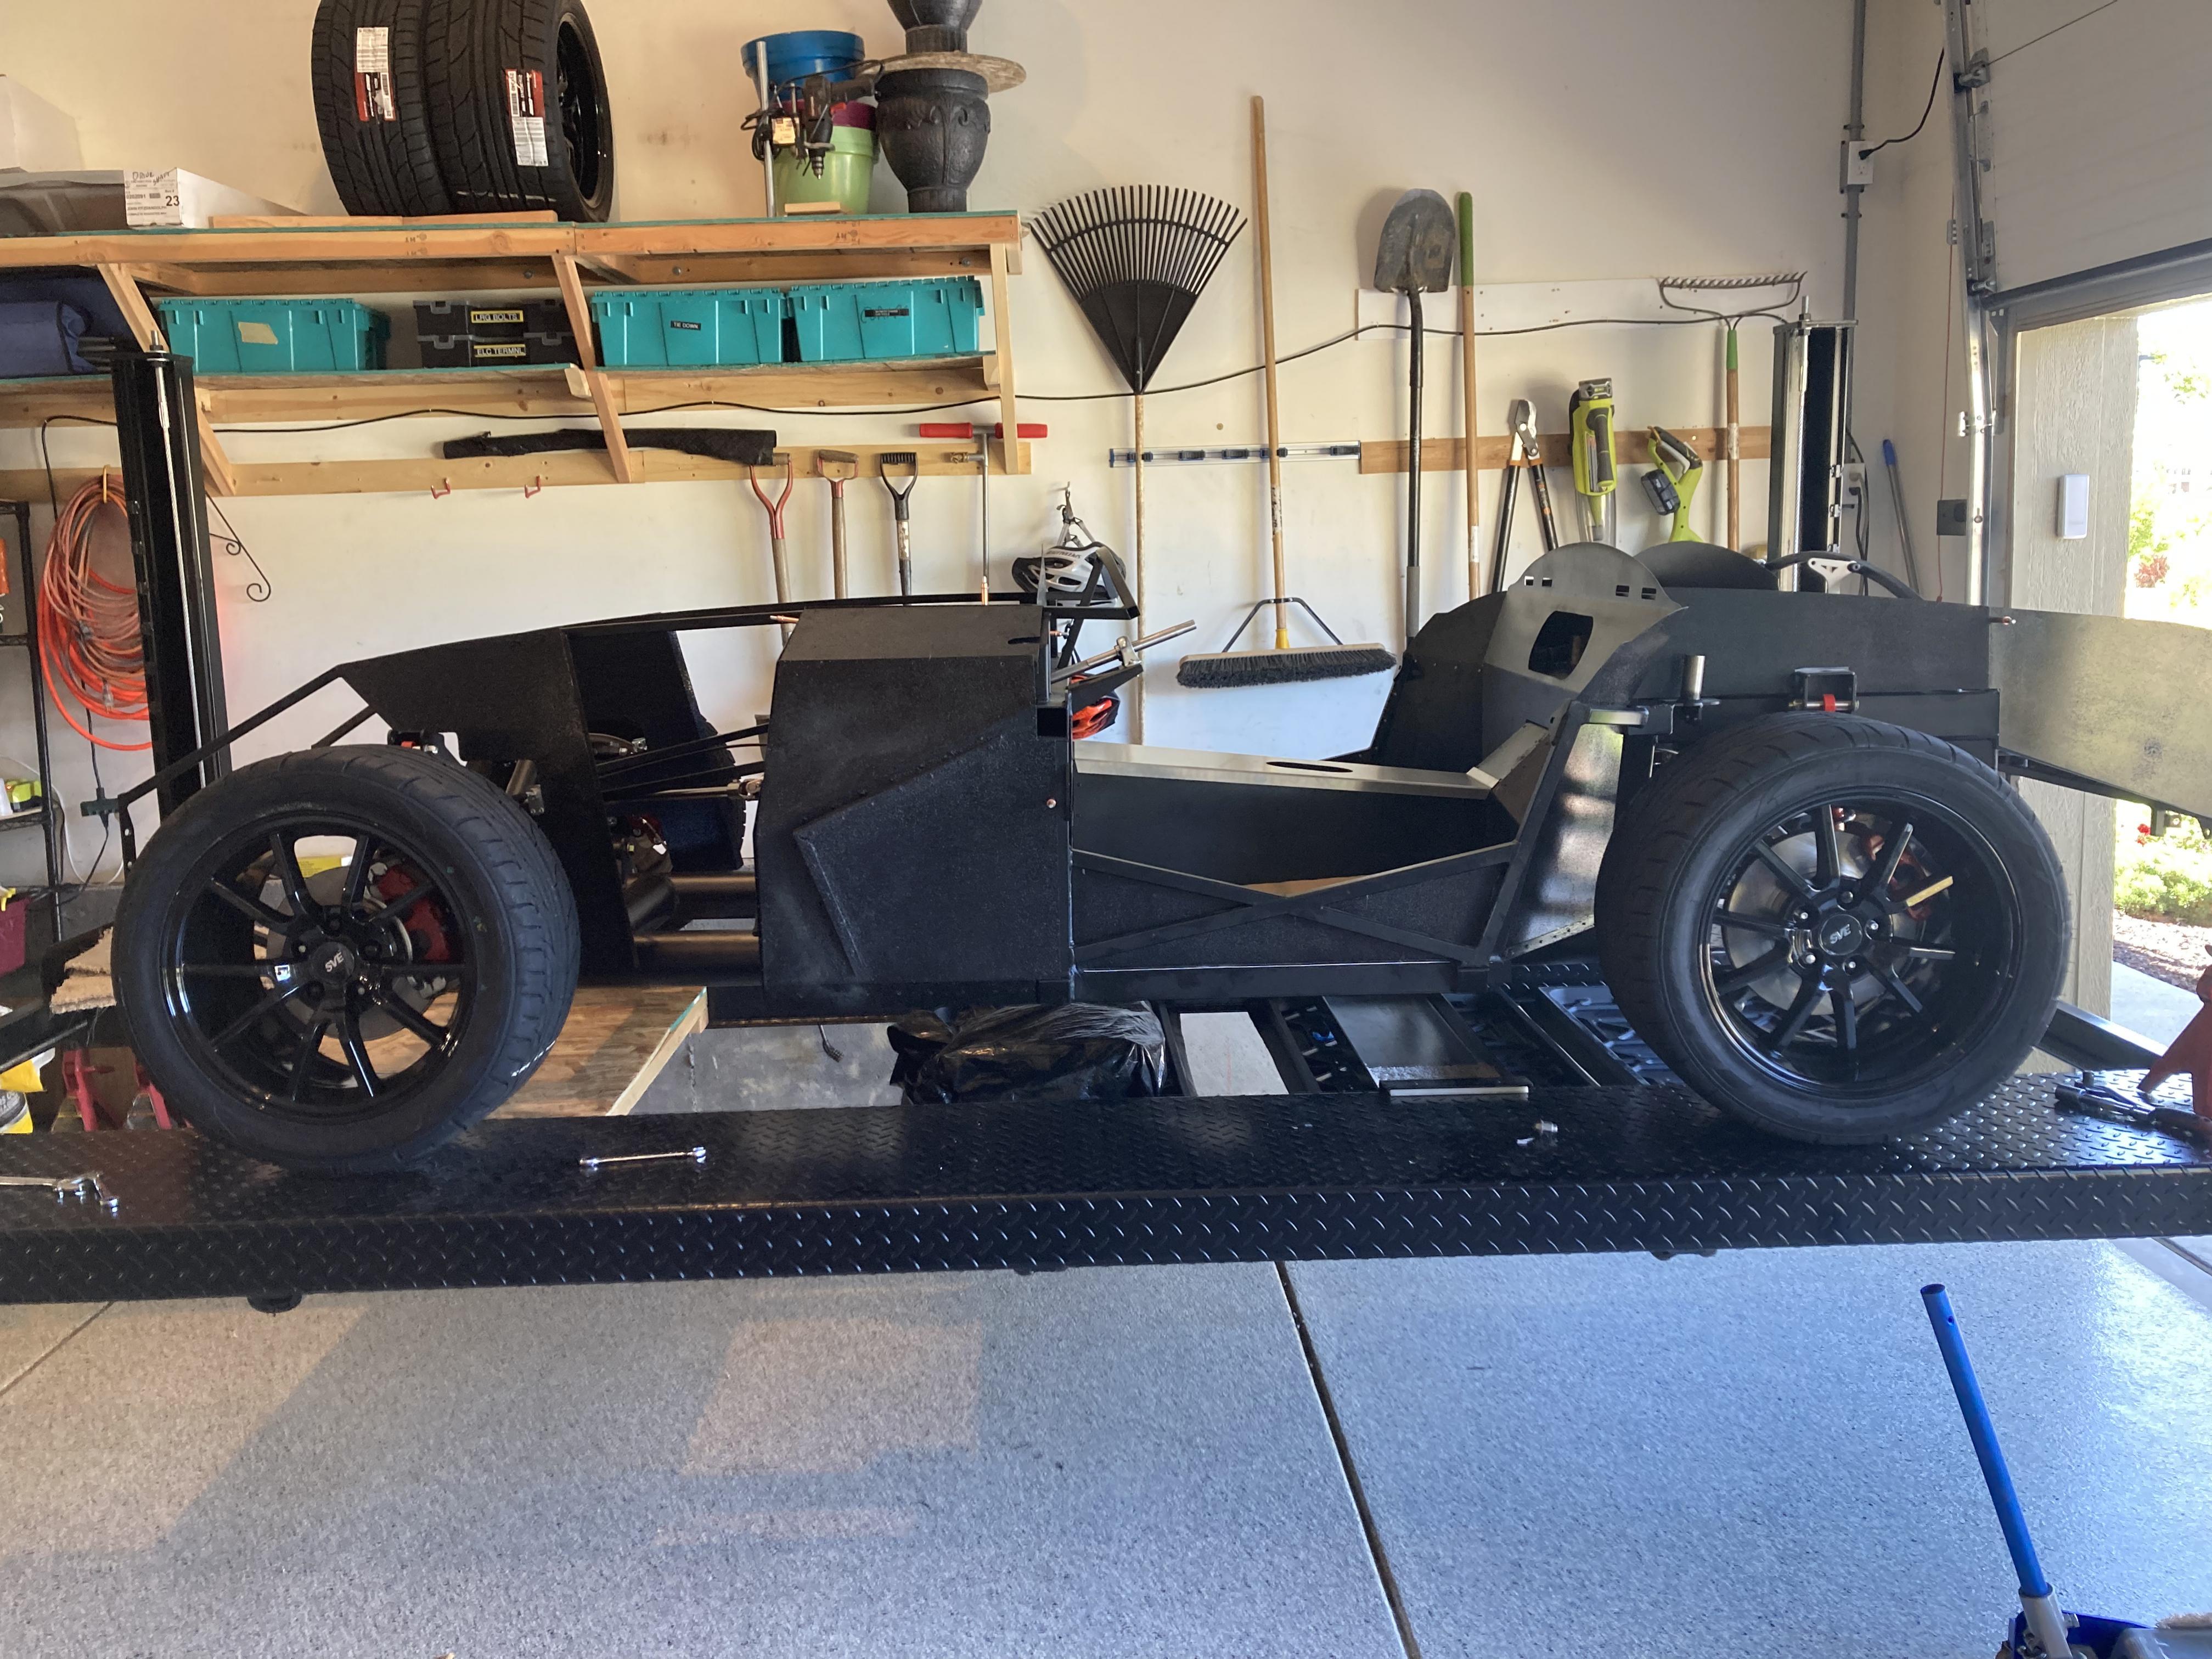
The tires and wheels showed up and I could not wait to put them on the car.


-
Member
In this picture you can see the wheels and tires and also the progress on panels
Last edited by jvfitz; 02-13-2024 at 06:40 PM.
-
Member
Brake Lines: Rather than bend and flair the FFR supplies lines, we decided to use coated (black) braided brake lines. We had used these lines on previous Mustang projects and felt comfortable with their performance. The trick was that the braided brake line come in various sizes. We had to plan our line paths to accommodate the available sizes.
-
Member
-
Member


 Thanks:
  Likes:


 Reply With Quote


