-
08-21-2016, 07:33 PM
#361
Senior Member

Side Louvers Plus
Today I finished the body side louver installation. Pretty minor update, but some aspects that newer builders may find helpful. Still fitting in a little build activity around our real estate dealings. Down to the last few details. This week we hope to close out the last couple contingencies and firm up the closing dates for both properties around the end of September. Meanwhile, back to the build while I can.
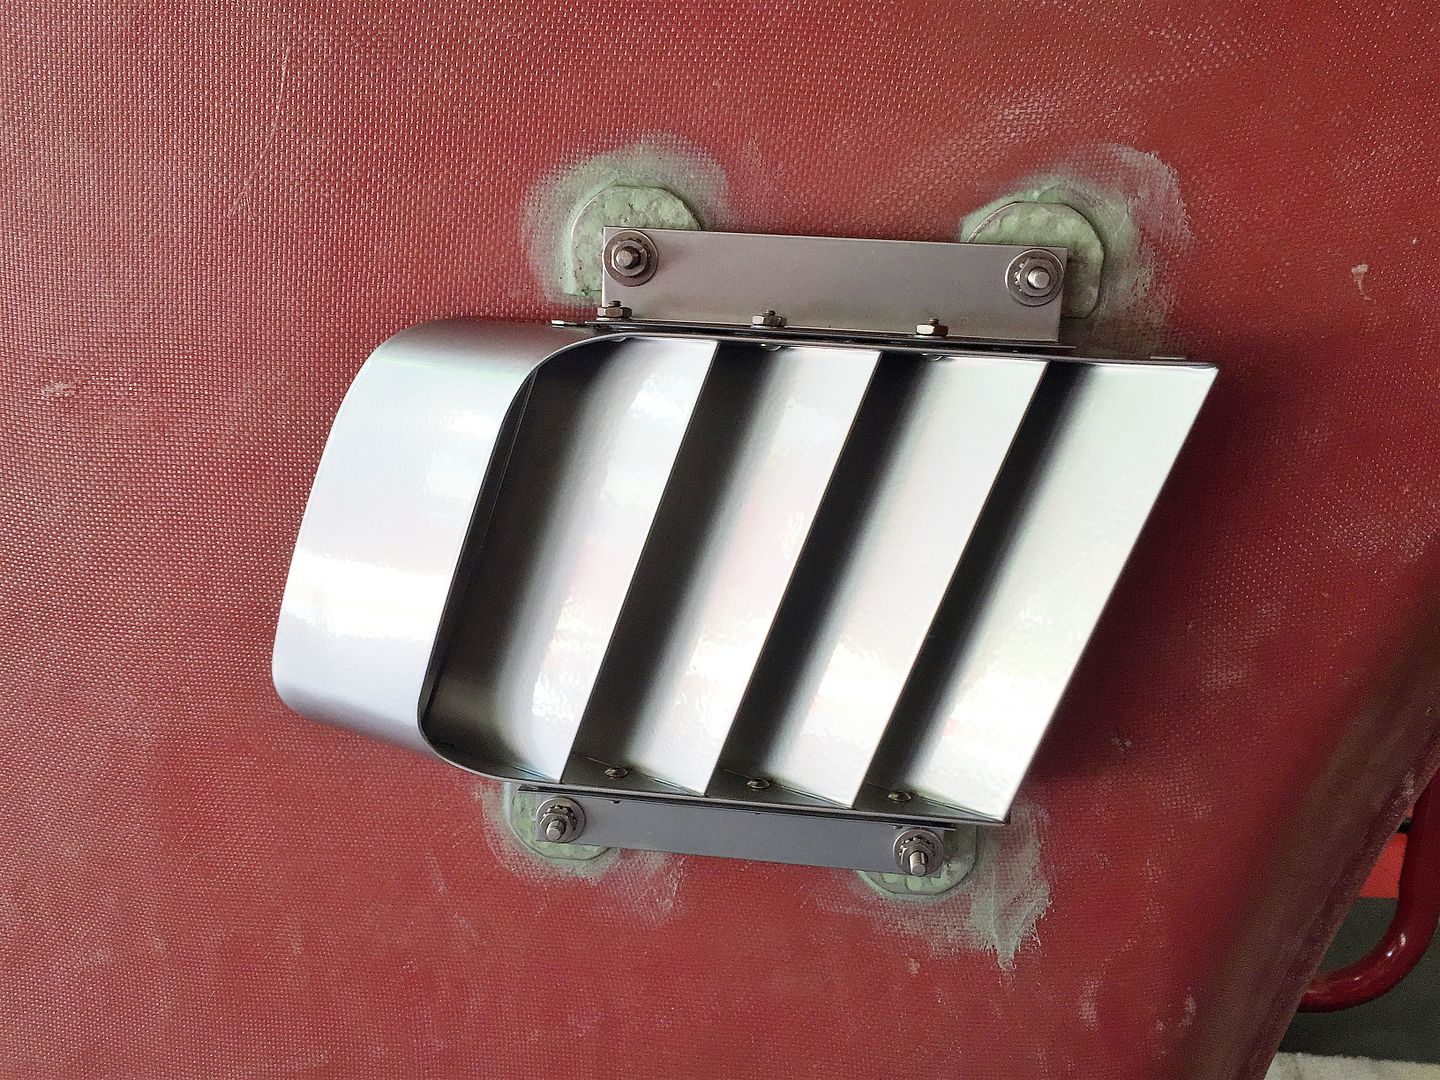
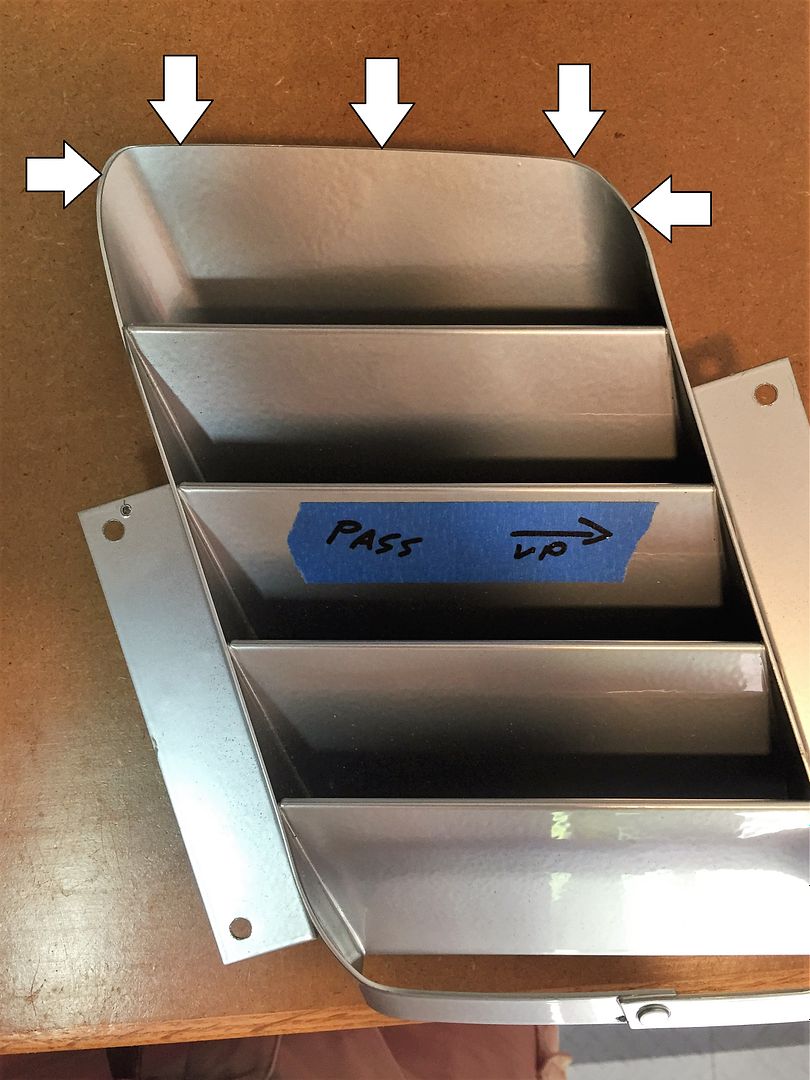
I bought the assembled side louver set from Factory Five. These appear to be exactly the same as the ********** ones I used on the Mk3 build. I polished the last ones, which wasn't easy. So decided to have these powder coated, and chose a bright silver color. They turned out nice. I bolted the mounting brackets on each side as mentioned in a previous update. There is regular discussion on both forums about how best to mount these things to the body and always seems to draw lots of different opinions. Velcro, silicone, etc. I’m 3-for-3 mounting them with McMaster 10-32 perforated base studs, part number 97590A569, and bonding the studs to the inside of the body with 3M HSRF. Applied properly they will never come loose, it looks neat and clean, and they’re easy to install and remove once the studs are bonded to the body.
I captured the studs on the mounting brackets with nuts on each side, determined where they would attach on the inside of the body centered in the pre-cut opening, roughed up the body with 60 grit paper, and bonded them in place. I used rubber bands looped around the louvers in two places and held in place by paint sticks while the HSRF cured. The clothes pins helped hold the rubber bands while I fed the paint sticks through. I only had used paint sticks on hand. Nice. One of the colors in our family room and not sure about the other one...
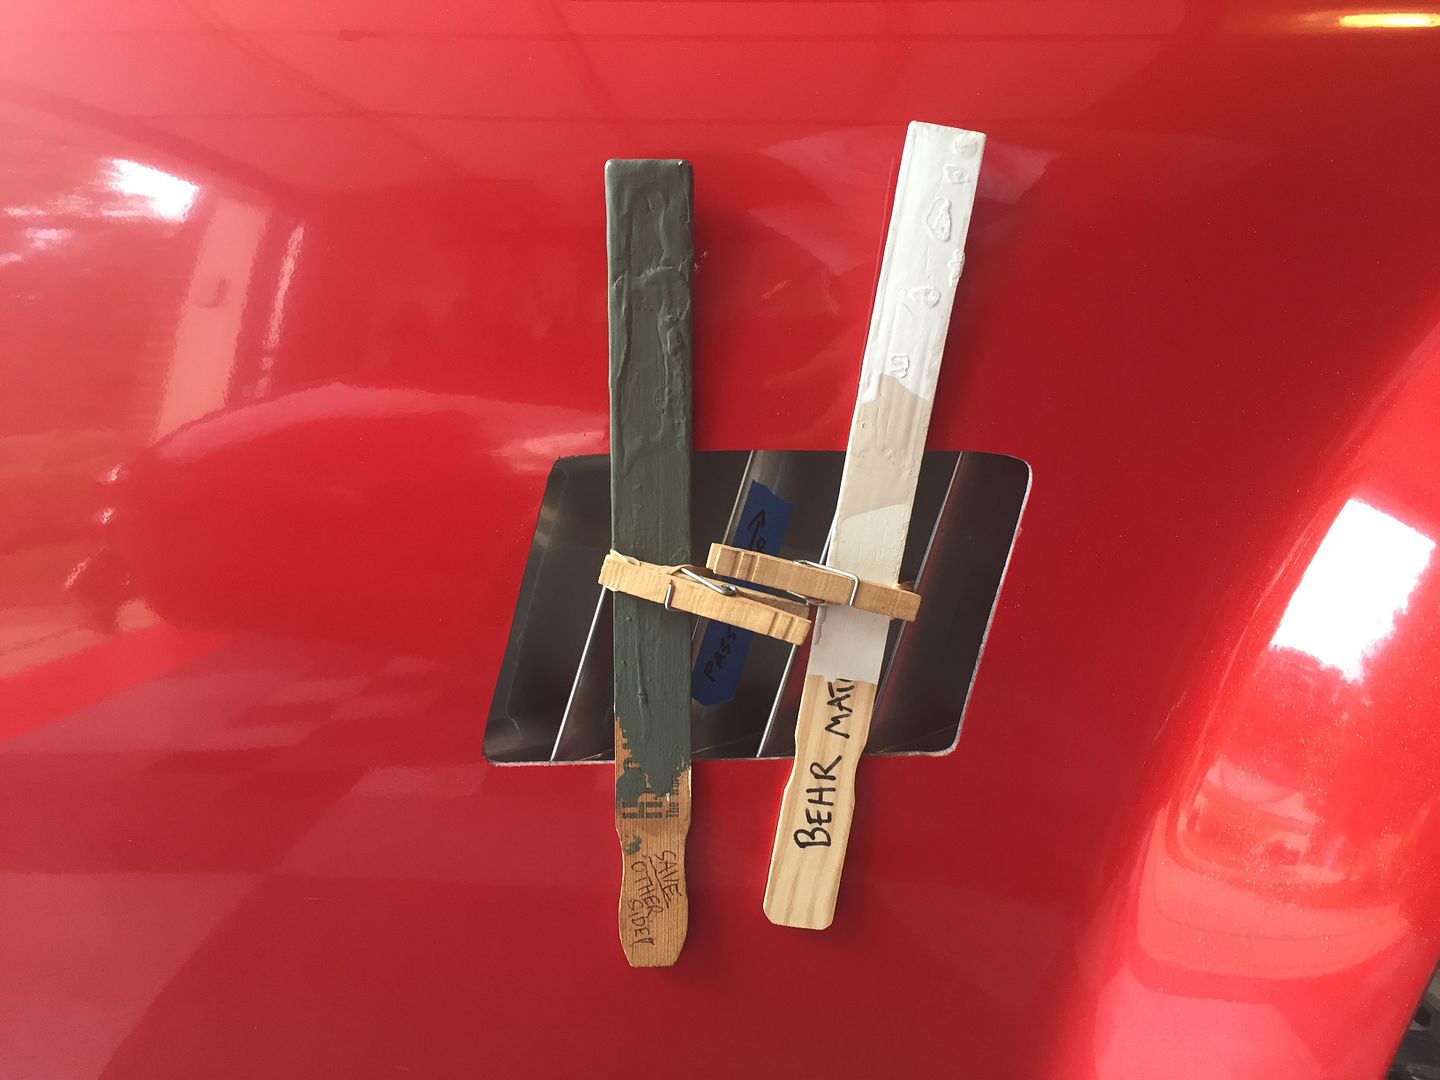
Once cured, removed the louvers and the studs are bonded in place for good. Used a Dremel to clean things up a little and added a little more HSRF in any voids. Then trimmed the bolts to have a more reasonable length.
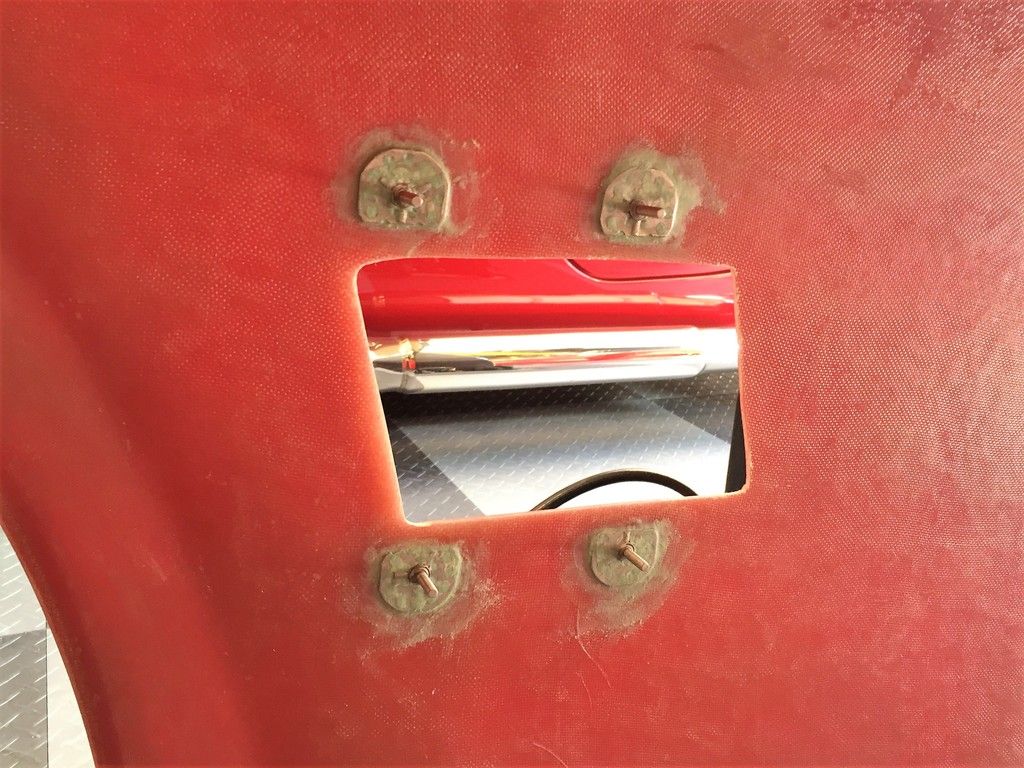
Re-installed the louvers.
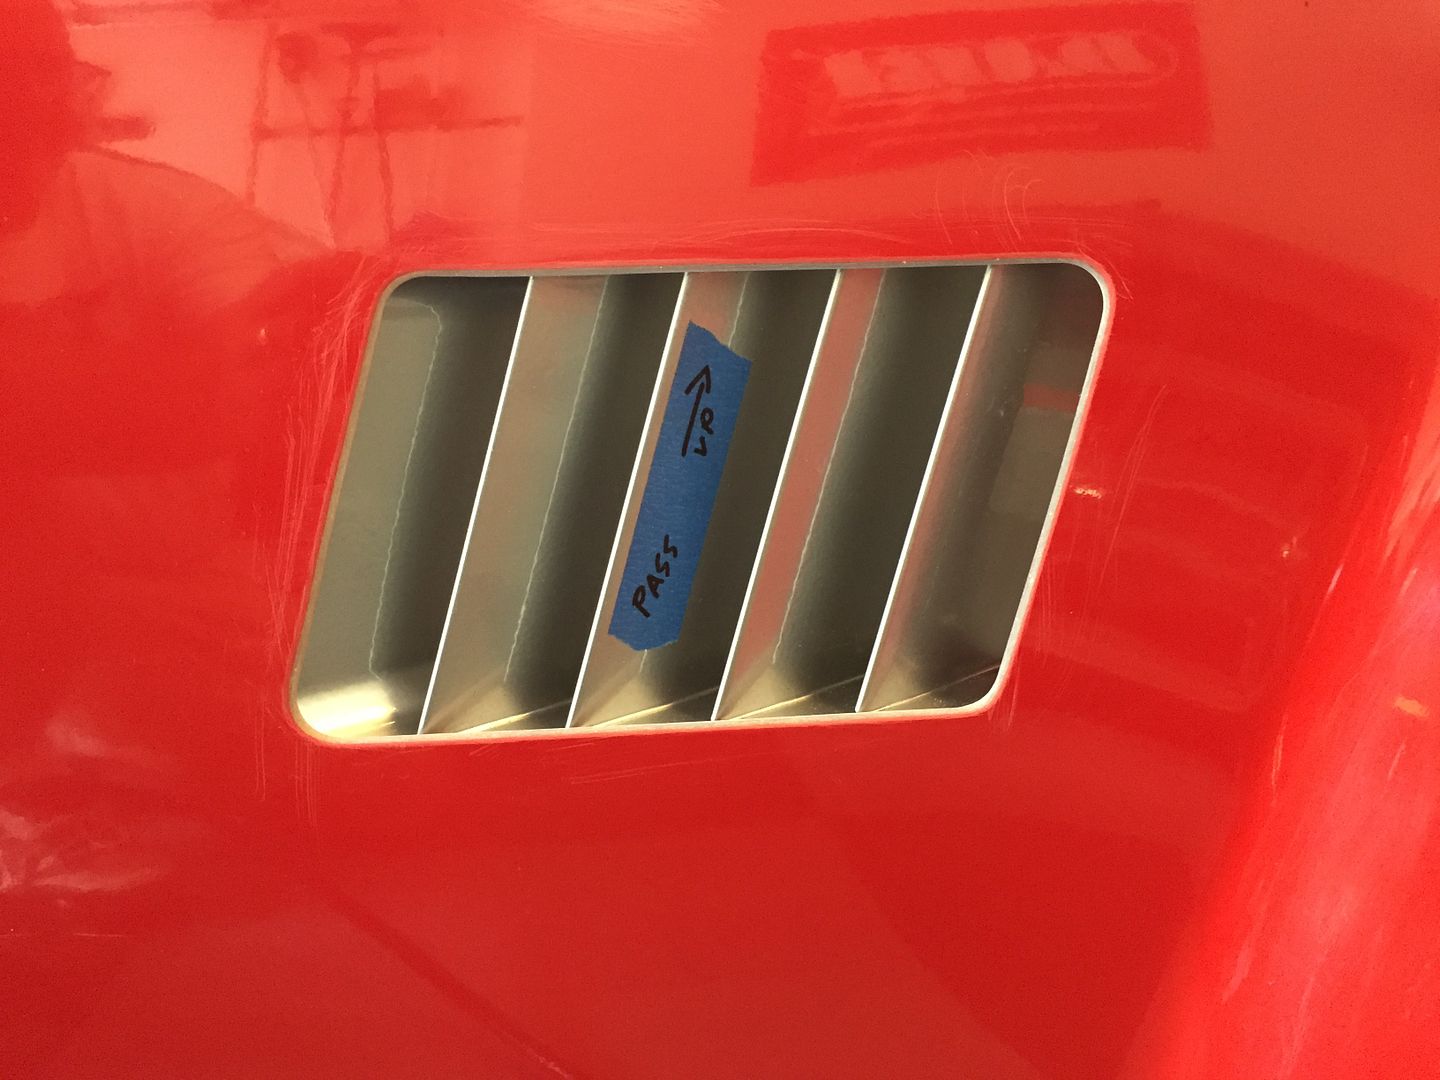
Now for a very important part. The precut openings were reasonably close, but not finished products at all. Drew parallel lines top and bottom. Then drew lines on each side parallel with the angle of the louvers. This is a critical step and IMO makes the difference between a pro looking job and one that isn’t as much. Also, ideally the width between the last louver and the body on each side should the same as the width of the inner louvers. The louvers weren’t quite long enough, but got them close.
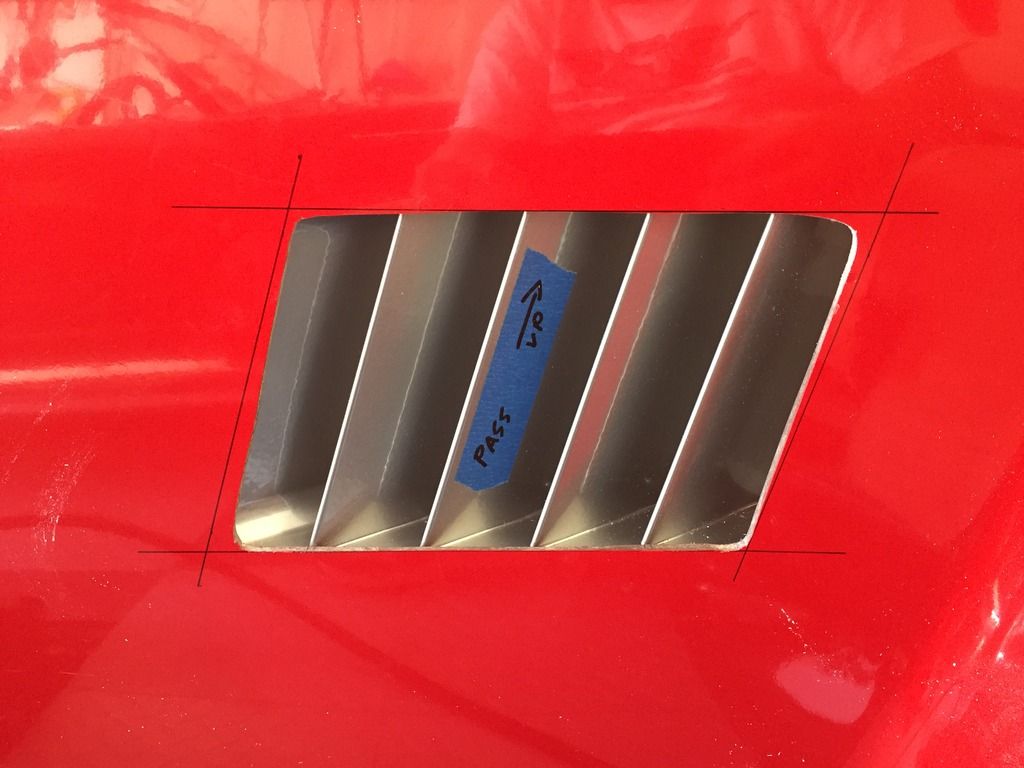
While doing the final fitting, I noted that the louvers didn’t fit flush against the inside of the body. Further review showed the rear part of the louver is too high. I trimmed them on my disk sander until they were flat. Roughly in the area noted here. The sanding removed the powder coat on the edge, but it’s inside against the body and doesn’t show.
With the body trimmed to the lines, a radius sanded all around, and the louvers trimmed so they fit flush, the final product.
Nothing left to do with these except install them after paint is done.
Last edited by edwardb; 03-22-2017 at 09:54 AM.
Build 1: Mk3 Roadster #5125. Sold 11/08/2014.
Build 2: Mk4 Roadster #7750. Sold 04/10/2017.
Build Thread
Build 3: Mk4 Roadster 20th Anniversary #8674. Sold 09/07/2020.
Build Thread and
Video.
Build 4: Gen 3 Type 65 Coupe #59. Gen 3 Coyote. Legal 03/04/2020.
Build Thread and
Video
Build 5: 35 Hot Rod Truck #138. LS3 and 4L65E auto. Rcvd 01/05/2021. Legal 04/20/2023.
Build Thread. Sold 11/9/2023.
-
Post Thanks / Like - 1 Thanks, 0 Likes
-
08-21-2016, 08:05 PM
#362
Senior Member

Side Louvers Plus (continued)
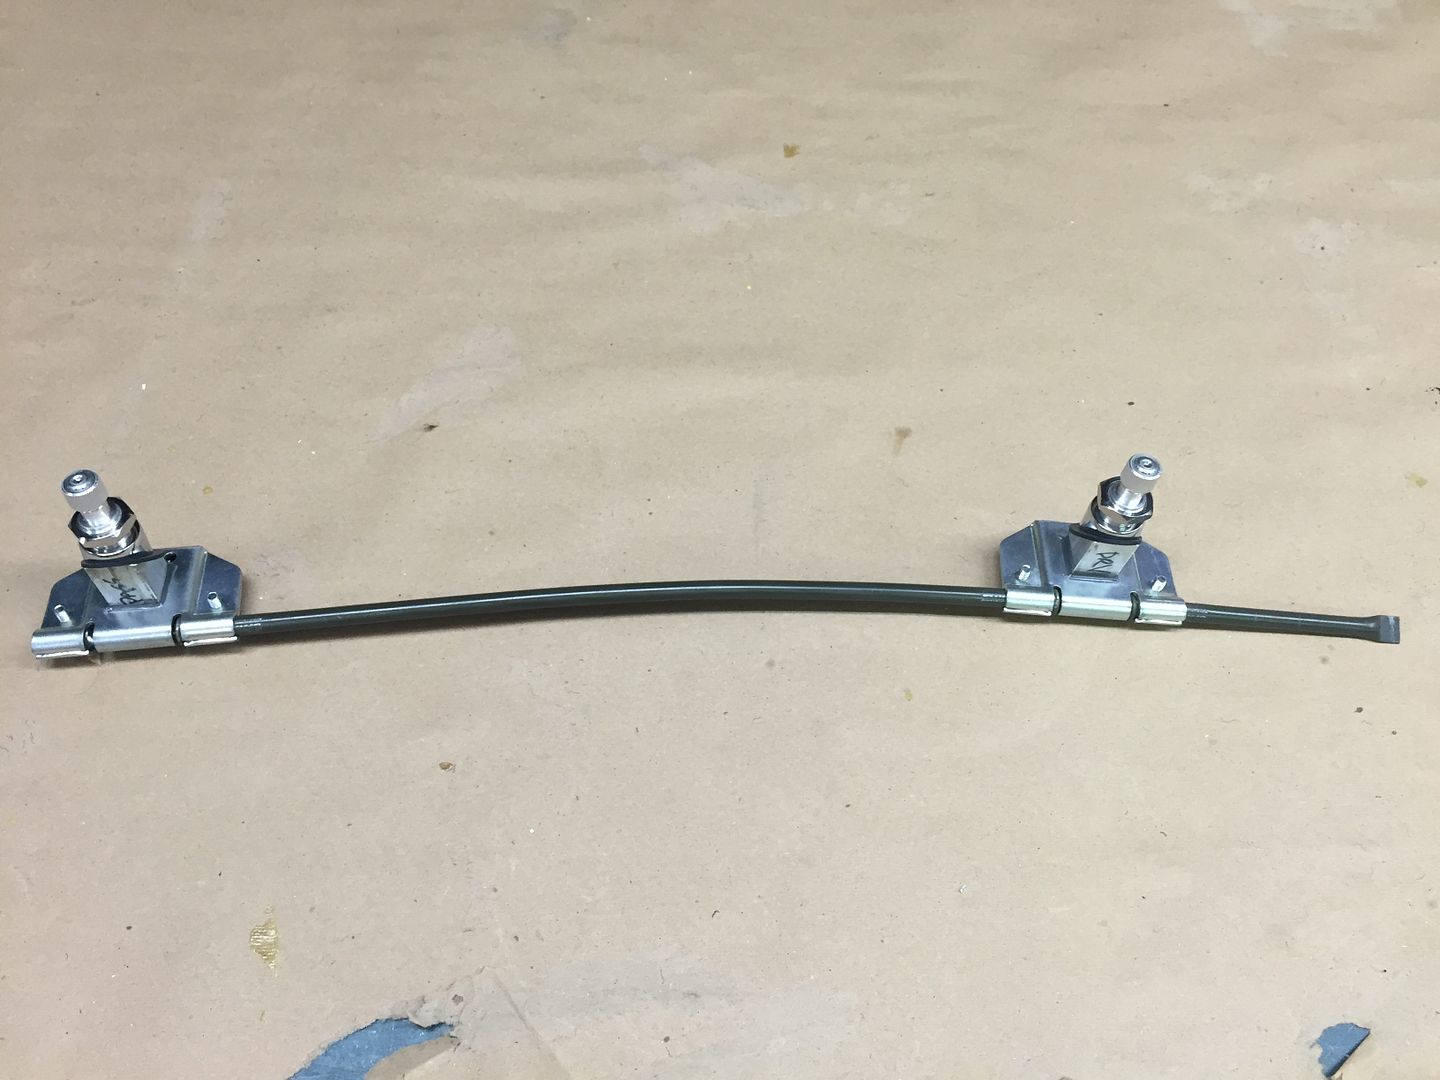
Also, I nearly completed the wipers. With the two wheelboxes mounted in the body, made up the tube that goes between the two plus the little stub for the end of the cable to run in. I was planning to use the nice shiny tubing that came with the wiper kit from FF. Looks like it's SS. But it's rock hard so apparently not annealed. Even my nice Eastwood pro flare tool wouldn't dent it. The tubing would slide before making a decent flare, no matter how tight I tried to clamp it in the flaring tool. So went back to my old standby. 5/16-inch steel fuel tubing. It's the perfect size for the cable and flares like butter with the Eastwood tool. Made the two pieces and clamped them into the wheelboxes while they were in the body. Sets everything at the right angle. I'll make the last piece between the motor and the PS wheelbox when the body is back on.
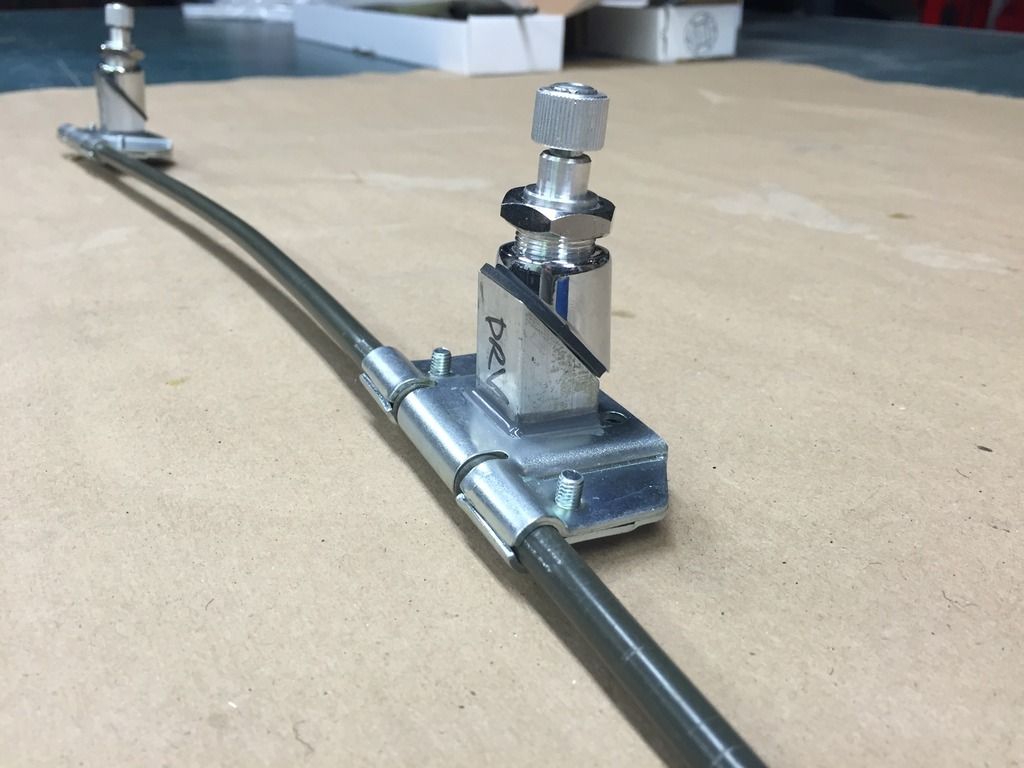
This is a closer picture of the 3/4-inch square aluminum spacers I mentioned in a previous update. These instead of the rubber tubing supplied with the kit. Once the right angle and length was determined, spotted them in place to the base of the wheelbox with JB Weld. Not necessary once they're all together. But keeps things lined up for final assembly. Plus I apparently just like to glue stuff...
Couple more things to do to the body, including the truck bedliner coating, and I'll get the body back on the chassis. Likely will be my stopping place until after the move.
Last edited by edwardb; 08-21-2016 at 08:31 PM.
Build 1: Mk3 Roadster #5125. Sold 11/08/2014.
Build 2: Mk4 Roadster #7750. Sold 04/10/2017.
Build Thread
Build 3: Mk4 Roadster 20th Anniversary #8674. Sold 09/07/2020.
Build Thread and
Video.
Build 4: Gen 3 Type 65 Coupe #59. Gen 3 Coyote. Legal 03/04/2020.
Build Thread and
Video
Build 5: 35 Hot Rod Truck #138. LS3 and 4L65E auto. Rcvd 01/05/2021. Legal 04/20/2023.
Build Thread. Sold 11/9/2023.
-
08-21-2016, 08:20 PM
#363

Steve >> aka: GoDadGo

I like your "Square Bar" solutions Sir Edward.
I used 1/2 PVC pipe (schedule 40) with a union attached then I drilled it out with a 5/8" bit and cut it to the correct angle.
It fits very well plus I was able to use my belt sander to get the sizes just right.
As always I'm glad to view your work and while I believe that my solution will work well, I know I've got your solutions if it doesn't.
Have A Great Evening!
Last edited by GoDadGo; 08-21-2016 at 08:23 PM.
-
08-22-2016, 06:46 AM
#364
Senior Member

Looking great Paul, as usual! Good luck with the move, sounds like you found a great place for you and your wife. Now the $25k question, what colour you painting her?  let me guess, red?
Kyle
Complete Kit pickup 09/05/2015, 351w, QF680, 3.55, 3-Link, 15" Halibrands with MT's, Painted Viking blue with Wimbledon white stripes on 03/15/2017. Sold in 08/2018 and totally regret it.
-
08-22-2016, 07:07 AM
#365
Senior Member


Originally Posted by
KDubU

Looking great Paul, as usual! Good luck with the move, sounds like you found a great place for you and your wife. Now the $25k question, what colour you painting her?

let me guess, red?
Lucky guess... 
Build 1: Mk3 Roadster #5125. Sold 11/08/2014.
Build 2: Mk4 Roadster #7750. Sold 04/10/2017.
Build Thread
Build 3: Mk4 Roadster 20th Anniversary #8674. Sold 09/07/2020.
Build Thread and
Video.
Build 4: Gen 3 Type 65 Coupe #59. Gen 3 Coyote. Legal 03/04/2020.
Build Thread and
Video
Build 5: 35 Hot Rod Truck #138. LS3 and 4L65E auto. Rcvd 01/05/2021. Legal 04/20/2023.
Build Thread. Sold 11/9/2023.
-
08-25-2016, 03:56 PM
#366
Senior Member

Footboxes
Another quick update as I’m wrapping up chassis details. I installed the final two panels on the DS footbox. Outside top and side. I had previously given them the full Lizard Skin treatment, so just a matter of the usual silicone and rivets to make them permanent. Then a little touch-up of Lizard Skin around the inside to completely seal it up. You can see the bolts for the Russ Thompson dead pedal. More about that later.
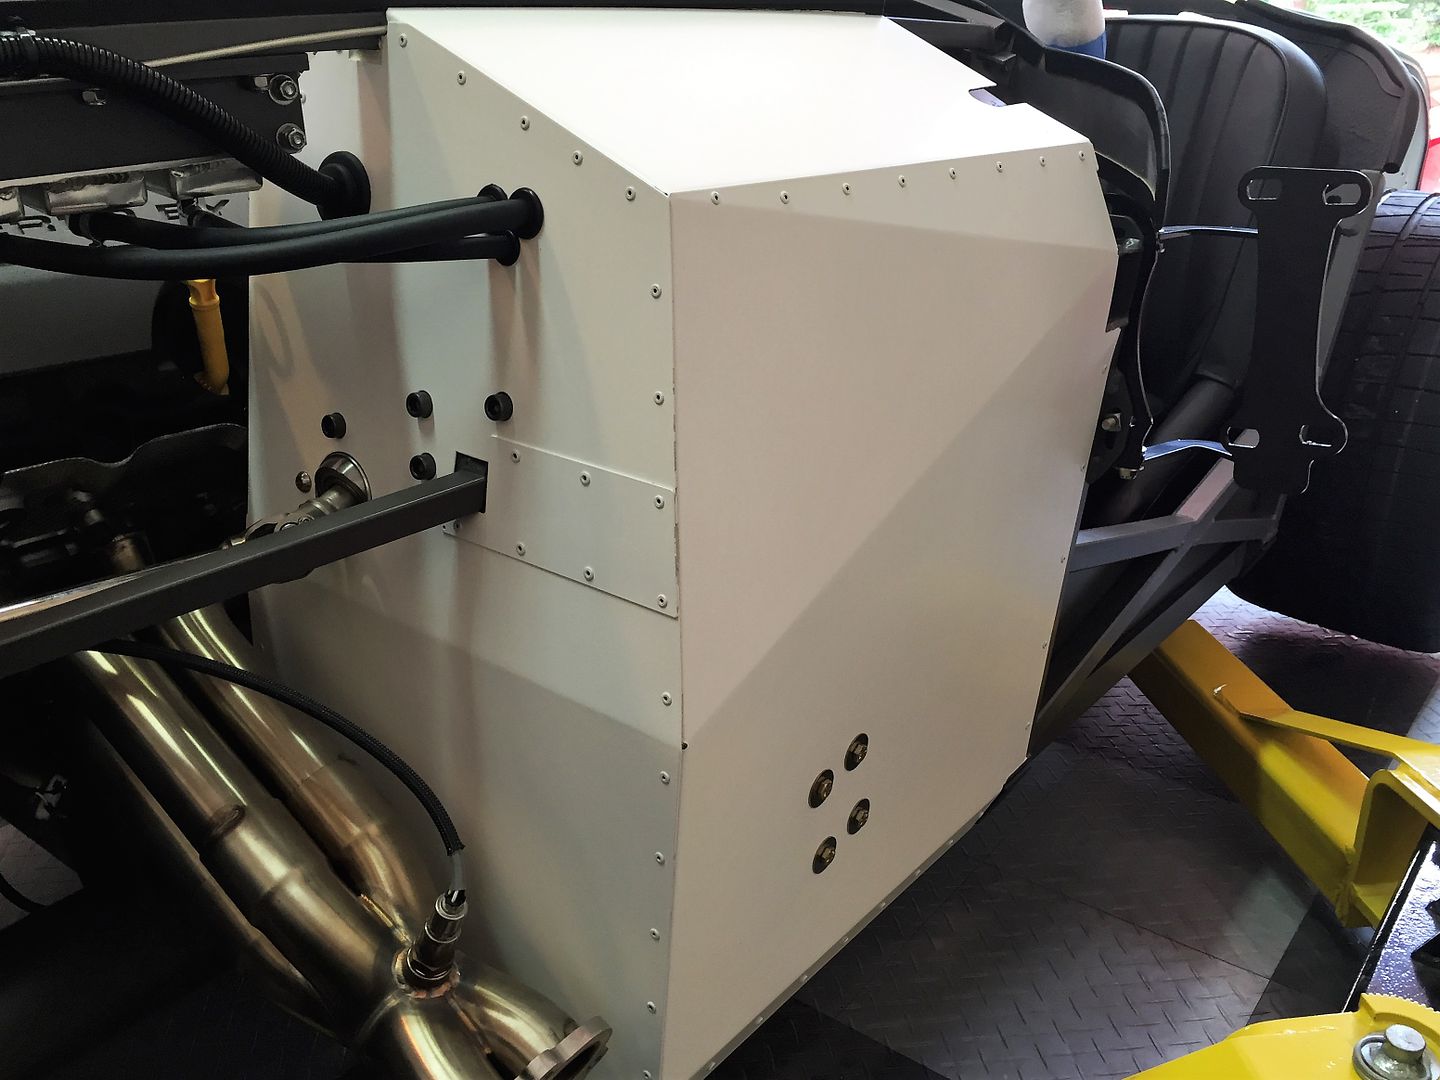
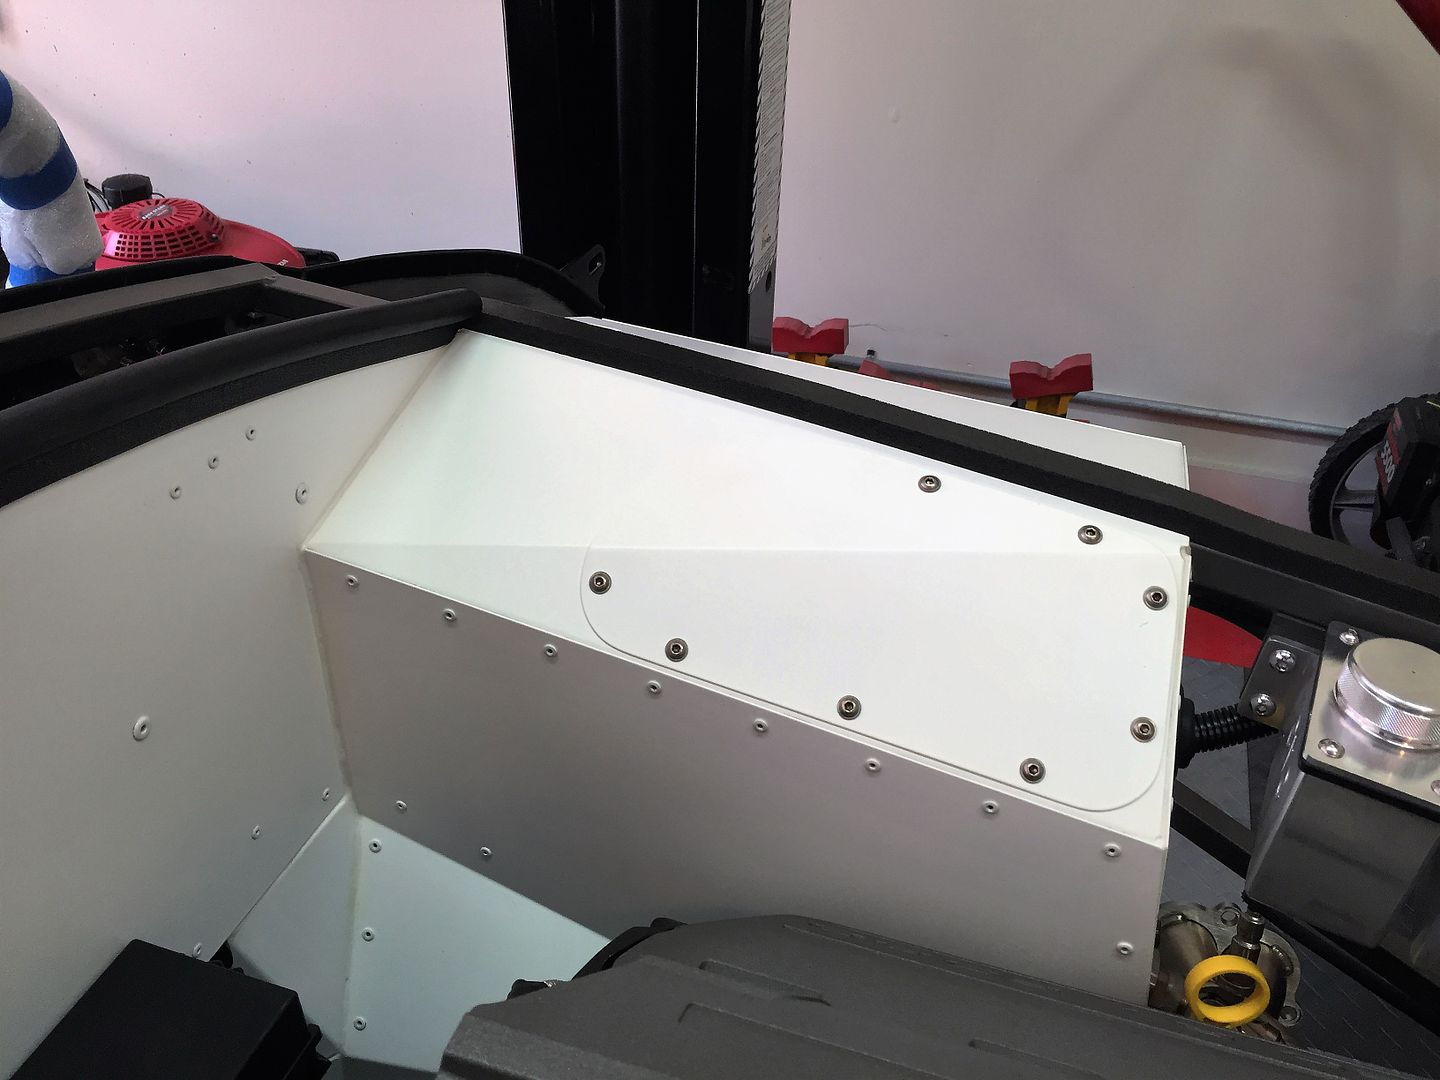
Also bolted on the access cover. I had previously installed nutserts and also put some coats of Lizard Skin on the underside of the cover in the area of the opening. None around the edges so it fits nice and flush. Feels good to see that installed. Hopefully it stays there for a good while.
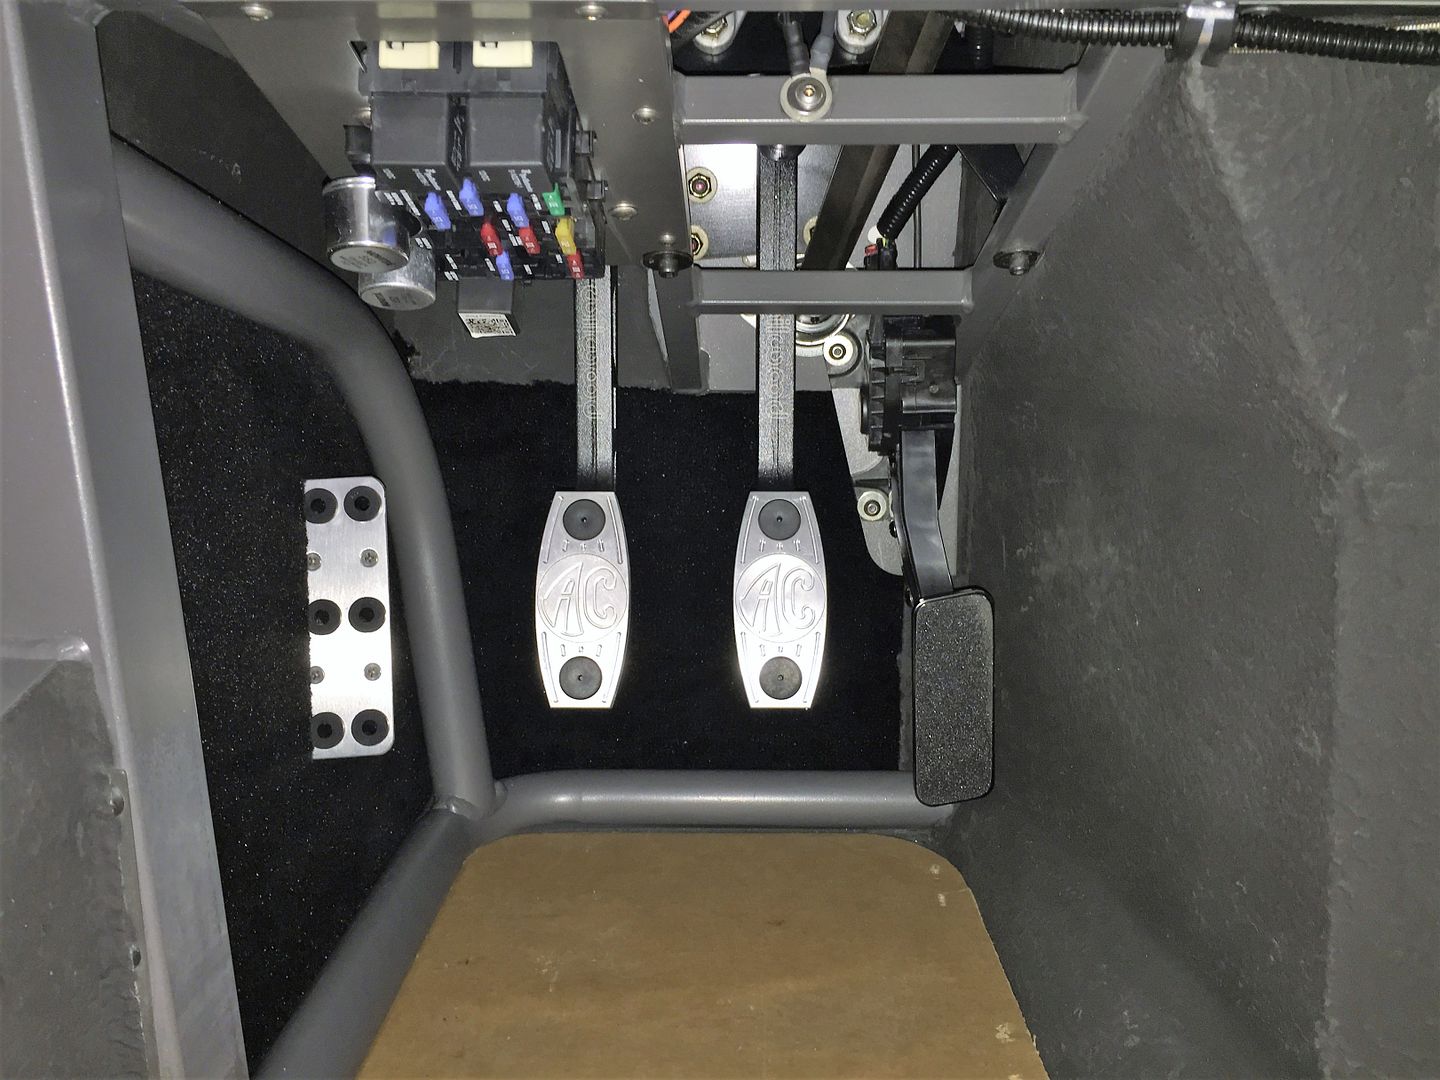
I really like a dead pedal to rest my left foot while cruising. On my previous Mk4 I used the Russ Thompson bolt-on dead pedal sold by Breeze. Very happy with it so did the same thing here. Sitting in the seat, I used some double back tape and found the best angle and depth to fit my foot. Then drilled the mounting holes. Note this is the older version of the footbox sheet metal. I don't have the little bumpout like on the newest sheet metal. I'm assuming this same dead pedal would still work, but I don't know for sure.
Since the dead pedal goes on top of the carpet, and I wanted to install it for good, went ahead and installed the carpet. Actually this is a good time to do the footbox carpet before the body is on. Easier to reach back in there. So I installed the outside and back piece. It comes in one piece from FF, but I cut it and installed in two pieces. Just easier to position. Nearly completed DS footbox and pedal area:
Since I was doing carpet, did the same area on the PS. Also cut the single piece and installed as two pieces.
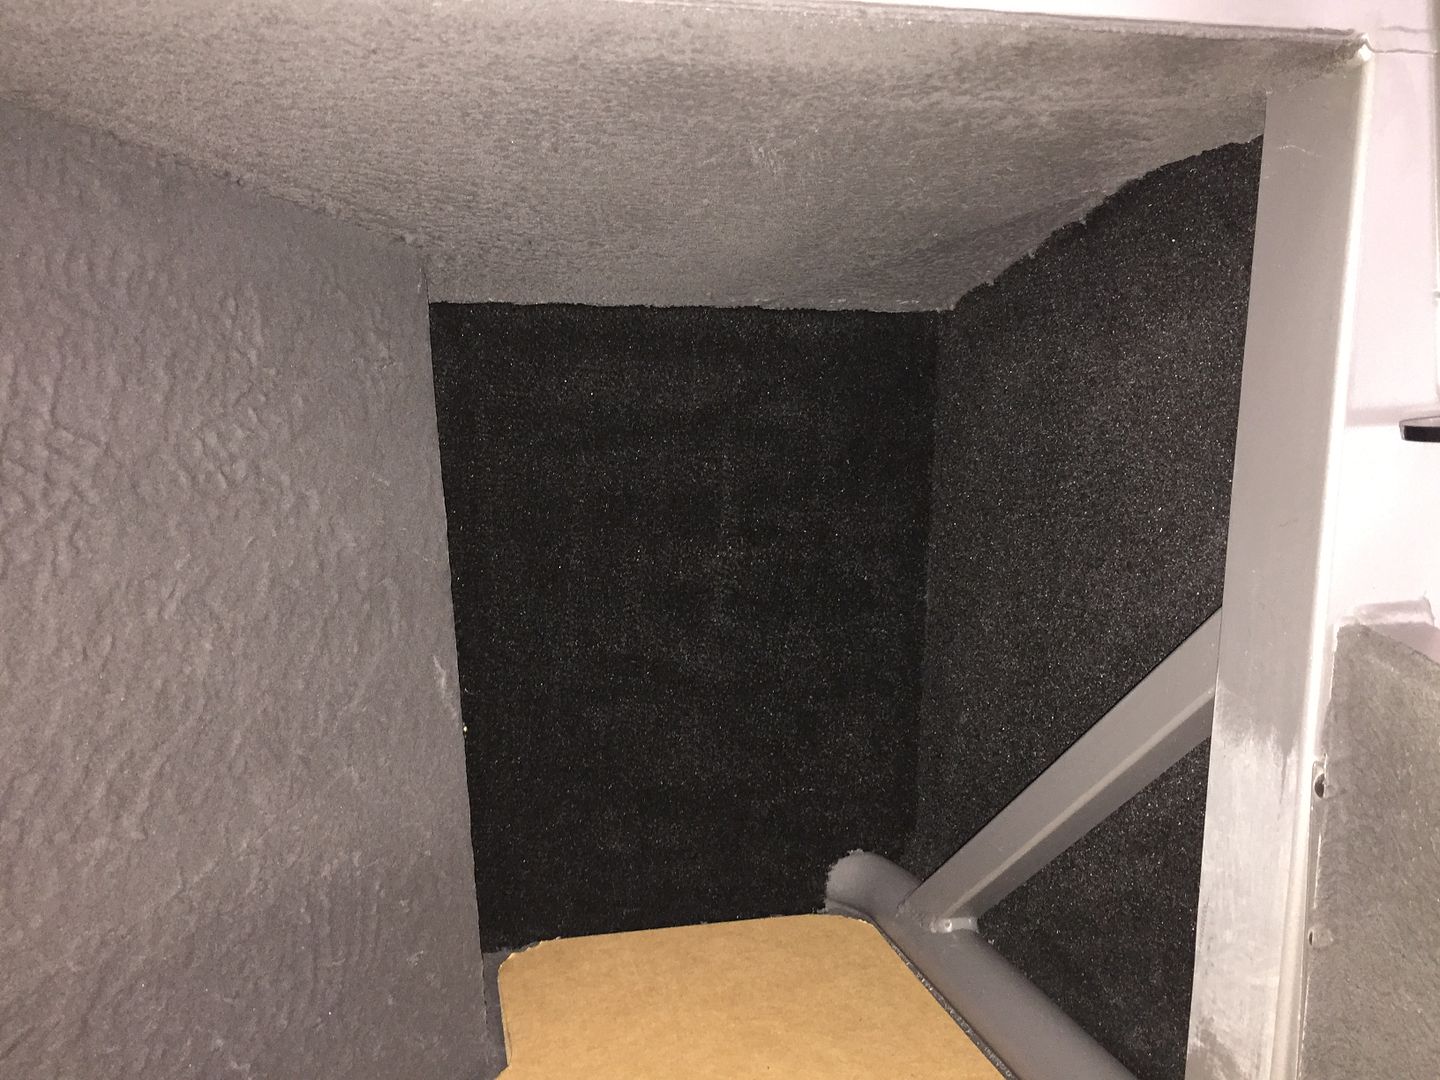
I’ve tried a number of different methods to attach carpet (contact cement, silicone, spray adhesive, etc.) and like Outdoor Carpet Adhesive far and away the best. It’s strong like contact cement, but allows some re-positioning. You only have to apply it on one surface with a 1/8-inch notched trowel, place the carpet, and then a roller to lock it down. Works really great. I use the DAP product. I find the solvent based stuff works a little better than the water based. Just more aggressive when you push the carpet down and sets up faster. Not easy to find though. I order it on Amazon. Note that if you get any of this adhesive on the good side of the carpet (it happens...) a little mineral spirits on a paper towel and it cleans right off. Doesn't seem to harm the carpet.
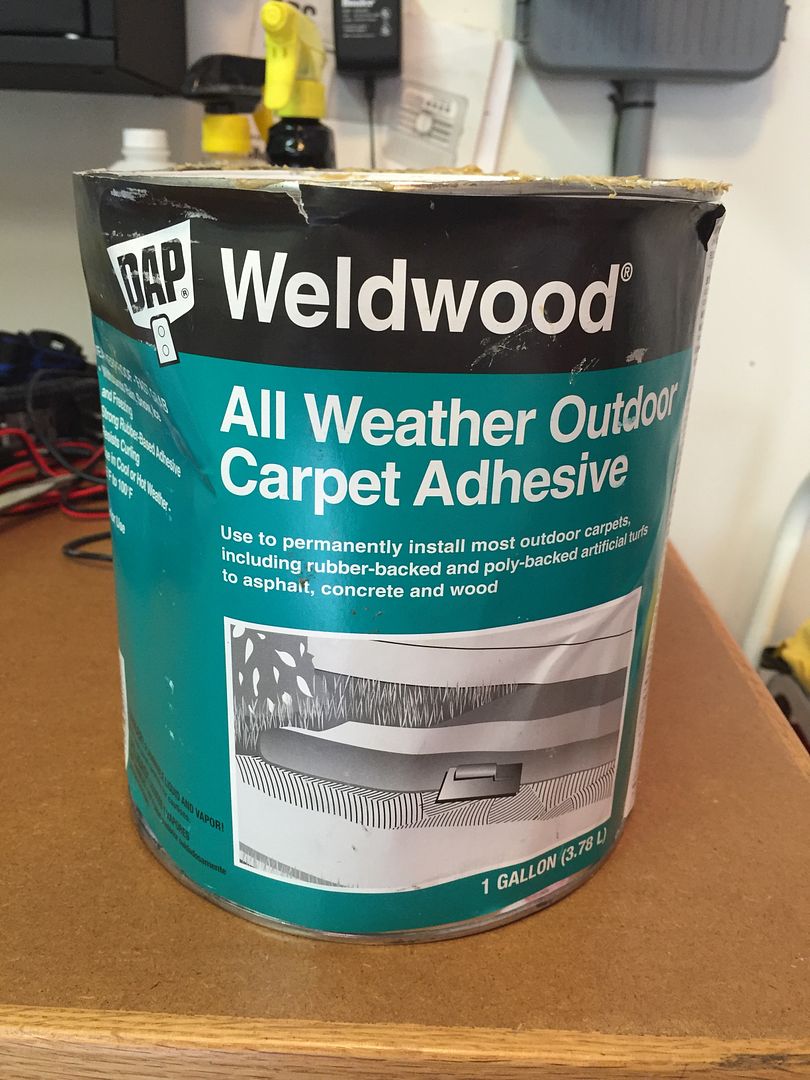
Tomorrow I’m going to start the final details on the body, and then drop it on the chassis probably early next week. Then I expect to start my time out. Our house deals are progressing with basically all details completed. Closings are supposed to be one month from today and we have a lot of work to do to get organized for our big move. Then I have an ever increasing list of things to do on the new place. At some point I hope to find a gap and finish up what's needed so I can get this thing to paint. But it's going to be a few months from now at least. We'll see. Gotta save some of this build for my new expanded garage and workspace.
Last edited by edwardb; 08-26-2016 at 07:13 AM.
Build 1: Mk3 Roadster #5125. Sold 11/08/2014.
Build 2: Mk4 Roadster #7750. Sold 04/10/2017.
Build Thread
Build 3: Mk4 Roadster 20th Anniversary #8674. Sold 09/07/2020.
Build Thread and
Video.
Build 4: Gen 3 Type 65 Coupe #59. Gen 3 Coyote. Legal 03/04/2020.
Build Thread and
Video
Build 5: 35 Hot Rod Truck #138. LS3 and 4L65E auto. Rcvd 01/05/2021. Legal 04/20/2023.
Build Thread. Sold 11/9/2023.
-
08-25-2016, 05:18 PM
#367
 Administrator

Quick question Paul:
For the louver studs, do you see and problem with using JB Weld instead of 3M HSRF? I have JB Weld on hand already and was thinking I'd use that, but I'm interested to hear if you have a reason why I shouldn't.

FFR 5369 Pin Drive, IRS, Trigos, Torsen, Wilwoods, FMS BOSS 302 "B" cam , Mass-flo. CA SB100 (SPCN) Registered
Delivered 4/23/06. "Finished" 4/2012 (still not done!)
-
08-25-2016, 08:02 PM
#368
Senior Member


Originally Posted by
David Hodgkins

Quick question Paul:
For the louver studs, do you see and problem with using JB Weld instead of 3M HSRF? I have JB Weld on hand already and was thinking I'd use that, but I'm interested to hear if you have a reason why I shouldn't.

Hi David. I use my share of JB Weld. But I've never tried it on the vinylester glass body. Generally, it's not recommended to use epoxy with polyester or vinylester resins. But my sense is that if you roughed up the bonding area on the body real well, the JB Weld should stick to it OK. That stuff does well with many different surfaces. And frankly the louvers aren't a huge weight to hold up. If I were doing it, I would only do one and give it a pretty good pull test once the JB Weld cured. Then do the rest if it seems OK.
Last edited by edwardb; 08-26-2016 at 10:51 AM.
Build 1: Mk3 Roadster #5125. Sold 11/08/2014.
Build 2: Mk4 Roadster #7750. Sold 04/10/2017.
Build Thread
Build 3: Mk4 Roadster 20th Anniversary #8674. Sold 09/07/2020.
Build Thread and
Video.
Build 4: Gen 3 Type 65 Coupe #59. Gen 3 Coyote. Legal 03/04/2020.
Build Thread and
Video
Build 5: 35 Hot Rod Truck #138. LS3 and 4L65E auto. Rcvd 01/05/2021. Legal 04/20/2023.
Build Thread. Sold 11/9/2023.
-
08-26-2016, 10:38 AM
#369
 Administrator


Originally Posted by
edwardb

Hi David. I use my share of JB Weld. But I've never tried it on the vinylester glass body. Generally, it's not recommended to use epoxy with polyester or vinylester resins. But my sense is that if you roughed up the bonding area on the body real well, the JB Weld should stick to it OK. That stuff does well with many difference surfaces. And frankly the louvers aren't a huge weight to hold up. If I were doing it, I would only do one and give it a pretty good pull test once the JB Weld cured. Then do the rest if it seems OK.
Thanks, I hadn't thought of that (obviously).
I think I'll just go ahead and do it the right way, with HSRF. Thanks!

FFR 5369 Pin Drive, IRS, Trigos, Torsen, Wilwoods, FMS BOSS 302 "B" cam , Mass-flo. CA SB100 (SPCN) Registered
Delivered 4/23/06. "Finished" 4/2012 (still not done!)
-
08-26-2016, 07:41 PM
#370
Carl

Paul,
Your Post 334 on body preparations is just what I needed to have ... perfect for us trying to tackle the body right now.
Thanks for your dedication to perfection, setting a very high standard and your willingness to help all of us!
Have a great move ...
Carl
Mk 4 Roadster
October 25, 2012 - Kit Arrives
April 8, 2013 - Build Starts
August 23, 2015 - Rolling Chassis/Engine & Transmission Installed
March 26, 2016 - Go Cart
-
08-26-2016, 09:02 PM
#371
Senior Member


Originally Posted by
carlewms

Paul,
Your Post 334 on body preparations is just what I needed to have ... perfect for us trying to tackle the body right now.
Thanks for your dedication to perfection, setting a very high standard and your willingness to help all of us!
Have a great move ...
Carl
Thanks Carl. I appreciate your comments very much. 
Glad the body work post is helpful. Also glad most of that is behind me. Not my favorite part of the build.
Build 1: Mk3 Roadster #5125. Sold 11/08/2014.
Build 2: Mk4 Roadster #7750. Sold 04/10/2017.
Build Thread
Build 3: Mk4 Roadster 20th Anniversary #8674. Sold 09/07/2020.
Build Thread and
Video.
Build 4: Gen 3 Type 65 Coupe #59. Gen 3 Coyote. Legal 03/04/2020.
Build Thread and
Video
Build 5: 35 Hot Rod Truck #138. LS3 and 4L65E auto. Rcvd 01/05/2021. Legal 04/20/2023.
Build Thread. Sold 11/9/2023.
-
08-31-2016, 10:05 AM
#372
Senior Member

Body Work Progressing
Just about ready to put the body back on prior to final panel fit and then ready to go off to paint. While doing the basic trimming and cleanup, I noted 5-6 spots that needed some repair. Mostly just minor stuff like the gel coat chipped on the ends of the cockpit roll around dash and back wall, couple of chips around the front radiator opening, etc. Also decided to tighten up the holes cut for the windshield post. Once the windshield was fitted, I had some pretty big openings between the post and the body. You donít want the post touching the body, and the provided covers would have covered the holes I had. But it was kind of a lot, and close to where one of the mounting holes needed to be on one side. They need to be sealed from the underside after final assembly to keep water from running in. Having them closer just gives less to seal. Plus looks better. Like that matters...
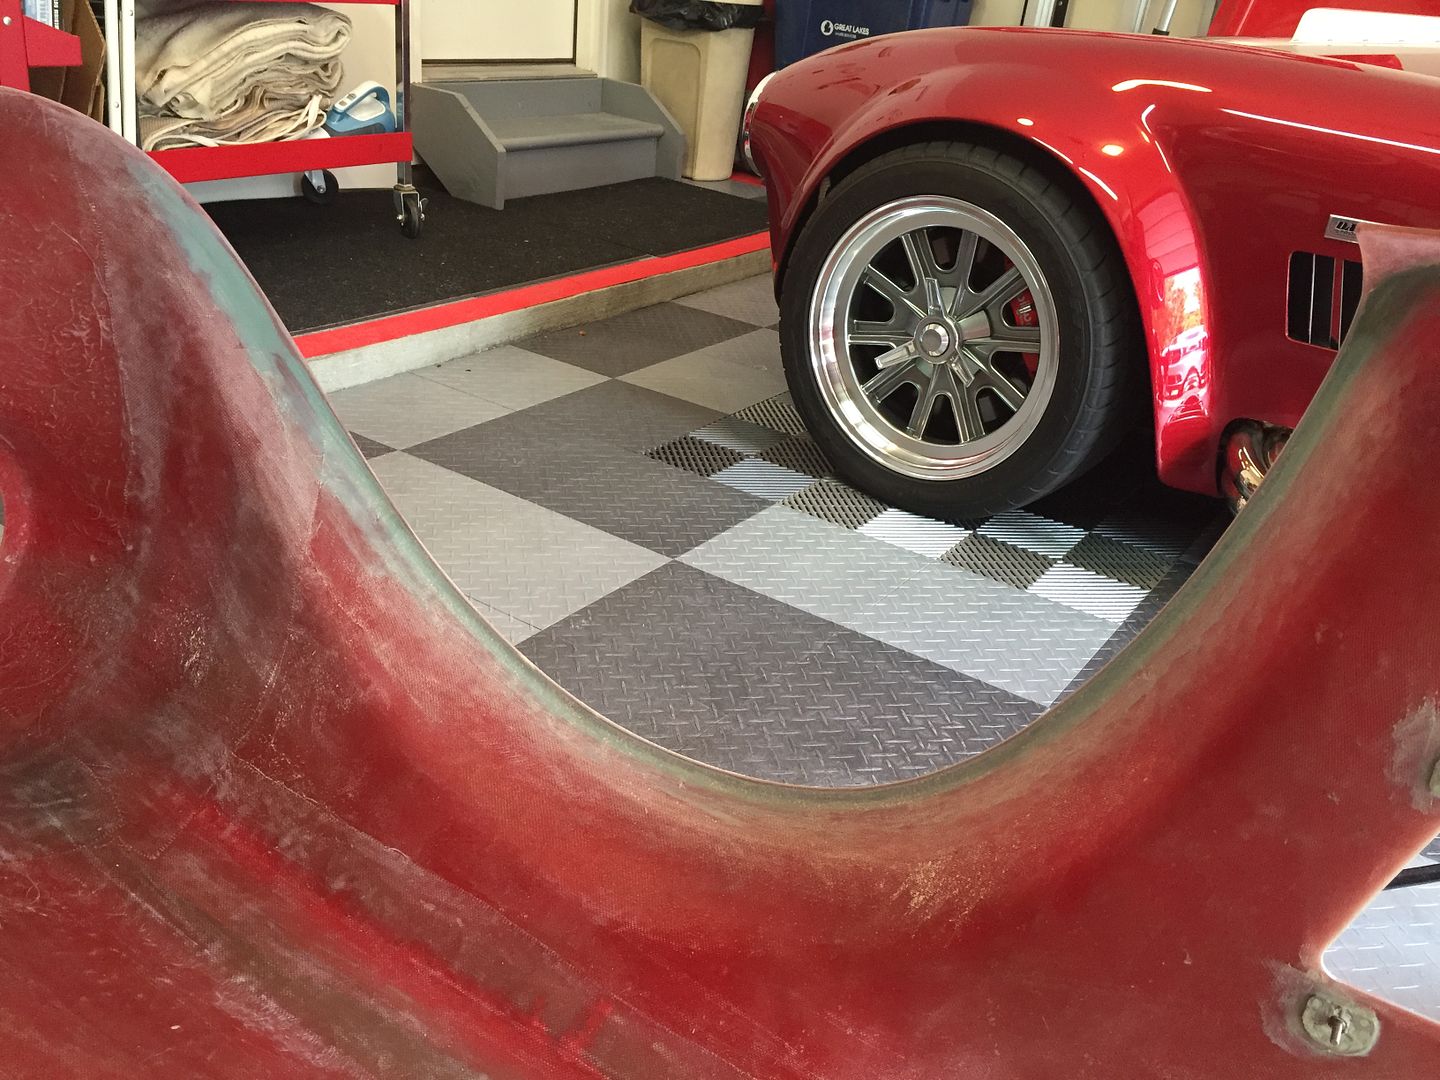
Additionally, I like to add a filet on the inside of the wheel lips. On the Mk3 (and maybe earlier, but I donít have experience with those) the wheel lips once trimmed were a pretty sharp edge and it was common practice to add a ďrollĒ or filet to give a more finished appearance. The Mk4 body is much better and once trimmed can be left as is and still look good. But I added the filet on my previous build and chose to do the same again on this one. Once the area behind the lip is filled, they can be rounded over and gives a nice solid look with nothing hollow behind. I like it. The material of choice for this as well as the previously mentioned repairs is 3Mís HSRF (High Strength Repair Filler). Same stuff used to bond the perforated based studs mentioned before. Itís specifically made for vinylester glass, like the FF fiberglass parts, and is amazingly strong. Like most material of this type, is a 2-part product with a small tube of hardener. It takes a few tries to get the feel for how much to use. To keep moving you want it to set up pretty quickly, but not too fast! Itís not impossible to sand, but not easy either. Best to get it as close as you can before it sets.
After doing all the little repairs noted, did the wheel lips as described. After searching far and wide, found the best forming tool.
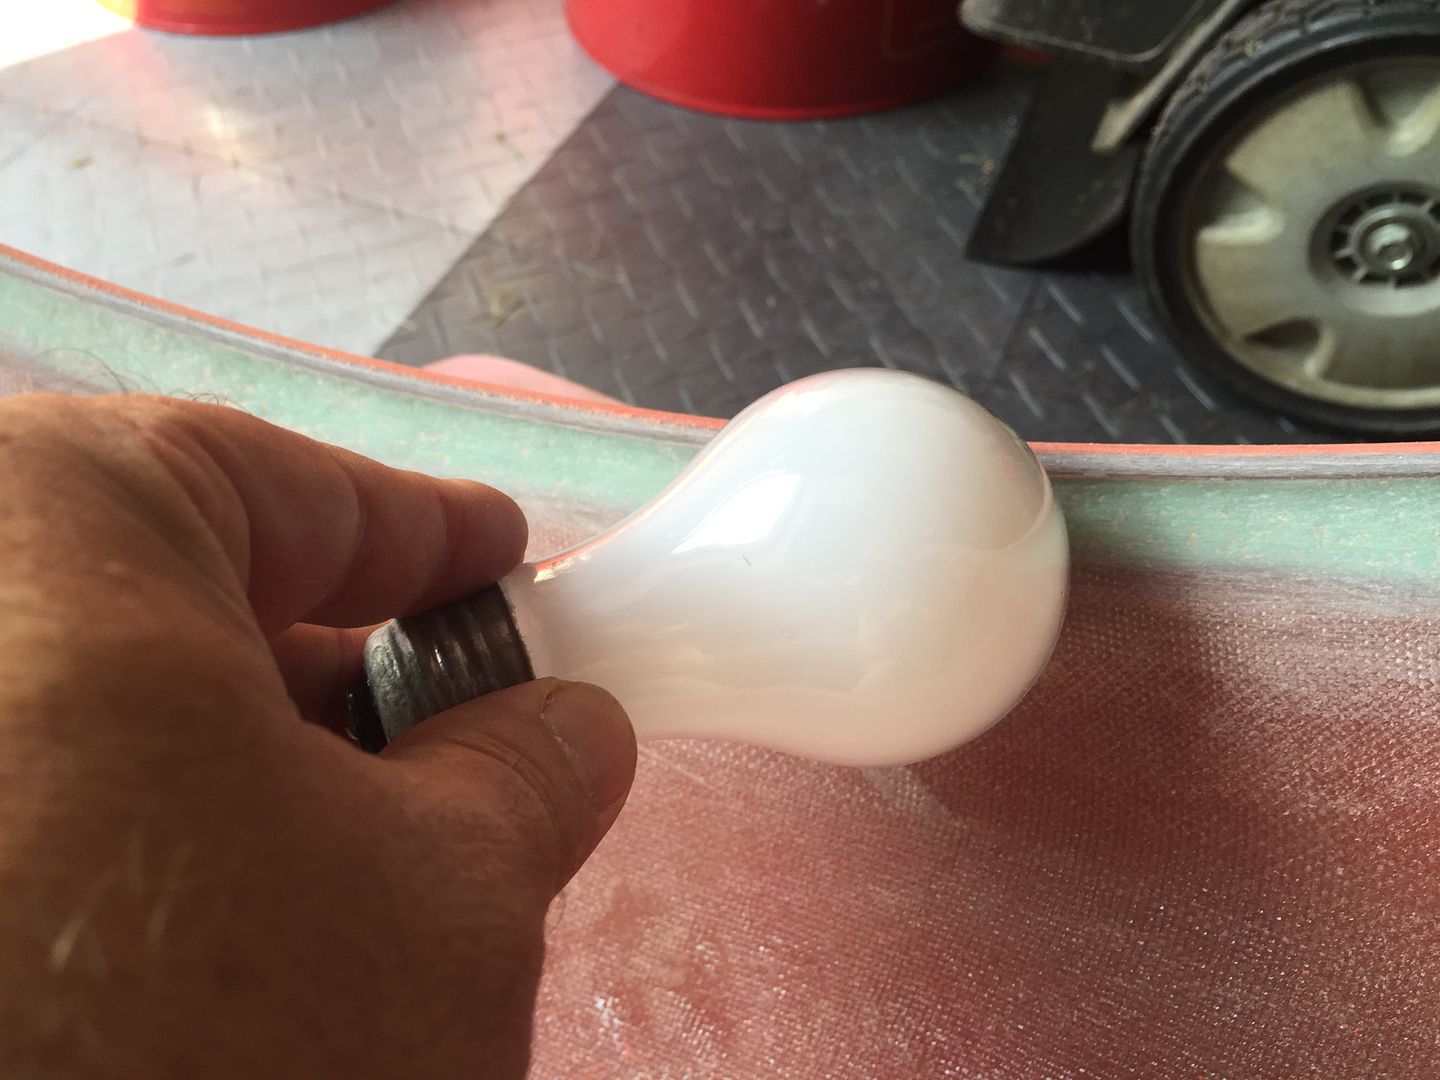
Some shots of the finished product.
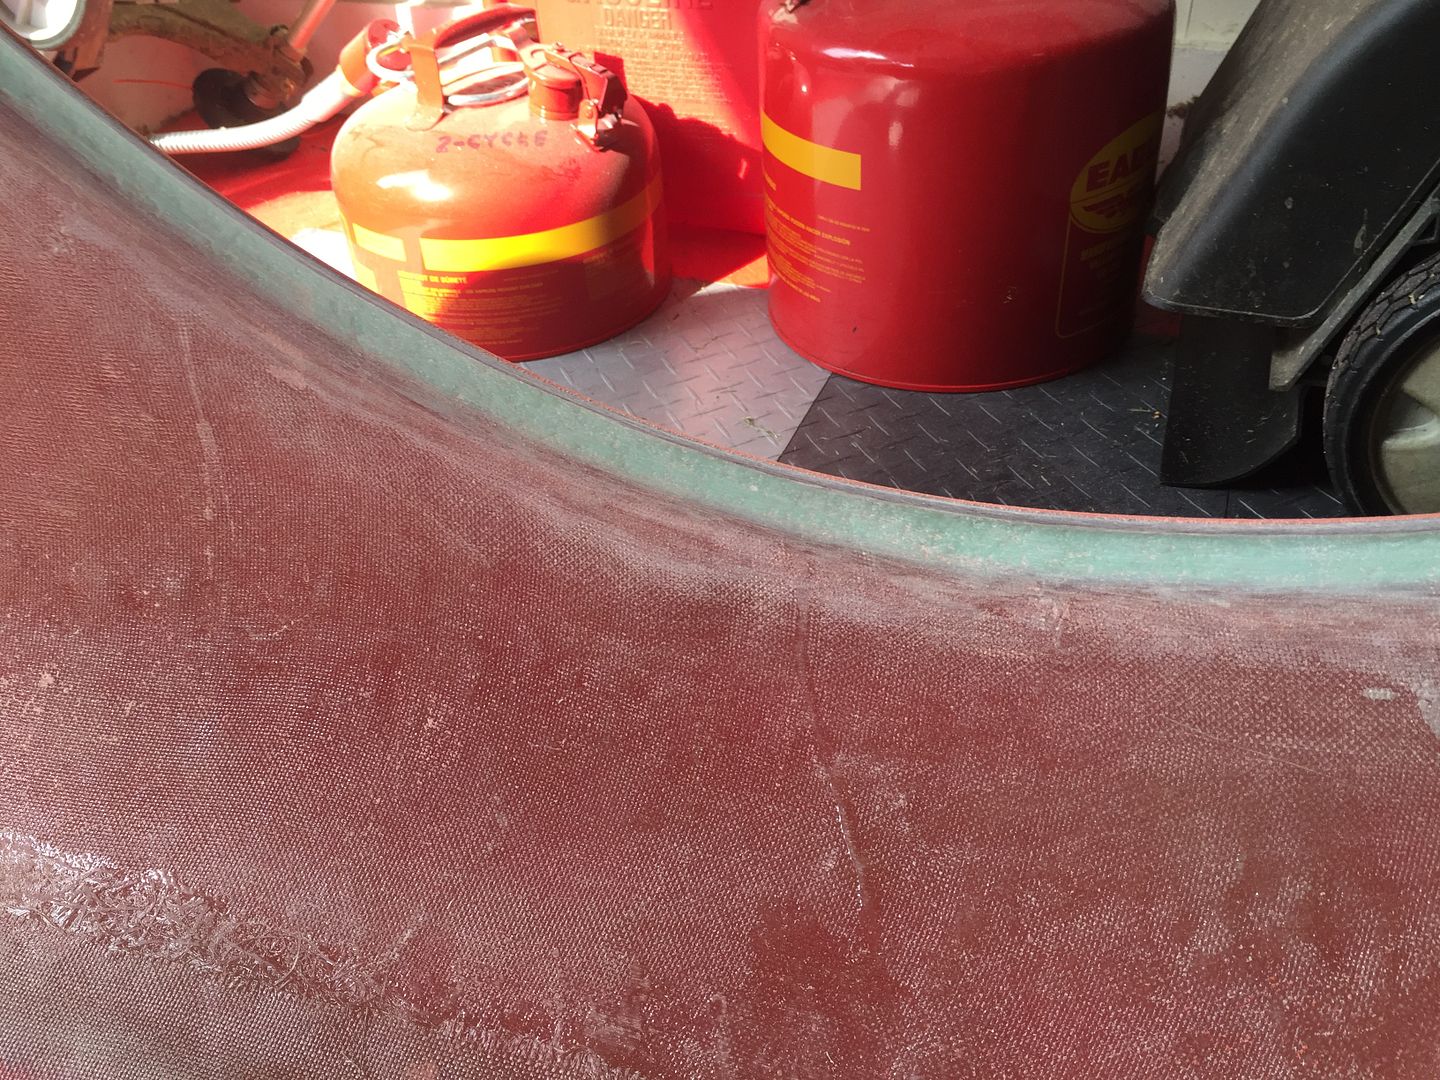
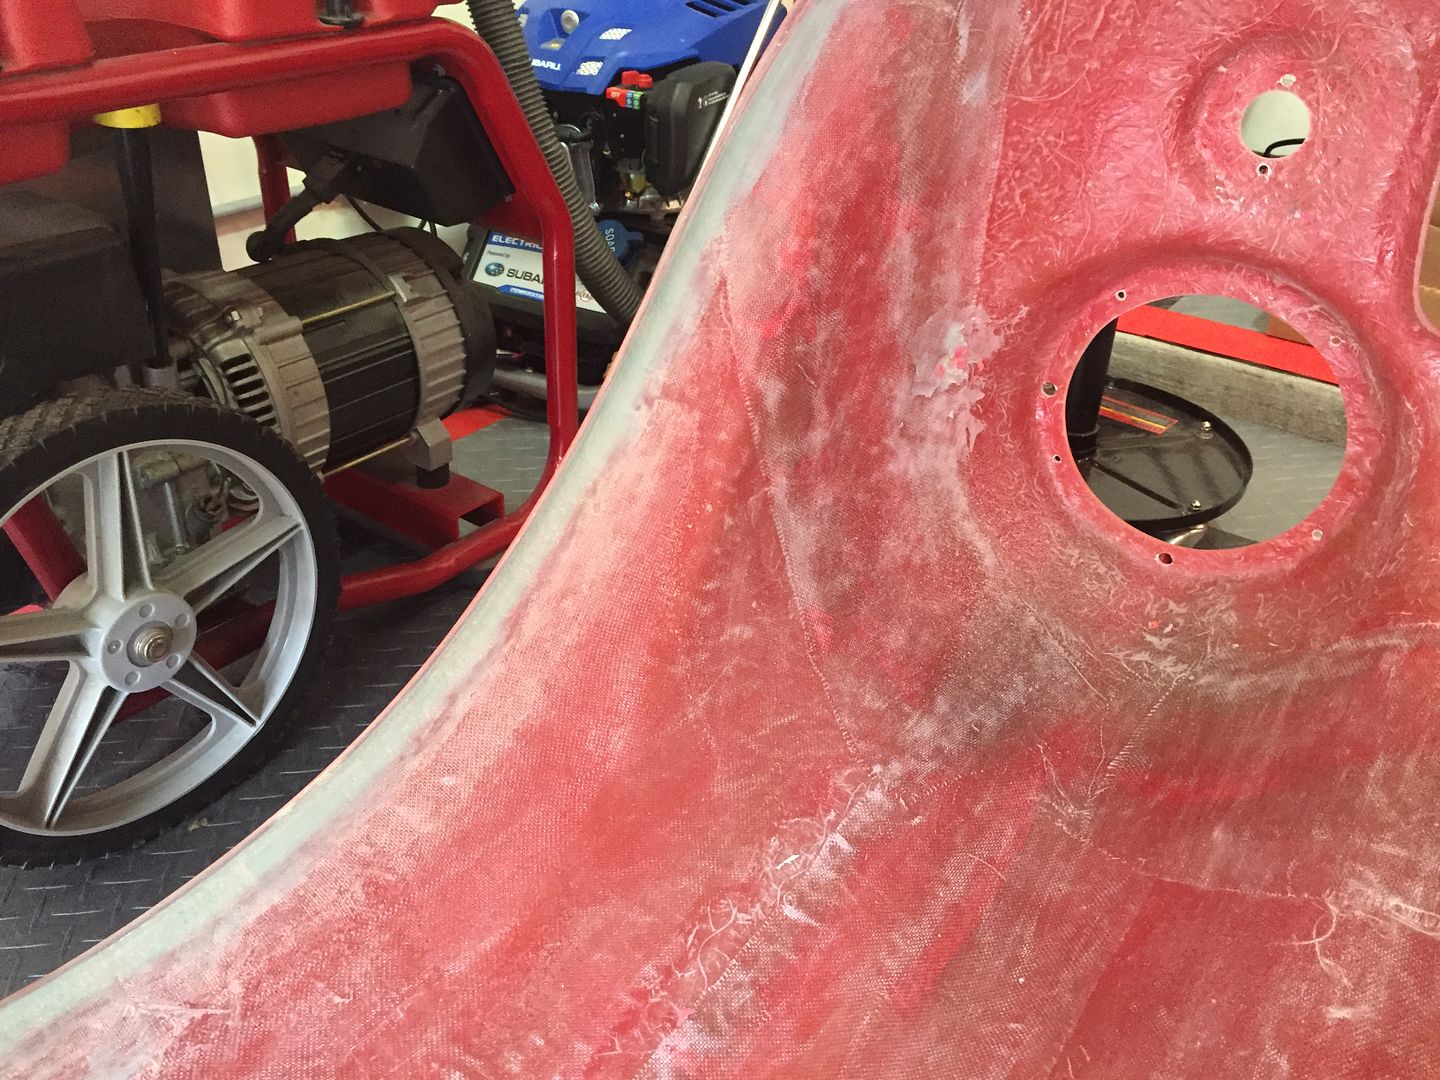
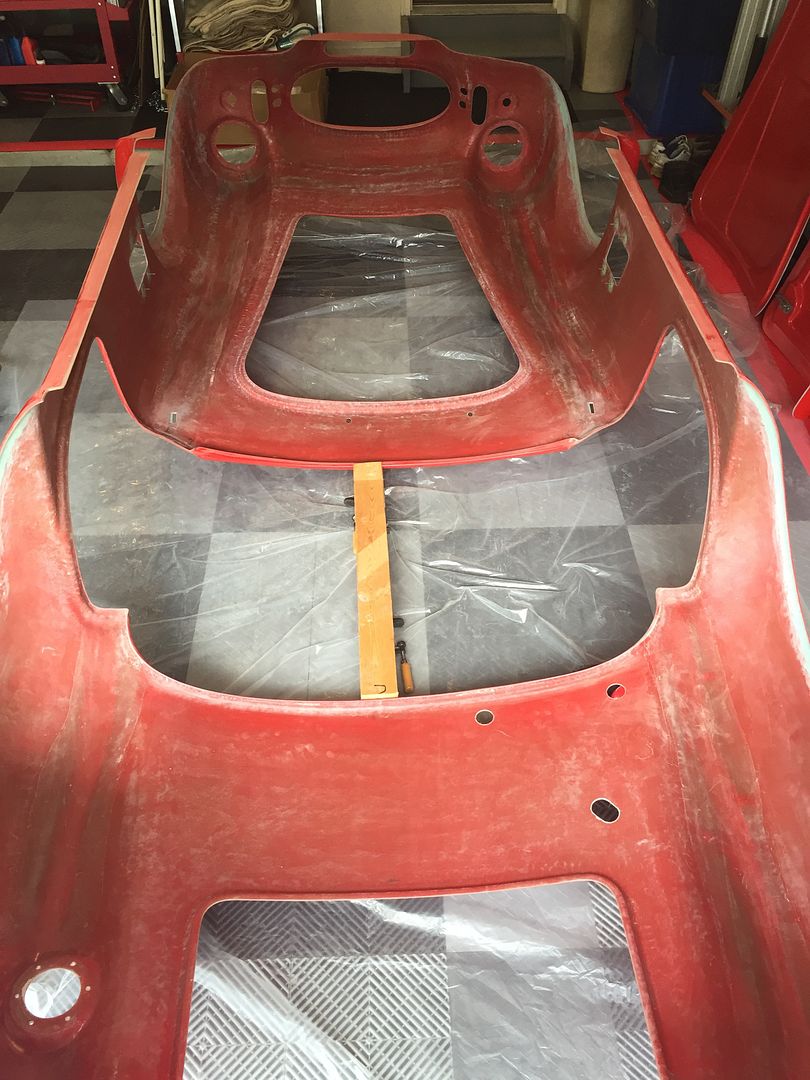
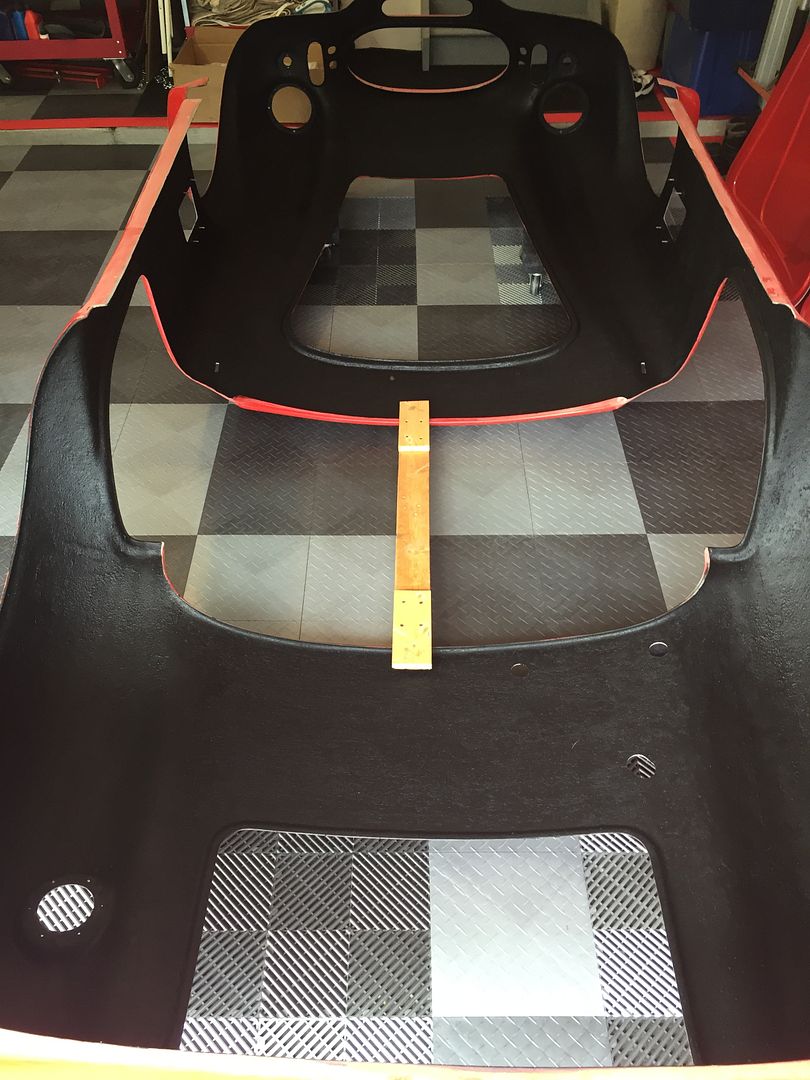
Next up was the body undercoat. This isnít mentioned in the FF instruction book as I recall. But itís a step many builders add. Accomplishes at least two things. First gives an overall uniform and clean appearance to the underside of the body. Not too important for much of the body, but some of it shows behind the wheels in the wheel wells, some in the trunk, and also you can see the inside of the body behind the F-panels under the hood. Just looks better. But more important is that it gives a measure of protection to the body from stones or whatever being thrown up into the body and potentially cracking the glass or staring the paint. There are a number of different products on the market. I chose to use the Duplicolor Bed Armor product. Happened to be on sale at Advance Auto. Plus, itís water based which helps for an already pretty messy process. This is the first time Iíve done the underside myself. Last two times were by the painter. I donít know how much they charged, but Iím sure more than the < $100 for the materials to DIY. Itís not hard, but took several hours and would have been easier if I had gotten the body up off the ground. (OK, I know Iím really spoiledÖ). The undercoat material has a lot of solid material (I assume ground up rubber?) in suspension. Needs to be stirred constantly and doesnít brush all that easily. The roller that comes with the kit does a good job, but has a really short nap so doesnít work in the curves or irregular surfaces all that well. I used a combination of brushes and the provided roller. I put a couple coats on the entire underside and another heavy one in the wheel wells. Still have a little left over that Iíll use for the splash guards.
All ready:
Done:
Instructions say 72 hours for full cure. With as humid as itís been, it will take every bit of that. Iíll get the body onto the chassis in a couple days. Back to packing!
Last edited by edwardb; 08-31-2016 at 10:16 AM.
Build 1: Mk3 Roadster #5125. Sold 11/08/2014.
Build 2: Mk4 Roadster #7750. Sold 04/10/2017.
Build Thread
Build 3: Mk4 Roadster 20th Anniversary #8674. Sold 09/07/2020.
Build Thread and
Video.
Build 4: Gen 3 Type 65 Coupe #59. Gen 3 Coyote. Legal 03/04/2020.
Build Thread and
Video
Build 5: 35 Hot Rod Truck #138. LS3 and 4L65E auto. Rcvd 01/05/2021. Legal 04/20/2023.
Build Thread. Sold 11/9/2023.
-
08-31-2016, 03:45 PM
#373

Steve >> aka: GoDadGo

Edward,
I'm planning to coat the underside of the body and have the UPOL Raptor Liner in Red, but have concerns.
My question is how did you flip and support the body without creating problems?
I haven't flipped mine yet and don't want to damage it.
Steve
Last edited by GoDadGo; 08-31-2016 at 06:21 PM.
-
08-31-2016, 04:48 PM
#374
Senior Member


Originally Posted by
GoDadGo

Edward,
I'm planning to under body coating, but have the UPOL Raptor Liner in Red, but have concerns.
My question is how did you flip and support the body without creating problems?
I haven't flipped mine yet and don't want to damage it.
Steve
Notice in the pictures, I always have a spreader bar between the front and rear cockpit rolls. I find with this in place and careful handling, it's possible to flip the body over pretty easily. I make sure the spreader doesn't fall out with a couple bar clamps if needed. To flip it, with it on the ground and the spreader in place, I put a bunch of blankets along the side. Then carefully roll it over by first standing it on the side and then lowering on its back. The spreader keeps the front and back from flexing in. But it's also important to make sure it doesn't flex apart. That's when the clamps can be useful. With it on it's back, a padded furniture dolly under each fender keeps it stable and it can be moved around with a little care. I do most everything myself, but if you have a helper or two it's easier and less stressful. Plus it's not painted. If it were, of course everything completely changes.
Build 1: Mk3 Roadster #5125. Sold 11/08/2014.
Build 2: Mk4 Roadster #7750. Sold 04/10/2017.
Build Thread
Build 3: Mk4 Roadster 20th Anniversary #8674. Sold 09/07/2020.
Build Thread and
Video.
Build 4: Gen 3 Type 65 Coupe #59. Gen 3 Coyote. Legal 03/04/2020.
Build Thread and
Video
Build 5: 35 Hot Rod Truck #138. LS3 and 4L65E auto. Rcvd 01/05/2021. Legal 04/20/2023.
Build Thread. Sold 11/9/2023.
-
08-31-2016, 06:25 PM
#375

Steve >> aka: GoDadGo

I'm not sure if I'm brave enough to flip it and may just hang the body buck and spray it from underneath.
I may try, but can't say for sure.
Thanks Again!
-
08-31-2016, 07:59 PM
#376
Senior Member


Originally Posted by
GoDadGo

I'm not sure if I'm brave enough to flip it and may just hang the body buck and spray it from underneath.
I may try, but can't say for sure.
Thanks Again!
It's not as fragile as you might think if you don't put any undo stress on it. It's going to have to come off the body buck sometime. 
Build 1: Mk3 Roadster #5125. Sold 11/08/2014.
Build 2: Mk4 Roadster #7750. Sold 04/10/2017.
Build Thread
Build 3: Mk4 Roadster 20th Anniversary #8674. Sold 09/07/2020.
Build Thread and
Video.
Build 4: Gen 3 Type 65 Coupe #59. Gen 3 Coyote. Legal 03/04/2020.
Build Thread and
Video
Build 5: 35 Hot Rod Truck #138. LS3 and 4L65E auto. Rcvd 01/05/2021. Legal 04/20/2023.
Build Thread. Sold 11/9/2023.
-
08-31-2016, 10:12 PM
#377

Steve >> aka: GoDadGo

I'll take your word for it and will keep you posted.
We've had the body on a few times and tonight we put the engine in for the 4th and hopefully final test fit.
Being my 1st build, you know exactly how I feel since you're now on your 3rd.
Thanks Again For Posting So Many Pics!
-
09-02-2016, 09:03 PM
#378
Senior Member

Assembly, Posing, Time Out
Today was the day to get the undercoated and nearly completely prepped body back onto the chassis. The goal was to get it to a stopping point in preparation for our move.
Did my usual solo thing with rope locks from the hooks in my garage ceiling to lower the body onto the chassis. I use lots of towels to let it slide into place a little more easily, especially while pulling out the sides over the door posts/hinges. Note this also goes a long way to keep from tearing up the bulb seal along the trunk sides and the cushioning around the hood opening.
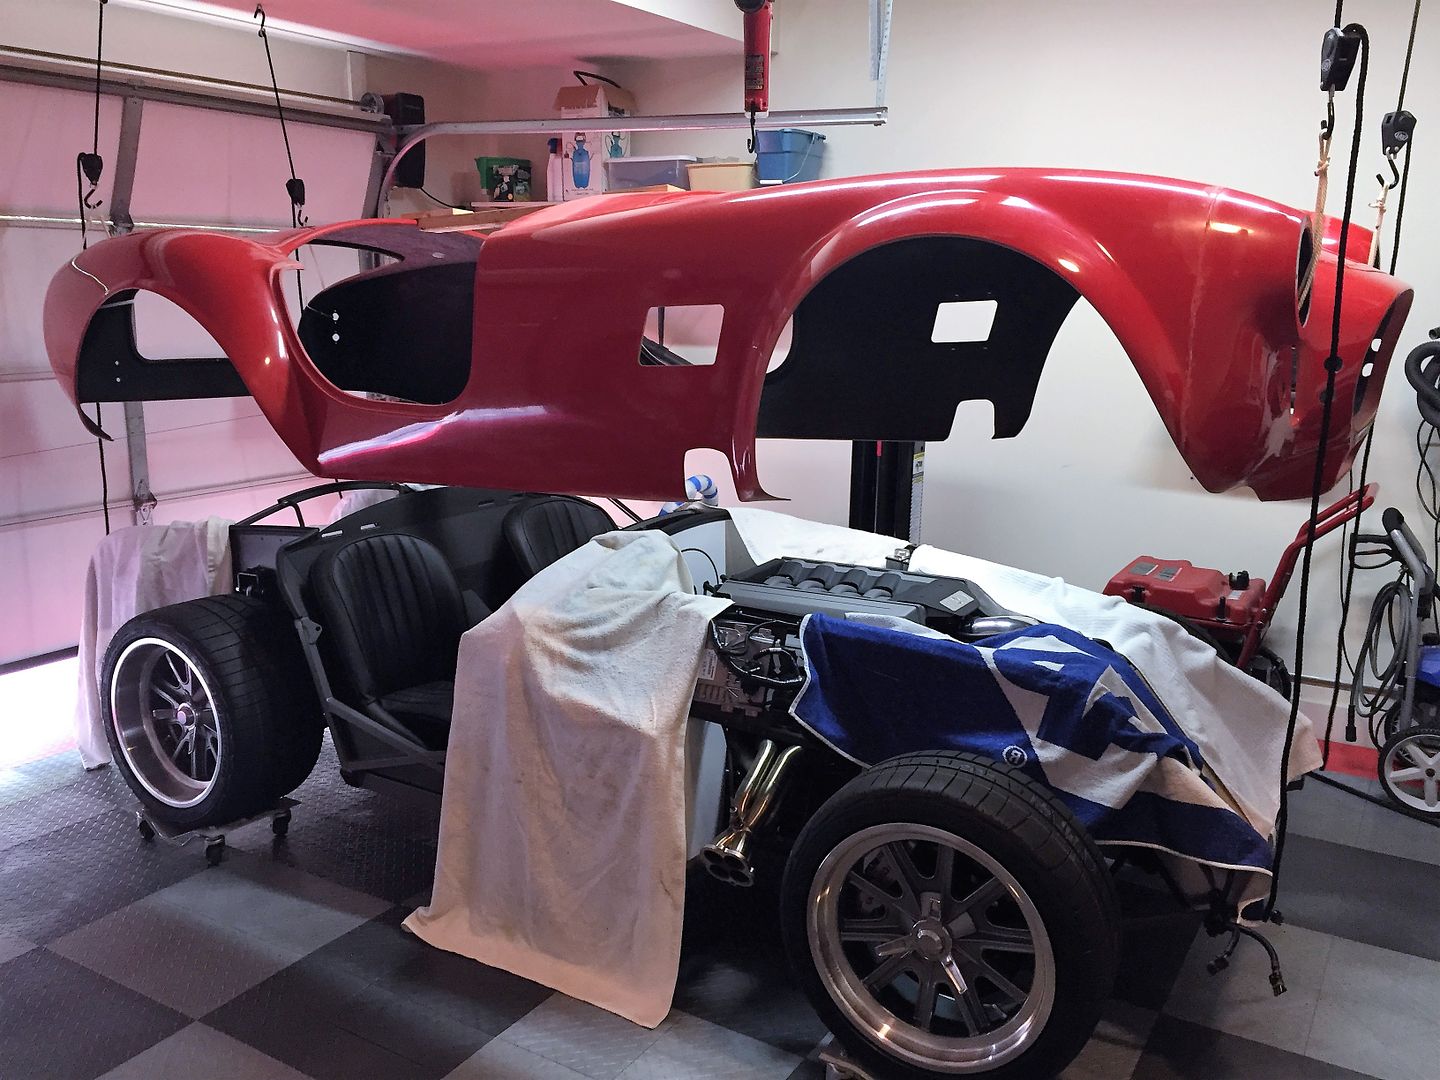
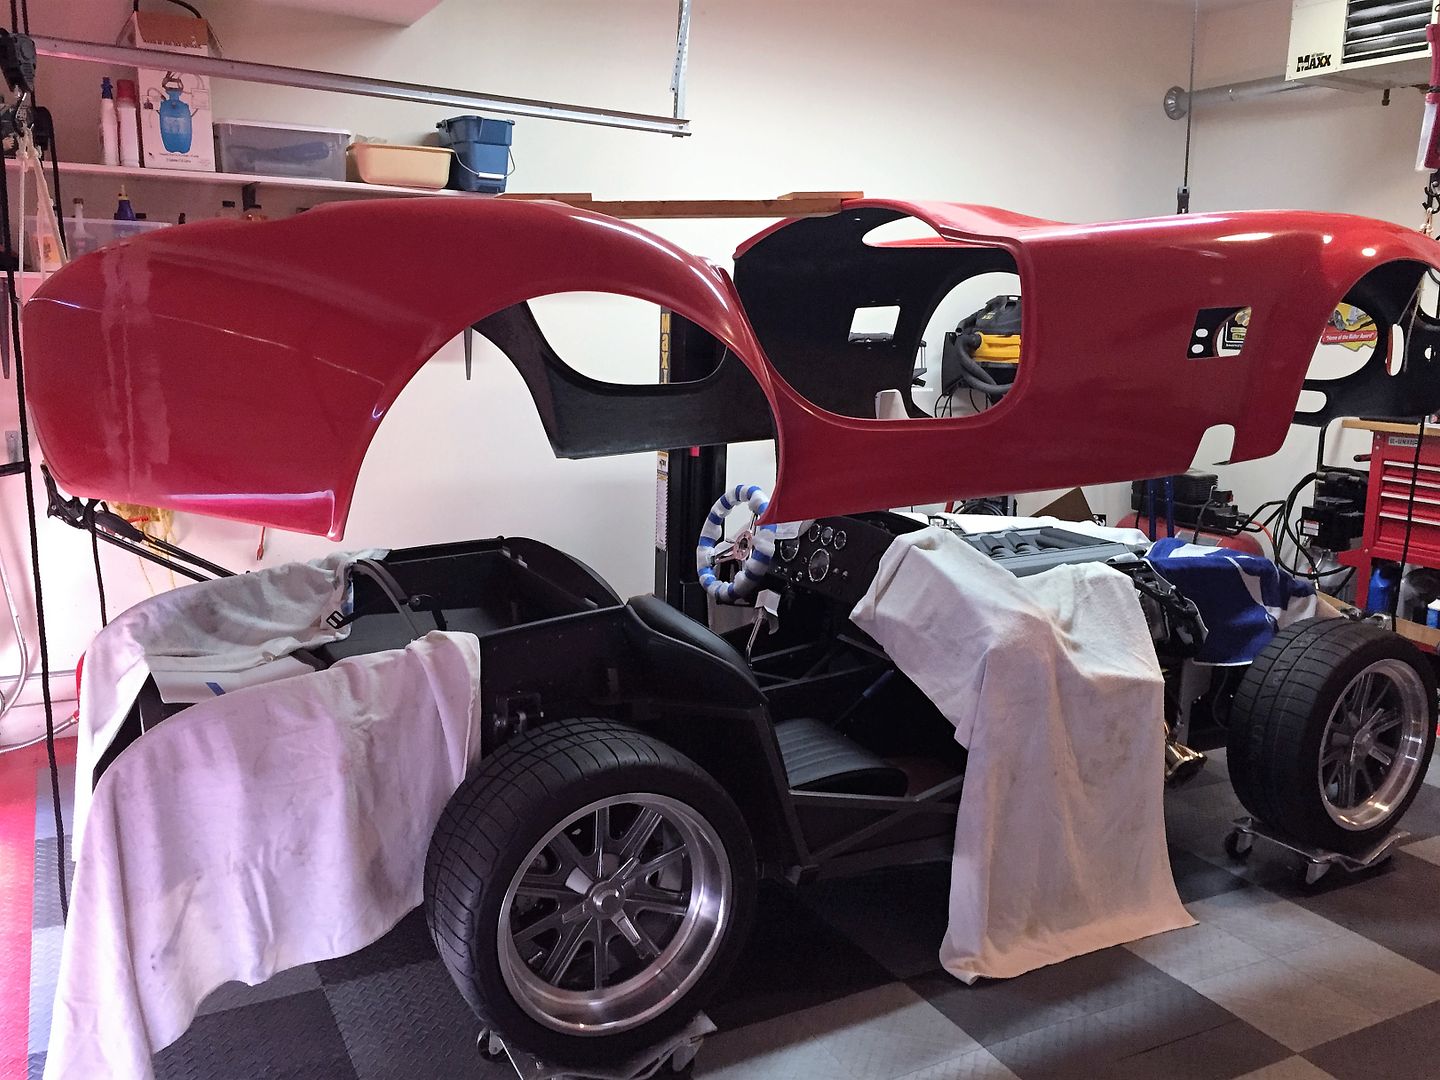
Once the body was lowered into place, installed the front and rear quickjack bolts, the front and rear splash guards, side louvers, and the windshield. All that stuff is pretty much in final form. I’m real happy with how everything is fitting and the body is lining up on the chassis.
While I still had the chassis on the lift, I decided to clip off the corner of the e-brake bracket back near the rear driveshaft u-joint. This has been discussed in several threads. Some were just close like mine, others with actual interference. Word from Factory Five is these are hand placed when the chassis is welded up. Apparently there is some variation. Mine was clearing by 1/4 to 5/16 inch, but a little close for comfort. I was able to fit a reciprocating air saw up in there and take off the corner. Cleaned it up with a file and touched up with a little matching grey paint. Much better. Now it’s over 1/2 inch clearance. One less thing to worry about.
I bolted on the doors, taped on the trunk lid, and set the hood in place. I haven’t started to trim or fit any of those parts. All look pretty good with the exception of the usual low spot on the front of the DS door. I haven’t starting fitting the side pipes or adjusting the body openings yet. But the GP Header alignment into the openings looks good. Not expecting any big issues there. At that point, took it off the lift for now. It was such a nice day I pushed it out onto the driveway and posed for a few pictures alongside #7750.
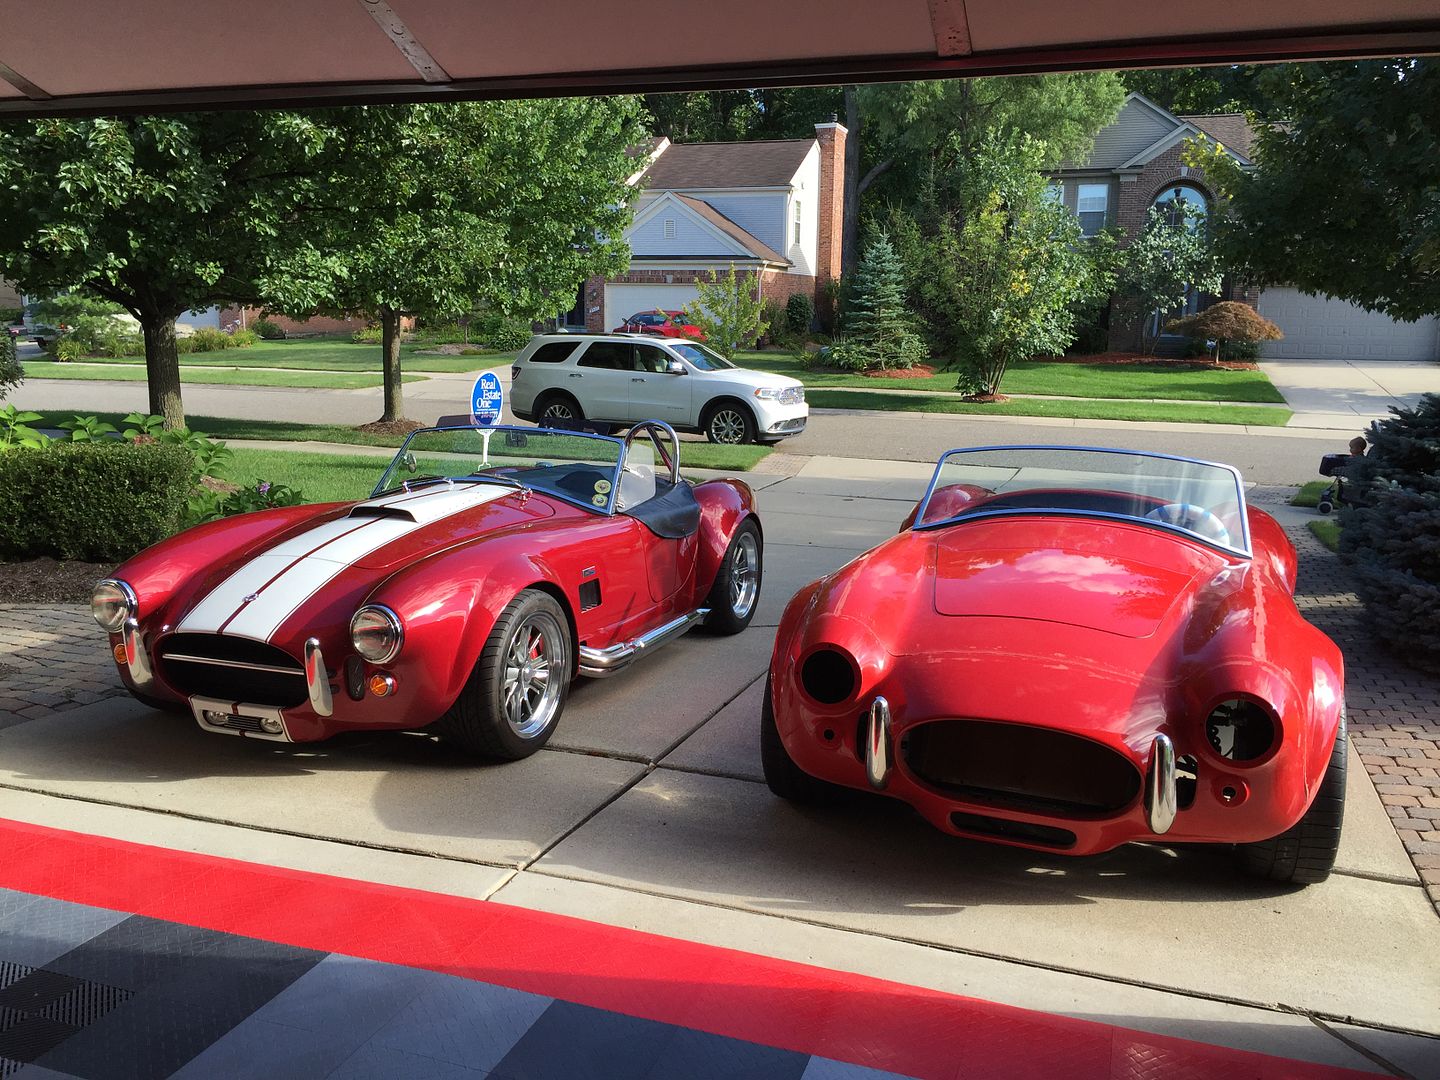
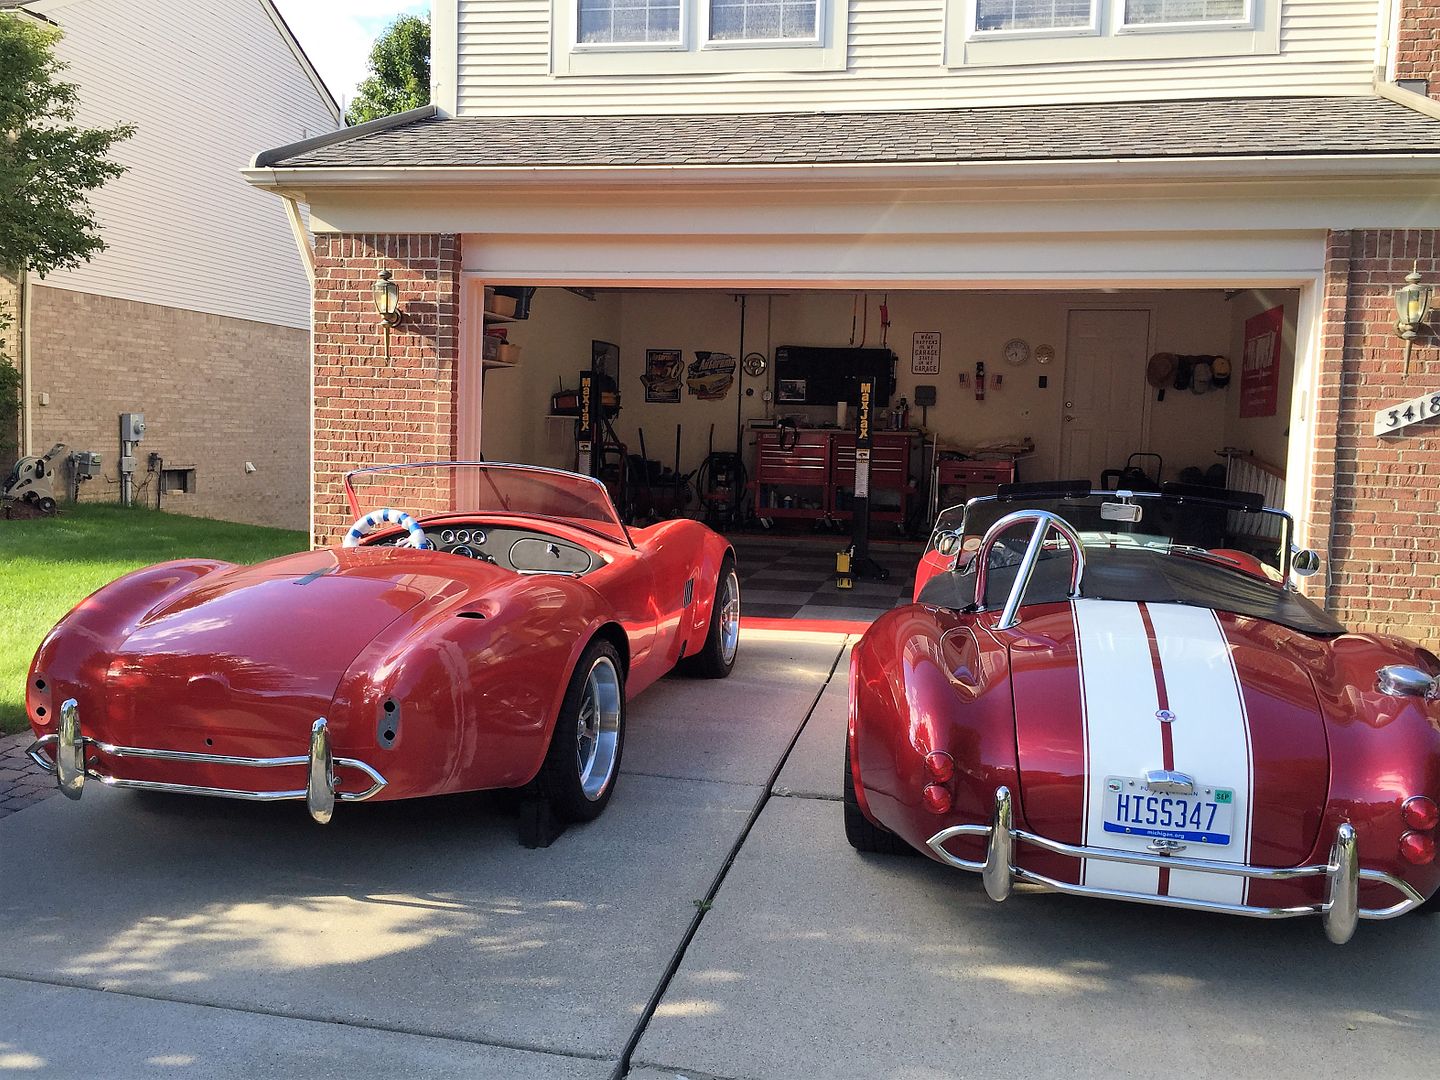
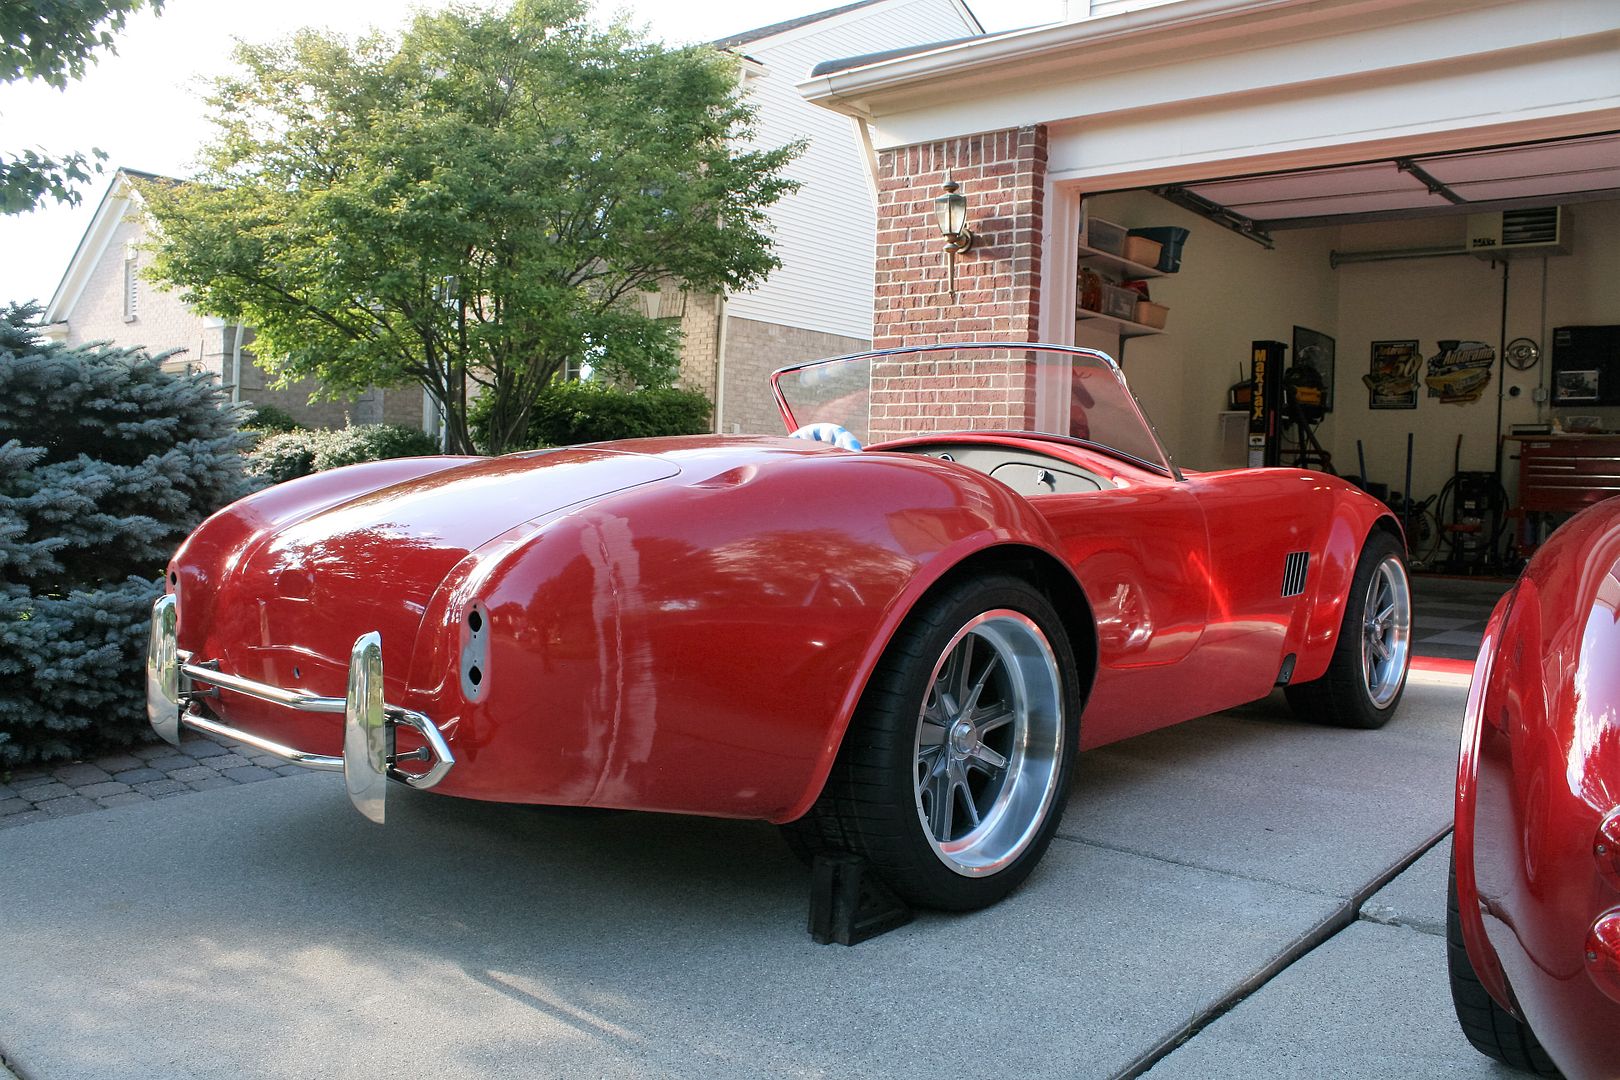
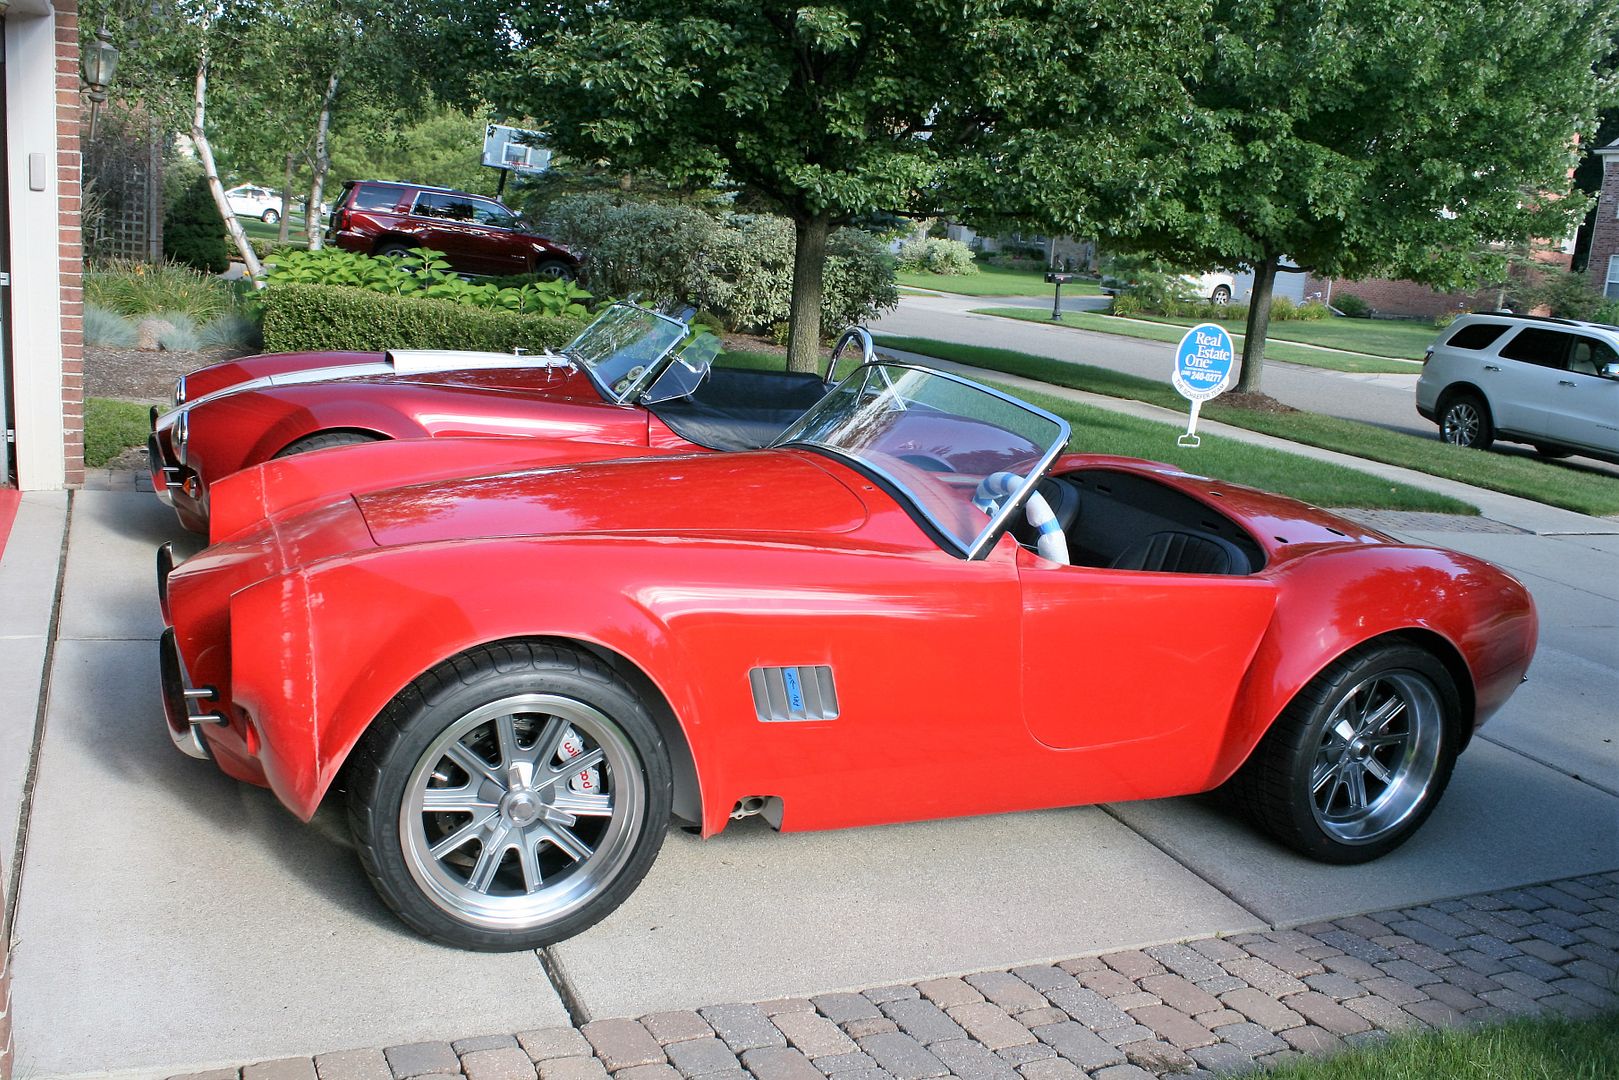
Feels good getting it to this point. Several observations. I’m liking the aggressive look of the 18-inch wheels more and more. I also really like the deep dish design of the rear wheels. Ride height is at 4-1/2 front and 5 back. Exactly one inch more than #7750 sitting next to it. Shows in the wheel wells and the overall height. I expect some of this will settle, but will watch and adjust if needed. The rear track is one inch wider than #7750 (69-3/4 vs. 70-3/4) and gets the tires right to the edge of the wheel lip. The front track is exactly the same on both (67-1/2). I was a little disappointed those BFG’s didn’t come in a 255. But the 245’s look very similar in width to the 255 Nittos on #7750.
I didn’t feel like trying to push the new build up the slight incline back into the garage. So started it up and drove it in. Quickly. Two observations. It’s been at least a month or two since I’ve started the Coyote. It started instantly. Amazing. But without side pipes and open headers, it is crazy LOUD. I don’t plan to do that again unless I have to. You guys that do first starts and run your engines with open headers I hope are using ear protection or you don’t have any hearing left. That’s just nuts.
With both Roadsters back in the garage, took this final pic. Hopefully the next picture like this will be in our new garage.
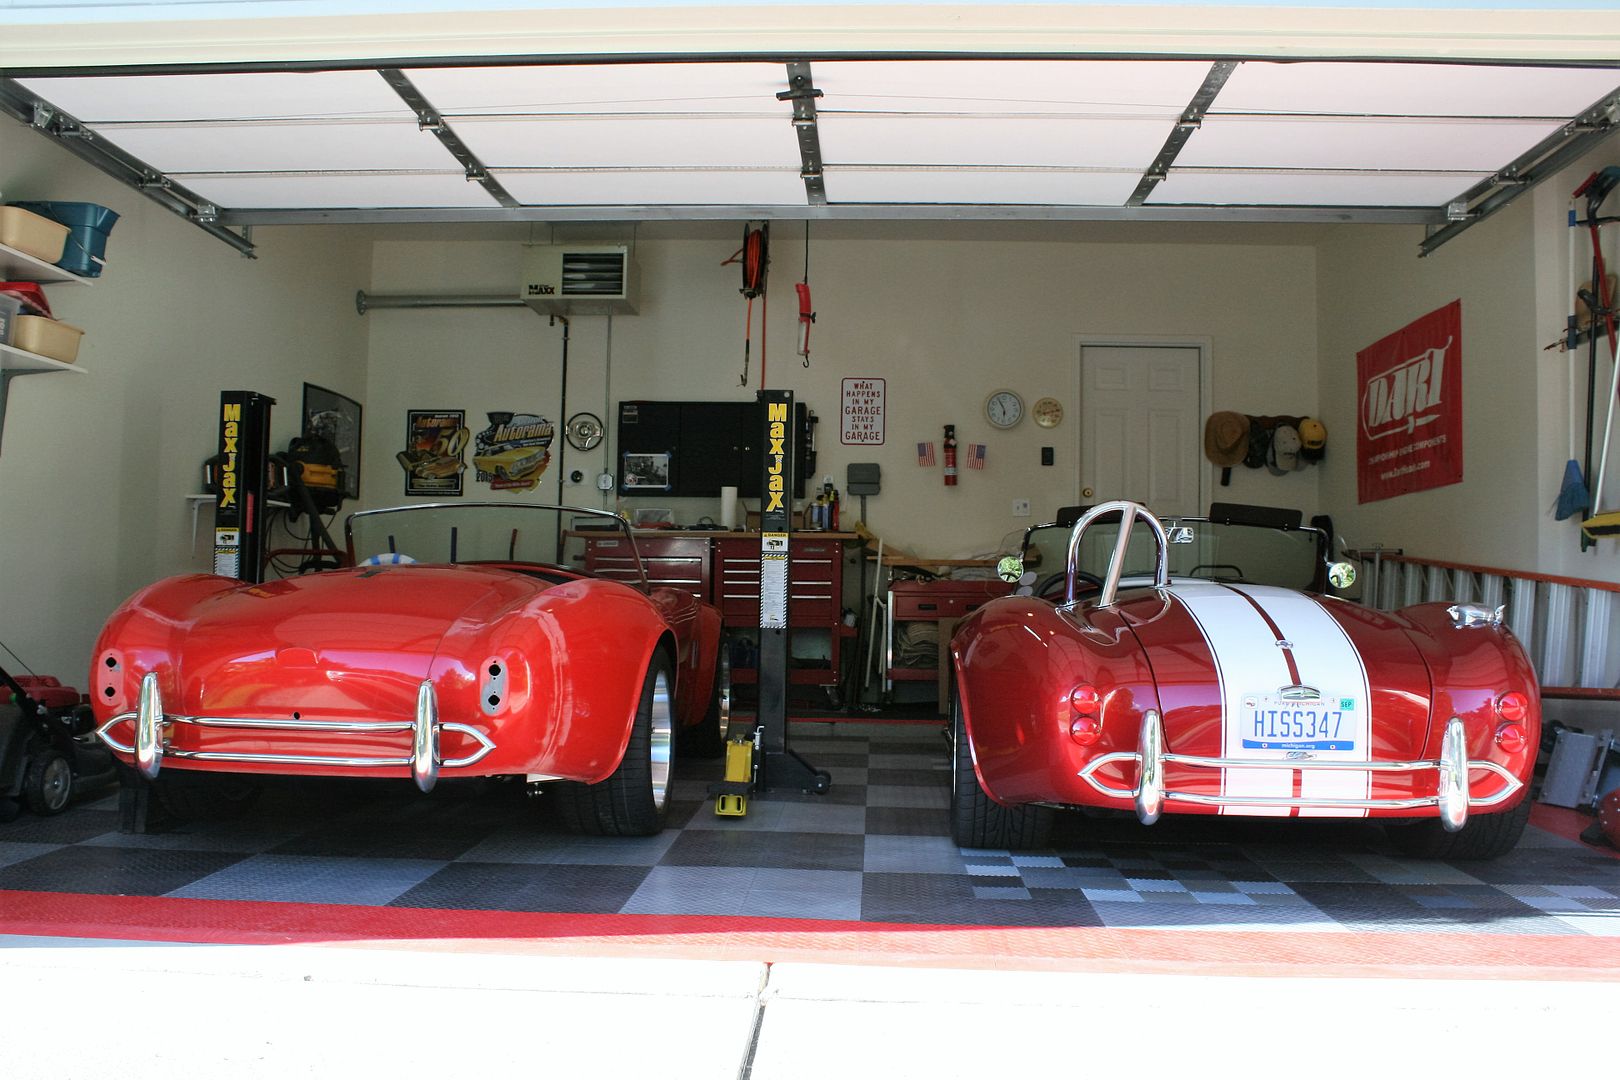
We’re roughly three weeks from our expected close dates, with some possibility it could be sooner. So I’m officially calling a time out on the build at this point. We have a lot to do to get ready for our move and then there will be even more once we get there. It’s possible I may be able to get the final couple remaining things done and it could be at the painter sometime during the move. But we’ll see.
Last edited by edwardb; 09-03-2016 at 12:14 AM.
Build 1: Mk3 Roadster #5125. Sold 11/08/2014.
Build 2: Mk4 Roadster #7750. Sold 04/10/2017.
Build Thread
Build 3: Mk4 Roadster 20th Anniversary #8674. Sold 09/07/2020.
Build Thread and
Video.
Build 4: Gen 3 Type 65 Coupe #59. Gen 3 Coyote. Legal 03/04/2020.
Build Thread and
Video
Build 5: 35 Hot Rod Truck #138. LS3 and 4L65E auto. Rcvd 01/05/2021. Legal 04/20/2023.
Build Thread. Sold 11/9/2023.
-
09-03-2016, 05:49 AM
#379

Steve >> aka: GoDadGo

Phenomenal Work As Always!
-
09-03-2016, 09:40 AM
#380
Senior Member

GoDadGo,
The body is quite flexible and lite enough for one person to handle. My body buck was on casters. I rolled it outside and flipped the body off onto the front lawn. One gallon of bedliner later (I don't know how many coats) with a paint brush. In the sun, the bedliner was dry in no time. Rolled the body back onto the buck and into the garage. It was about a 3 hour deal as I remember. Appearance? NO ONE will ever see it. But for protection, you'll be glad you did it the first time you hear rocks coming off your tires striking the underside of the wheel well areas.
-
09-08-2016, 02:30 PM
#381
Member

Amazing build. Was thinking of doing a build now not to sure.
-
09-08-2016, 02:39 PM
#382
Senior Member


Originally Posted by
M3ichael

Amazing build. Was thinking of doing a build now not to sure.
Thanks, but.... What about the build causes doubt? It is a lot of work. No question about that. But keep in mind there are a number of areas I went off the grid from a stock build. Plus I was early to the game with the new 2015 IRS and the new 2015 version Coyote. A year later, both are more established. The newer sheet metal that wasn't available when I bought my kit also is a nice improvement and eliminates some of the things I did.
Build 1: Mk3 Roadster #5125. Sold 11/08/2014.
Build 2: Mk4 Roadster #7750. Sold 04/10/2017.
Build Thread
Build 3: Mk4 Roadster 20th Anniversary #8674. Sold 09/07/2020.
Build Thread and
Video.
Build 4: Gen 3 Type 65 Coupe #59. Gen 3 Coyote. Legal 03/04/2020.
Build Thread and
Video
Build 5: 35 Hot Rod Truck #138. LS3 and 4L65E auto. Rcvd 01/05/2021. Legal 04/20/2023.
Build Thread. Sold 11/9/2023.
-
09-08-2016, 03:05 PM
#383

Steve >> aka: GoDadGo


Originally Posted by
M3ichael

Amazing build. Was thinking of doing a build now not to sure.
I'm a first time builder and while my build won't be up to the level of EdwardB's latest car, I'm sure it will stack up some place in between.
My advice to you is to look at the assembly videos, then get the manual and read it, then go to the build school if you are still interested.
Once you do that figure out if you want to do this, then review out your finances and assess your skill sets before pulling the trigger.
NOTE: My point is if I can do it then you probably can too!
Last edited by GoDadGo; 09-08-2016 at 06:45 PM.
-
09-08-2016, 04:31 PM
#384
Mustang Convert


Originally Posted by
M3ichael

Amazing build. Was thinking of doing a build now not to sure.
I'll chime in here being one of the very early Coyote builders starting in 2012. A lot of what I tackled on my own is baked into the kit from FFR now. The new sheet metal is great from what I hear and solves all the things I faced trying to fit size 12 EEE feet in the footbox of a Coyote build. This is a majority of where I spent my time addressing challenges on my own to use the Coyote. A non-issue now. The new IRS is outstanding as well. I'm on the older IRS design (which I still love) but modern stuff is definitely more refined. Building these things is primarily about attention to detail. I didn't find it difficult but it required vision and focus.
Kevin
MKIV, IRS/TruTrack/3.55s, Coyote, TKO600, Wilwoods
Delivered: 1/6/2012
First Start: 1/19/2014
First Go-Kart: 2/1/2014
Graduation: 1/4/2015
Graduation Thread
-
09-08-2016, 10:19 PM
#385
Member


Originally Posted by
GoDadGo

I'm a first time builder and while my build won't be up to the level of EdwardB's latest car, I'm sure it will stack up some place in between.
My advice to you is to look at the assembly videos, then get the manual and read it, then go to the build school if you are still interested.
Once you do that figure out if you want to do this, then review out your finances and assess your skill sets before pulling the trigger.
NOTE: My point is if I can do it then you probably can too!
Great advise. Been watching the video's, just got reply back on the FF manual (pic on wesbite is older version), looking into the build school for sure, finances meh, and the last one the gets me is skill set.
-
09-08-2016, 10:22 PM
#386
Member


Originally Posted by
bansheekev

I'll chime in here being one of the very early Coyote builders starting in 2012. A lot of what I tackled on my own is baked into the kit from FFR now. The new sheet metal is great from what I hear and solves all the things I faced trying to fit size 12 EEE feet in the footbox of a Coyote build. This is a majority of where I spent my time addressing challenges on my own to use the Coyote. A non-issue now. The new IRS is outstanding as well. I'm on the older IRS design (which I still love) but modern stuff is definitely more refined. Building these things is primarily about attention to detail. I didn't find it difficult but it required vision and focus.
Kevin
Thanks Kevin for the advise and I'm just around the corner from you in Salinas (Toro Park Area) off HWY 68. The new IRS is great and I'll be Auto-crossing it heavily "if" I build it.
-
09-08-2016, 11:11 PM
#387
Mustang Convert


Originally Posted by
M3ichael

Thanks Kevin for the advise and I'm just around the corner from you in Salinas (Toro Park Area) off HWY 68. The new IRS is great and I'll be Auto-crossing it heavily "if" I build it.
I'm in Morgan Hill which is really close. PM me anytime and come by to check things out and get inspiration. 95% of my 2013 Coyote build is the same....
Kevin
MKIV, IRS/TruTrack/3.55s, Coyote, TKO600, Wilwoods
Delivered: 1/6/2012
First Start: 1/19/2014
First Go-Kart: 2/1/2014
Graduation: 1/4/2015
Graduation Thread
-
09-13-2016, 08:47 PM
#388
Senior Member

Nearly Ready for Paint
We’re two weeks from closing and moving, so this really is my last update. I’ve managed to get some shop time in here and there trying to get as much ready for paint as I can. I’ll be talking to the painter this week to see where I can fit into their schedule.
In my last update, I had the front and rear quick jack mounts done, the body centered, and the windshield on. Next up was to fit the doors. Here the location of the sills is very important. On the passenger side, I’ve found like most others that the door fits fine with the sill pulled tight against the plastic bumpers on the chassis side. The driver’s side is another story. I don’t know how far back it goes, but it was quite common on the Mk3 for the lower front corner of the DS door to end up lower than the body and require some buildup. In spite of a re-designed body and new tooling, the Mk4 duplicated the same issue. With the Mk3, you added washers or spacers under the DS side mounting points to minimize the issue. For the Mk4, you can do the same thing by varying the location of the DS sill attachment on the underside of the chassis. The common approach is to pull the sill tight against the front and middle bumpers. As tight as possible. Then space the body away from the rear bumper while fitting the door. Doing this, it’s possible to get the DS door to fit reasonably well except along the lower front corner. I prefer to still have the body touching something back there, so made a spacer from a chunk of hard rubber. It ended up being a tapered piece, about 3/8-inch wide at the top down to 1/4-inch at the bottom. Glued this on the plastic bumper and pulled the body tight against it. I’ve heard of some pushing the DS rear sill out even more. But I didn’t find any more helped the door fit any further, plus I wasn’t comfortable bending the body sill any more than that.
With the doors fitted and the sill locations established, time to anchor them. The FF instructions say to use pop rivets to attach the sills. I’m not too excited about that approach because they’re just not that strong, not easy to take on/off repeatedly as I tend to do, and finally I don’t find the sills fit tight against the frame everywhere. So rivets just aren’t the best choice IMO. For my last build I used 5/16 nutserts in the frame with flanged SS button head cap screws. I did the same thing on this build. These are the same nutserts I used on the support frame for the passenger grab handle and also for the side pipe hangars. More about them later.
With the sill taped in place, I located three attachment points on each side. Installed the nutserts in the frame and the cap screws. The rear and center ones are easy enough because they go into the square frame tube. The fronts though are in a section of round tube. So it’s important to measure carefully and hit the center of the tube. Not much to see, but this is one of the attachment points.
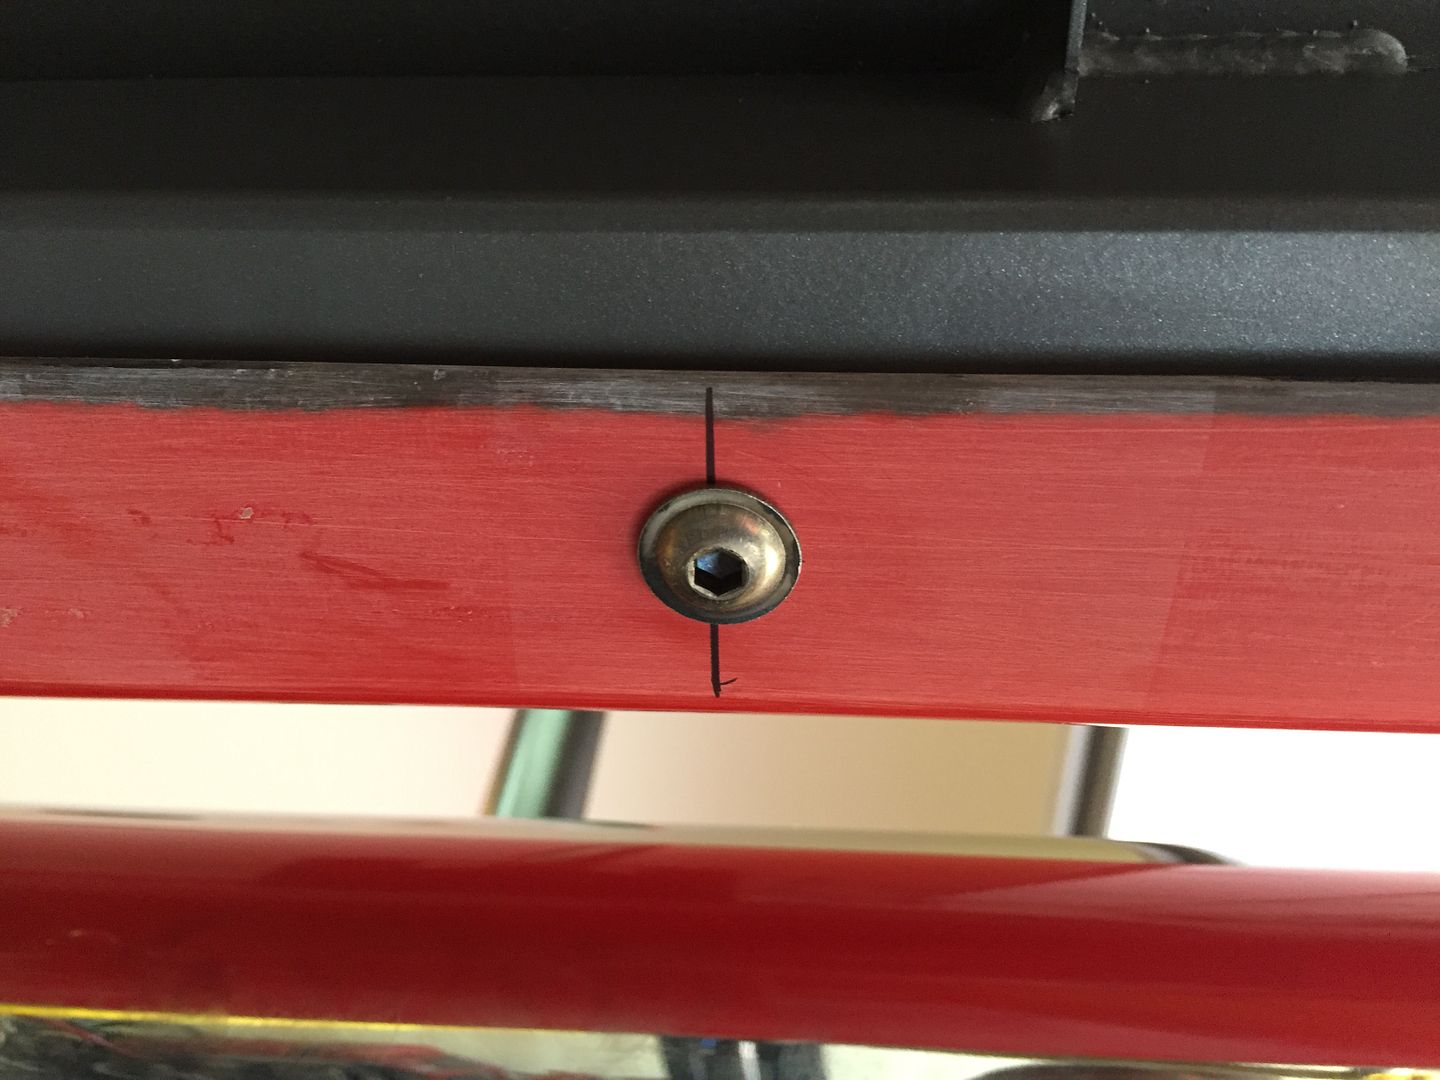
I don’t have the final gaps or latches installed yet, but did some preliminary trimming to get the doors hung. The passenger side is almost perfect on all sides including where it wraps up on to the dash area. The driver’s side is pretty good except in the already mentioned lower front corner. I was able to get to about 1/8-inch lower than the body at the worst point, and tapers from there along the front and bottom edges. Better than #7750, so that’s good I guess. Should be easy enough for the painter to fill and make go away.
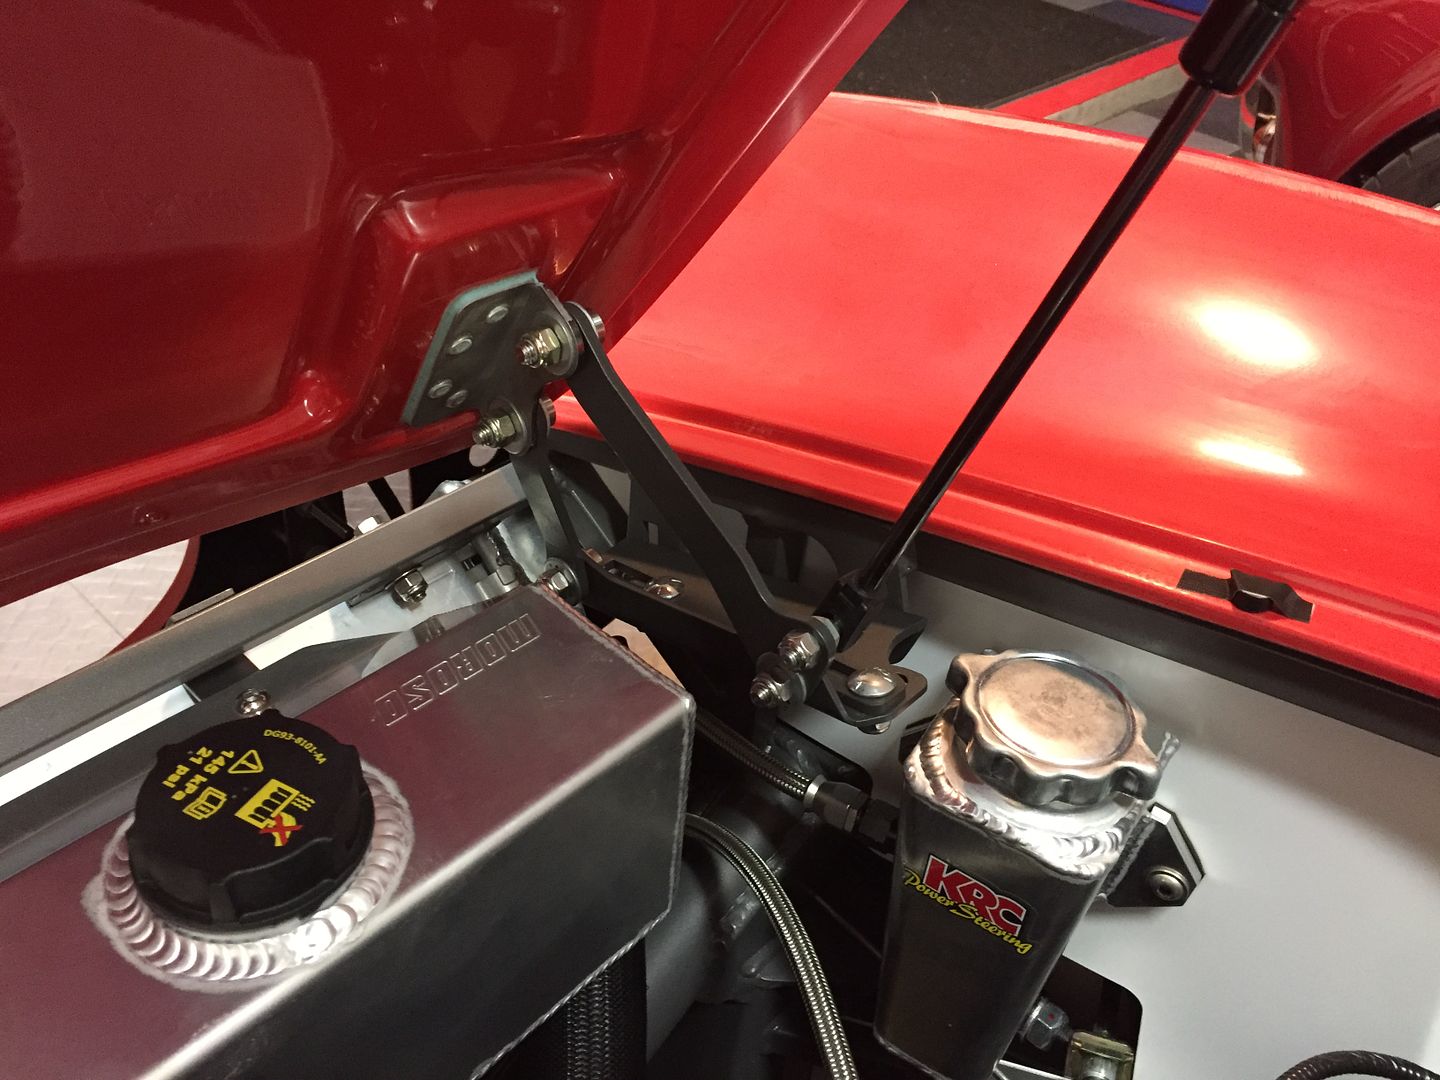
From there I fit the trunk lid and hood. Same as the doors, final gaps aren’t set yet or latches installed. But trimmed to where they fit in the openings reasonably well. For both, it’s important to not start trimming without something to hold them up to the same level as the body. I tape bumpers around the perimeter of varying thickness, mark, and trim. I use my ancient Craftsman 3x21 handheld belt sander for trimming back to a scribed line and works great. Hard to give up my old woodworking habits. #7750 had the older style round trunk hinges. I really struggled to get those adjusted properly. This kit has the newer, more square hinges, and maybe it’s just my imagination, but I was able to get the lid aligned and working well pretty quickly. For the hood, I bonded and riveted the hinge and strut brackets with HSRF. They’ll get painted with the rest. Makes a really clean finished look. I’ve got the hood hinges probably about 90% adjusted. Once again, the Coyote install makes things interesting because it’s so full under the hood. The intake is right up against the DS hinges. My power steering reservoir, hoses, and degas tank are guarding the PS. Interestingly, I ran out of rear adjustment on the PS hinge on #7750. This time was exactly the same. I turned the holes in the chassis bracket piece into slots so the bracket could move back about 1/4-inch and all was good.
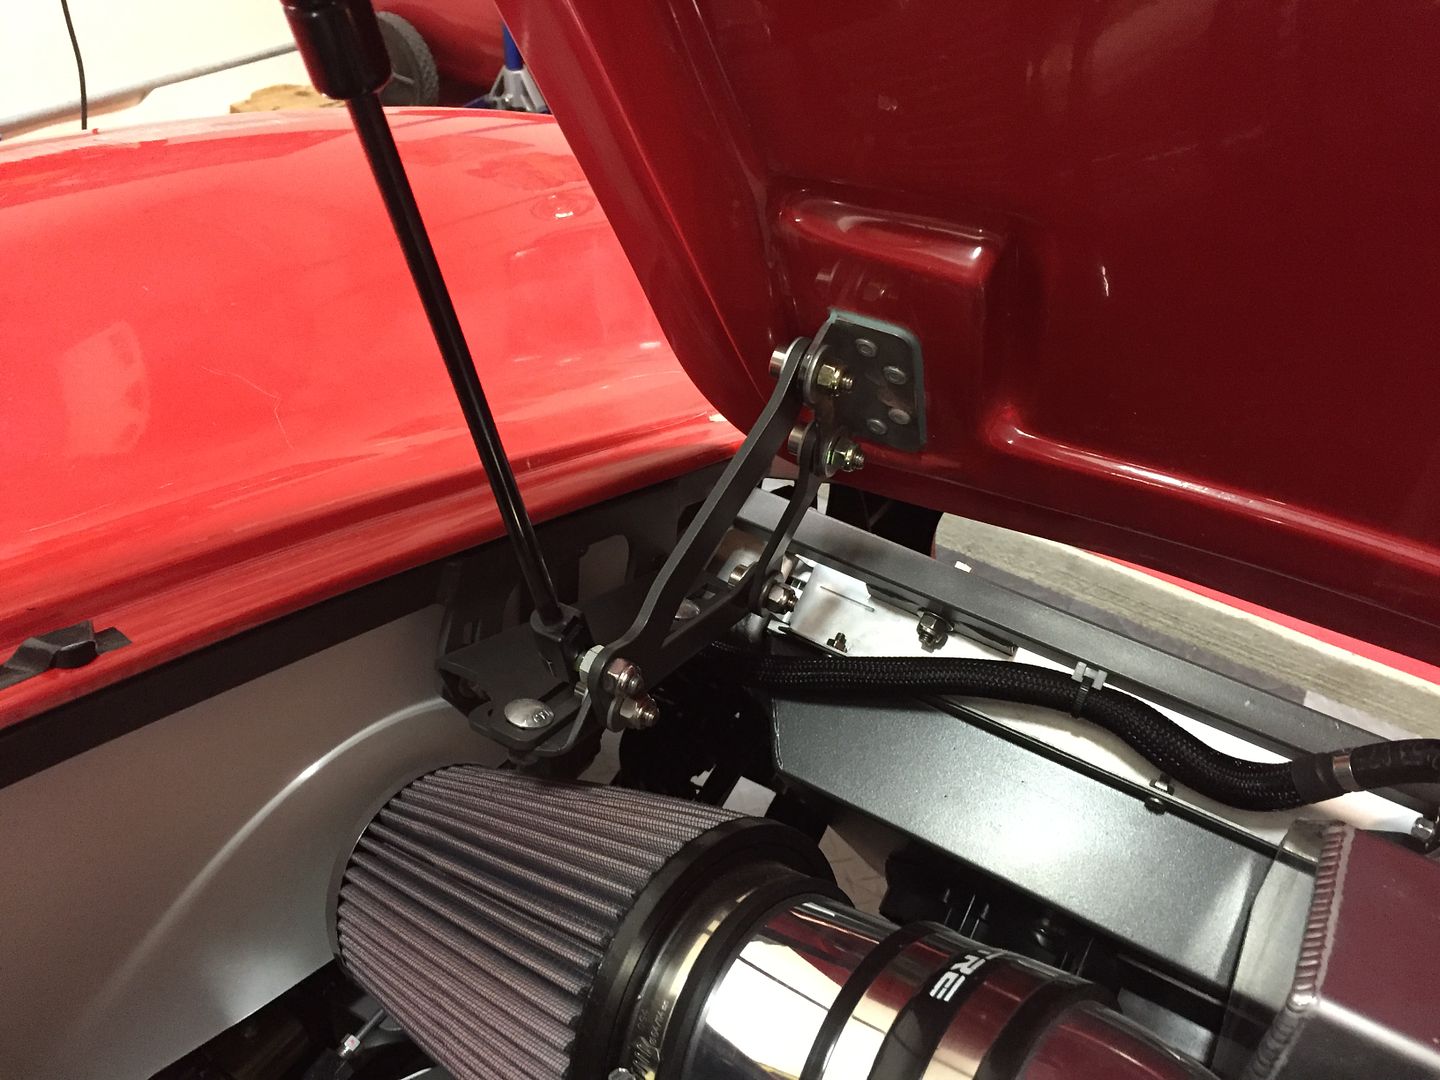
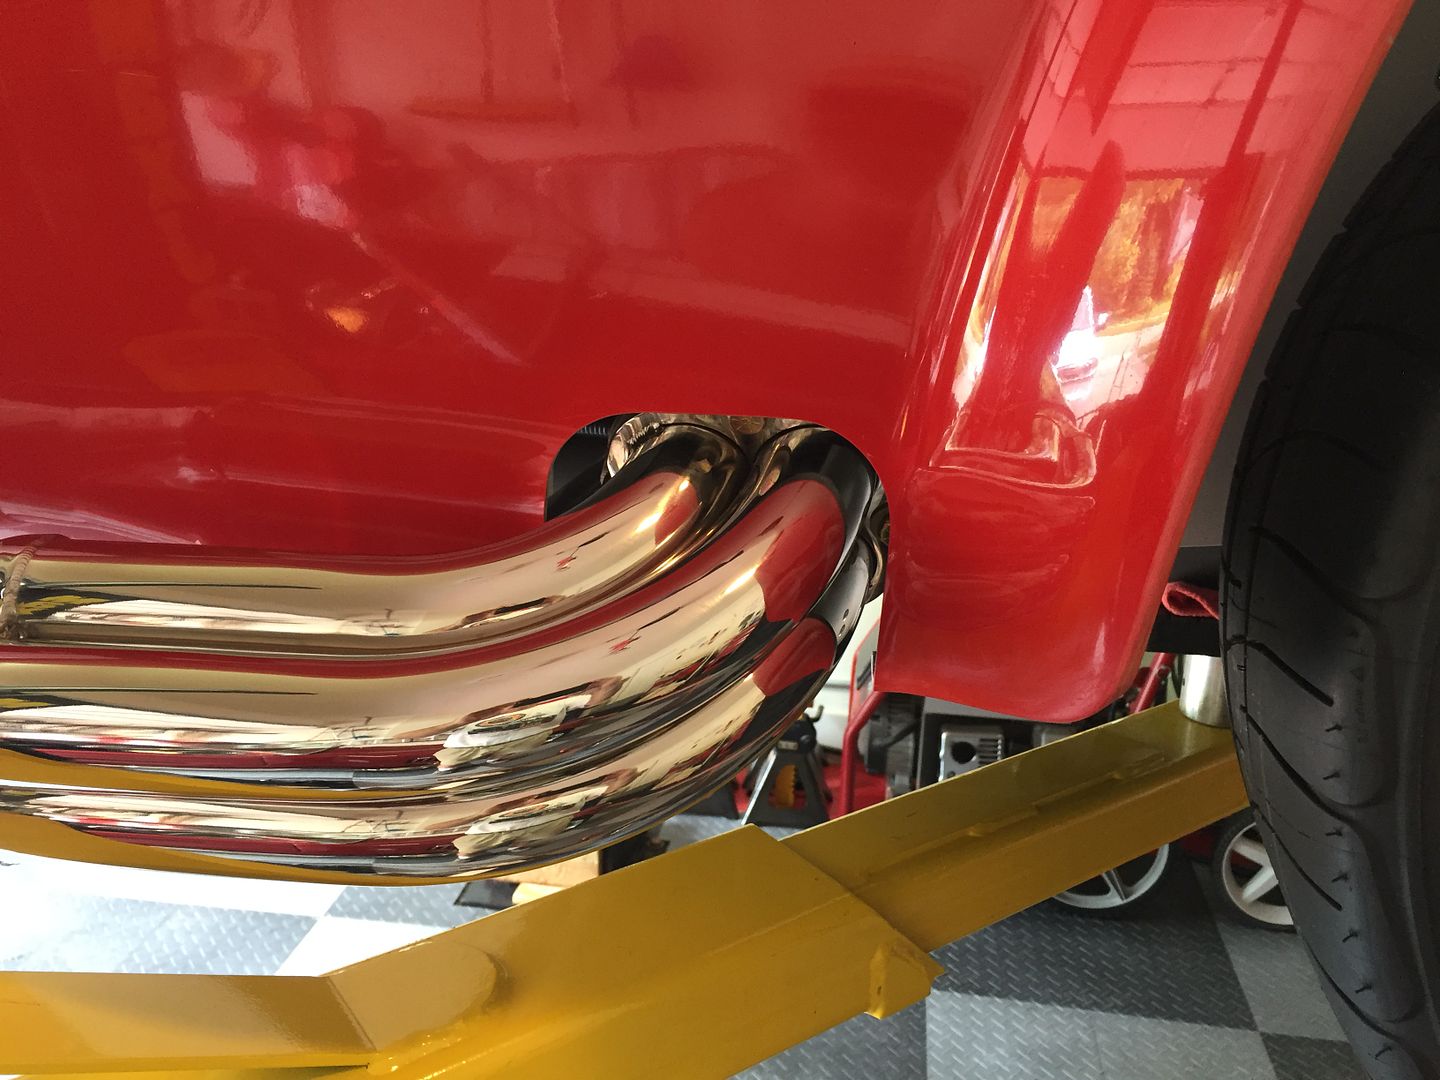
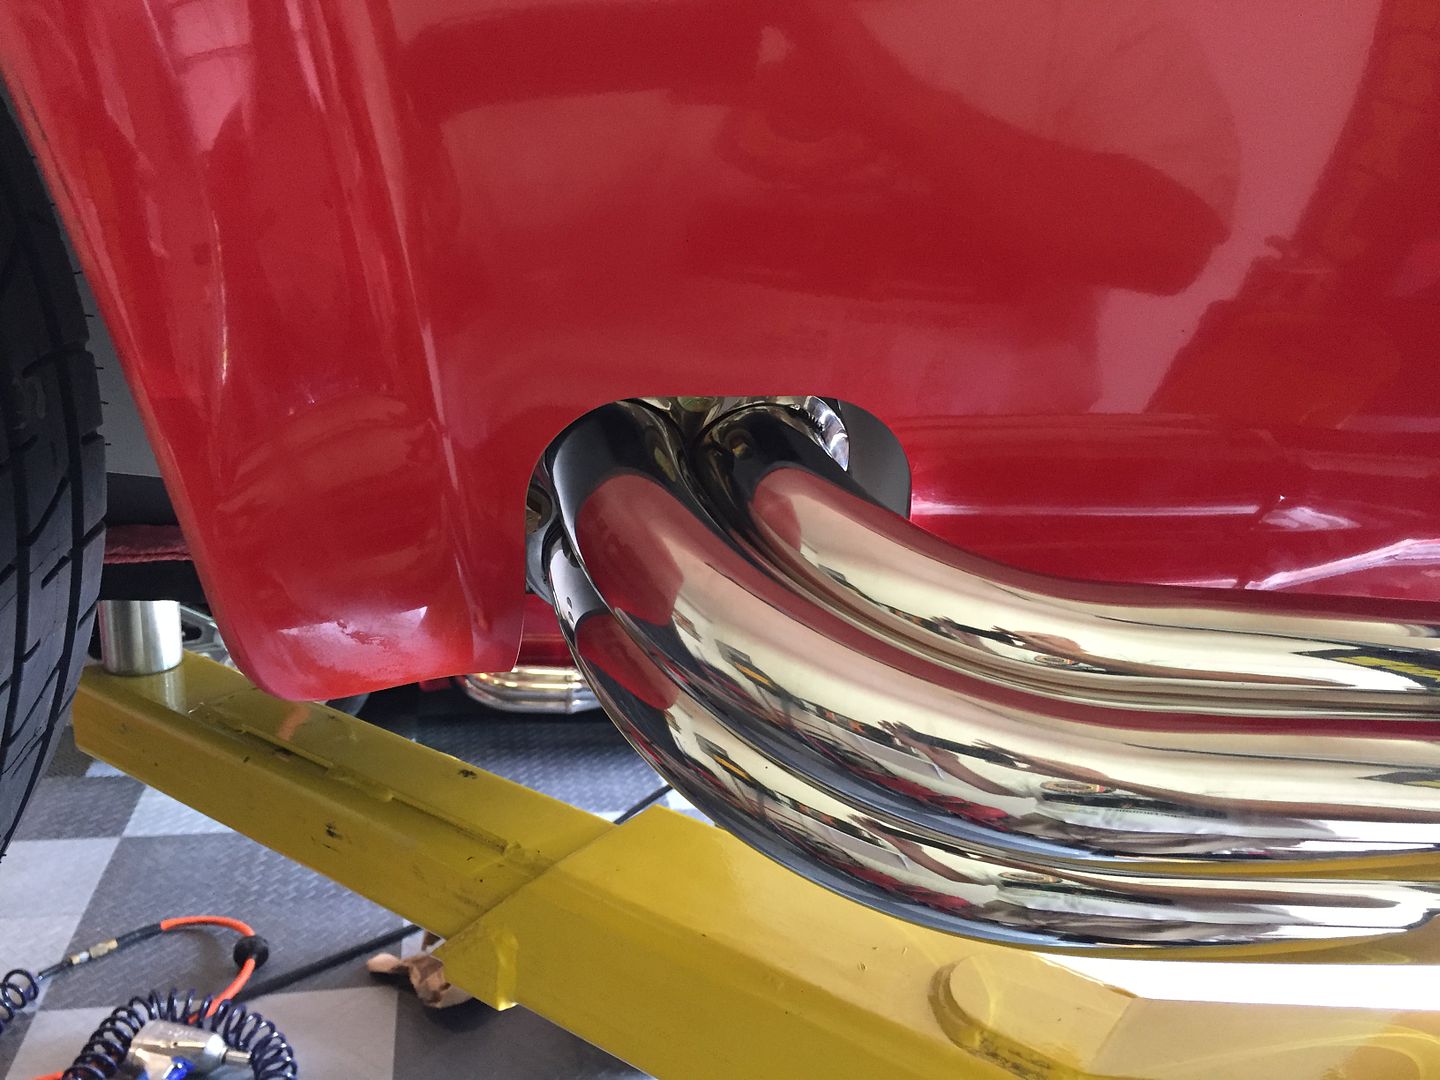
Next up worked on the side pipe alignment and body cutouts. Took a spacer and small wedge on the PS, and two wedges on the DS to get them parallel with the body. The Gas-N pipe flanges already had 7/16-inch holes. I drilled out the GP Header holes also to 7/16-inch, and using 3/8-inch bolts was able to get them level. I haven’t had a build yet that didn’t take some wedges and tweaking to get the side pipes lined up nicely. This was no different. But the final product is by far the best of the three builds I’ve done. They are almost exactly the same height side-to-side and the same distance from the body on both sides. My other builds I can’t say either of those things (but don’t tell anyone). It’s subtle, and you don’t see it unless you compare the two cars side-by-side, but the pipes on this build exit the body at a more “down” angle than the previous SBF builds. I don’t know if this is because of the taller/wider Coyote or the design of the GP headers. Doesn’t matter because they’re still (barely) above the height of the frame 4-inch tubes. So won’t be any lower than I set ride height.
With the sills attached, the splash guards in place, and the pipes installed, marked an even gap around the pipes on the body, and trimmed accordingly. Hard to tell from the reflections, but I set the gaps at just over 1/2-inch front and back and 5/8-inch along the top. Turned out clean and tight.
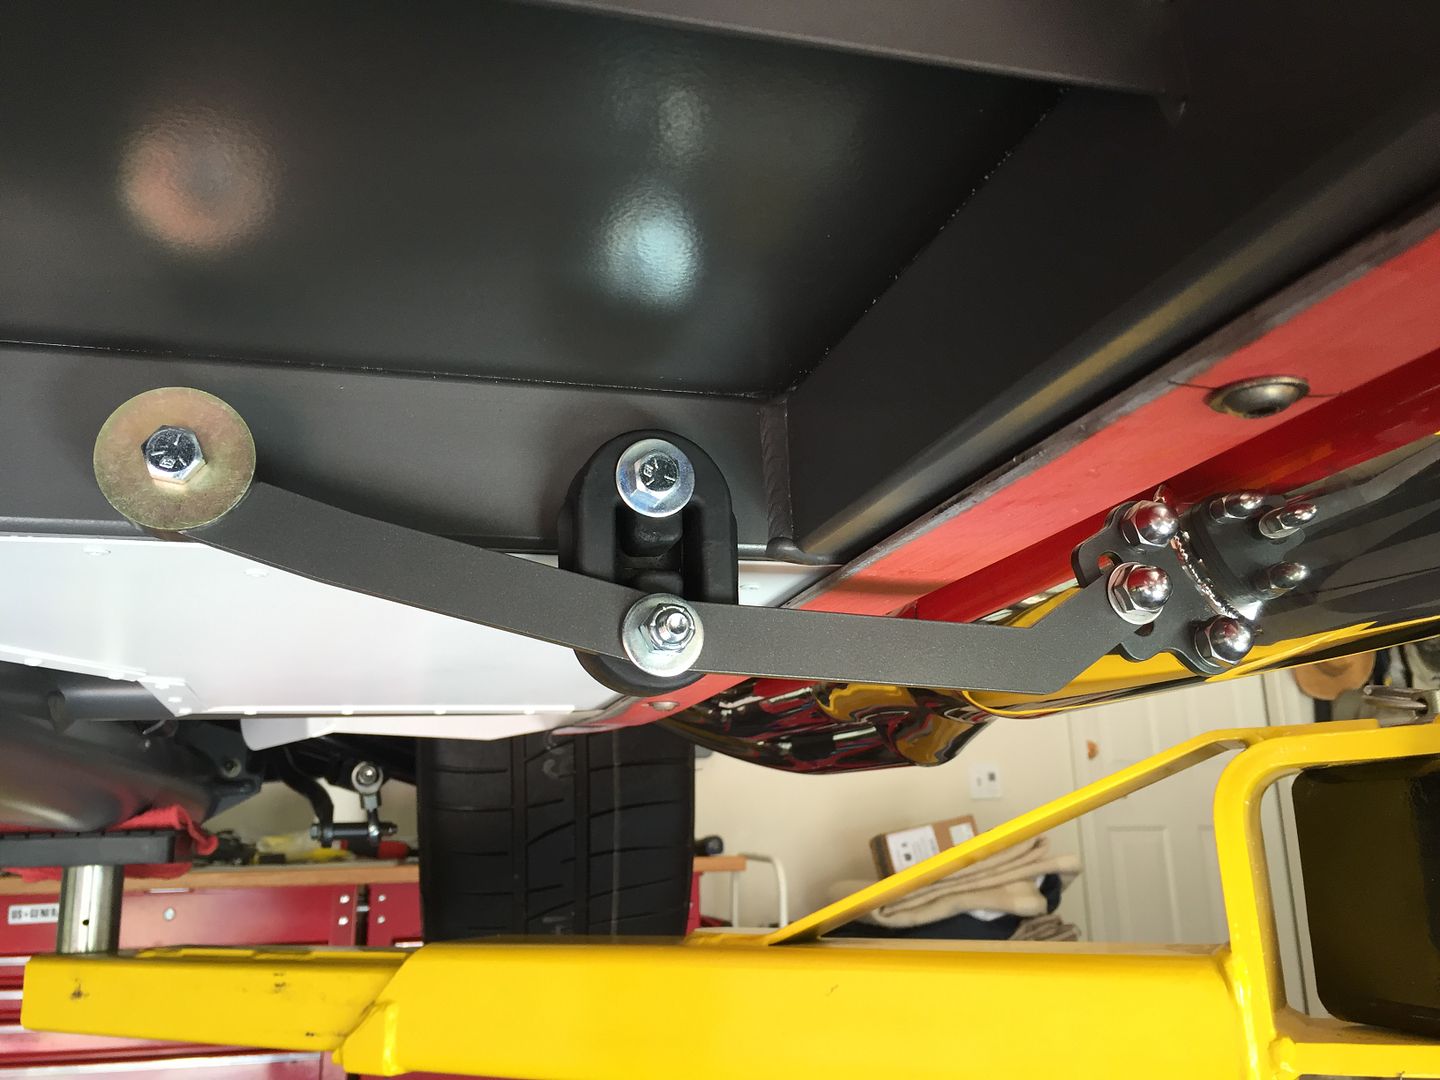
Last thing on my list was the side pipe hangars. Some guys leave them off, but I’m in the “use ‘em” camp. The Gas-N hangars are a little different than the FF ones. The locations of the mounting tabs on the pipes aligned very nicely with the 2-inch chassis tube where they’re attached. The hangars come with through-bolts, which puts the head of the bolt in the footwell. No big deal, but I’ve used heavy duty 5/16-inch nutserts on my builds instead. Same ones I mentioned previously. They’ve held up just fine. This is where they end up.
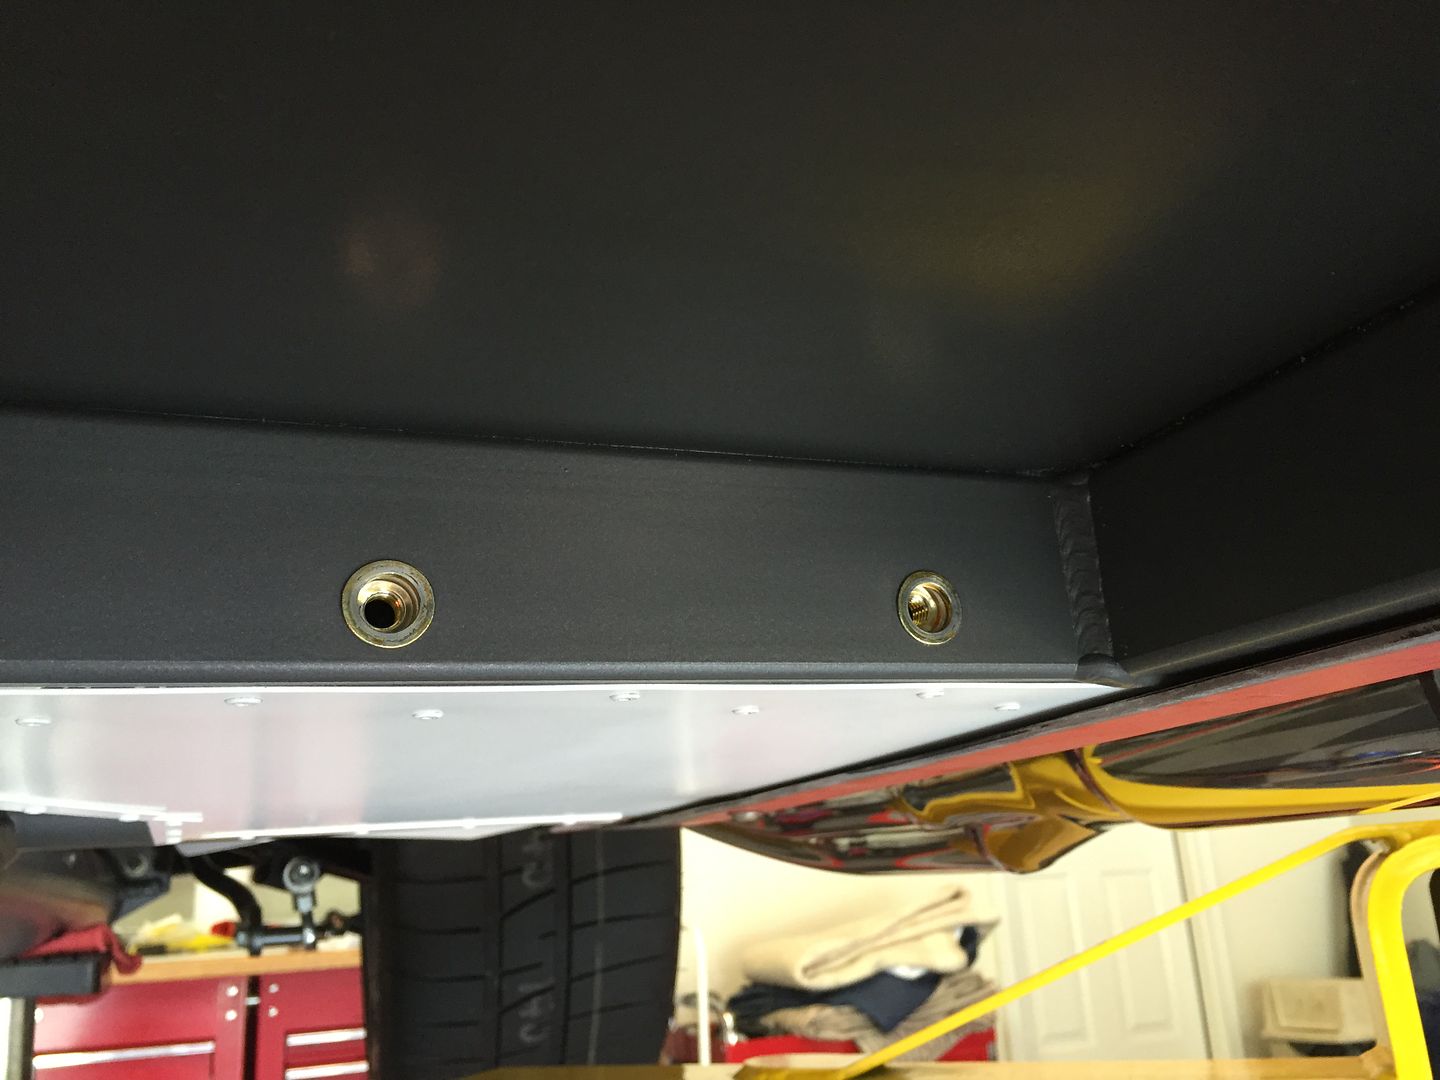
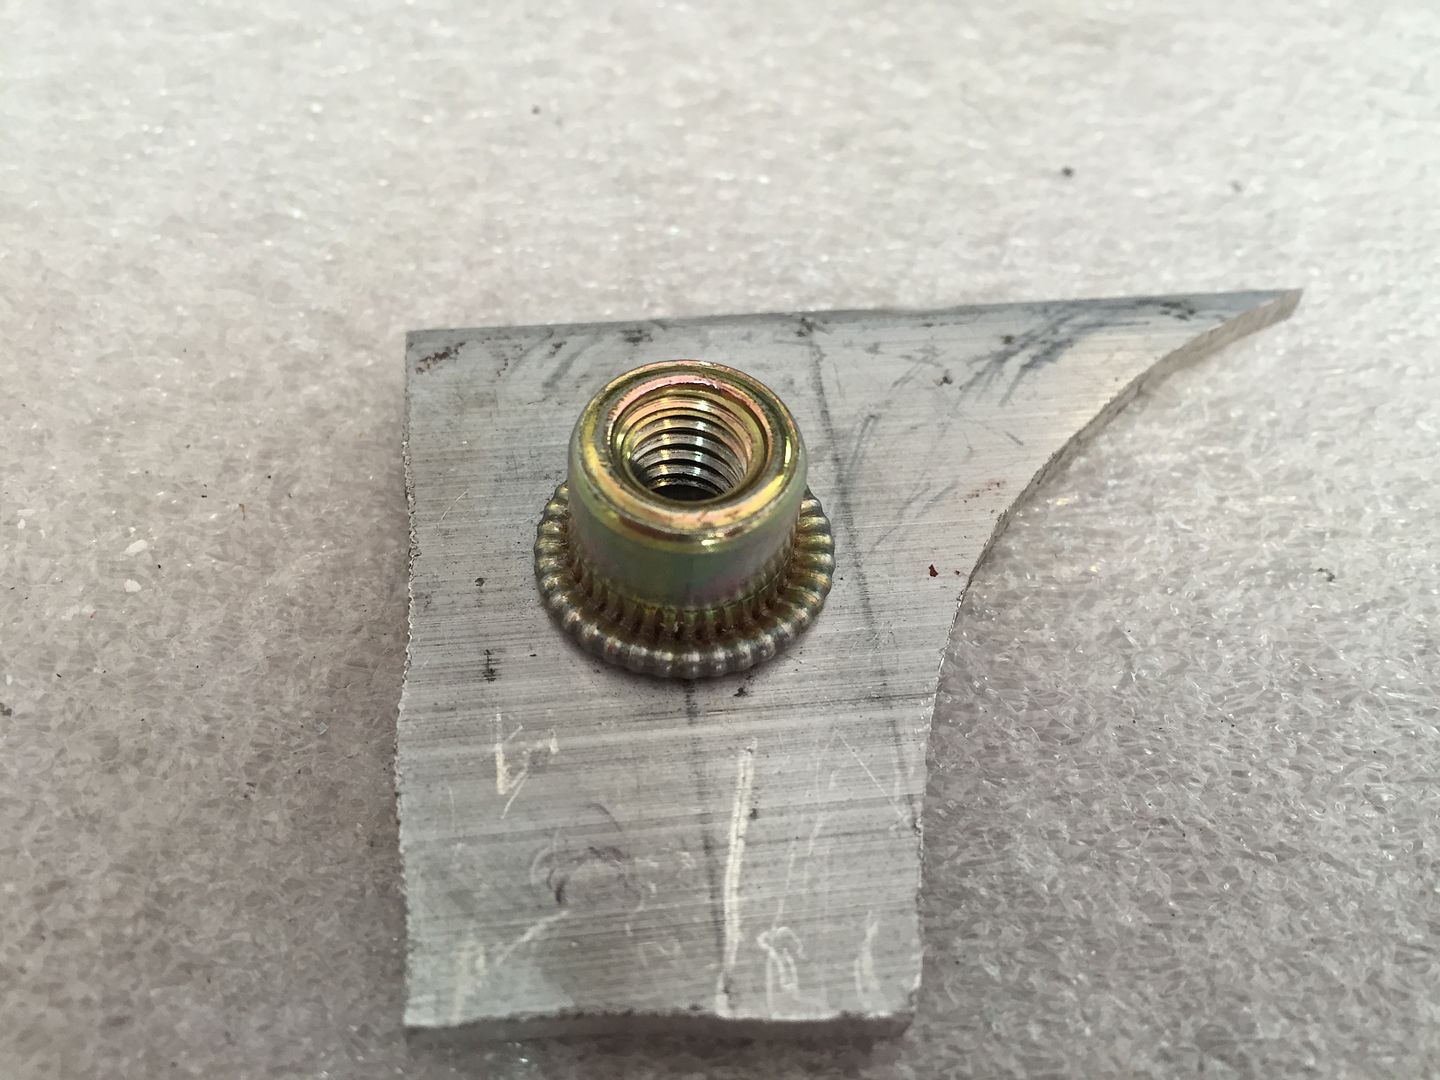
To give an idea, this is what the back of these particular nutserts look like in a test piece I did a while back. These are McMaster part number 95105A155. Once installed are very strong and really hard to get back out. Ask me how I know.
Last edited by edwardb; 09-14-2016 at 06:51 AM.
Build 1: Mk3 Roadster #5125. Sold 11/08/2014.
Build 2: Mk4 Roadster #7750. Sold 04/10/2017.
Build Thread
Build 3: Mk4 Roadster 20th Anniversary #8674. Sold 09/07/2020.
Build Thread and
Video.
Build 4: Gen 3 Type 65 Coupe #59. Gen 3 Coyote. Legal 03/04/2020.
Build Thread and
Video
Build 5: 35 Hot Rod Truck #138. LS3 and 4L65E auto. Rcvd 01/05/2021. Legal 04/20/2023.
Build Thread. Sold 11/9/2023.
-
09-13-2016, 08:49 PM
#389
Senior Member

Nearly Ready for Paint (continued)
Muffler hangar installed and ready to go:
That finished everything on my list plus no more time for now. I adjusted the ride height a bit on all four corners because it was really high, and took it off the lift. Also disassembled the lift in preparation for moving, so it’s really done with that. Beautiful day out and a quiet day in the neighborhood, so just had to take it around the block a couple times. It’s still pretty raw with no carpet, open transmission tunnel, and small stones pinging off the unfinished splash guards. But all seems to be working well. I have officially 1.8 miles showing on the odometer. Parked back in the drive while working in the garage, walked around and took a few pictures. A few hours and it will be ready for the painter. But that will happen at our new place.
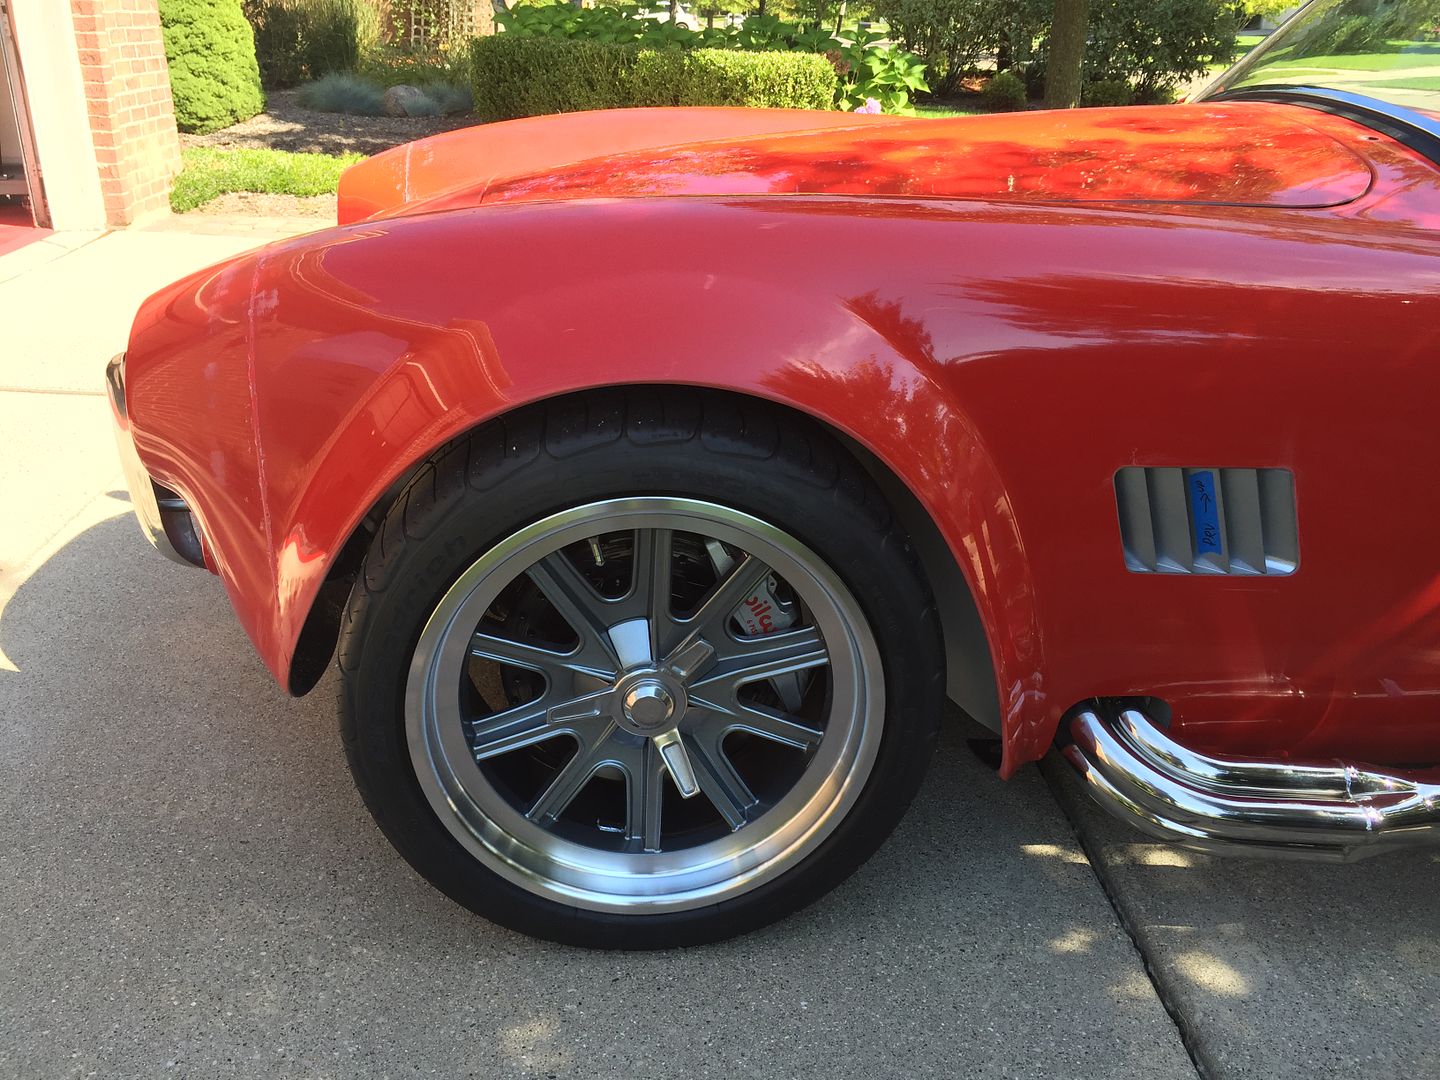
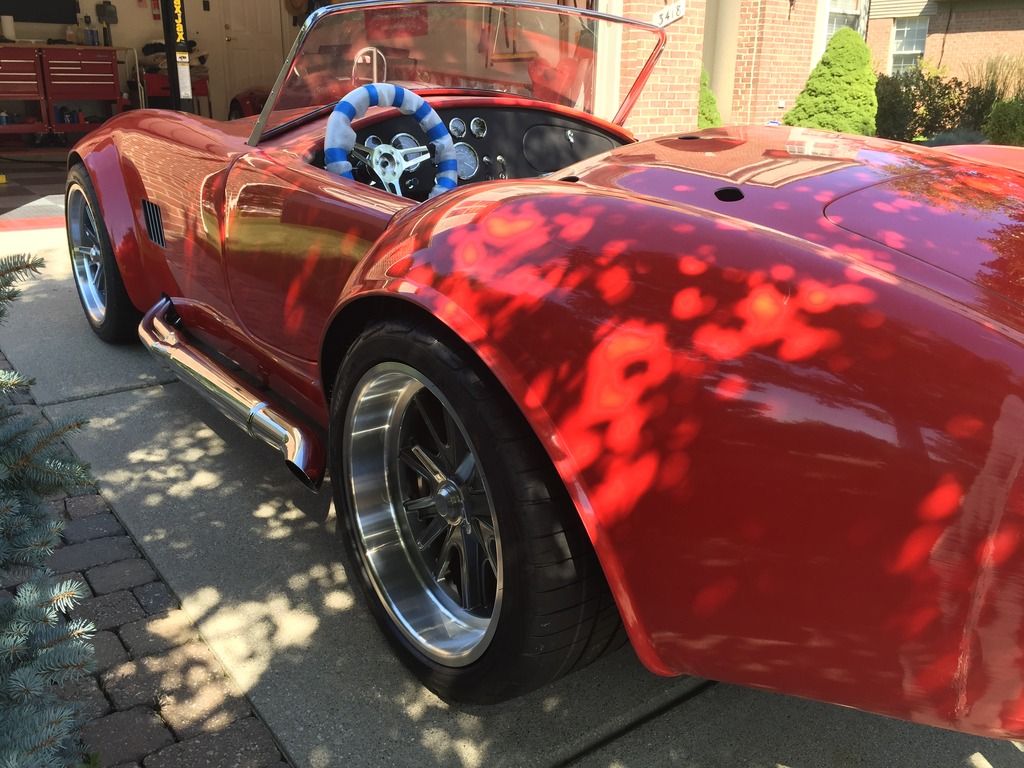
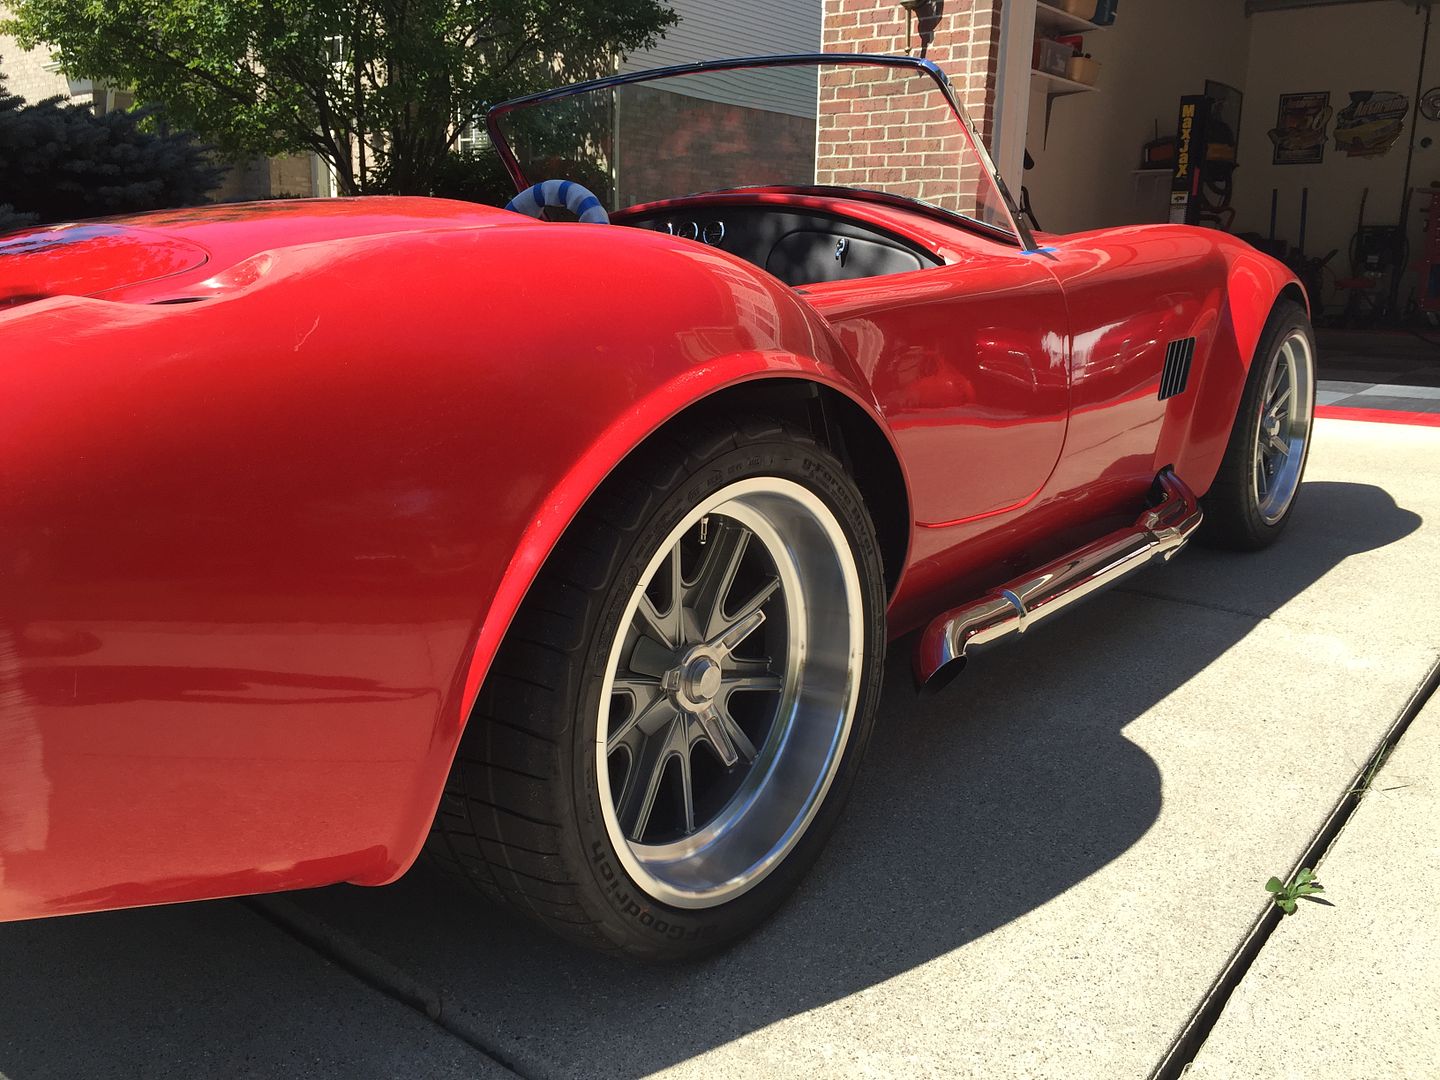
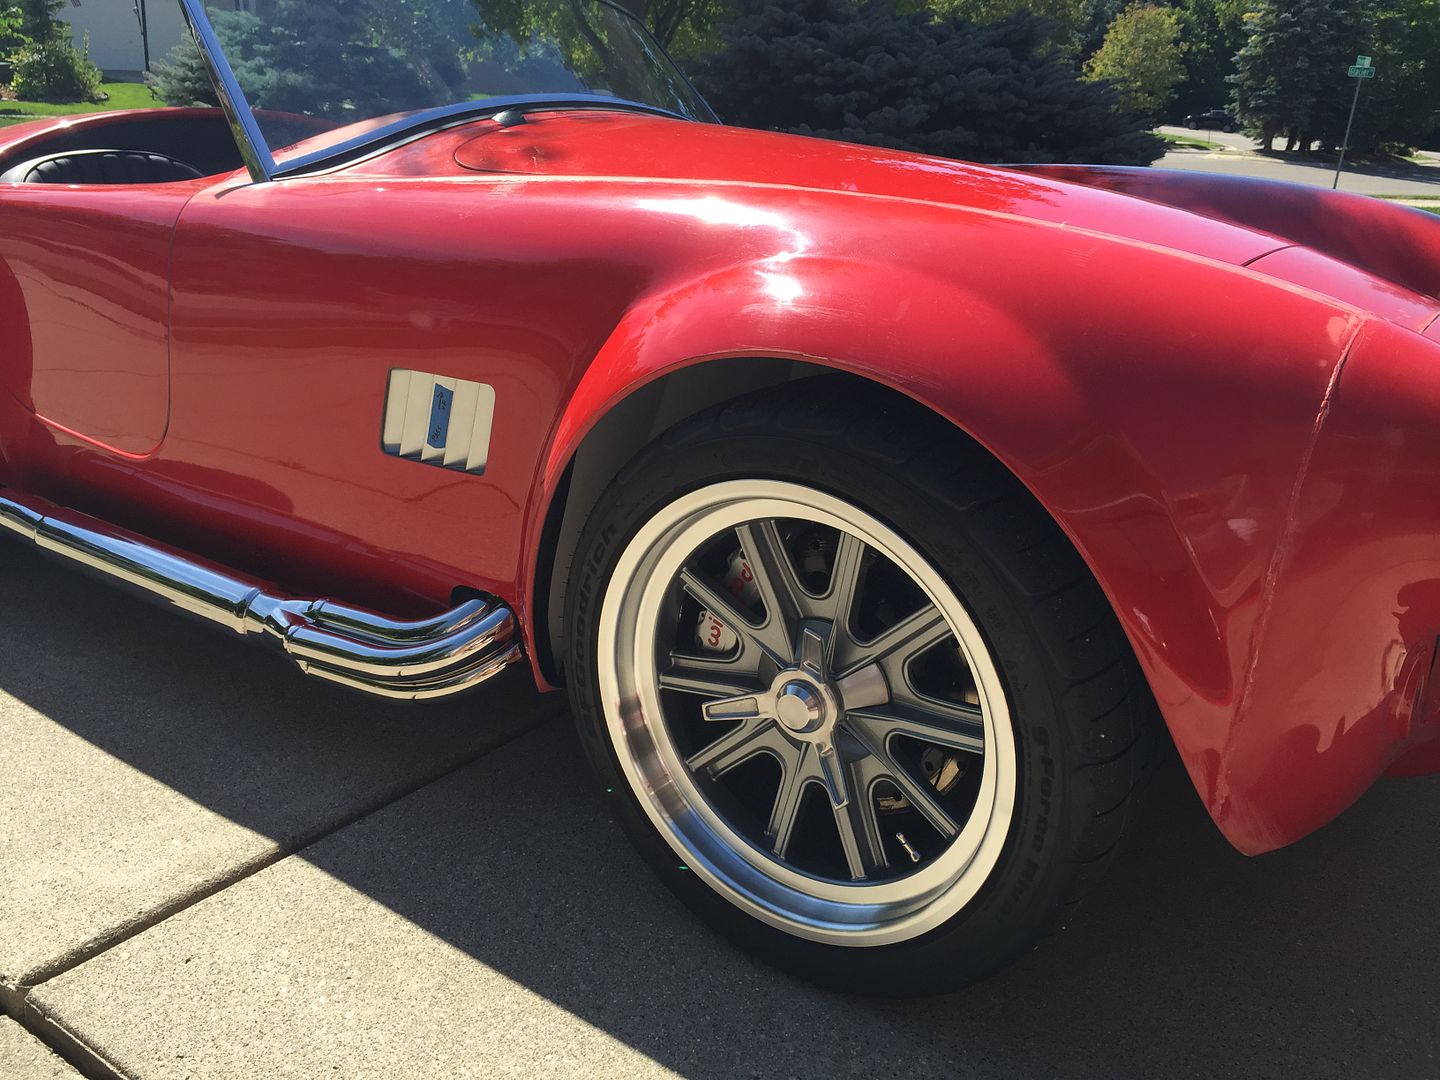
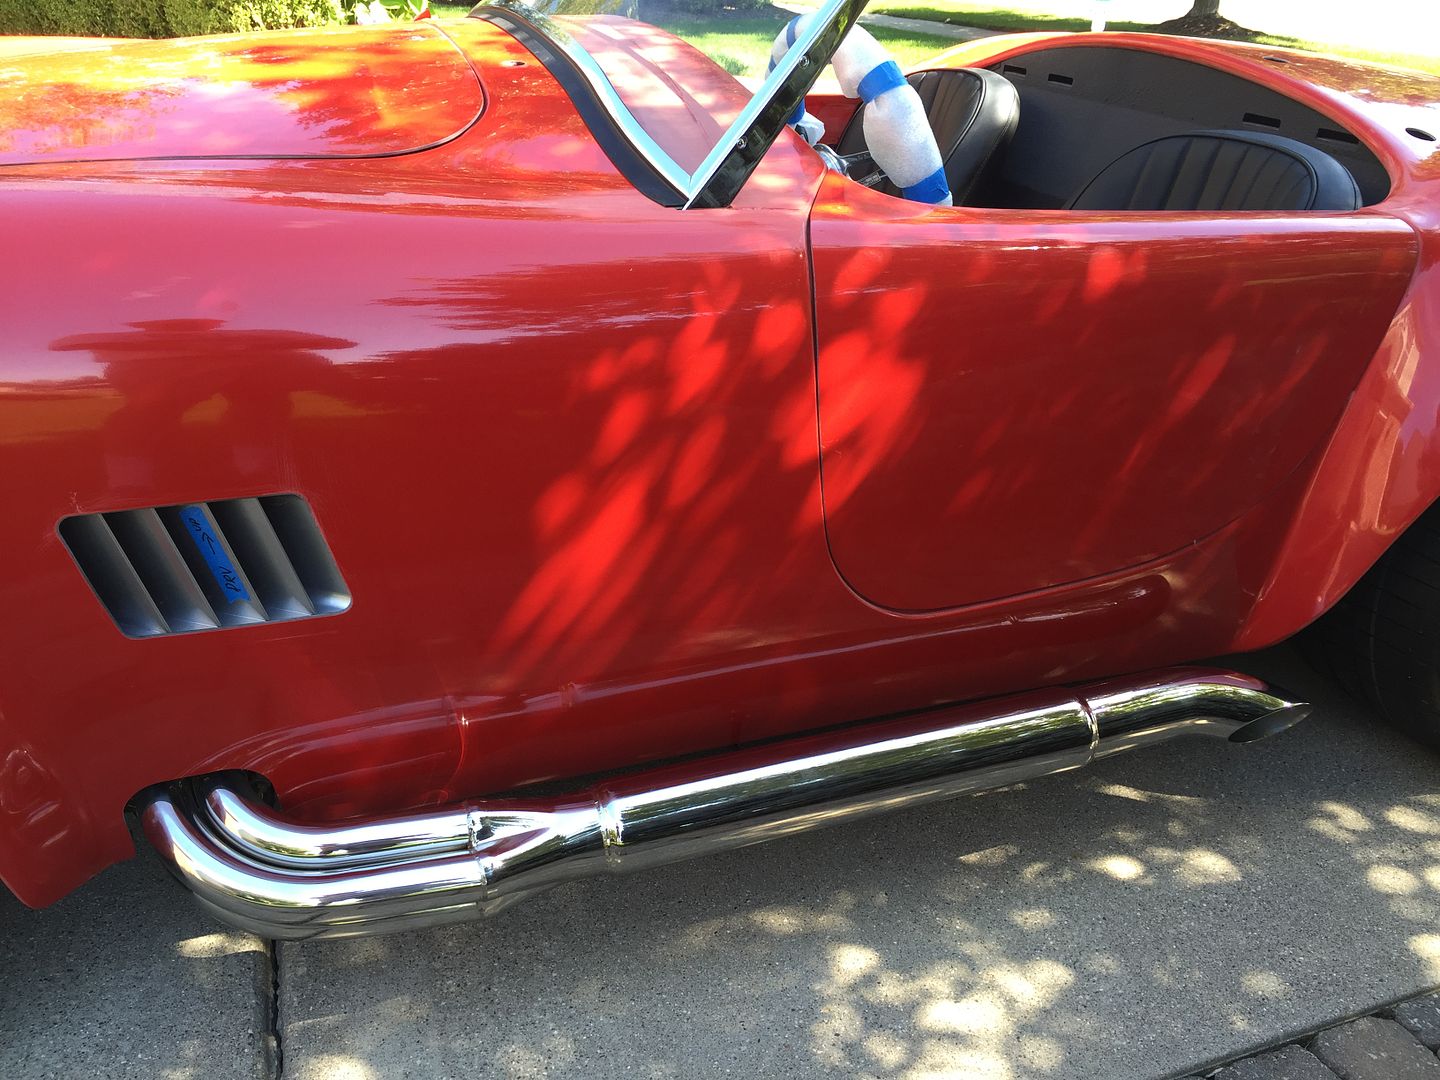
We are at “RTC” (Ready to Close) on both properties and closings are set for Sept 26. Then 15 days to make our move. I’m expecting to be out of the Roadster build business through at least the end of October. The list of projects at the new homestead keeps getting longer. We’ll be running out of driving season here in Michigan sooner than we’d like, but still very much on track to have done and on the road for the start of next season which has been my goal from the start.
Last edited by edwardb; 09-14-2016 at 06:53 AM.
Build 1: Mk3 Roadster #5125. Sold 11/08/2014.
Build 2: Mk4 Roadster #7750. Sold 04/10/2017.
Build Thread
Build 3: Mk4 Roadster 20th Anniversary #8674. Sold 09/07/2020.
Build Thread and
Video.
Build 4: Gen 3 Type 65 Coupe #59. Gen 3 Coyote. Legal 03/04/2020.
Build Thread and
Video
Build 5: 35 Hot Rod Truck #138. LS3 and 4L65E auto. Rcvd 01/05/2021. Legal 04/20/2023.
Build Thread. Sold 11/9/2023.
-
09-14-2016, 05:10 AM
#390
Senior Member

MK4 #8900 - complete kit - Coyote, TKO600, IRS - Delivered 6/28/16 First Start 10/6/16 Go cart - 10/16/16 Build completed - 4/26/17 - 302 days to build my 302 CI Coyote Cobra - Registered and street legal 5/17/17
Build Thread
http://thefactoryfiveforum.com/showt...e-build-thread
PHIL 4:13 INSTAGRAM - @scottsrides
-
09-14-2016, 01:17 PM
#391
Member

Epic build! Love reading all the meticulous details, learning so much with each of your posts. I see the new homestead has room for another MK4..... your hired!
-
09-14-2016, 03:25 PM
#392
Paul-
I know you have shown pictures of your new 18" wheels before, but I didn't realize just how deep those rear wheel deep dishes really are!
Car looks great as I know I have told you before. I look forward to seeing the finishing touches that you do to make it just right!
I hope you move goes smoothly!
Regards,
Steve
-
09-17-2016, 03:06 PM
#393
Thanks for the tip about the tapered pins. My son came home from college for just long enough to pick up clothes and cash. I borrowed his muscle for a half hour and we got the center section installed. The pins made for a quick install.
-
09-17-2016, 07:44 PM
#394
Senior Member


Originally Posted by
Straversi

Thanks for the tip about the tapered pins. My son came home from college for just long enough to pick up clothes and cash. I borrowed his muscle for a half hour and we got the center section installed. The pins made for a quick install.
You're welcome. Glad it worked out for you and congrats for getting the center section installed. It can be a challenge. After trying unsuccessfully myself for some hours to get the parts to line up so the bolts would go in, I was pleasantly surprised how well the tapered pin worked. Done in minutes. I guess the iron workers that have been using something like these for the past 100+ years (called bull pins) had a pretty good idea.
Last edited by edwardb; 09-17-2016 at 07:47 PM.
Build 1: Mk3 Roadster #5125. Sold 11/08/2014.
Build 2: Mk4 Roadster #7750. Sold 04/10/2017.
Build Thread
Build 3: Mk4 Roadster 20th Anniversary #8674. Sold 09/07/2020.
Build Thread and
Video.
Build 4: Gen 3 Type 65 Coupe #59. Gen 3 Coyote. Legal 03/04/2020.
Build Thread and
Video
Build 5: 35 Hot Rod Truck #138. LS3 and 4L65E auto. Rcvd 01/05/2021. Legal 04/20/2023.
Build Thread. Sold 11/9/2023.
-
09-17-2016, 07:58 PM
#395
Senior Member

Paint Scheduled
Took the build to the shop that I want to do my paint on Thursday. Same place that did the amazing job on #7750. Local, less than an hour from where I live. They agreed it's a clean body and everything is fitting pretty well. Makes a difference in the amount of time they expect it to take, which is why I wanted them to see it before giving me an estimate. Received a written estimate yesterday that I'm satisfied with. They're real busy, but have me scheduled for December. Will be about three weeks once they start. Should have it done sometime after the first of the year. With everything else I have going on, that's good timing and still lets me get it done by my target date. I have a few days of work to do before then, but shouldn't be a problem. Since the body is undercoated and fitted, they're going to paint it "body on." Of the ones they've done, about half off and the rest on. They prefer body on, so that's what we're doing. They're the pros and I'll leave that to them.
One other quick update. Yesterday while taking a break from packing, put a vacuum gauge on the connection on the back of the intake I used for the fuel regulator vacuum reference line. That's the connection that had an attached hose going through the intake to the front of the engine and I found out later was attached to the power brakes booster in a Mustang. So removed the hose and used the very convenient location to run a short hose over to the fuel regulator. I never bothered to check it. Assumed if it's going to the power brake booster, it has to be good. Another forum member reported in another thread that this port didn't register with his vacuum gauge. Didn't make sense, but added it to my "to do" to check. So yesterday I did. Zero vacuum. The needle didn't move. At idle, higher RPM, revving up, whatever. Nothing. Very strange. Who knows what's going on, but I just capped it (for apparently no real reason) and ran a hose to the vacuum port on the intake that Factory Five shows to use for the fuel regulator. (See, I can follow directions.) Took some creativity to get from the 1/2-inch port on the intake to the 5/32-inch nipple on the regulator, but got it done. That port, BTW, shows a very active vacuum signal when measured. Don't notice any difference in how the engine runs, and didn't expect to, but now the regulator is getting the vacuum signal it's supposed to have.
Build 1: Mk3 Roadster #5125. Sold 11/08/2014.
Build 2: Mk4 Roadster #7750. Sold 04/10/2017.
Build Thread
Build 3: Mk4 Roadster 20th Anniversary #8674. Sold 09/07/2020.
Build Thread and
Video.
Build 4: Gen 3 Type 65 Coupe #59. Gen 3 Coyote. Legal 03/04/2020.
Build Thread and
Video
Build 5: 35 Hot Rod Truck #138. LS3 and 4L65E auto. Rcvd 01/05/2021. Legal 04/20/2023.
Build Thread. Sold 11/9/2023.
-
09-17-2016, 09:05 PM
#396

Steve >> aka: GoDadGo

I Flat Out Love Digging Through Your Most Recent Build!
You know how I feel about your work, but more importantly, the help you've given me through this forum is greatly appreciated!
I'm doing my best to try to achieve your standards, but I'm not there yet.
Can't Wait To See The Finished Product!
-
09-18-2016, 01:58 AM
#397

Originally Posted by
edwardb

......Zero vacuum. The needle didn't move. At idle, higher RPM, revving up, whatever. Nothing. Very strange. Who knows what's going on....
The vacuum port on the back of the pre 2015 Coyotes didn't have any vacuum either and was the port shown on the FFR instructions for attaching the pressure regulator. All that was needed was to drill through the plastic in the bottom of the port to make it function.
-
09-18-2016, 06:26 AM
#398
Senior Member


Originally Posted by
GoDadGo

I Flat Out Love Digging Through Your Most Recent Build!
You know how I feel about your work, but more importantly, the help you've given me through this forum is greatly appreciated!
I'm doing my best to try to achieve your standards, but I'm not there yet.
Can't Wait To See The Finished Product!
Thanks for the generous comments. I too am very anxious to see/drive the final product. But kind of with mixed feelings. I enjoy the build process a lot.

Originally Posted by
2bking

The vacuum port on the back of the pre 2015 Coyotes didn't have any vacuum either and was the port shown on the FFR instructions for attaching the pressure regulator. All that was needed was to drill through the plastic in the bottom of the port to make it function.
I remember that from the previous version. But what's strange on this version is they have a quite elaborate hose assembly attached to the port that's clamped, etc. These engines come right off the same assembly line as the regular production motors going to Flat Rock for Mustang assembly. I can't imagine they have to remove the hose and drill out the port as part of the engine installation. So I didn't bother to check plus with the engine installed and the added complexity of the CMCV motors on the back of the manifold it's pretty hard to reach. Anything is possible I guess, but it's a moot point now.
Build 1: Mk3 Roadster #5125. Sold 11/08/2014.
Build 2: Mk4 Roadster #7750. Sold 04/10/2017.
Build Thread
Build 3: Mk4 Roadster 20th Anniversary #8674. Sold 09/07/2020.
Build Thread and
Video.
Build 4: Gen 3 Type 65 Coupe #59. Gen 3 Coyote. Legal 03/04/2020.
Build Thread and
Video
Build 5: 35 Hot Rod Truck #138. LS3 and 4L65E auto. Rcvd 01/05/2021. Legal 04/20/2023.
Build Thread. Sold 11/9/2023.
-
09-18-2016, 07:12 AM
#399
Senior Member

Paul I was reading a thread on the other forum you were involved in about the engine tune, either a dyno or a purchased tune you could load yourself. Where are you at on that?
MK4 #8900 - complete kit - Coyote, TKO600, IRS - Delivered 6/28/16 First Start 10/6/16 Go cart - 10/16/16 Build completed - 4/26/17 - 302 days to build my 302 CI Coyote Cobra - Registered and street legal 5/17/17
Build Thread
http://thefactoryfiveforum.com/showt...e-build-thread
PHIL 4:13 INSTAGRAM - @scottsrides
-
09-18-2016, 07:55 AM
#400
Senior Member


Originally Posted by
wareaglescott

Paul I was reading a thread on the other forum you were involved in about the engine tune, either a dyno or a purchased tune you could load yourself. Where are you at on that?
Interesting question. During my initial consideration of the Coyote, seemed custom tuning was optional. Some did it, others didn't and often cited considerable time/miles on the engine. Since I'm not necessarily looking for absolute maximum power (given how much it has in stock form) my plan was to look at a custom tune only if it needed for driveability. Fast forward to several conversations with Ford Racing tech support regarding some questions during my installation. They told me with the non-stock intake and exhaust, a custom tune was mandatory to prevent possible damage to the engine. They said it was OK to start and run the engine with the stock tune, but not to put it under any load. They also recommended a couple of local dyno tuners. I talked to the recommended tuners, and while they would be happy to tune the engine if it were in a Mustang, neither was prepared to deal with the crate version. After further research, my plan now is to use one of the remote tuners. Basically, you run/drive the build and create a log file downloaded through the OBD2 port. They build a custom tune based on the log file which is uploaded into the PCM again through the ODB2 port. Several iterations may be needed. Note these need to be actual custom tunes. Not the generic custom tunes being sold through many channels. Same as with the dyno tuners, I've found it's very important to confirm they support the Coyote specifically with the Ford Racing crate controls pack.
Last edited by edwardb; 09-18-2016 at 08:06 AM.
Build 1: Mk3 Roadster #5125. Sold 11/08/2014.
Build 2: Mk4 Roadster #7750. Sold 04/10/2017.
Build Thread
Build 3: Mk4 Roadster 20th Anniversary #8674. Sold 09/07/2020.
Build Thread and
Video.
Build 4: Gen 3 Type 65 Coupe #59. Gen 3 Coyote. Legal 03/04/2020.
Build Thread and
Video
Build 5: 35 Hot Rod Truck #138. LS3 and 4L65E auto. Rcvd 01/05/2021. Legal 04/20/2023.
Build Thread. Sold 11/9/2023.


 Thanks:
  Likes:


 Reply With Quote


 let me guess, red?


