London Cobra Show

Visit our community sponsor

Thanks Thanks:  47
Likes Likes:  84
Page 7 of 7 FirstFirst ... 567
Results 241 to 276 of 276

Thread: Jesse builds another Cobra #11,061 - Clutch cover, cockpit & a little engine bling

  1. #241
    Senior Member TTimmy's Avatar
    Join Date
    Sep 2021
    Location
    Emmaus, PA
    Posts
    176
    Post Thanks / Like
    Tight quarters in that engine compartment - congrats on getting that engine shoehorned in. Well done!

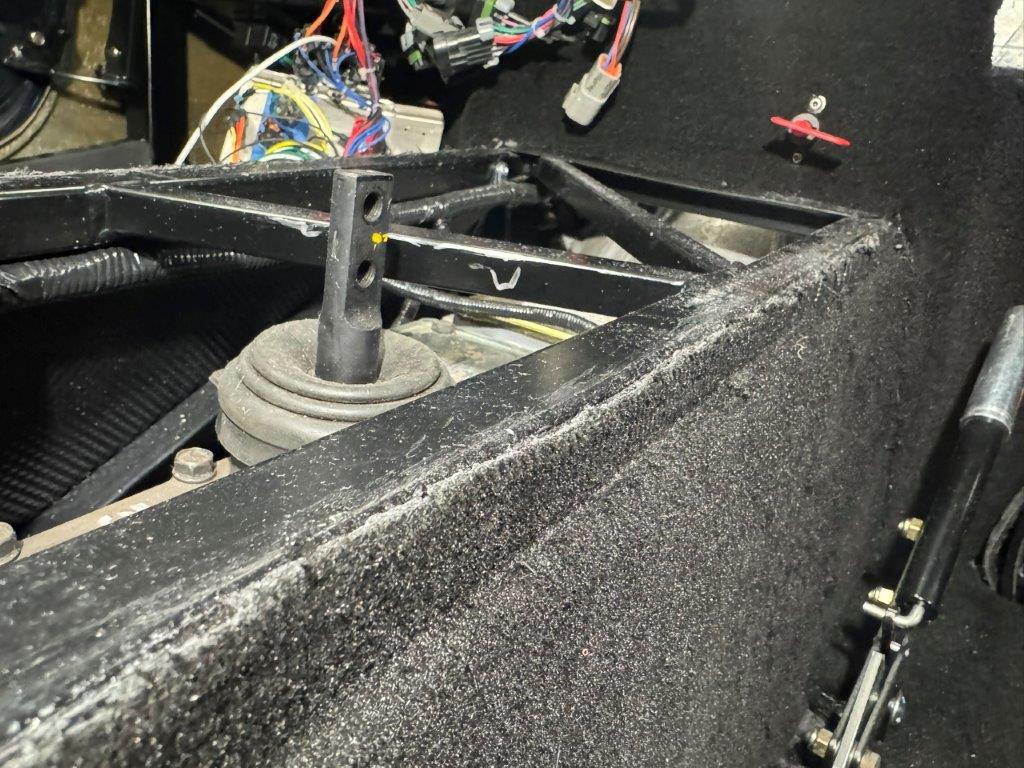
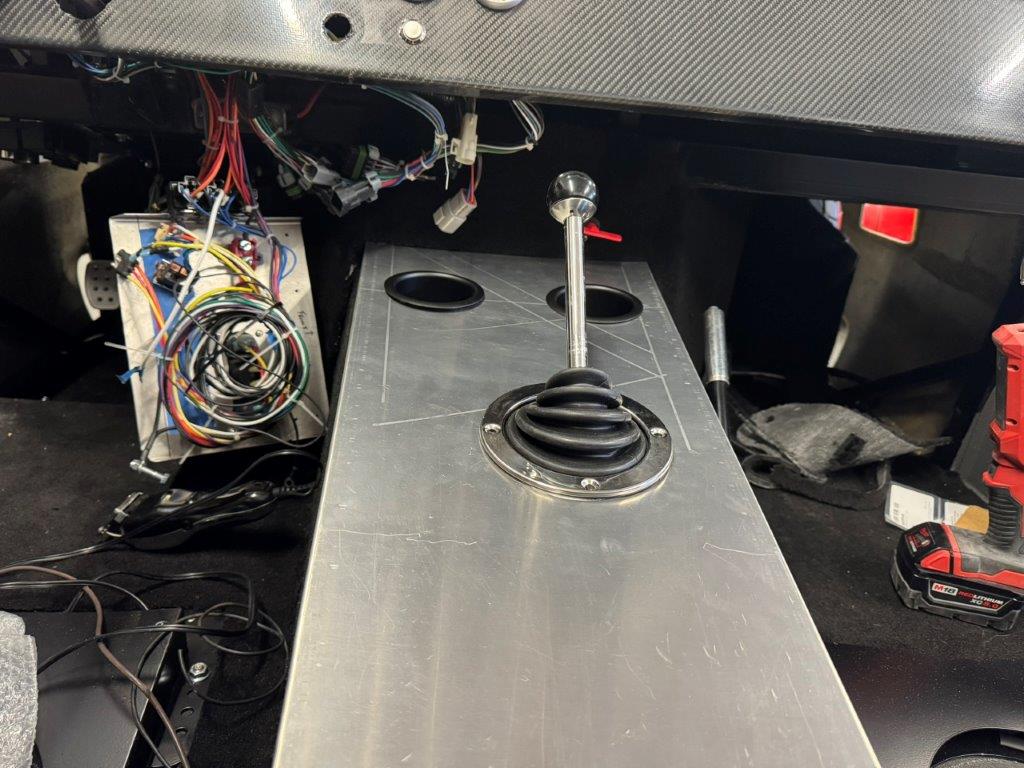
    Regarding shifter position, my Mk3 is in the same place in regards to the frame. Since mine is a 302 it is in the “forward” of the two rear options on my TKO. With the supplied shifter’s radical angle everything ends up in a good place. Any further back and my arm gets jammed up against the seat. Hard to tell but here’s some photos:


  2. Thanks Blitzboy54 thanked for this post
  3. #242
    cv2065's Avatar
    Join Date
    Dec 2017
    Location
    Orlando, FL
    Posts
    2,217
    Post Thanks / Like
    Quote Originally Posted by Mike.Bray View Post
    That's a lot of yoke showing out f the transmission, are you sure you have the correct length driveshaft?
    I agree with Mike. Might want to verify with FFR.
    MKIV Roadster - #9380 - Complete Kit - Delivered 7/17/18 - SOLD 5/2023
    Build Thread #1: https://thefactoryfiveforum.com/show...V-Build-Thread
    MKIV Roadster - #TBD - Complete Kit - Delivered 11/6/23 - In Progress
    Build Thread #2: https://thefactoryfiveforum.com/show...Build-Thread-2

  4. Likes Blitzboy54 liked this post
  5. #243
    Senior Member gbranham's Avatar
    Join Date
    Jul 2021
    Location
    Tonganoxie, KS
    Posts
    1,046
    Post Thanks / Like
    That's definitely the wrong driveshaft. That's the driveshaft I have in my IRS/TKX/427W setup. Before I switched to SBF from Coyote, I had a longer driveshaft that came with my kit, and it was longer than my current driveshaft by about the same amount of yoke you have showing there. I think you have the SBF/TKX/IRS driveshaft.

    Greg
    Built an early MkIII years ago, sold years ago. Back after 18 years to build a MkIV
    Build Thread Here Partners: Levy Racing, Summit Racing, LMR, Breeze, Forte's Parts, Speedhut, ReplicaParts
    MkIV Complete Kit Ordered 4/18/23, Delivered 7/11/23, Boss 427W, Edelbrock Pro Flo 4, TKX (.68 5th), IRS, Wilwood Brakes, 18" Halibrands, Toyo R888R Tires, Custom Speedhut Gauges

  6. Thanks Blitzboy54 thanked for this post
  7. #244
    Senior Member 460.465USMC's Avatar
    Join Date
    Aug 2019
    Location
    Spokane, WA
    Posts
    1,044
    Post Thanks / Like
    Quote Originally Posted by Blitzboy54 View Post
    It's definitely tight on the drivers side. Really only have a couple of mm. I would assume some contact when the engine torques but we will see.
    Congrats on the drivetrain install! Yep. It's one. Tight. Fit. So glad I had a local F5 builder help me shoehorn it into place on my Roadster. My driver's side looked similar to yours. I had the TKO and the Gen 3, but I didn't have nearly that much driveshaft exposed.

    Squeezing this motor in is one of those experiences you don't forget. As they say, "If you know. You know". Great work!
    Chris
    Coupe complete kit. Index. Delivered: 4/22/24. Build Thread. Coyote Gen 4X. T-56. IRS w/3.55. Wilwoods. PS. HVAC. Side windows.
    MK4 Complete kit. Build Thread Index. Delivered: 10/15/2020. Legal: 7/25/23. Coyote Gen3. TKO600 (0.64 OD). IRS w/3.55. PS. Wilwoods. Sway bars. This build is dedicated to my son, Benjamin. Build Thread.

  8. Thanks Blitzboy54 thanked for this post
  9. #245
    Senior Member Blitzboy54's Avatar
    Join Date
    Oct 2020
    Location
    Albany, NY
    Posts
    1,694
    Post Thanks / Like
    Thanks gang. That’s why I have a build thread. Great way to double check. I’ll reach out to FFR.
    Build 1 MK4 #10008 - Delivered 03/03/21, Graduated 7/20/22 - Sold 6/6/24
    Build Thread #1 https://thefactoryfiveforum.com/show...been-delivered
    Build 2 MK4 #11061- Delivered 08/24/24
    Build Thread #2 https://thefactoryfiveforum.com/show...006#post562006

  10. #246
    Senior Member Nigel Allen's Avatar
    Join Date
    Oct 2012
    Location
    South Australia
    Posts
    676
    Post Thanks / Like
    Quote Originally Posted by Blitzboy54 View Post

    It's definitely tight on the drivers side. Really only have a couple of mm. I would assume some contact when the engine torques but we will see.

    My Coyote was as tight as that. 5 years on the road, with some decent canings. No sign of any contact with the upper foot boxes to date. Engine does not seem to move around at all. Good news

    Cheers,

    Nige
    Mk.4 FFR supplied Right hand drive
    Received 12/2012 completed 12/2019
    Gen1 Coyote / TKO600 / IRS
    Lots of mods to make compliant for Australian design rules

  11. Thanks Blitzboy54 thanked for this post
  12. #247
    Senior Member Blitzboy54's Avatar
    Join Date
    Oct 2020
    Location
    Albany, NY
    Posts
    1,694
    Post Thanks / Like
    Driveshaft update

    The forum remains undefeated. I reached out to FFR and they confirmed I have the wrong drive shaft. I have an 8 inch and need a 10 inch. Replacement is on the way, so thanks everyone for looking out.


    Coyote Wiring

    I got started on the coyote control pack wiring. As I was laying everything out I noticed I have a problem with the alternator cable on the Ron Francis harness. The instructions say to route the cable under the engine mount to keep it safe from the header. As you can see in this picture if I go that way I come up about 4 inches short. I have to figure out what to do next. I think I am going to use a 2 wire bus bar. I will terminate it there and run a new longer line to the alternator.


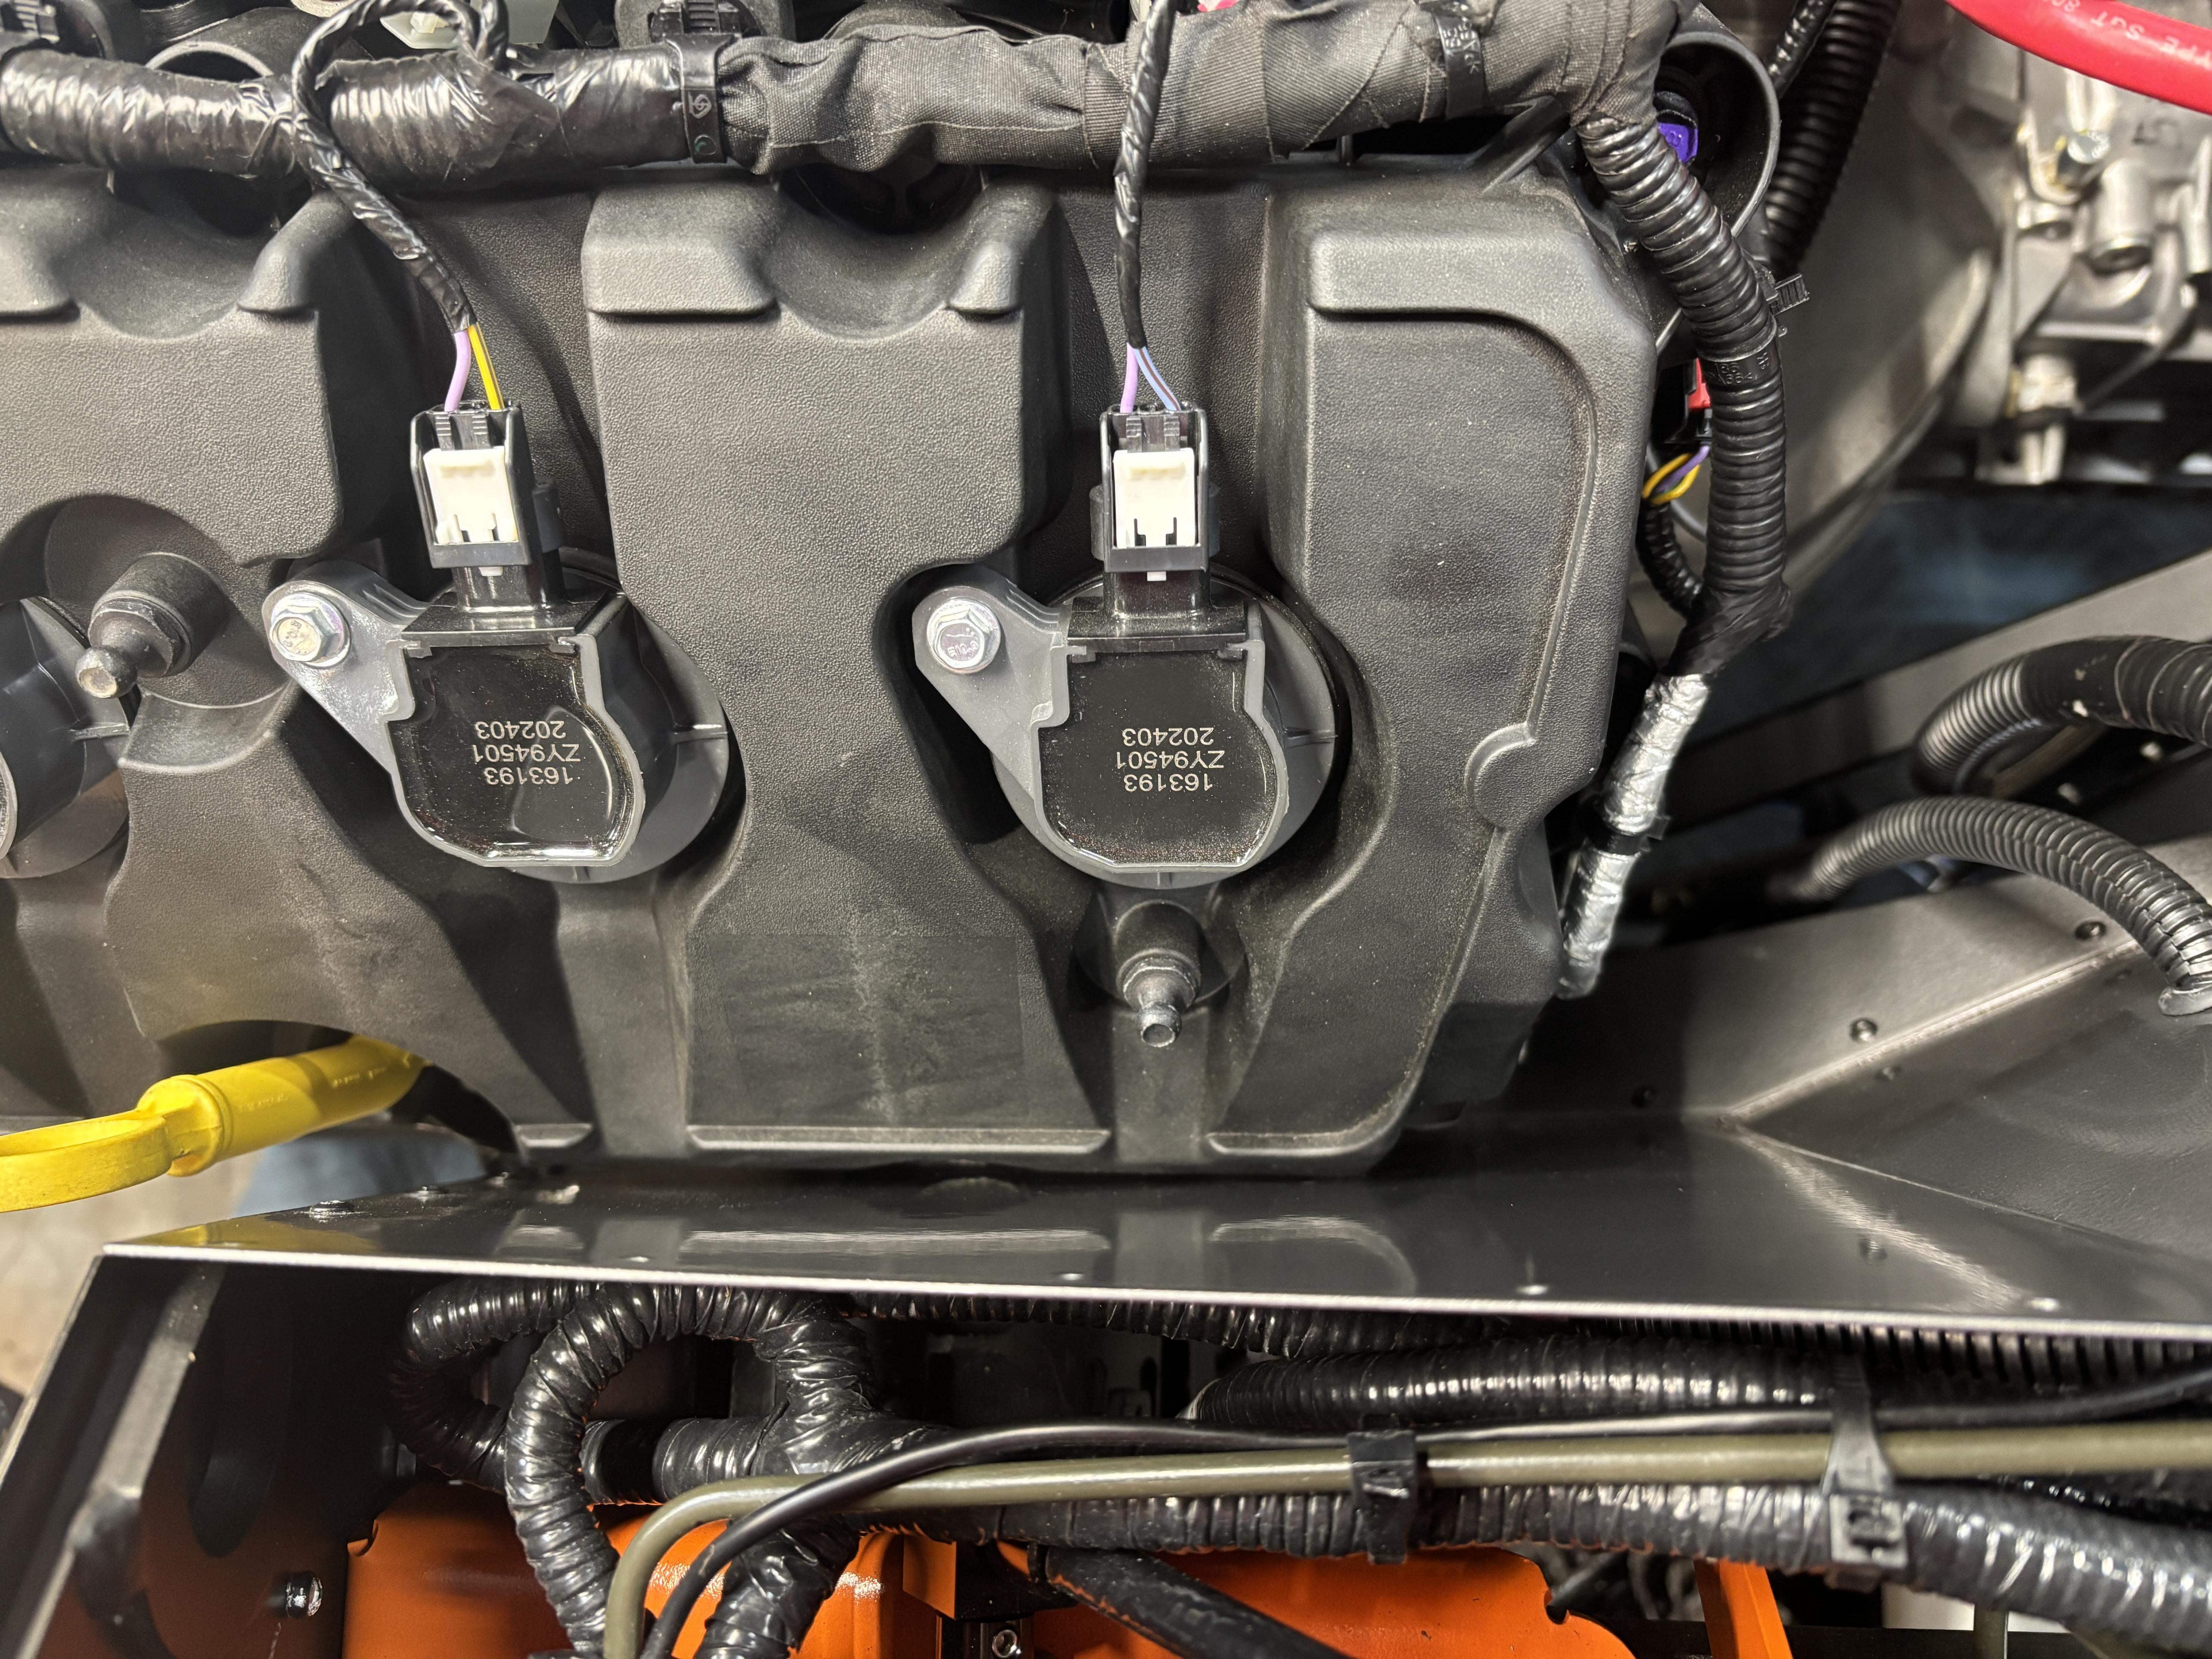
    I am using Autometer gauges so I needed to run the tach adapter for the Coyote. The instructions are clear that you need to tap into the purple tach wire that feeds all 8 cylinders.


    I ran some clamps down the front of the passenger footbox and connected the starter wires. You can also see the orange fan pigtail. Once the radiator is installed I will splice this into the RF connector.


    The coyote control pack harness is installed and integrated.

    Build 1 MK4 #10008 - Delivered 03/03/21, Graduated 7/20/22 - Sold 6/6/24
    Build Thread #1 https://thefactoryfiveforum.com/show...been-delivered
    Build 2 MK4 #11061- Delivered 08/24/24
    Build Thread #2 https://thefactoryfiveforum.com/show...006#post562006

  13. #248
    Senior Member Blitzboy54's Avatar
    Join Date
    Oct 2020
    Location
    Albany, NY
    Posts
    1,694
    Post Thanks / Like
    Quote Originally Posted by TTimmy View Post
    Tight quarters in that engine compartment - congrats on getting that engine shoehorned in. Well done!

    Regarding shifter position, my Mk3 is in the same place in regards to the frame. Since mine is a 302 it is in the “forward” of the two rear options on my TKO. With the supplied shifter’s radical angle everything ends up in a good place. Any further back and my arm gets jammed up against the seat. Hard to tell but here’s some photos:


    I appreciate the pics! I am going to do a short straight shifter at or near the front. I want it where it would be if it were a modern car. I think the mid shift is too close because I have a screen right there. Looking forward to figuring it all out.
    Last edited by Blitzboy54; 01-21-2025 at 11:04 AM.
    Build 1 MK4 #10008 - Delivered 03/03/21, Graduated 7/20/22 - Sold 6/6/24
    Build Thread #1 https://thefactoryfiveforum.com/show...been-delivered
    Build 2 MK4 #11061- Delivered 08/24/24
    Build Thread #2 https://thefactoryfiveforum.com/show...006#post562006

  14. #249
    Senior Member Blitzboy54's Avatar
    Join Date
    Oct 2020
    Location
    Albany, NY
    Posts
    1,694
    Post Thanks / Like
    Power Steering

    I routed the power steering hoses. I was pleasantly surprised I could get both of them run to the passenger side of the engine and still clear the battery. I am pretty sure I am in good shape here but if the collective see's something I missed please let me know.


    I do have something I need to figure out. I would like to add steering rack limiters before I put the radiator in. However I don't have tires for my rims. It doesn't make sense to use the temp wheels. I think I might try to simulate the tires somehow. Maybe foam? I'm open to ideas.

    Factory Five came through and got me the right drive shaft. This looks a lot better.

    Build 1 MK4 #10008 - Delivered 03/03/21, Graduated 7/20/22 - Sold 6/6/24
    Build Thread #1 https://thefactoryfiveforum.com/show...been-delivered
    Build 2 MK4 #11061- Delivered 08/24/24
    Build Thread #2 https://thefactoryfiveforum.com/show...006#post562006

  15. #250
    Senior Member gbranham's Avatar
    Join Date
    Jul 2021
    Location
    Tonganoxie, KS
    Posts
    1,046
    Post Thanks / Like
    Delete...double post
    Last edited by gbranham; 01-24-2025 at 09:26 AM.
    Built an early MkIII years ago, sold years ago. Back after 18 years to build a MkIV
    Build Thread Here Partners: Levy Racing, Summit Racing, LMR, Breeze, Forte's Parts, Speedhut, ReplicaParts
    MkIV Complete Kit Ordered 4/18/23, Delivered 7/11/23, Boss 427W, Edelbrock Pro Flo 4, TKX (.68 5th), IRS, Wilwood Brakes, 18" Halibrands, Toyo R888R Tires, Custom Speedhut Gauges

  16. #251
    Senior Member gbranham's Avatar
    Join Date
    Jul 2021
    Location
    Tonganoxie, KS
    Posts
    1,046
    Post Thanks / Like
    I see you installed the 'hoop' over the passenger side mount for the steering rack, as provided by FFR as a precaution for weld failure. I did, as well. I didn't like how the PS hard line sits just above it, worried that it may vibrate and wear against that hoop. As an extra precaution, I put a short length of split fuel injection hose on that hard line, secured with a couple of zip ties. Just a thought.
    HeadlightTest1.jpg
    Built an early MkIII years ago, sold years ago. Back after 18 years to build a MkIV
    Build Thread Here Partners: Levy Racing, Summit Racing, LMR, Breeze, Forte's Parts, Speedhut, ReplicaParts
    MkIV Complete Kit Ordered 4/18/23, Delivered 7/11/23, Boss 427W, Edelbrock Pro Flo 4, TKX (.68 5th), IRS, Wilwood Brakes, 18" Halibrands, Toyo R888R Tires, Custom Speedhut Gauges

  17. #252
    cv2065's Avatar
    Join Date
    Dec 2017
    Location
    Orlando, FL
    Posts
    2,217
    Post Thanks / Like
    Looks good Jesse. Looks like you are faring better than I. The pump I've got from Roush is from Turn One steering and they didn't give me an integrated reservoir. Not a fan of the remote cannister so may change the pump as it's not as simple as just adding an integrated reservoir. Glad you found the right driveshaft!
    MKIV Roadster - #9380 - Complete Kit - Delivered 7/17/18 - SOLD 5/2023
    Build Thread #1: https://thefactoryfiveforum.com/show...V-Build-Thread
    MKIV Roadster - #TBD - Complete Kit - Delivered 11/6/23 - In Progress
    Build Thread #2: https://thefactoryfiveforum.com/show...Build-Thread-2

  18. #253
    Senior Member Blitzboy54's Avatar
    Join Date
    Oct 2020
    Location
    Albany, NY
    Posts
    1,694
    Post Thanks / Like
    Quote Originally Posted by gbranham View Post
    I see you installed the 'hoop' over the passenger side mount for the steering rack, as provided by FFR as a precaution for weld failure. I did, as well. I didn't like how the PS hard line sits just above it, worried that it may vibrate and wear against that hoop. As an extra precaution, I put a short length of split fuel injection hose on that hard line, secured with a couple of zip ties. Just a thought.
    HeadlightTest1.jpg
    That tube just passes air back and forth to the grease boots, however what you did is not a bad idea. There is some contact between the power steering hoses and it. The car will vibrate and I can't get a hose clamp in there. I may copy what you did.

    Quote Originally Posted by cv2065 View Post
    Looks good Jesse. Looks like you are faring better than I. The pump I've got from Roush is from Turn One steering and they didn't give me an integrated reservoir. Not a fan of the remote cannister so may change the pump as it's not as simple as just adding an integrated reservoir. Glad you found the right driveshaft!
    The FFR instructions still show a remote reservoir. I like the integrated arrangement better as well. There is only so much room to hang stuff. Should be plenty of pump options for an SBF. Good luck, looking forward to your next update.
    Build 1 MK4 #10008 - Delivered 03/03/21, Graduated 7/20/22 - Sold 6/6/24
    Build Thread #1 https://thefactoryfiveforum.com/show...been-delivered
    Build 2 MK4 #11061- Delivered 08/24/24
    Build Thread #2 https://thefactoryfiveforum.com/show...006#post562006

  19. #254
    Senior Member Blitzboy54's Avatar
    Join Date
    Oct 2020
    Location
    Albany, NY
    Posts
    1,694
    Post Thanks / Like
    More Coyote Wiring

    As mentioned in another update the alternator wire from the RF harness did not reach the alternator if routed below the engine mount as recommended by the build manual. After giving it some thought I decided the best way to make that run longer was to use a single stud bus bar attached to the frame with machine screws. I used a 3ft length of 8 awg wire and shortened the RF wire and soldered a lug on it. I then wrapped it all in a silicone cover.


    While I was down there I made connections to the water temp and oil pressure senders as well as completing the run to the alternator.


    I connected the oil temp sender on the opposite side of the oil pan. I routed it around the front of the pan under the longer screws and used nuts and washers to keep it tucked in there.


    Expansion Tank

    I purchased a Mishimoto expansion tank clone. It is the same dimensions and I added the correct cap for the application. I dug up a number of threads on this tank and found that height was the main issue. First off I needed to create a mount. I have these. I used them to create mounting points for the side exhaust on my last roadster.


    I had to modify them slightly by trimming down the edges. I used M8 rivnuts on the frame to anchor them. I also used 12mm spacers to lower the tank. The nice thing about this arrangement is I can add more spacers if I need to to lower it further if need be. I think it will clear as is.


    The other piece of good news is this is so stout I don't need to mount the bottom stud. It has plenty of clearance. I put the boot in place and there is more than enough room. I also temp mounted part of the hood hinge for clearance and reference. I may powder coat the brackets for the tank. We will see.


    Lastly I pulled the cap inlet and installed a plug. I couldn't find one at the hardware store the right size so I used one that was a slightly different size and tapped the hole. Fits nice.

    Last edited by Blitzboy54; 01-29-2025 at 03:43 PM.
    Build 1 MK4 #10008 - Delivered 03/03/21, Graduated 7/20/22 - Sold 6/6/24
    Build Thread #1 https://thefactoryfiveforum.com/show...been-delivered
    Build 2 MK4 #11061- Delivered 08/24/24
    Build Thread #2 https://thefactoryfiveforum.com/show...006#post562006

  20. #255
    Senior Member Blitzboy54's Avatar
    Join Date
    Oct 2020
    Location
    Albany, NY
    Posts
    1,694
    Post Thanks / Like
    Vacuum and Fuel

    I found some cool orange Silicone tubing. I am using different colors within the engine. Vacuum will be orange. I have some 5/8 silicone tubing on order for the PCV.


    I completed the fuel circuit as well


    I picked up an electric bypass valve from Restomod Air. Has a rheostat that I can operate from the cockpit. Comes with easy to follow instructions. I decided to color code the hoses. Red for supply and blue for return. No real reason other than I like the way it looks.


    I also picked up the flat bed toe hook. Looks pretty sharp and seems like it will do what it's designed to do. Hopefully I never need it.

    Last edited by Blitzboy54; 01-27-2025 at 07:57 AM.
    Build 1 MK4 #10008 - Delivered 03/03/21, Graduated 7/20/22 - Sold 6/6/24
    Build Thread #1 https://thefactoryfiveforum.com/show...been-delivered
    Build 2 MK4 #11061- Delivered 08/24/24
    Build Thread #2 https://thefactoryfiveforum.com/show...006#post562006

  21. #256
    Senior Member Blitzboy54's Avatar
    Join Date
    Oct 2020
    Location
    Albany, NY
    Posts
    1,694
    Post Thanks / Like
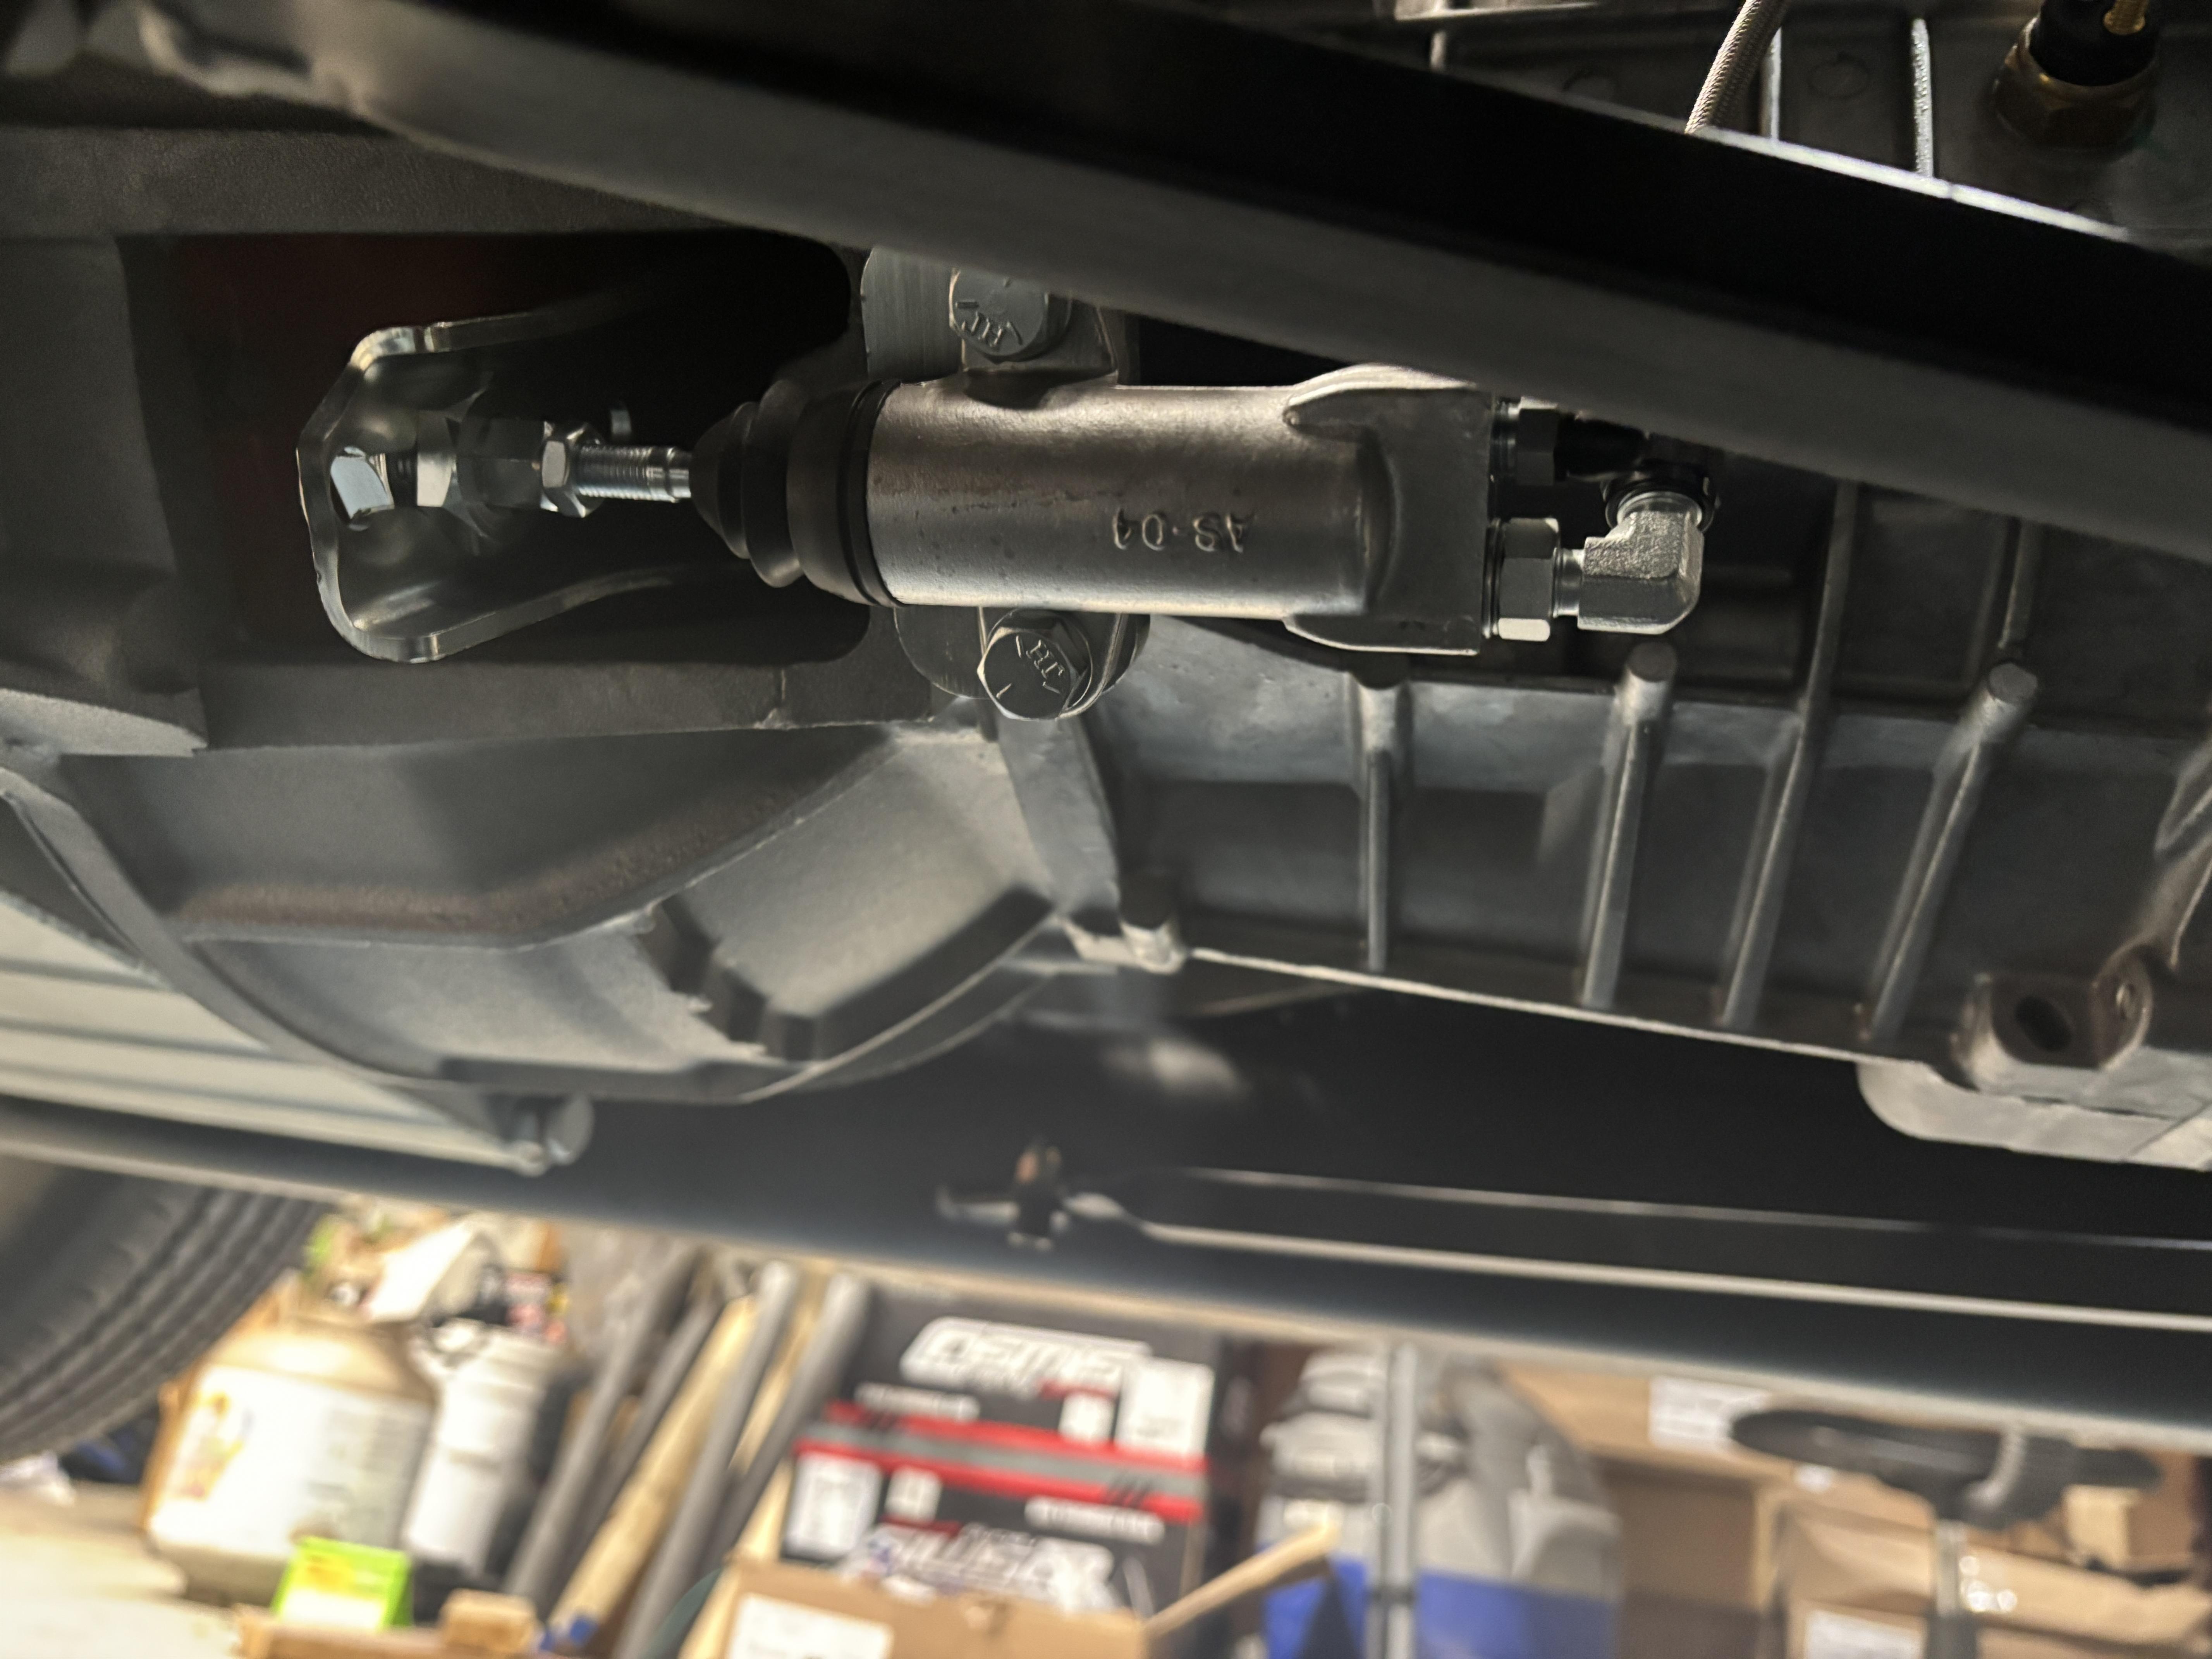
    I learned something about vacuum bleeders and brakes vs the clutch. I reported not liking the vacuum bleeder on the brakes because it pulls air in past the fitting. You can't tell when the air is all gone. So I had another person help me do it the old fashioned way. On the clutch however I was never able to fully get the air out of the slave cylinder. I tried a number of tricks and I just couldn't get it. I would imagine a pressure bleeder would work for both but just for the sake of informing folks I found the vacuum bleeder worked great for this application. I was unable to remove the "rebound" because of the air behind the cylinder. The vacuum bleeder pulled it right out. The piston rebound was immediately tight while the vacuum bleeder was operating. The clutch now moves mm to mm with the pedal.

    I did have to put a spacer behind the pin that engages the clutch as it was not long enough. Based on this experience and having to modify the bracket you may want to go a different route if installing an external slave. MDL is just ok.
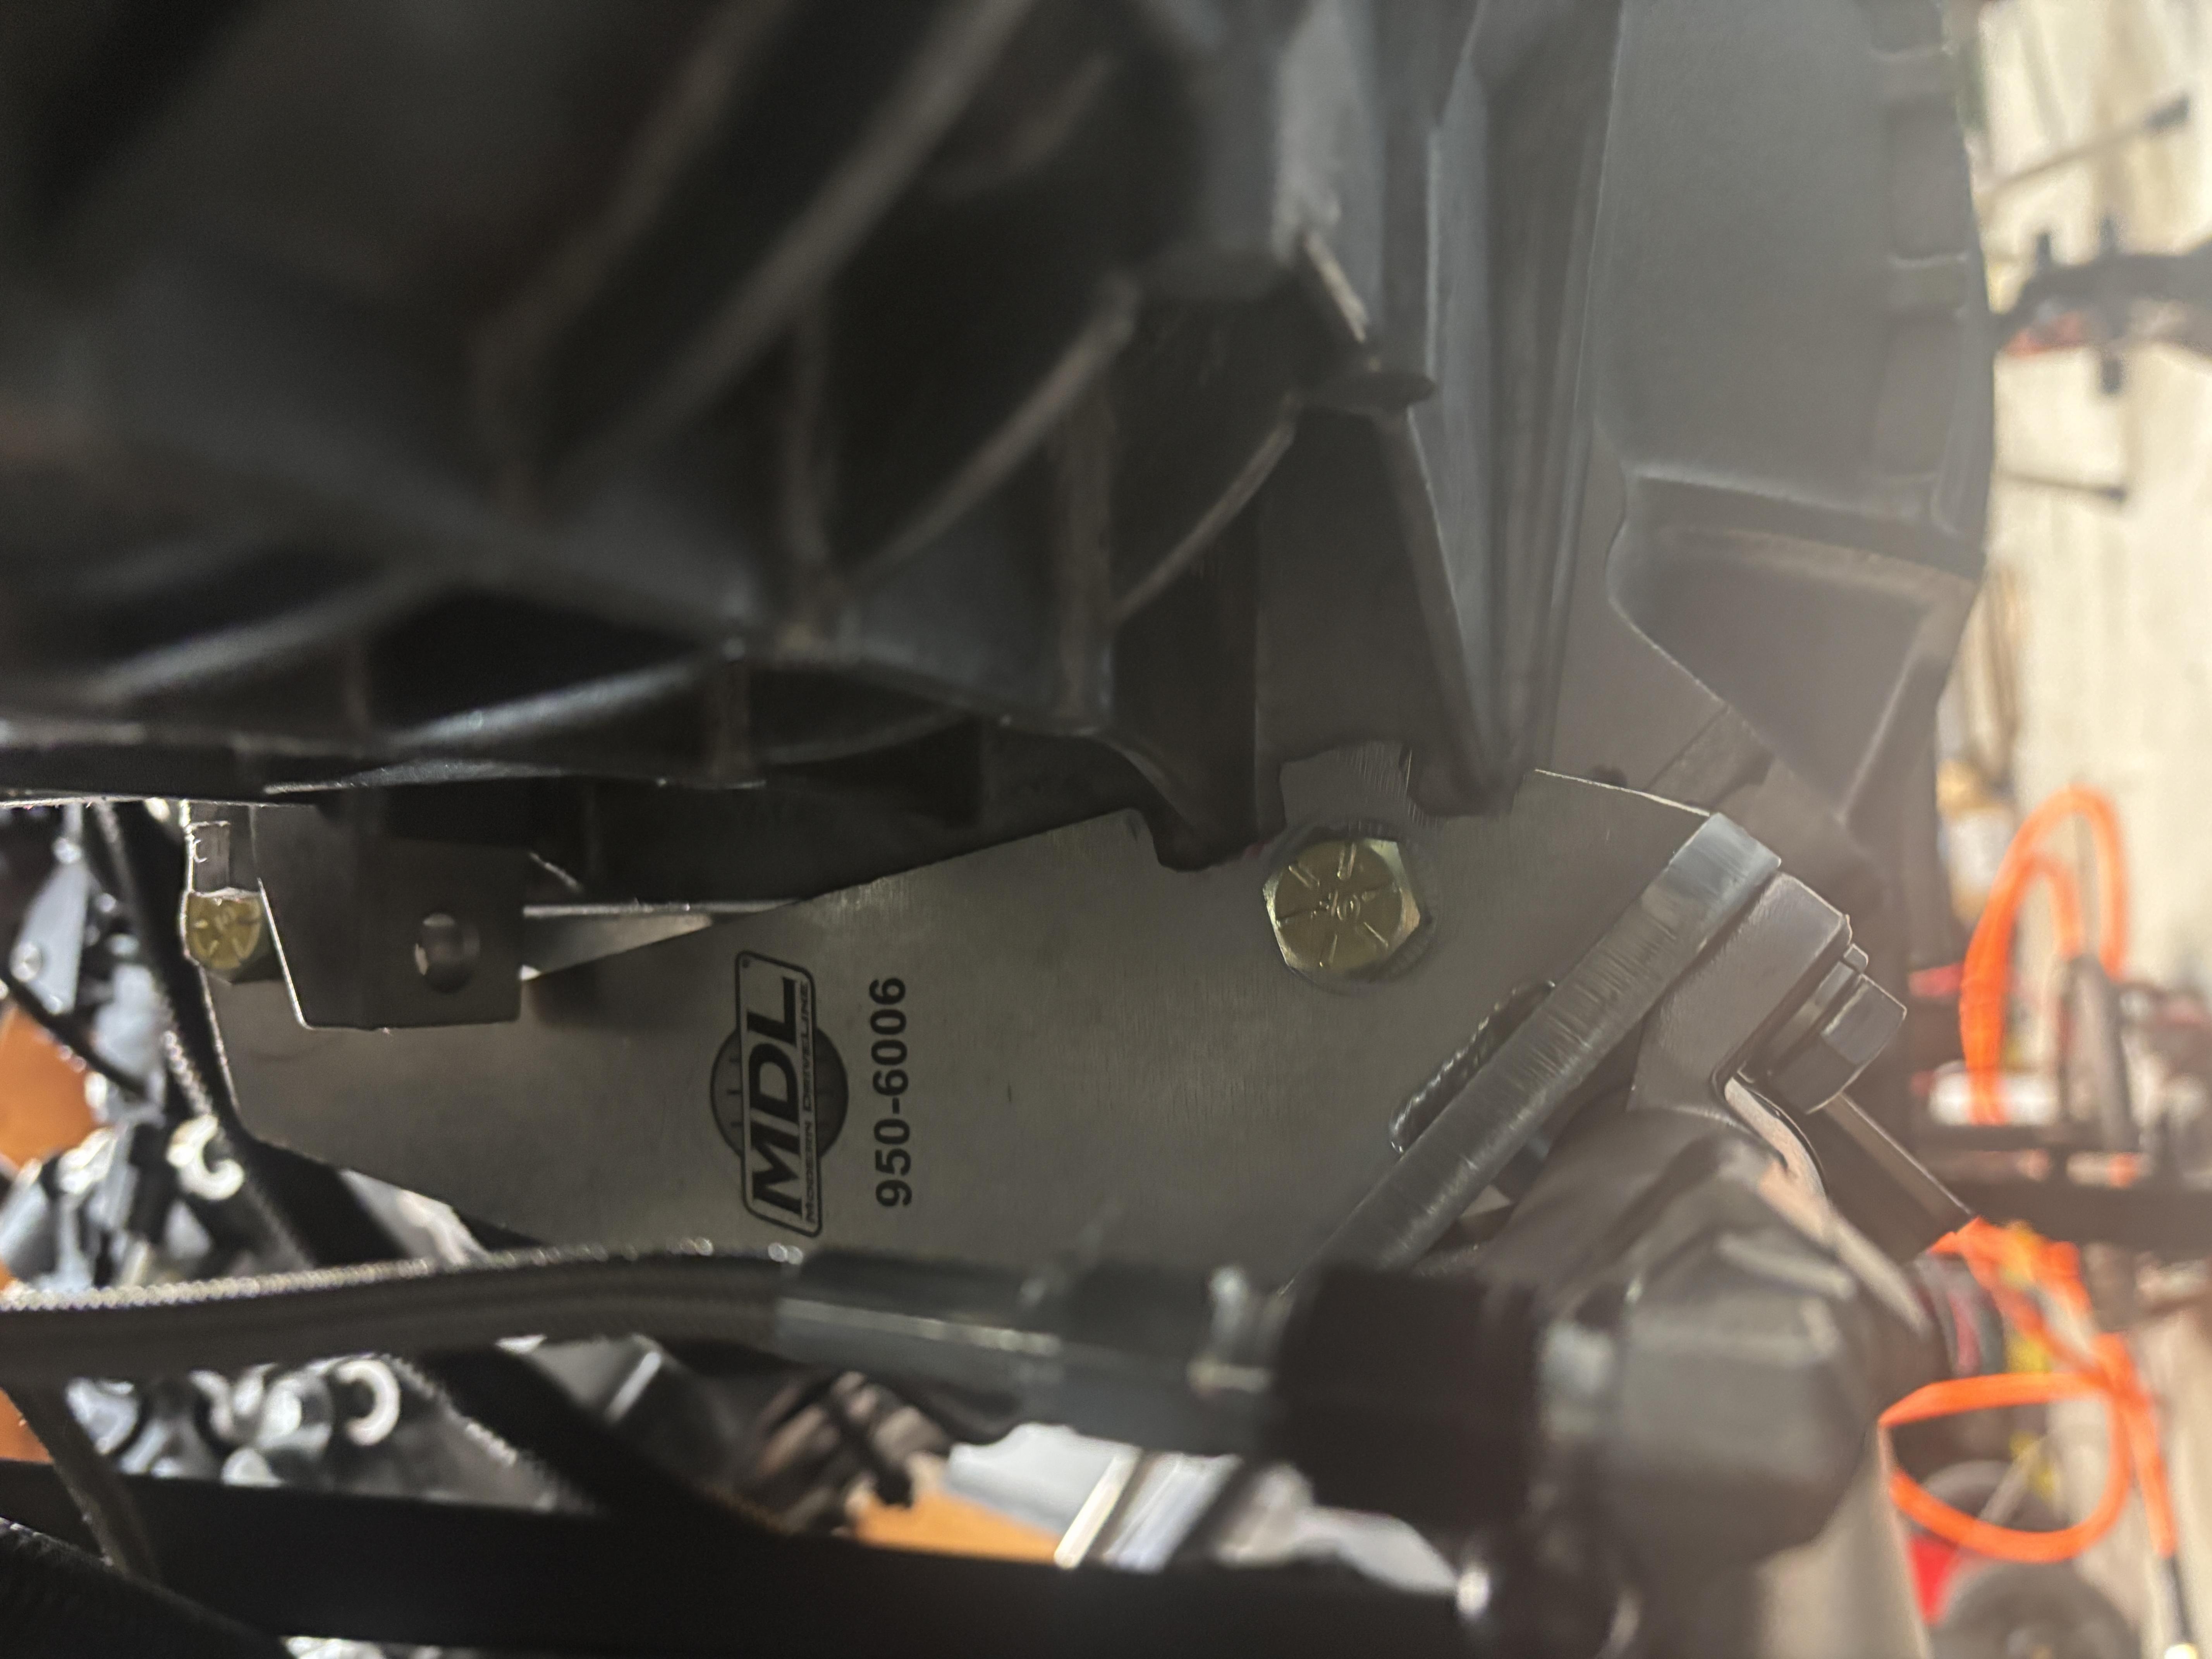


    I also filled the TKX with sycromesh. The instructions call for 2.75 quarts. I removed the mid shift plate. I put 2.75 in and if you use a flashlight you can see the level from up there. It was right at the upper plug. So it was nice not to have to remove the side plug.
    Last edited by Blitzboy54; 01-30-2025 at 11:35 AM.
    Build 1 MK4 #10008 - Delivered 03/03/21, Graduated 7/20/22 - Sold 6/6/24
    Build Thread #1 https://thefactoryfiveforum.com/show...been-delivered
    Build 2 MK4 #11061- Delivered 08/24/24
    Build Thread #2 https://thefactoryfiveforum.com/show...006#post562006

  22. #257
    Senior Member Blitzboy54's Avatar
    Join Date
    Oct 2020
    Location
    Albany, NY
    Posts
    1,694
    Post Thanks / Like
    Radiator Installation

    I am in the extreme minority of builders (at least that post here) in that I really like the radiator fan as is. I get why folks put the shroud in but for me there is something about the look of it out and exposed that I dig. I broke out the hardware that come with the fan and went to work. Also it leaves a little more room in that area and I dig that as well. I installed a 1/4 NPT to 3/8 barb elbow for the expansion tank on the left side.


    I propped it up with a floor jack to center and marked it. I had to trim the frame a little on my last build to clear one of the radiator welds. This was not the case this time.


    I did use the breeze lower mount again though. I have absolutely no interest in riveting my radiator to the body. This was always just a weird solution IMO. I think FFR agrees because it went away on the MK5


    I tightened everything down and pinned the radiator to the lower mount per the instructions.


    Last thing is I hooked a power supply up to the fan to test it. Works like it should and sounds like a fan boat. lol

    I joke but this doesn't bother me either. The car is so loud I honestly never really noticed when I was driving.

    Last edited by Blitzboy54; 01-30-2025 at 11:53 AM.
    Build 1 MK4 #10008 - Delivered 03/03/21, Graduated 7/20/22 - Sold 6/6/24
    Build Thread #1 https://thefactoryfiveforum.com/show...been-delivered
    Build 2 MK4 #11061- Delivered 08/24/24
    Build Thread #2 https://thefactoryfiveforum.com/show...006#post562006

  23. #258
    Senior Member Mike.Bray's Avatar
    Join Date
    Dec 2021
    Location
    Flower Mound TX
    Posts
    1,448
    Post Thanks / Like
    The Factory Five supplied fan is definitely loud. I tested it on the bench in my garage and my neighbor came over asking if I was putting a jet engine in my car. Sad thing is it doesn't pull very much air for all that noise.
    My build thread https://thefactoryfiveforum.com/show...Roadster-Build

    Thread on Stainless Steel AN brake lines.

    Thread on fasteners and torque wrenches.

  24. Likes Blitzboy54 liked this post
  25. #259
    Senior Member Blitzboy54's Avatar
    Join Date
    Oct 2020
    Location
    Albany, NY
    Posts
    1,694
    Post Thanks / Like
    Cooling system

    I continued to to integrate the cooling system. First I wanted to connect the radiator fan but first needed to finish routing the wiring harness. Also if I am going to complete the harness I mind as well install and test the horn.


    I then fixed the connector to the fan. The male and female ends of the connector that come with the kit are not compatible. You can mash it together with channel locks or shave the female side. I opted to use a weather pack connector.


    I ran the blue wire around the passenger side of the 4" frame tube and connected it to the orange Coyote fan trigger wire.


    Build 1 MK4 #10008 - Delivered 03/03/21, Graduated 7/20/22 - Sold 6/6/24
    Build Thread #1 https://thefactoryfiveforum.com/show...been-delivered
    Build 2 MK4 #11061- Delivered 08/24/24
    Build Thread #2 https://thefactoryfiveforum.com/show...006#post562006

  26. #260
    Senior Member Blitzboy54's Avatar
    Join Date
    Oct 2020
    Location
    Albany, NY
    Posts
    1,694
    Post Thanks / Like
    Cooling system cont

    Next was time to get to work on the actual cooling lines. The lower was easy enough. I used the lower hose (came with the control pack) and married that to the corrugated steel line. I again may be in the minority but I like the steel lines that come with the kit. The Ford lower hose comes with the needed bend and the rest went together without issue.


    I put my battery in as it will be covered up by the cooling system. I wonder if I will be able to change it without draining the radiator? Will find out if 5 years I guess.


    I found my upper radiator hose when put in the spot it is keyed to go into contacts the power steering pump belt. So I cut off the clamp and removed the fitting. Using 2 pieces of existing radiator line and a small piece of steel I managed to manufacture myself and upper hose that does not contact the power steering pump belt but it doesn't clear it by much.


    Lastly I put in the Mishimoto hose kit for the expansion tank and installed the intake. For the sake of disclosure this is not the intake I plan to use in the final build but the one I am using for now.


    Last edited by Blitzboy54; 02-01-2025 at 06:17 PM.
    Build 1 MK4 #10008 - Delivered 03/03/21, Graduated 7/20/22 - Sold 6/6/24
    Build Thread #1 https://thefactoryfiveforum.com/show...been-delivered
    Build 2 MK4 #11061- Delivered 08/24/24
    Build Thread #2 https://thefactoryfiveforum.com/show...006#post562006

  27. #261
    Senior Member Blitzboy54's Avatar
    Join Date
    Oct 2020
    Location
    Albany, NY
    Posts
    1,694
    Post Thanks / Like
    I made a few adjustments. First was the upper cooling hose. The way it's keyed it points down about 35 degrees. This creates interference or near or near interference with the power steering drive belt. I dug up a thread from 2021 and found several solutions to this. The one I liked the best is to create another key groove. So that's what I did.


    This makes the fitting level. I like this fit better.


    Next was I didn't like the way the upper return line was routed. I now have it above the intake elbow. It's a pre molded piece that isn't a perfect fit. I will run with it for now but could replace it with a generic hose later depending. I put in a catch can off the PCV. I have hoses for that system plumbed. This is just for first start and possibly dyno tune. I have some custom hoses coming.

    Build 1 MK4 #10008 - Delivered 03/03/21, Graduated 7/20/22 - Sold 6/6/24
    Build Thread #1 https://thefactoryfiveforum.com/show...been-delivered
    Build 2 MK4 #11061- Delivered 08/24/24
    Build Thread #2 https://thefactoryfiveforum.com/show...006#post562006

  28. #262
    Senior Member Blitzboy54's Avatar
    Join Date
    Oct 2020
    Location
    Albany, NY
    Posts
    1,694
    Post Thanks / Like
    Headers

    When I purchased a Ford remanufactured engine it cam with OEM header studs and nuts. One of the things I struggled a little with my last build was the header bolts coming lose after several heat cycles. I decided that the OEM studs would be best. This turned out to be true for the passenger side. The engine also comes with OEM header gaskets.


    I purchased a set of O2 sensor extension cables. This is a necessity for the passenger side. But only the passenger side. So if anyone needs a Gen 2 O2 sensor cable extension let me know. I have a spare.


    The passenger header slid right into place and was relatively easy to tighten down. So far so good.


    The drivers side was an entirely different kettle of fish. First, the studs have to come out. There isn't enough room to clear them and the footbox. Two of the eight you can't get the stud back in. I had to use regular bolts.


    Almost all of them on the driver side was a genuine struggle to tighten down. The passenger side took 30 minutes to install, the driver was an hour and a half. But they are both in, so all's well that ends well.

    Build 1 MK4 #10008 - Delivered 03/03/21, Graduated 7/20/22 - Sold 6/6/24
    Build Thread #1 https://thefactoryfiveforum.com/show...been-delivered
    Build 2 MK4 #11061- Delivered 08/24/24
    Build Thread #2 https://thefactoryfiveforum.com/show...006#post562006

  29. #263
    Senior Member Blitzboy54's Avatar
    Join Date
    Oct 2020
    Location
    Albany, NY
    Posts
    1,694
    Post Thanks / Like
    Prep for engine start

    This all went pretty smoothly. First I used my 12v power supply to test my fuel system and set the regulator. I recommend doing this if you have a fuel injected system as not to overload the injectors. I backed the regulator all the way out. Then un plugged the fuel pump and put the power supply on the positive and negative leads easy peasy.


    I then set the regulator to the required 55 psi. I did not have any leaks so yay! I let it run for 20 minutes. No issues


    I hung the side pipes. I was planning on doing turnbuckle supports for the corners but I don't have a ball joint at the collector because of the cats so maybe no need? My Jpipes drooped on the last one. I think that might be a solution looking for a problem. I can tell you this though. There will definitely be some wedges in my future. The good news is both pipes are parallel to the frame so only the tips will need to move in.


    I welded in mufflers from Chambord Exhaust. I will re attach the tips after the body on and set. I want them to point down a bit to reduce the road noise.

    End of the good news for now

    I moved on to first start but that was a bust. I am having problems with the control pack that I wont get into here but if your interested I have a thread here.

    https://thefactoryfiveforum.com/show...I-found-it-But

    At the end of the day I am sure it will be resolved but it could be a few weeks until we get there. In the mean time now that I know the fuel system is good I am going to start working on the back aluminum. I planned for a cubby and other things so I can stay busy with that.
    Build 1 MK4 #10008 - Delivered 03/03/21, Graduated 7/20/22 - Sold 6/6/24
    Build Thread #1 https://thefactoryfiveforum.com/show...been-delivered
    Build 2 MK4 #11061- Delivered 08/24/24
    Build Thread #2 https://thefactoryfiveforum.com/show...006#post562006

  30. Likes M22_COBRA liked this post
  31. #264
    Senior Member Blitzboy54's Avatar
    Join Date
    Oct 2020
    Location
    Albany, NY
    Posts
    1,694
    Post Thanks / Like
    Limping Along

    As I continue to work through my first start woes I have decided dust myself off and finally get back to it. I purchased a drop trunk from our friend Frank and put the rest of the back aluminum in. This is significantly bigger than the Breeze option. I fully tested my fuel system for leaks so I feel comfortable putting aluminum in.

    I rough cut the opening with a jigsaw and metal blade.


    I like to seal up the edges with aluminum tape. Since the design of this trunk goes all the way to the back wall it ends up with one piece lapped over the other. In order to make it even when I get the carpet in i put some heat mat in.

    All in all a pretty big space


    Also got a little present from the Fedex man! New skins are here so I can get my wheels mounted. I think I will leave Scott's temp wheels on the car until I get it to the dyno (trying to stay positive). They sit pretty high and it will be easier to get it on and off a trailer like this.

    Build 1 MK4 #10008 - Delivered 03/03/21, Graduated 7/20/22 - Sold 6/6/24
    Build Thread #1 https://thefactoryfiveforum.com/show...been-delivered
    Build 2 MK4 #11061- Delivered 08/24/24
    Build Thread #2 https://thefactoryfiveforum.com/show...006#post562006

  32. Likes 460.465USMC liked this post
  33. #265
    Senior Member gbranham's Avatar
    Join Date
    Jul 2021
    Location
    Tonganoxie, KS
    Posts
    1,046
    Post Thanks / Like
    Looks familiar!

    20240414_183315.jpg
    Built an early MkIII years ago, sold years ago. Back after 18 years to build a MkIV
    Build Thread Here Partners: Levy Racing, Summit Racing, LMR, Breeze, Forte's Parts, Speedhut, ReplicaParts
    MkIV Complete Kit Ordered 4/18/23, Delivered 7/11/23, Boss 427W, Edelbrock Pro Flo 4, TKX (.68 5th), IRS, Wilwood Brakes, 18" Halibrands, Toyo R888R Tires, Custom Speedhut Gauges

  34. Likes Blitzboy54 liked this post
  35. #266
    Senior Member Blitzboy54's Avatar
    Join Date
    Oct 2020
    Location
    Albany, NY
    Posts
    1,694
    Post Thanks / Like
    I continue to work on the back end of the car. I got the rest of the trunk aluminum in. I also drilled and set my cockpit wall. I keep forgetting how much I don't enjoy drilling and riveting. I broke my last 1/8 drill bit but it was as I finished my last hole so that was kind of a win.

    I started some preliminary wiring. I put an LED light strip under the trunk rail and mounted a toggle switch on the right side. I have a 12v line running that and the USB port that will be in the cubby. I am running a hot at all times because I want to be able to charge my phone at say a car show without turning the accessories on. On a side note one challenge was a finding a USB port that didn't have an LED backlight. I found it, was just harder than I thought it would be.


    I made the pass through hole much smaller on this one. The breeze cubby is great but I found having it go all the way behind the harness mounts is

    1. Things roll around back there and are hard to retrieve
    2. Makes changing out the harness really difficult if you choose too. You have to reach back through the hole.

    This could all probably be settled by cutting the hole the recommended size in the instructions but I just didn't like it that big. This is all to say I want to make a smaller box that just holds a few things.

    I mocked up the box I am going to make.


    After I get everything fabbed up I can break it all down, clean up and rivet everything in.
    Build 1 MK4 #10008 - Delivered 03/03/21, Graduated 7/20/22 - Sold 6/6/24
    Build Thread #1 https://thefactoryfiveforum.com/show...been-delivered
    Build 2 MK4 #11061- Delivered 08/24/24
    Build Thread #2 https://thefactoryfiveforum.com/show...006#post562006

  36. #267
    Senior Member Blitzboy54's Avatar
    Join Date
    Oct 2020
    Location
    Albany, NY
    Posts
    1,694
    Post Thanks / Like
    Back on track

    It's pretty well documented at this point that I haven't been able to start my engine. The first problem was a have a defective wiring harness from Ford Performance. It has been a brutally slow process but I got an email on Friday that stated that engineering believes that I "most likely" have a defective part and it will "most likely" be replaced. In the mean time I Frankensteined it and I now have power. The engine turns over but won't start. This is was my next problem. I figured out that I did not install a pulse ring between my fly wheel and my crank. Oops

    Well taking the engine back out isn't my first choice so I removed the transmission, clutch, flywheel and fix it that way. It was a lot of work but ultimately successful. I found an older thread from BEAR-AVHistory where he did something similar with car. He has a coyote as well so it gave me a template. I called Kevin and he shared his experience with me. This was very helpful.

    One thing he mentioned was supporting the engine so it didn't droop. This was a good call. I used a bottle jack and counter sunk it in to a piece of 2x8


    This also gave me the ability to fine tune the angle when putting the transmission back in.


    Ultimately we dug down to pay dirt and put the ring in.


    Spent the rest of the day putting everything back together. The transmission fought me quite a bit. Eventually had to pull the last 1/2 in with the bolts. It was a long day but the results speak for themselves.


    I filled the coolant and ran a couple of heat cycles. I still have a check engine light but no code. I strongly suspect this is due to the harness. When (if?) Ford sends the new one I will lay it over the top, fire up the engine and see if the MIL goes away. If it does I will swap out, if not I might keep it as a spare. We will see

    It feels good to now be able to get back to fabricating. Tip of the cap to the board for all the support.
    Build 1 MK4 #10008 - Delivered 03/03/21, Graduated 7/20/22 - Sold 6/6/24
    Build Thread #1 https://thefactoryfiveforum.com/show...been-delivered
    Build 2 MK4 #11061- Delivered 08/24/24
    Build Thread #2 https://thefactoryfiveforum.com/show...006#post562006

  37. Likes Namrups, Mike.Bray liked this post
  38. #268
    Senior Member Blitzboy54's Avatar
    Join Date
    Oct 2020
    Location
    Albany, NY
    Posts
    1,694
    Post Thanks / Like
    Quick update, on the MIL or check engine light. The control pack comes with a Malfunction Indicator Light that is bracketed to the OBD port. I wanted a proper check engine light in my dash that matched the rest of my indicators. Now that my engine is running my check engine light never shuts off. I also don't have any error codes. Well I of course put an LED in my dash. What is happening is the LED uses so much less voltage that it's always lit.

    I put an incandescent light in it's place and sure enough it goes out. I thought about playing around with resisters but ultimately I think I will just use a relay. Should work easy peasy.
    Build 1 MK4 #10008 - Delivered 03/03/21, Graduated 7/20/22 - Sold 6/6/24
    Build Thread #1 https://thefactoryfiveforum.com/show...been-delivered
    Build 2 MK4 #11061- Delivered 08/24/24
    Build Thread #2 https://thefactoryfiveforum.com/show...006#post562006

  39. Likes PNWTim liked this post
  40. #269
    Senior Member Nigel Allen's Avatar
    Join Date
    Oct 2012
    Location
    South Australia
    Posts
    676
    Post Thanks / Like
    You could put a dummy load resistor (equivalent resistance and power to the incandescent lamp) across the LED. If you use a relay, make sure it is back EMF protected with a diode, or high back EMF could damage the ECM.

    Cheers,

    Nige
    Mk.4 FFR supplied Right hand drive
    Received 12/2012 completed 12/2019
    Gen1 Coyote / TKO600 / IRS
    Lots of mods to make compliant for Australian design rules

  41. Thanks Blitzboy54 thanked for this post
  42. #270
    Senior Member TTimmy's Avatar
    Join Date
    Sep 2021
    Location
    Emmaus, PA
    Posts
    176
    Post Thanks / Like
    Congrats on the start man - long time coming and well deserved!
    Build 1: Type 65 Coupe
    - Album: Coupe Album
    - Delivered: February 24, 2022, Legal: April 20, 2024, Complete: TBD

    Build 2: Mk3 Roadster
    (Acquired as a partially started build)
    - Build Thread: TTimmy’s MK3 Basket Case Build Thread - Album: Mk3 Album
    - Originally Delivered: 2004, Acquired by me: August 2024

  43. Thanks Blitzboy54 thanked for this post
  44. #271
    Senior Member Blitzboy54's Avatar
    Join Date
    Oct 2020
    Location
    Albany, NY
    Posts
    1,694
    Post Thanks / Like
    Update on the MIL.

    I ordered a basic relay. the trigger side is connected to the MIL which is always hot and uses a ground switch to operate. On the feed side I installed the red wire of LED indicator in the dash. On the other side of the relay I ran 12v using the HAAT B pigtail from the 16 pin connector. I ran the black wire to ground. I tested the relay with a power supply and it lit up as expected.

    I tucked the whole thing above the RF fuse box.


    I wasn't sure how I would test it in the system as I would need to create an error. Luckily when you turn the key to run the MIL flashes. The light on the dash blips accordingly so I know it works. I now have a fully functional control pack.


    Last edited by Blitzboy54; 03-10-2025 at 10:23 PM.
    Build 1 MK4 #10008 - Delivered 03/03/21, Graduated 7/20/22 - Sold 6/6/24
    Build Thread #1 https://thefactoryfiveforum.com/show...been-delivered
    Build 2 MK4 #11061- Delivered 08/24/24
    Build Thread #2 https://thefactoryfiveforum.com/show...006#post562006

  45. Thanks TXeverydayDad thanked for this post
    Likes PNWTim liked this post
  46. #272
    Senior Member Blitzboy54's Avatar
    Join Date
    Oct 2020
    Location
    Albany, NY
    Posts
    1,694
    Post Thanks / Like
    I basically lost a month with the engine troubles. I realize I could continue to work but not knowing what was wrong I was hesitant to keep building around it. Now that I am back on track I am fighting the urge to "make up for lost time". Having said that it's good to be back in the saddle.

    I want to complete the back end wiring so I finish the aluminum. Now that I am done (hopefully) messing around with the transmission I wanted to wire up the reverse light circuit. New York requires backup lights. I did little minimalist lights on my last car so I could just meet the requirement. This time I have a backup camera so I plan to do something a little more robust. I had the raw wires ready to go. I have 12v going to the switch that is always hot. I want the reverse lights, trunk lights and phone charger to always have power. The TKX comes with 2 threaded pigtails for reverse power. You could secure wires with eyelets and leave them open but water or mud would short it out. I like it to be clean and water proof so I purchased one of these from Modern Driveline. Nice little unit.


    Snaps right in there. Probably waterproof


    I ran wires back to my switch and then back into the side of the trunk area. This sends power to my lights and I have a loomed pigtail that I still need to route to the charger once the box is built. I originally ran the return line directly across forgetting about the elephant ear rear tire panel. dropped it underneath and back around.


    This will serve as my trunk light off the switch.


    Since I had to dig around quite a bit behind my dash I am re testing all my lights and signals.


    Build 1 MK4 #10008 - Delivered 03/03/21, Graduated 7/20/22 - Sold 6/6/24
    Build Thread #1 https://thefactoryfiveforum.com/show...been-delivered
    Build 2 MK4 #11061- Delivered 08/24/24
    Build Thread #2 https://thefactoryfiveforum.com/show...006#post562006

  47. #273
    Senior Member Blitzboy54's Avatar
    Join Date
    Oct 2020
    Location
    Albany, NY
    Posts
    1,694
    Post Thanks / Like
    Clutch Cover, Cockpit and a little Engine bling

    The TCM1899 bellhousing comes with a clutch fork cover. It's designed to cover the hole the fork protrudes from and covers the cable. It's not nessesary and if you use and external slave cylinder it doesn't fit. I like the idea of a dust cover. It keeps water and debris out. Even though there is little to no chance of it being a problem open I like the clean look of the cover. It also gives a tiny bit of protection from light impact from flying debris or a speed bump as the fork sticks out a bit.

    So to that end I made a cut out of the back end. To secure it I drilled a 1/8 hole on either side and used some of the self tapping screws that come with the kit. I like how it turned out


    With the back end wiring done it was time to permanently mount the cockpit back wall.


    I also re tested my head unit electrically. This also gave me a chance to see if this is where I want my shifter to be. I think despite assuming i wanted it mid shift this size and angled shifter from FFR in a coyote setup is just about perfect. I will leave it here.


    Last but not least, I have started dressing up the engine a bit. I ordered some 5/8 Silicon hoses in orange for the PCV circuit and a matching silicon elbow. I purchased a standard PCV fitting from Ford and modified it slightly. If you remove the oring it clips in the hole I drilled nicely but I sealed it up with some epoxy. I found some black worm clamps that I quite like. I will switch over the the clamp on the heater to the black at some point as well.


    Build 1 MK4 #10008 - Delivered 03/03/21, Graduated 7/20/22 - Sold 6/6/24
    Build Thread #1 https://thefactoryfiveforum.com/show...been-delivered
    Build 2 MK4 #11061- Delivered 08/24/24
    Build Thread #2 https://thefactoryfiveforum.com/show...006#post562006

  48. Likes cv2065, PNWTim liked this post
  49. #274
    Senior Member dbo_texas's Avatar
    Join Date
    Feb 2018
    Location
    Austin, TX
    Posts
    551
    Post Thanks / Like
    I like the colored hoses in the engine bay. Sets it apart for sure. Nicely done.
    Darryl [dbo_texas]
    MKIV #9644 (build thread) (Index)
    MK4 Complete Kit | Gen2 crate Coyote | Tremec T56, 3.55 IRS | power steering | hydroboost | dual roll bars | FFR carbon fiber dash | 18" Halibrands + Wilwoods | RT drop trunk kit & turn signal | front battery mount | saddle leather Intatrim Stoneleigh seats + interior accents

  50. Thanks Blitzboy54 thanked for this post
  51. #275
    Junior Member
    Join Date
    Feb 2023
    Location
    Mechanicville, NY
    Posts
    29
    Post Thanks / Like
    How are you placing bends in the sheet metal for the cubby box and clutch fork cover? A HF brake or something else?
    Jen

    MK4 complete kit, IRS, 347 stroker (carb), TKX, PS, heater-defroster-wipers, firewall forward, 11.65 rear brakes, 17" Halibrands, #11124.
    Ordered: 9.8.2024
    Delivered: 10.31.2024

  52. #276
    Senior Member Blitzboy54's Avatar
    Join Date
    Oct 2020
    Location
    Albany, NY
    Posts
    1,694
    Post Thanks / Like
    Quote Originally Posted by jengum View Post
    How are you placing bends in the sheet metal for the cubby box and clutch fork cover? A HF brake or something else?
    Yep, I use metal jigsaw blade and a HF break. Nothing fancy.
    Build 1 MK4 #10008 - Delivered 03/03/21, Graduated 7/20/22 - Sold 6/6/24
    Build Thread #1 https://thefactoryfiveforum.com/show...been-delivered
    Build 2 MK4 #11061- Delivered 08/24/24
    Build Thread #2 https://thefactoryfiveforum.com/show...006#post562006

Page 7 of 7 FirstFirst ... 567

Posting Permissions

  • You may not post new threads
  • You may not post replies
  • You may not post attachments
  • You may not edit your posts
  •  

Julio Car Custom

Visit our community sponsor