Visit our community sponsor

Thanks:
2

Likes:
9
-
Senior Member

JDav's MK4 #9028 Build Thread
I ordered my kit back on December 27th during FFR's end of year sale and it is due to be complete tomorrow (1/21/17).
My order included:
- MK IV complete kit
- Powder coated chassis
- 31 spline 12.875 driveshaft
- Body cut outs
- Classic roadster seats
- Coyote power steering kit
- 3-Link rear suspension
- FFR Vintage gauge set
- 17" Halibrand wheel/tire package
- Stainless exhaust
- Wind wings
- Sun visors
- Chrome driver and passenger roll bars
- Coyote installation kit
- Upgraded dash with glovebox
I will be going with a Coyote engine, headers w/cats and TKO-600 from Mike Forte.
I plan to order my rear end assembly from MPS.
- Other plans include
- Cool It insulation
- CNC Triple Reservoir
- Forte's hydraulic clutch
- Russ Thompson Drop Trunk
- Russ Thompson Turn signal
- Breeze Engine Compartment Battery Mounting Kit
- Breeze radiator cowl cover, shroud and mount
- CobraHeat seat heaters
- Hidden USB port
Stewart will be delivering, so until then, the garage is lonely:
Lonely Garage.JPG
Last edited by Jdav; 02-07-2017 at 04:58 PM.
Reason: Added FFR #
-

Steve >> aka: GoDadGo

Congratulations From The Dark Side!
This is truly one heck of an adventure that is about to begin!
Also, check out Edwardb's lastest build and you'll get some fantastic tips and great ideas.
Steve
Last edited by GoDadGo; 01-20-2017 at 10:45 AM.
-
Senior Member

Originally Posted by
GoDadGo

Congratulations From The Dark Side!
This is truly one heck of an adventure that is about to begin!
Also, check out Edwardb's latest build and you'll get some fantastic tips and great ideas.
Steve
Thanks GoDadGo, I'm quite excited.
I have read EdwardB's build thread a couple of times and will definitely be using it for guidance, along with WarEagleScott's. I have no real automotive experience, so the support and help from all you guys will be invaluable to me.
-
Steve >> aka: GoDadGo
I'm a first time builder too so read the book, read it again and take your time.
Do a very detailed inventory and make a copy of the inventory sheet & place copy of each sheet on the coordinating box to find your parts.
Reach out to the guys on this forum who have done at least a few builds and all will be right with the world.
Here is where I am so if I can do it, then so can you:
https://youtu.be/_wnHDNgnNqs
-
Senior Member

Hey Joel. Garage is looking good and I am excited to see you get going. (I am secretly hoping for a better avatar on this site! haha)
Hey when you order your transmission from Mike ask him about the speedo plug that goes in the side of it. Pictured in my thread post 128. You will plug that hole since you are using the GPS speedo. It comes with a rubber shipping plug in it but that will eventually fall out and you would lose your fluid. I did not know that was needed at the time I ordered and ended up having to pay separate S&H. Not Mike's fault because he did not know I would be plugging that hole so he may not think to offer it to you.
MK4 #8900 - complete kit - Coyote, TKO600, IRS - Delivered 6/28/16 First Start 10/6/16 Go cart - 10/16/16 Build completed - 4/26/17 - 302 days to build my 302 CI Coyote Cobra - Registered and street legal 5/17/17
Build Thread
http://thefactoryfiveforum.com/showt...e-build-thread
PHIL 4:13 INSTAGRAM - @scottsrides
-
Senior Member
Originally Posted by
wareaglescott
Hey Joel. Garage is looking good and I am excited to see you get going. (I am secretly hoping for a better avatar on this site! haha)
Hey when you order your transmission from Mike ask him about the speedo plug that goes in the side of it. Pictured in my thread post 128. You will plug that hole since you are using the GPS speedo. It comes with a rubber shipping plug in it but that will eventually fall out and you would lose your fluid. I did not know that was needed at the time I ordered and ended up having to pay separate S&H. Not Mike's fault because he did not know I would be plugging that hole so he may not think to offer it to you.
Thanks Scott - after reading your thread a while ago, I had Mike add that to my order sheet so I wouldn't forget when the time comes. Thanks!
My small 1 car garage will be 'cozy' for the build, but where there is a will, there is a way.
-
Senior Member
Speaking of my small garage, it is not big enough to store the body while I build the car, so it is going to the back yard.
The gate to the back yard Is not wide enough to get the body through in its natural position, so I was planning on tilting it on its side to get through and then back to horizontal to store on a buck.
Any concerns with this twisting action and any recommendations on support pieces to have (or not have) on the body while moving it?
Thanks
-
Welcome to the party.
Prior to this build my MO had been: Start, Apply force, apply more force, apply more force and WD-40, look for instructions..
With this project I have learned to: Read instructions twice and not just the page I'm working on. Make a plan. Read several forum articles. Begin, re-read the forum posts, apply a little assembly lube or emery cloth, add a little force, go back to the forum and ask for help.
Have fun.
-Steve
-
Originally Posted by
Jdav
Speaking of my small garage, it is not big enough to store the body while I build the car, so it is going to the back yard.
The gate to the back yard Is not wide enough to get the body through in its natural position, so I was planning on tilting it on its side to get through and then back to horizontal to store on a buck.
Any concerns with this twisting action and any recommendations on support pieces to have (or not have) on the body while moving it?
Thanks
None whatsoever. I have done exactly this multiple times. The body is quite strong. Don't bother covering the body on the buck. the sunlight and heat help cure the resin.
I advise inviting a half a dozen teenagers over to help you move the body around. It has worked well for me!! If possible, invite a couple of them that are over 6'6" tall. That also was big help for me. Promise rides when done, and pizza currently.
Last edited by Jazzman; 01-22-2017 at 03:41 PM.
-
Senior Member
I got the call today from Stewart that my baby is on the truck and on its way to me (after a stop in Wisconsin).
Hope to have it in my possession on Sunday!
-
Senior Member
The driver was delayed one day, but scheduled to drop it off with me tomorrow.
I used the extra time to give the garage a little love. I figure I'll be spending a lot in there, so replaced the old crappy window, added a new led shoplight and painted the walls.
IMG_0059.JPG
-
Senior Member
Week 1
Week 1 is almost in the books.
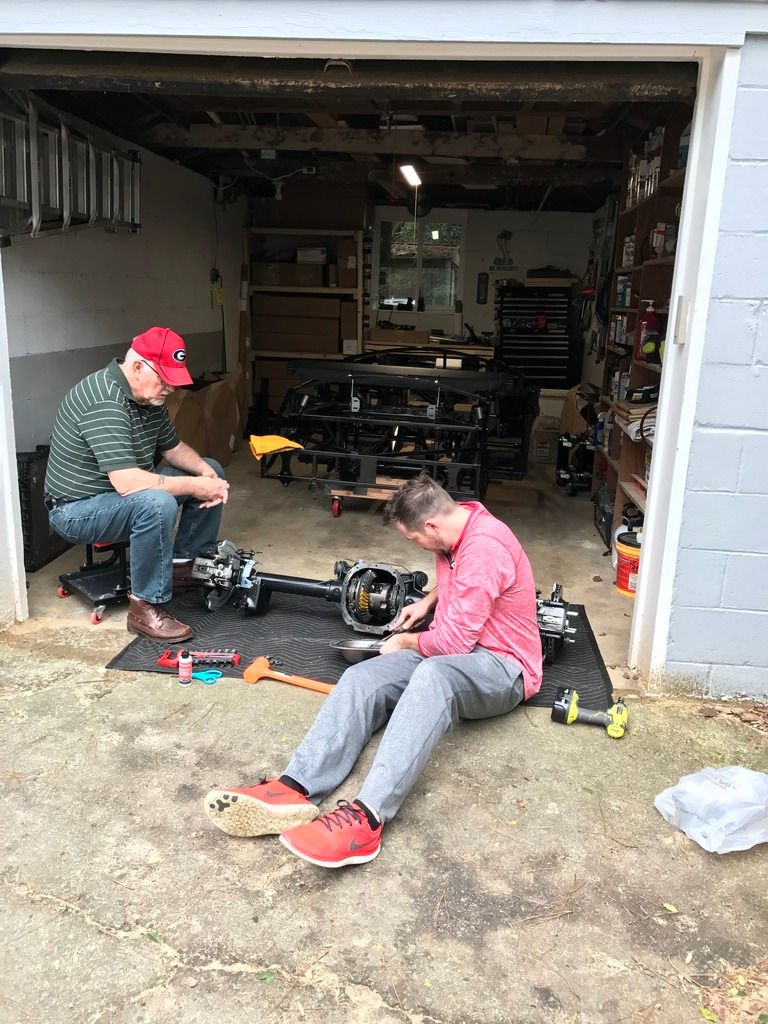
My kit was delivered on Monday afternoon with a little drama. I live on a fairly busy street and in my phone calls with the Stewart driver, he indicated that wouldn't be an issue. However once he arrived, it was. I had to quickly get a flatbed tow truck out to a nearby parking lot so we could unload fro the trailer onto the tow truck and then from the tow truck into my garage. Additionally, I got called back into work, so luckily my amazing fiancée and my parents were able to handle most of the process.
IMG_0246_zpsfm3q1x8c.jpg
IMG_0003_zpsimqw2urx.jpg
But at the end of the day, it was in my possession and I was happy.
I've mentioned before that I will be building out of a small 1 car garage (10x18) so I was pleased that all of the boxes fit.
IMG_0248_zpslwarpkxj.jpg
I did inventory the rest of the nights this week. After reading several posts where people found a lot of missing or incorrect parts, I was pleased to find I was only missing one set of 5 screws, a lock nut and a washer. Additionally, my back order list wasn't too long and a box with about half of those items showed up Thursday.
I moved several boxes up to my attic to get some room to actually work. I need to find a place to store my wheels and tires, but I think I should be able to make this space work well.
IMG_0046_zpsnbe7oy4o.jpg
Today, I was able to get a few helping hands to get the body off and onto the buck. I also started marking, drilling and removing the aluminum that was mounted to the chassis for shipping.
IMG_0050_zpsubw0gkws.jpg
I'll be doing more of the same tomorrow before watching the Super Bowl. Go Falcons #RiseUp
-
Senior Member
Body Aluminum Question
On the rear cockpit wall aluminum, should the slots for the harness be completely above the rail?
When the bottom of the piece is flush with the cockpit floor, the slots are partially covered by the frame rail that is behind it. Do I need to adjust somehow? And if so, how?
C74399B4-CD3E-40E8-930F-ACE8885C9F56_zpshvcktuyq.jpg
CC50D720-EF21-4B79-8A41-C4F3E4274507_zpskvywsxxq.jpg
-
Senior Member
Originally Posted by
Jdav
Mine sits a little higher that that. The rail is just a tiny bit above even with the bottom of the opening. Carpeted it and got the edge guard around the opening and the seatbelt through just fine though.
MK4 #8900 - complete kit - Coyote, TKO600, IRS - Delivered 6/28/16 First Start 10/6/16 Go cart - 10/16/16 Build completed - 4/26/17 - 302 days to build my 302 CI Coyote Cobra - Registered and street legal 5/17/17
Build Thread
http://thefactoryfiveforum.com/showt...e-build-thread
PHIL 4:13 INSTAGRAM - @scottsrides
-
That looks pretty close. It is not supposed to be flush. FFR has a chassis in R&D. You can send them a marked up photo and ask for a measurement. Sometimes easier than looking at forum photos. As far as adjustments, you can cut the bottom flange off and then make an angle to re attach it at an adjusted height. It's all covered with carpet later. I had to adjust one side as mine was uneven. It probably wouldn't have mattered but it was an easy fix.
-Steve
-
Senior Member
I finished removing and drilling all of the pre-installed aluminum yesterday. She looks naked!
9D57BB1C-1E6B-41CA-AE7D-E3B2A562C97D_zpsyhy2bemm.jpg
I am just using rust-oleum rattle can (dark steel) to paint the aluminum pieces. As such, I haven't fit all of the shipped aluminum panels. I was just going to fit/drill/paint as I go.
I ordered my rear end today from MPS (http://www.mpsautosalvage.com/sunsho..._detail&p=3597).
It should get built this week. Luckily I live about an hour from them, so I can go pick it up, rather than having to pay for shipping.
I'll get started on the front suspension tonight!
-
Senior Member
Originally Posted by
wareaglescott
Mine sits a little higher that that. The rail is just a tiny bit above even with the bottom of the opening. Carpeted it and got the edge guard around the opening and the seatbelt through just fine though.
Originally Posted by
Straversi
That looks pretty close. It is not supposed to be flush. FFR has a chassis in R&D. You can send them a marked up photo and ask for a measurement. Sometimes easier than looking at forum photos. As far as adjustments, you can cut the bottom flange off and then make an angle to re attach it at an adjusted height. It's all covered with carpet later. I had to adjust one side as mine was uneven. It probably wouldn't have mattered but it was an easy fix.
-Steve
Thanks guys. I'll run with it as is for now and address later if there ends up being any issues.
-
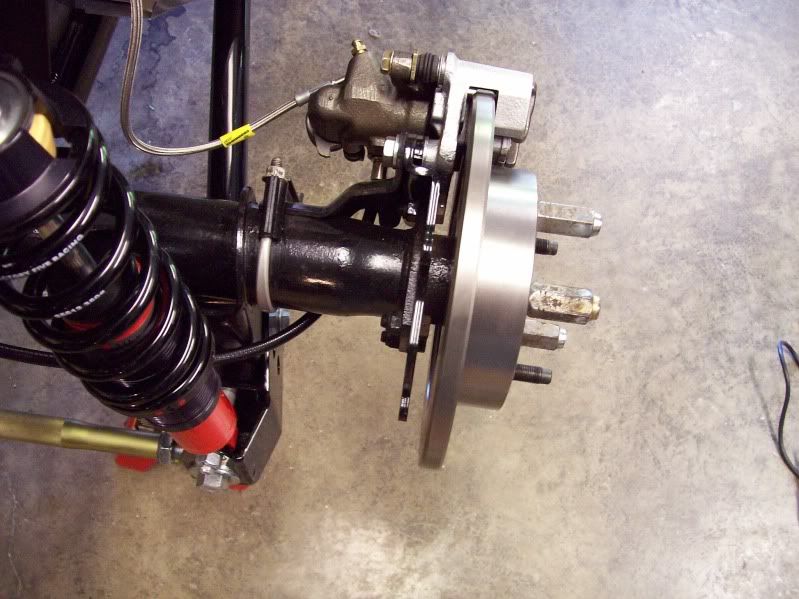
Senior Member
Issue #1.
On my driver side the mount for the forward part of the front lower control arm is too narrow.
The rear part fits and the passenger side both fit fine. Any ideas?
C18FAF49-92C7-4274-8FEC-512BDD7982B7_zpsqqobxtg1.jpg
-
Senior Member
Originally Posted by
Jdav
A little brute force got it in.
86B3E0C3-5040-4630-8EF4-4AF11E7A1085_zpss239dapw.jpg
-
Not a waxer

You said "the rear part fits"---looking at your photo I can't see if you added the shim washer in the rear mount. You're supposed to.
What I can see is that you installed the arm in a semi-upside down orientation (is that even a word???  ). Your ball joint plate is pointed correctly but the crossbar pivots should be like the photo below, with the grease fittings facing up:

Easiest fix would be to unbolt them from the adjuster clevis and crossbar and flip them around.
Good luck!
Jeff
-
Senior Member
Originally Posted by
Jeff Kleiner
You said "the rear part fits"---looking at your photo I can't see if you added the shim washer in the rear mount. You're supposed to.
What I can see is that you installed the arm in a semi-upside down orientation (is that even a word???
). Your ball joint plate is pointed correctly but the crossbar pivots should be like the photo below, with the grease fittings facing up:
Easiest fix would be to unbolt them from the adjuster clevis and crossbar and flip them around.
Good luck!
Jeff
Thanks Jeff.
Yes, I have the spacer in the rear mount. I used a spacer in both front and rear mounts on the passenger side. There was a washer sized gap in the front on that side so I figured I should. Would that be an issue?
Thanks for pointing out the semi-upside donwness of the upper arm (definitely a word). I will flip it tomorrow.
-
Senior Member
Upper arm disassembled, flipped and reassembled and installed.
Look better Jeff?
DB42A212-102E-4B10-B63F-21F53E1DFE6B_zps3kpwhag6.jpg
-
Senior Member
A few of my back ordered items came in today, including my vintage gauges. As someone else noted recently, mine have the built in turn signal and high beam indicators. Really pleased about that unexpected upgrade.
CE3E79DF-D552-4D2A-81E5-AB1A881A67BB_zpsvup5u0xl.jpg
Dumb question of the day: what is my FFR #? On the name plate there is a longer number - does everyone just refer to the last 4 digits?
-
Senior Member
Yes the 4 digits. Mine is 8900. I would suspect yours is between 9000-9100.
What is it?
MK4 #8900 - complete kit - Coyote, TKO600, IRS - Delivered 6/28/16 First Start 10/6/16 Go cart - 10/16/16 Build completed - 4/26/17 - 302 days to build my 302 CI Coyote Cobra - Registered and street legal 5/17/17
Build Thread
http://thefactoryfiveforum.com/showt...e-build-thread
PHIL 4:13 INSTAGRAM - @scottsrides
-
Not a waxer
Originally Posted by
Jdav
Look better Jeff?
Yep!
Jeff
-
Senior Member
Originally Posted by
wareaglescott
Yes the 4 digits. Mine is 8900. I would suspect yours is between 9000-9100.
What is it?
#9028
-
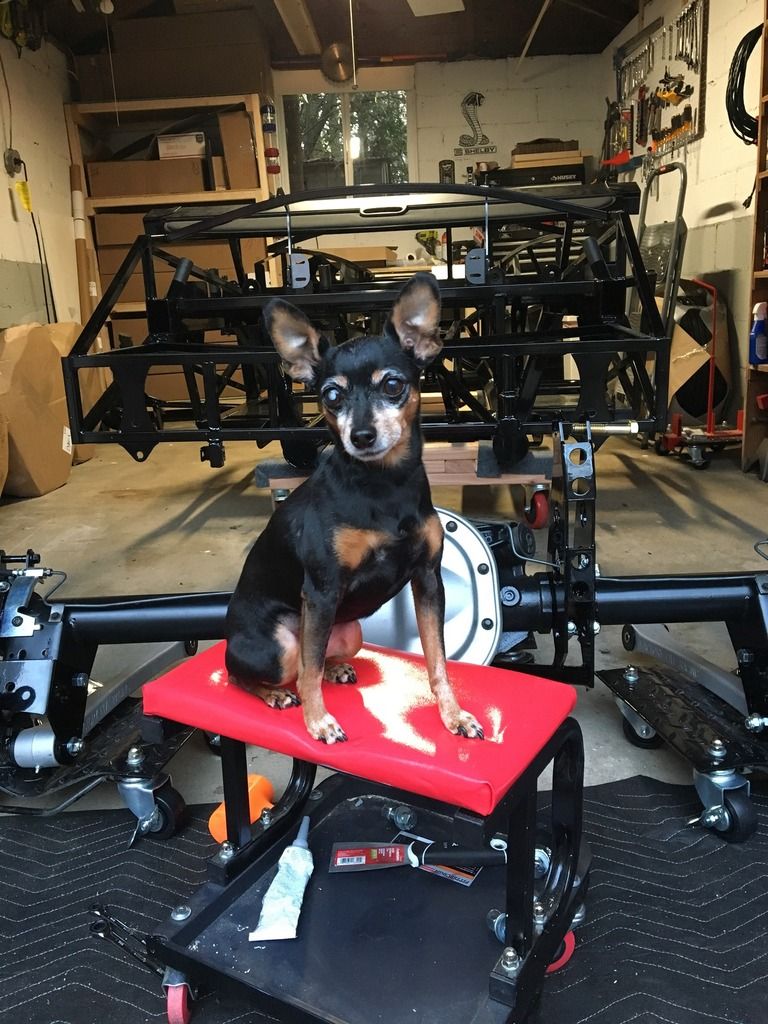
Senior Member
-
Steve >> aka: GoDadGo
Man That Is One Very Ferocious Guard Dog!
-
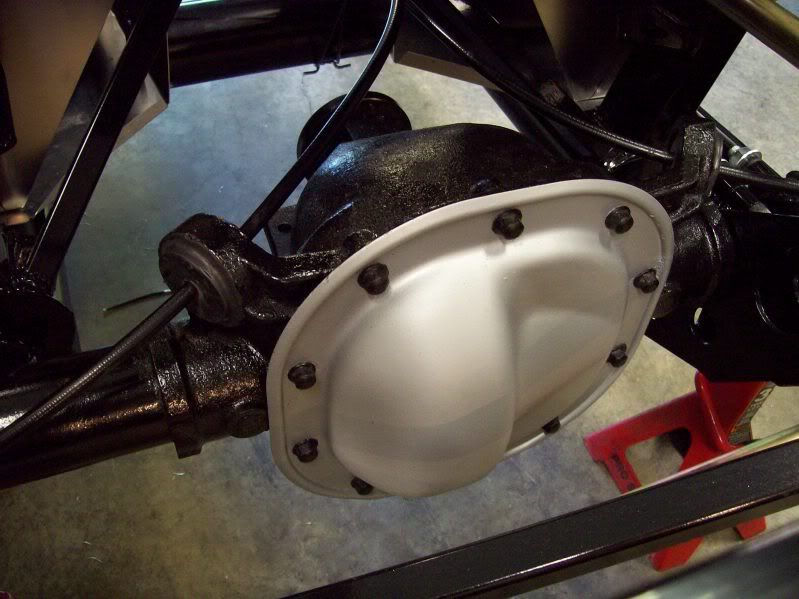
Senior Member

Is the banana bracket just bolted on? If so, you may want to consider welding it to the axle (after removing the powdercoat first). At the suggestion of others, I welded mine to prevent rotation under load.

After welding, I touched it all up with POR-15.
FFR #8833 289 FIA 3-link
1965 289, TKO600 from Forte's Parts Connection
Body and Paint by Mike's Auto Restoration
Picked up 3/5/2016, First start 4/22/2017, MA legal 7/11/2018
Build Thread
http://thefactoryfiveforum.com/showt...FIA-build-8833
"Insanity is contagious" - Joseph Heller
-
Senior Member

Originally Posted by
wareaglescott
Mine sits a little higher that that. The rail is just a tiny bit above even with the bottom of the opening. Carpeted it and got the edge guard around the opening and the seatbelt through just fine though.
If you are installing "edgeguards" around the opening, you may want to move the slot to the centre of the panel by 1/2". I found my "edgeguards" made contact with the rolled back edge of the body, an I had to tuck in under a little.
Last edited by Dave Howard; 03-25-2017 at 10:35 AM.
-
Senior Member
Originally Posted by
cnutting
Is the banana bracket just bolted on? If so, you may want to consider welding it to the axle (after removing the powdercoat first). At the suggestion of others, I welded mine to prevent rotation under load.
After welding, I touched it all up with POR-15.
I was just bolting it in per the instructions - I don't have welding equipment at home and would need to send it out to weld. It seems with the clamp bolts and the connection to the flange that it shouldn't go anywhere - for a non-track car do you think that is really necessary?
-
David aka Ducky2009

cnutting,
Looking at your pic, I noticed your brake calipers are on the front side of the axle. Jdav's calipers are behind the axle (same as mine. I purchased from MPS, same as jdav). My emergency brake cables will go forward from the calipers. Have you fit your emergency cables yet? Do you have a pic of the cable routing? And part numbers.
Thx
David
-
Senior Member
Jdav
Mine is non-track as well, but I decided to do it anyway. The bar to the flange will most likely not hold if there is rotation. I had a welder that did house calls do the job for a reasonable fee. If you choose not to weld, at minimum I would remove all powdercoat from the ID of the brackets and the OD of the axle where they touch to get metal to metal contact.
Ducky
As far as the e-brake goes, mine was run per the instructions. I got everything from FFR and it went together without issue (knock on wood...). I don't have any pictures of this, sorry...
Chris
FFR #8833 289 FIA 3-link
1965 289, TKO600 from Forte's Parts Connection
Body and Paint by Mike's Auto Restoration
Picked up 3/5/2016, First start 4/22/2017, MA legal 7/11/2018
Build Thread
http://thefactoryfiveforum.com/showt...FIA-build-8833
"Insanity is contagious" - Joseph Heller
-
Not a waxer
Originally Posted by
Ducky2009
cnutting,
Looking at your pic, I noticed your brake calipers are on the front side of the axle. Jdav's calipers are behind the axle (same as mine. I purchased from MPS, same as jdav). My emergency brake cables will go forward from the calipers. Have you fit your emergency cables yet? Do you have a pic of the cable routing? And part numbers.
Thx
David
I generally swap the calipers to the front side of the axle to allow for a simpler parking brake cable routing; when done this way they'll make a gentle sweeping "U" rather than an "S".
This allows you to secure the cables by routing them through the unused UCA mounting "ears" on the center section. I use tapered rubber stoppers of the proper diameter with a hole drilled in the center for the cables to pass through and then held in place with black silicone:
Cheers,
Jeff
-
Senior Member
^^
And... That's how I did mine as well, as Jeff suggested.
FFR #8833 289 FIA 3-link
1965 289, TKO600 from Forte's Parts Connection
Body and Paint by Mike's Auto Restoration
Picked up 3/5/2016, First start 4/22/2017, MA legal 7/11/2018
Build Thread
http://thefactoryfiveforum.com/showt...FIA-build-8833
"Insanity is contagious" - Joseph Heller
-
David aka Ducky2009
Thanks Jeff. What cables did you use? I haven't purchased the cables yet. My kit is due for delivery on Friday. I was going to install the rearend and measure the needed length before purchasing incorrect parts.
Thx,
David
Last edited by Ducky2009; 02-14-2017 at 06:25 PM.
-
Senior Member
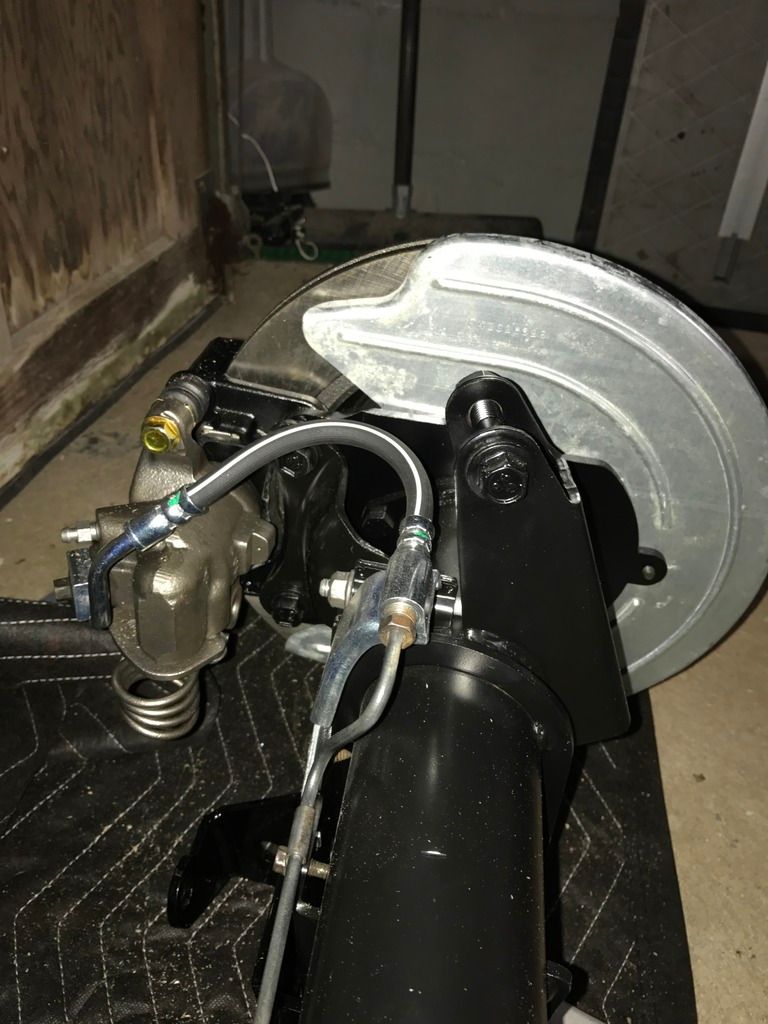
So I was going to move the calipers to the front, but there is another bracket welded to the axle that looks like it would prevent that. Am I thinking about this wrong?
-
Not a waxer
Joel,
Got your text message and was going to send you a PM (lots easier to type on a real keyboard rather than pecking away on the phone) but since you posted the same question here...
The bracket you show is for the quad shocks in the Mustang. Unused for our purposes and I always cut them off if for no other reason than to clean up the rearend and eliminate unneeded "stuff" but you can leave 'em if you like. From your photo I see that you have all of the OEM hardlines and hoses (even the dust shields!) installed. This isn't usually the case and this hardware doesn't lend itself to easily swapping the calipers so with that in mind I'd keep the calipers as-is. In my opinion it wouldn't be worth the hassle of reworking all the brake lines to simplify the parking brake cables---one of those lesser of two evils deals
Cheers,
Jeff
-
David aka Ducky2009
Jeff, What emergency cables did you use? I was going to check the needed length after the rear end is installed.
Just got the call. My kit will be delivered on Friday!
Thx
David
PS: How do you add the text at the bottom of your message. (MK3 #......, etc...)
-
Not a waxer
Most times I use SN95 cables and then cut them to length.
The text can be added by going to your user profile and putting it in as your signature.
Jeff
 Posting Permissions
- You may not post new threads
- You may not post replies
- You may not post attachments
- You may not edit your posts
-
Forum Rules

Visit our community sponsor


 Reply With Quote