Very Cool Parts

Visit our community sponsor

Thanks Thanks:  29
Likes Likes:  40
Page 16 of 20 FirstFirst ... 61415161718 ... LastLast
Results 601 to 640 of 779

Thread: EdwardBs Mk4 #8674 20th Anniversary Build

  1. #601
    Straversi's Avatar
    Join Date
    Nov 2014
    Location
    Palos Verdes, CA
    Posts
    1,278
    Post Thanks / Like
    She's a beauty! Thank you so much for all you have done.
    -Steve
    Mk IV #8901 - Complete kit, Coyote, TKO-600, IRS. Ordered 5/23/16, Delivered 7/14/16, First Start 8/13/17, First Go-Kart 10/22/17, Registered and Completed 10/18/18. Build Thread: http://thefactoryfiveforum.com/showt...V-Coyote-Build Graduation Thread: https://thefactoryfiveforum.com/show...-Roadster-8901

  2. #602
    Junior Member
    Join Date
    Jan 2017
    Posts
    1
    Post Thanks / Like
    Great final product!! Great thread!! Time to think about a new build?

  3. #603
    Senior Member
    Join Date
    Aug 2012
    Location
    Grand Rapids, MI
    Posts
    1,006
    Post Thanks / Like
    Wow! What a great car. Visited with Paul yesterday at AutoRama. An exceptional build, better live than in the photos. Looking forward to seeing it in sunlight and being able to spend more time looking it over.
    Jim

  4. #604
    Senior Member edwardb's Avatar
    Join Date
    Feb 2011
    Location
    Lake Orion, Michigan
    Posts
    10,871
    Post Thanks / Like
    Quote Originally Posted by Jim1855 View Post
    Wow! What a great car. Visited with Paul yesterday at AutoRama. An exceptional build, better live than in the photos. Looking forward to seeing it in sunlight and being able to spend more time looking it over.
    Jim
    Thanks Jim. It was great catching up with you again.
    Build 1: Mk3 Roadster #5125. Sold 11/08/2014. Build 2: Mk4 Roadster #7750. Sold 04/10/2017. Build Thread
    Build 3: Mk4 Roadster 20th Anniversary #8674. Sold 09/07/2020. Build Thread and Video. Build 4: Gen 3 Type 65 Coupe #59. Gen 3 Coyote. Legal 03/04/2020. Build Thread and Video
    Build 5: 35 Hot Rod Truck #138. LS3 and 4L65E auto. Rcvd 01/05/2021. Legal 04/20/2023. Build Thread. Sold 11/9/2023.

  5. #605
    Senior Member edwardb's Avatar
    Join Date
    Feb 2011
    Location
    Lake Orion, Michigan
    Posts
    10,871
    Post Thanks / Like

    Detroit Autorama Weekend

    Great weekend show at the Detroit Autorama. Met and talked to a bunch of people, including club and forum members. The new 20th Anniversary Roadster received a ton of very positive comments. The classic shape draws a crowd, with many comments and surprised looks seeing the Coyote in there. The most common question this time around was not of the usual “Is it real?” variety. Factory Five is really well known and most recognize it as a replica in a positive way. But I had a bunch of “How much did it cost?” questions. Tried to respond with ranges and how the build plan can affect the cost.

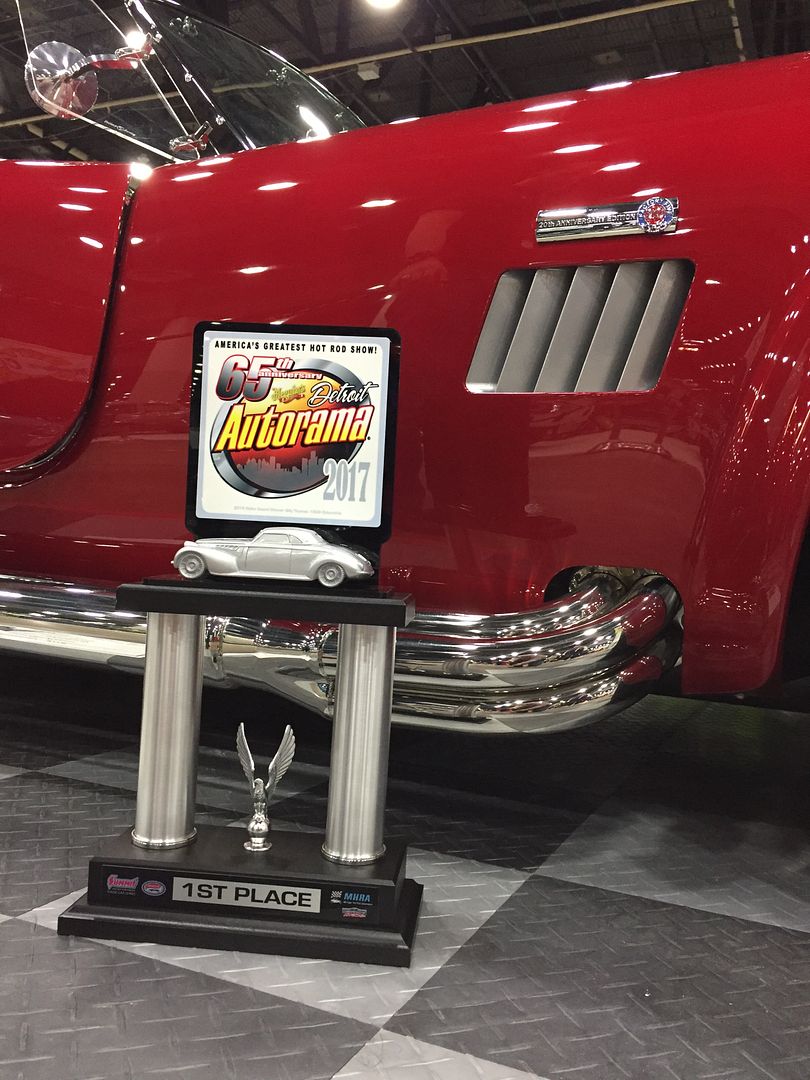
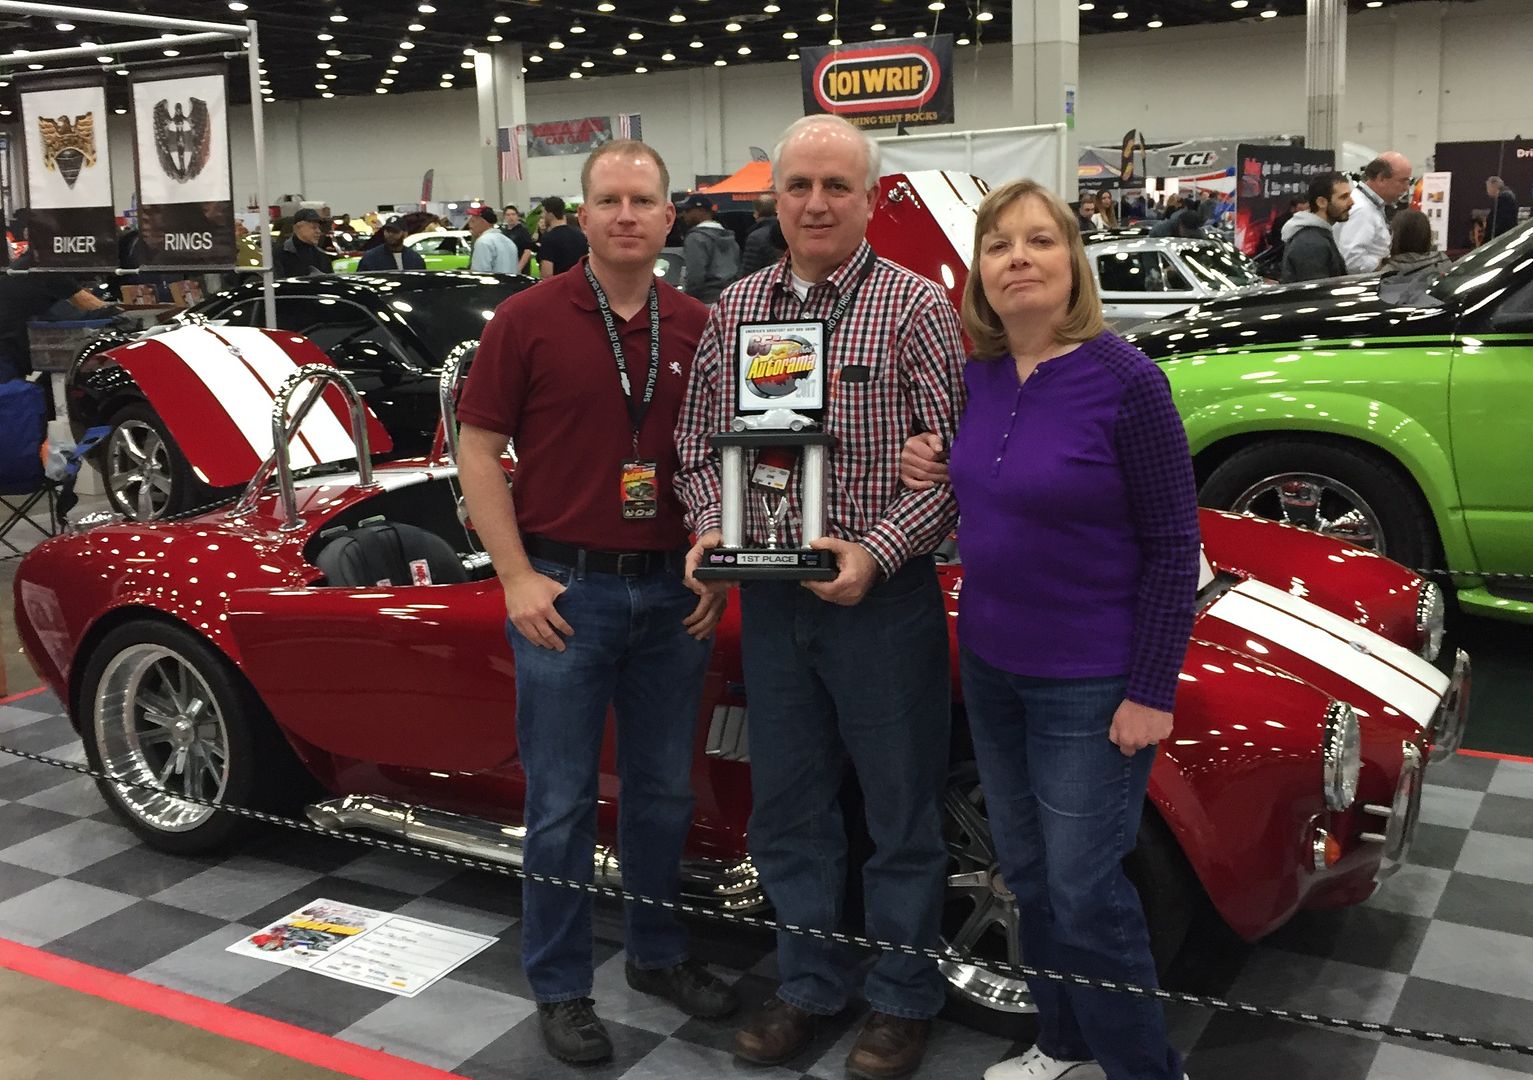
    All good and a not too bad an ending. First place Handbuilt Sports.


    Was happy our son came up from Texas and helped and hung out with Dad for the weekend. Sharon came for the Sunday festivities including the awards. Good times.


    Everything is back home and the new Roadster parked back next to #7750. Now to collapse for a couple days.
    Build 1: Mk3 Roadster #5125. Sold 11/08/2014. Build 2: Mk4 Roadster #7750. Sold 04/10/2017. Build Thread
    Build 3: Mk4 Roadster 20th Anniversary #8674. Sold 09/07/2020. Build Thread and Video. Build 4: Gen 3 Type 65 Coupe #59. Gen 3 Coyote. Legal 03/04/2020. Build Thread and Video
    Build 5: 35 Hot Rod Truck #138. LS3 and 4L65E auto. Rcvd 01/05/2021. Legal 04/20/2023. Build Thread. Sold 11/9/2023.

  6. #606
    Jazzman's Avatar
    Join Date
    Jan 2014
    Location
    Scottsdale, AZ
    Posts
    1,166
    Post Thanks / Like
    Huge congratulations! No one deserves it more! Your attention to detail showed through in every area. I am so pleased that the judges recognized all your hard work. You certainly earned it!!
    Jazzman

    MKIV #8745 "Flip Top" Roadster, Custom Tilt front, Coyote Engine, Tremec TKO600, Custom Interior. Best of Show winner, Huntington Beach Cruise In 2018.

    1967 Ford Mustang Coupe build thread updated 1/22/2021

    Roadster Frame Dolly Plan

  7. #607
    Senior Member wareaglescott's Avatar
    Join Date
    Apr 2016
    Location
    Auburn, AL
    Posts
    2,147
    Post Thanks / Like
    Congratulations Paul! Very well deserved. If there was an award for the help you have given others you would win first place in that as well.
    Go ahead and take a couple days off and then you can start the next build! haha
    MK4 #8900 - complete kit - Coyote, TKO600, IRS - Delivered 6/28/16 First Start 10/6/16 Go cart - 10/16/16 Build completed - 4/26/17 - 302 days to build my 302 CI Coyote Cobra - Registered and street legal 5/17/17
    Build Thread http://thefactoryfiveforum.com/showt...e-build-thread
    PHIL 4:13 INSTAGRAM - @scottsrides

  8. #608
    Member
    Join Date
    Dec 2013
    Location
    Sewickley, PA
    Posts
    51
    Post Thanks / Like
    Congratulations on the well deserved award! It is a beautiful car and your documentation of the build has been an inspiration and great help to those of us who have followed you posts.

    Cheers-

  9. #609
    Boydster's Avatar
    Join Date
    Aug 2014
    Location
    Maryville, TN
    Posts
    1,104
    Post Thanks / Like
    Congratulations. And Thank You. Your attention to every detail and willingness to post it all will help other builders for years to come.
    ---Boyd---
    MkIV #9042 build thread
    www.boss427.us
    427W, TKO600, Moser 3.55 rear.
    Delivered Feb 2017, Graduated Nov 4, 2019

  10. #610
    Senior Member
    Join Date
    Oct 2016
    Location
    Fayetteville WV
    Posts
    256
    Post Thanks / Like
    Congrats and it is well deserved. Thanks!
    1972 Corvette Stingray 350 c.i. Manual Steering & Brakes
    2003 H-D Softail Deuce 88 c.i. TwinCam
    Gen 3 Coupe Dreamer

  11. #611
    Senior Member cgundermann's Avatar
    Join Date
    Feb 2011
    Location
    Chino Valley, Arizona
    Posts
    1,077
    Post Thanks / Like
    Way to go Paul; you earned it! Echo everyone's MVP appreciation...

  12. #612
    Senior Member KDubU's Avatar
    Join Date
    May 2015
    Location
    Kennebunkport, ME
    Posts
    1,193
    Post Thanks / Like
    Congrats Paul!
    Kyle

    Complete Kit pickup 09/05/2015, 351w, QF680, 3.55, 3-Link, 15" Halibrands with MT's, Painted Viking blue with Wimbledon white stripes on 03/15/2017. Sold in 08/2018 and totally regret it.

  13. #613
    Junior Member
    Join Date
    Oct 2013
    Posts
    12
    Post Thanks / Like
    Congratulations, Well Deserved.

  14. #614
    Member M3ichael's Avatar
    Join Date
    Aug 2016
    Location
    Salinas, CA
    Posts
    38
    Post Thanks / Like
    So Awesome!!! Congratulations Paul very much well deserved!

  15. #615
    Senior Member Yama-Bro's Avatar
    Join Date
    Jul 2012
    Location
    Kearney Nebraska
    Posts
    851
    Post Thanks / Like
    Congrats!
    Started dreaming of a Cobra around 1987
    Purchased Complete Kit 6/9/2017, Delivered 9/4/2017, Rolling Chassis 3/30/2018, Engine Dyno'ed 3/4/2022, Engine installed 8/27/2022, First start 6/13/2024, Go Kart 8/19/2024
    Click here for my build thread
    Serial #9158
    Design Engineer at BluePrint Engines

  16. #616
    Senior Member
    Join Date
    Apr 2016
    Location
    Ohio
    Posts
    249
    Post Thanks / Like
    Congrats Paul. It really was the best there.
    JRL16
    Mk4 delivered 4/28/16. First start 10/15/16. First gocart 11/10/16. Engine Factory 427W. 750 carb. Tremec TKO600. 2015 IRS. Power steering. Whitby power brakes. Wilwood brakes. 18" wheels. Falken tires. Sway bars front and rear. Forte hydraulic clutch and mechanical throttle linkage. Scott's Hot Rods triple reservoir. Ceramic coated headers. Gas’n sidepipes. Heated seats. Herb Fraser walnut door panels. Wipers. Console.

  17. #617
    Senior Member edwardb's Avatar
    Join Date
    Feb 2011
    Location
    Lake Orion, Michigan
    Posts
    10,871
    Post Thanks / Like

    Time to Call it a Wrap

    After 16 pages, 616 posts, and >110K views (over 150K views between the two forums, crazy), I'm going to shut this build thread down. The Roadster is 100% completely assembled with everything working as it should (so far!). I need to aim the headlights and do a final check on the alignment, but other than that it’s ready to drive and enjoy. I’ll get started on the Michigan inspection, title and license process right away and it should be ready in plenty of time for spring. Right now, we’re tentatively planning to attend the 2017 Factory Five Open House, and we’re already registered for the London Cobra Show. Plus our local club has a full schedule of events planned. Looking forward to all of that!

    Yesterday while moving cars around in the garage, seemed moving the new Roadster required a brief run around the block in my neighborhood. First time with the body on and (obviously) with everything complete. I took it real easy because it’s far from legal and I really don’t want to find out if I have any grouchy neighbors. But it’s very obvious this is going to be an awesome runner and driver. Can’t wait.

    It’s been a blast sharing this build. It had enough detail and some new things (Mustang IRS, Gen2 Coyote, plus some others) that it really generated a lot of interest and tons of posts, messages, calls, texts, etc. All good and it was fun sharing and helping where I could. Thanks to everyone for your positive comments, encouragement, and suggestions along the way. I agreed with most of them.

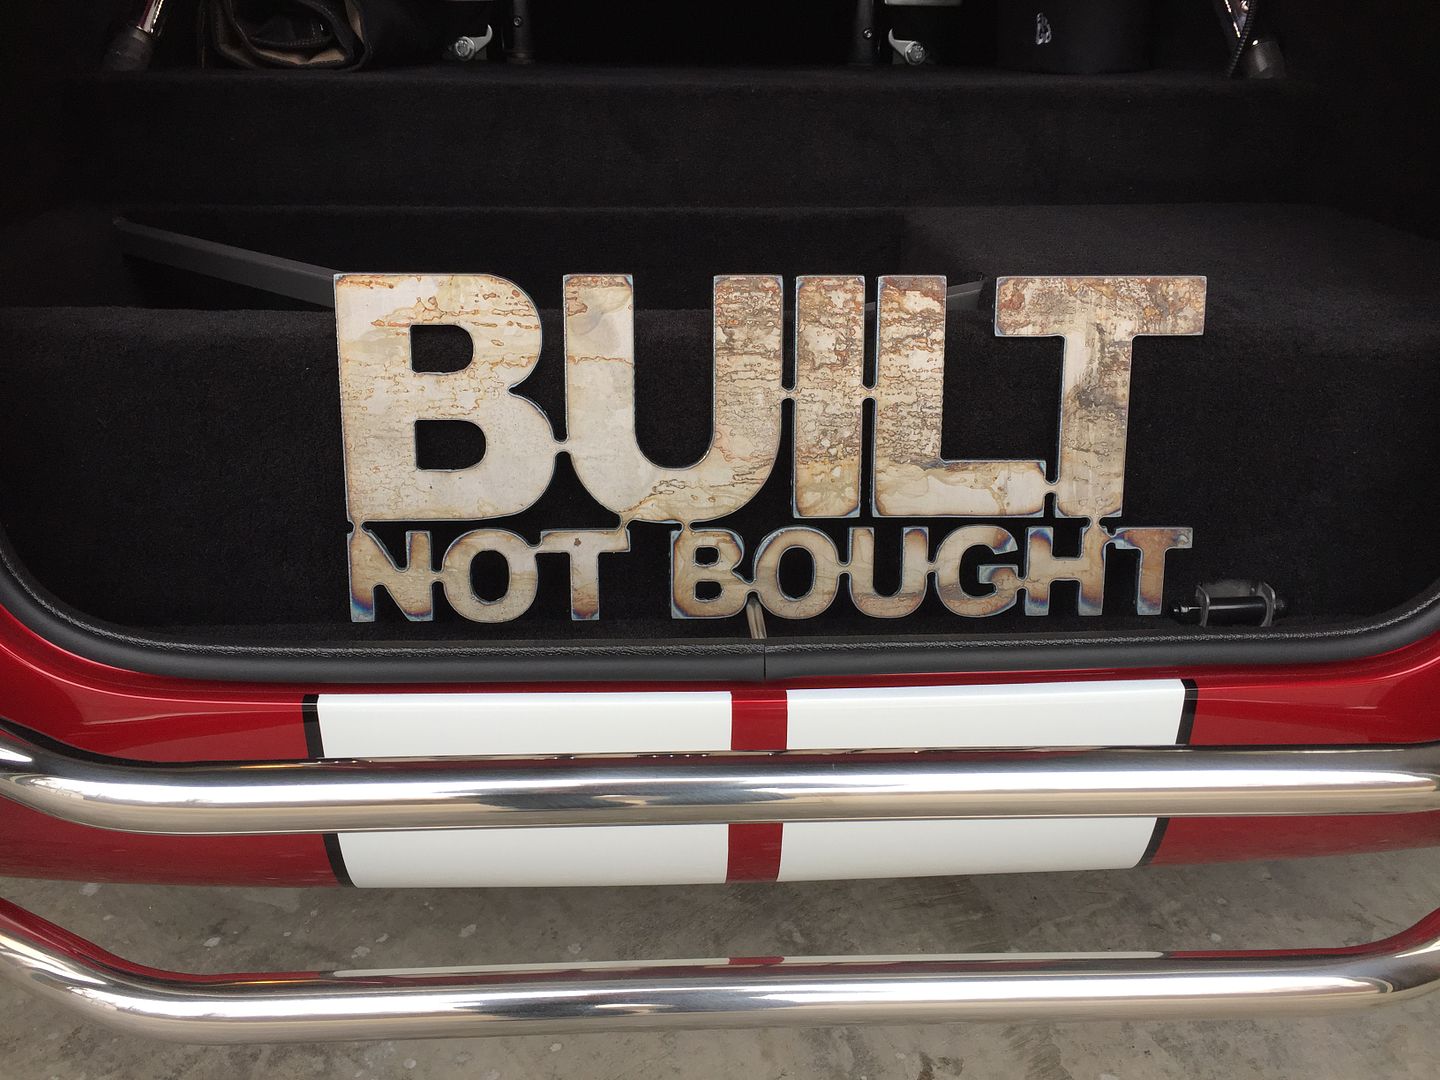
    I want to share this in conclusion. During the just completed Detroit Autorama, one guy came up to me and told me he appreciated my build as much or more than any of the other builds “over there” while waving in the general direction of the extremely high end builds including the Ridler finalists. He said it was because he knew I did this as an amateur in my own garage with my own sweat and blood as opposed to the professional builds being displayed. I’m sure that many of the other 700+ cars that were there were also labors of love, and I don’t deserve to be even talked about in the same breath as the Ridler builds. Check the winner here: http://www.hotrod.com/articles/2017-...r-wins-ridler/. Rumor was it cost over $5 million to build. Absolutely stunning to see in person. But I appreciated the compliment and sentiment very much. Many of the questions I had during the show about how much one of these builds costs completely misses the satisfaction and sense of accomplishment. My son bought this plasma cut steel sign for me from a vendor at the show. Very cool and it will find a place of prominence in my man cave. He didn’t know it, but it’s also a marketing phrase used by Factory Five. It captures the sentiment perfectly:


    With that, I’m done with the build thread. It’s been quite a ride. The new Coupe is at the top of the list for another project, maybe to start next winter. This weekend, talked to a couple Ford guys and received just a couple of inside tips about the 2018 (Gen3?) Coyote. Could be an interesting combination. We’ll see. Thanks again everyone, and looking forward to meeting more of you in person.
    Last edited by edwardb; 02-28-2017 at 04:39 PM.
    Build 1: Mk3 Roadster #5125. Sold 11/08/2014. Build 2: Mk4 Roadster #7750. Sold 04/10/2017. Build Thread
    Build 3: Mk4 Roadster 20th Anniversary #8674. Sold 09/07/2020. Build Thread and Video. Build 4: Gen 3 Type 65 Coupe #59. Gen 3 Coyote. Legal 03/04/2020. Build Thread and Video
    Build 5: 35 Hot Rod Truck #138. LS3 and 4L65E auto. Rcvd 01/05/2021. Legal 04/20/2023. Build Thread. Sold 11/9/2023.

  18. #618
    Jazzman's Avatar
    Join Date
    Jan 2014
    Location
    Scottsdale, AZ
    Posts
    1,166
    Post Thanks / Like
    Allow me to be the first of what I am sure will be many "thank you's" for your generosity, your wisdom, your attention to craftsmanship and detail, and last but not least, your build threads. You inspire many of us to look beyond what we think we can do to what is possible. You inspire us to dream and create. You exemplify the individuality of our hobby, while reinforcing the collaborative nature of this forum. In short, you are what we all should aspire to be.

    I do believe there are a couple of minor follow ups that you may be too humble to address:

    1. Your signature line needs to highlight the fact that #8674 is a 1st Place winner at the 2017 Detroit Autorama as the "Best Hand-Built Car".
    2. Your thread should be made "sticky" at the top of the "Built Threads" page. Because it is so detailed and has so many valuable ideas, your thread should be required reading for everyone considering building a Roadster. #7750 could also be put into that same vein.
    3. You really must load #8674 onto the SE trailer and haul it out to Huntington Beach in April. Yes, I know it is a long way from Michigan to California, but hey, you are retired right?! Every day is a holiday, everyday is a new adventure. That would be a great adventure!!

    Again, thank you for all you do for all the rest of us. We are all in your debt! We will now eagerly await the next installment in your creative life.
    Jazzman

    MKIV #8745 "Flip Top" Roadster, Custom Tilt front, Coyote Engine, Tremec TKO600, Custom Interior. Best of Show winner, Huntington Beach Cruise In 2018.

    1967 Ford Mustang Coupe build thread updated 1/22/2021

    Roadster Frame Dolly Plan

  19. #619
    Junior Member
    Join Date
    Oct 2013
    Posts
    12
    Post Thanks / Like
    I’ve had a dream of building a Factory Five Roaster since 1999, and hopefully soon my dream will come to pass, and I get to start my build.
    Your build is an inspiration and pack full of wisdom, information and great Ideas.
    Thank you for sharing this build and your knowledge.

  20. #620

    Join Date
    Mar 2014
    Location
    Louisville, KY
    Posts
    29
    Post Thanks / Like
    Wow,............. just wow. I've been watching your build from the beginning. You, sir, are a true inspiration to all the rest of us. Congratulaions.
    Build 1: MkIV Roadster #8675. Deliv: 8/15/2015.
    FFR MkIV complete kit. / 5.0 Coyote Motor / T56 Magnum Trans / 3.73 Torsen IRS / 18' Halibrand w/Michelin Pilot Sport PS2 Tires
    FFMetal: Firewall Forward, Trans Tunnel top, Battery Box, Fan Shroud
    Russ Thompson: Turn signal Assembly, Trunk Box Mod.
    Breeze: SS Roll Bars(2), Power Steering rack, and much more.
    Mike Forte: supplied 5.0 Coyote & T56 Magnum Trans

  21. #621
    Papa's Avatar
    Join Date
    Dec 2016
    Location
    Mexico, MO
    Posts
    5,705
    Post Thanks / Like
    Congratulations on a well-deserved 1st place! Your build definitely swayed my decision to order a kit instead of just buying a completed car. I hope you will still be ready to chime in with your advice as I run into my inevitable road blocks along the way when I finally get to start building my own this summer.

    Thank you,
    Dave
    My Build Thread: http://thefactoryfiveforum.com/showt...ter-Build-9754
    (Most viewed Roadster build thread on this forum!)

    Delivered: 6/17/2017
    First Start: 12/30/2017
    Completed: 12/7/2019
    Legal: 1/30/2020

    Member of the The Gateway Cobra Club
    Dave's Cobra YouTube Channel: https://www.youtube.com/channel/UCbk...npK1UZHj4R-bYQ
    Agora 1:8 Scale Cobra Build: https://thefactoryfiveforum.com/show...l-Build-Thread

  22. #622
    Senior Member
    Join Date
    Dec 2014
    Location
    Mooresville NC
    Posts
    133
    Post Thanks / Like
    I feel compelled to add my congratulations for your win as well as appreciation for your build documentation. You are, quite obviously, a master builder and your 1st place win seemed almost fore ordained as I started reading your build thread months ago. I agree with Jazzman's suggestions as well. What I would LOVE to see since I'm building a Coyote based M4 is an "indexed" version of your build thread so (and this is quite selfish) I don't have to page through too much to get answers (or not so I can search elsewhere). The last thing I'll offer is free room and board on a lake in NC if you'd like to come and "consult" on my build... :-)
    RJ "A race car exists in only two states: broken or in the process of becoming that way" Road and Track, May 2015

  23. #623
    RR20AC's Avatar
    Join Date
    Jul 2015
    Location
    Puyallup/WA
    Posts
    400
    Post Thanks / Like
    Blog Entries
    1
    Paul everyone is asking what is the weight of these cars. Is the weight more or less with a coyote vs a sbf? Have you taken yours to the scales yet? Congratulations on the win! Jim
    20th Anniversary MK4 Roadster, #8752, 18 of 20, Delivered 12/03/15, 1st Start 01/28/2017, off to paint 4/13/2017, Forte 351w/ Holley EFI, Forte throttle linkage, TKO 600/Forte Hyd. Clutch, UniSteer Electra Steering, RT's turn Signals, many Breeze parts, Paint by the Jeff Miller. Finished on 10/08/2017. 500 mile inspection on 10/21/2017, 3000 mile inspection on 1/14/19.

  24. #624
    Member
    Join Date
    Feb 2017
    Location
    Birmingham, AL
    Posts
    82
    Post Thanks / Like
    The factory five build manual seems informative, but this thread answers any questions the manual leaves unanswered. Thanks from all of us EdwardB, I know you have spent hours downloading pictures and explaining things to the rest of us neophytes. You are very generous with your time, I have asked several stupid questions on this forum and you are usually the first to respond. If you are not already, FF should put you on the payroll, reading your build seeing your knowledge and helpfullnesss makes me know I can do it.

  25. #625
    Senior Member edwardb's Avatar
    Join Date
    Feb 2011
    Location
    Lake Orion, Michigan
    Posts
    10,871
    Post Thanks / Like
    Quote Originally Posted by RR20AC View Post
    Paul everyone is asking what is the weight of these cars. Is the weight more or less with a coyote vs a sbf? Have you taken yours to the scales yet? Congratulations on the win! Jim
    Thanks Jim. The response to the new Roadster at the Detroit Autorama was really positive. Getting the trophy was a nice way to finish the weekend. I've never had any of my builds weighed. Based on info I've read on the forums, I always answer "around 2,200 pounds" when asked how much mine weigh. I think that is pretty close. The iron block/aluminum head SBF is close in weight to the significantly larger but all aluminum Coyote. So I suspect the weight is similar with either.

    To everyone else -- thanks for all the other positive comments and notes of encouragement. This is something I really enjoy and with retirement especially have time for. I get a lot of satisfaction out of seeing other builds and having a small part in helping. Something I never really expected. The years in this hobby have been a giant learning experience for me. I haven't been at it as long as many that are on here. But I'm happy to share what I've learned.

    Today I completed the first step in my title/registration process. Was able to get the safety inspection completed. Not without drama since the very first person I called didn't know what they were talking about, and it took most of the day to recover. But it's done. Tomorrow to the Secretary of State office (Michigan version of the DMV) to pay sales tax and get the title process started. Wish me luck. If that goes OK, should be legal and driving in about 8 weeks.
    Last edited by edwardb; 03-08-2017 at 07:13 AM.
    Build 1: Mk3 Roadster #5125. Sold 11/08/2014. Build 2: Mk4 Roadster #7750. Sold 04/10/2017. Build Thread
    Build 3: Mk4 Roadster 20th Anniversary #8674. Sold 09/07/2020. Build Thread and Video. Build 4: Gen 3 Type 65 Coupe #59. Gen 3 Coyote. Legal 03/04/2020. Build Thread and Video
    Build 5: 35 Hot Rod Truck #138. LS3 and 4L65E auto. Rcvd 01/05/2021. Legal 04/20/2023. Build Thread. Sold 11/9/2023.

  26. #626
    RR20AC's Avatar
    Join Date
    Jul 2015
    Location
    Puyallup/WA
    Posts
    400
    Post Thanks / Like
    Blog Entries
    1
    State of Washington needs a scale weight for road taxes and licensing, guess all states are different. The scale wt on my work car, Prius is 2985.
    20th Anniversary MK4 Roadster, #8752, 18 of 20, Delivered 12/03/15, 1st Start 01/28/2017, off to paint 4/13/2017, Forte 351w/ Holley EFI, Forte throttle linkage, TKO 600/Forte Hyd. Clutch, UniSteer Electra Steering, RT's turn Signals, many Breeze parts, Paint by the Jeff Miller. Finished on 10/08/2017. 500 mile inspection on 10/21/2017, 3000 mile inspection on 1/14/19.

  27. #627
    Senior Member edwardb's Avatar
    Join Date
    Feb 2011
    Location
    Lake Orion, Michigan
    Posts
    10,871
    Post Thanks / Like
    Quote Originally Posted by RR20AC View Post
    State of Washington needs a scale weight for road taxes and licensing, guess all states are different. The scale wt on my work car, Prius is 2985.
    You got that right. Huge difference across the board between states. When trying to sort through the inspection paperwork yesterday, a lady at the SOS office said "Michigan doesn't like assembled vehicles, so we're trying to make it as hard as possible so people won't do them." Hopefully she was just having a bad day and only speaking for herself. Didn't make me too happy as I was trying to sort through the process which has changed each of the three times I've done it.

    I'm betting your Roadster is going to be way lighter than your Prius. Unless you put some of those big battery packs in your build. Weight isn't part of the equation for cars here in Michigan, so we aren't required to have it.
    Build 1: Mk3 Roadster #5125. Sold 11/08/2014. Build 2: Mk4 Roadster #7750. Sold 04/10/2017. Build Thread
    Build 3: Mk4 Roadster 20th Anniversary #8674. Sold 09/07/2020. Build Thread and Video. Build 4: Gen 3 Type 65 Coupe #59. Gen 3 Coyote. Legal 03/04/2020. Build Thread and Video
    Build 5: 35 Hot Rod Truck #138. LS3 and 4L65E auto. Rcvd 01/05/2021. Legal 04/20/2023. Build Thread. Sold 11/9/2023.

  28. #628
    2bking's Avatar
    Join Date
    Jul 2013
    Location
    Garland, Texas
    Posts
    799
    Post Thanks / Like
    First, very very nice job on #8674. As others have said, you set the bar for craftsmanship on these kits. You do considerable research behind the scenes to figure out the best options and methods and it shows in your completed product. OCD is some of it but attention to detail wins out in the end.

    As far as weight on these, mine came in at 2380 on the certified scales with less than a half tank of gas and no roll bars or left/right mirrors. The only options I have that you don't (I think) are AC and ABS. I'm thinking these don't add up to 100 pounds so I would be surprised if the 2200 pound car is real with the sound/heat additives and carpet throughout. But then maybe my flip front has more weight in it than I think.
    King
    Roadster #8127, ordered 7/12/13, received 9/11/13
    http://thefactoryfiveforum.com/showt...4-Coyote-Build

  29. #629
    Not a waxer Jeff Kleiner's Avatar
    Join Date
    Feb 2011
    Location
    Bloomington, Indiana
    Posts
    8,733
    Post Thanks / Like
    Quote Originally Posted by 2bking View Post
    ... I would be surprised if the 2200 pound car is real with the sound/heat additives and carpet throughout. But then maybe my flip front has more weight in it than I think.
    Point of reference...my 3 link roadster with a fuel injected aluminum headed small block, Power steering & brakes, insulated and carpeted came in at 2180 with a full tank of gas and my bag of tools (20# + or -) in the trunk.

    Jeff

  30. #630
    Senior Member edwardb's Avatar
    Join Date
    Feb 2011
    Location
    Lake Orion, Michigan
    Posts
    10,871
    Post Thanks / Like
    Thanks guys. I suspect somewhere in the 2,200 - 2,300 pound range is about right. And a little bit more when I'm sitting in it. But I'm not saying how much more.

    Since I'm here anyway, today's update on the title/registration process. Had everything exactly lined up with what was needed to complete my title application, copies made, backup information ready, etc. This was going to go well! Arrived at the Secretary of State office mid-morning and there was almost no line. This is good! Then, not so good. We are having 60+ mile per hour winds here today, and power popping off all over the place. We're on generator power at our house right now in fact. Anyway, power went off at the SOS office briefly then came back, but no computers and no phones. Waited for awhile but clearly it wasn't going to get fixed anytime soon. Checked the wait time at the next closest office (available on-line, at least they're a little progressive) and it was 40 people in line one hour wait. That was good enough for me. Hopped in the DD and showed up there. Waited the hour, and was helped by a very nice lady that hadn't done an assembled vehicle title application in a long time apparently. But she found all the necessary instructions, was happy with all my paperwork, and got it done. I'm 6% of the purchase price poorer (the tax man had to eventually show up) but a VIN is assigned and the application paperwork on it's way to Lansing. Takes about 8 weeks, and they will have my title and VIN tag. An inspector will come to my house to supposedly inspect the car again then give me the title and place the VIN tag. Then I can get a plate and start driving. Hopefully about the time nice spring weather arrives. There's always the chance Lansing could find something in the paperwork they don't like. But it's all exactly per the book, so hopefully not. This is my third time through the process in Michigan, and each time it's been a little different. And harder. But still not as hard as some states so I'm just getting through it.
    Last edited by edwardb; 03-08-2017 at 05:38 PM.
    Build 1: Mk3 Roadster #5125. Sold 11/08/2014. Build 2: Mk4 Roadster #7750. Sold 04/10/2017. Build Thread
    Build 3: Mk4 Roadster 20th Anniversary #8674. Sold 09/07/2020. Build Thread and Video. Build 4: Gen 3 Type 65 Coupe #59. Gen 3 Coyote. Legal 03/04/2020. Build Thread and Video
    Build 5: 35 Hot Rod Truck #138. LS3 and 4L65E auto. Rcvd 01/05/2021. Legal 04/20/2023. Build Thread. Sold 11/9/2023.

  31. #631
    Senior Member
    Join Date
    Oct 2016
    Location
    Fayetteville WV
    Posts
    256
    Post Thanks / Like
    Edwardb,

    Always nice to find a nice person at the DMV. In WV, I would drive an hour to avoid the mean people to get registrations and renewals done. I have over 100 vehicles and trailers to renew each year for work. I'm Transportation Director for our company. A new office opened about 20 minutes away. Now I go thru the door and they just wave me over to a window. Happy to see me as I have all my paperwork in order.

    Looking forward to see your fine craftsmanship on the road! Congrats on your 1st place in the Detroit Show.

    Len
    1972 Corvette Stingray 350 c.i. Manual Steering & Brakes
    2003 H-D Softail Deuce 88 c.i. TwinCam
    Gen 3 Coupe Dreamer

  32. #632
    Straversi's Avatar
    Join Date
    Nov 2014
    Location
    Palos Verdes, CA
    Posts
    1,278
    Post Thanks / Like
    [QUOTE=edwardb;234044]Progress continues with the wiring. I have everything in place now. Just need to make all the necessary connections and (hopefully) wrap it up. In a previous update I showed the power wiring from the front mounted battery to the disconnect along with the Coyote power distribution box wiring. Now for the rest.

    First was the Ron Francis harness....


    Now that you are in build retirement, hopefully you have some time for a few questions.

    I understand (OK, I can follow) the wiring on the engine side of the firewall and now I'm trying work through the cockpit side of the firewall.

    From your post #255, which I have segmented,
    (1) "The only blue wire remaining is direct from the ignition switch to the start sense wire in the Coyote harness"

    Are you referring to the light blue wire in the 16 pin connection labeled "Starter Request"?

    (2) "Finally I broke into the fuel pump circuit in the RF fuse box and added the connection to the Coyote harness. The power and control for the fuel pump comes from the Coyote PDB and PCM, but it uses the existing RF wiring harness to get the +12V back to the in-tank fuel pump. It also uses the existing RF relay and inertia switch."

    The FRR Coyote instructions show taking the Green power connection from the 16 pin Coyote harness and splicing it to the tan fuel pump line in the rear RF harness. They seem to be taking it out of the fuse panel altogether. I'm assuming you did it differently. Can you elaborate?

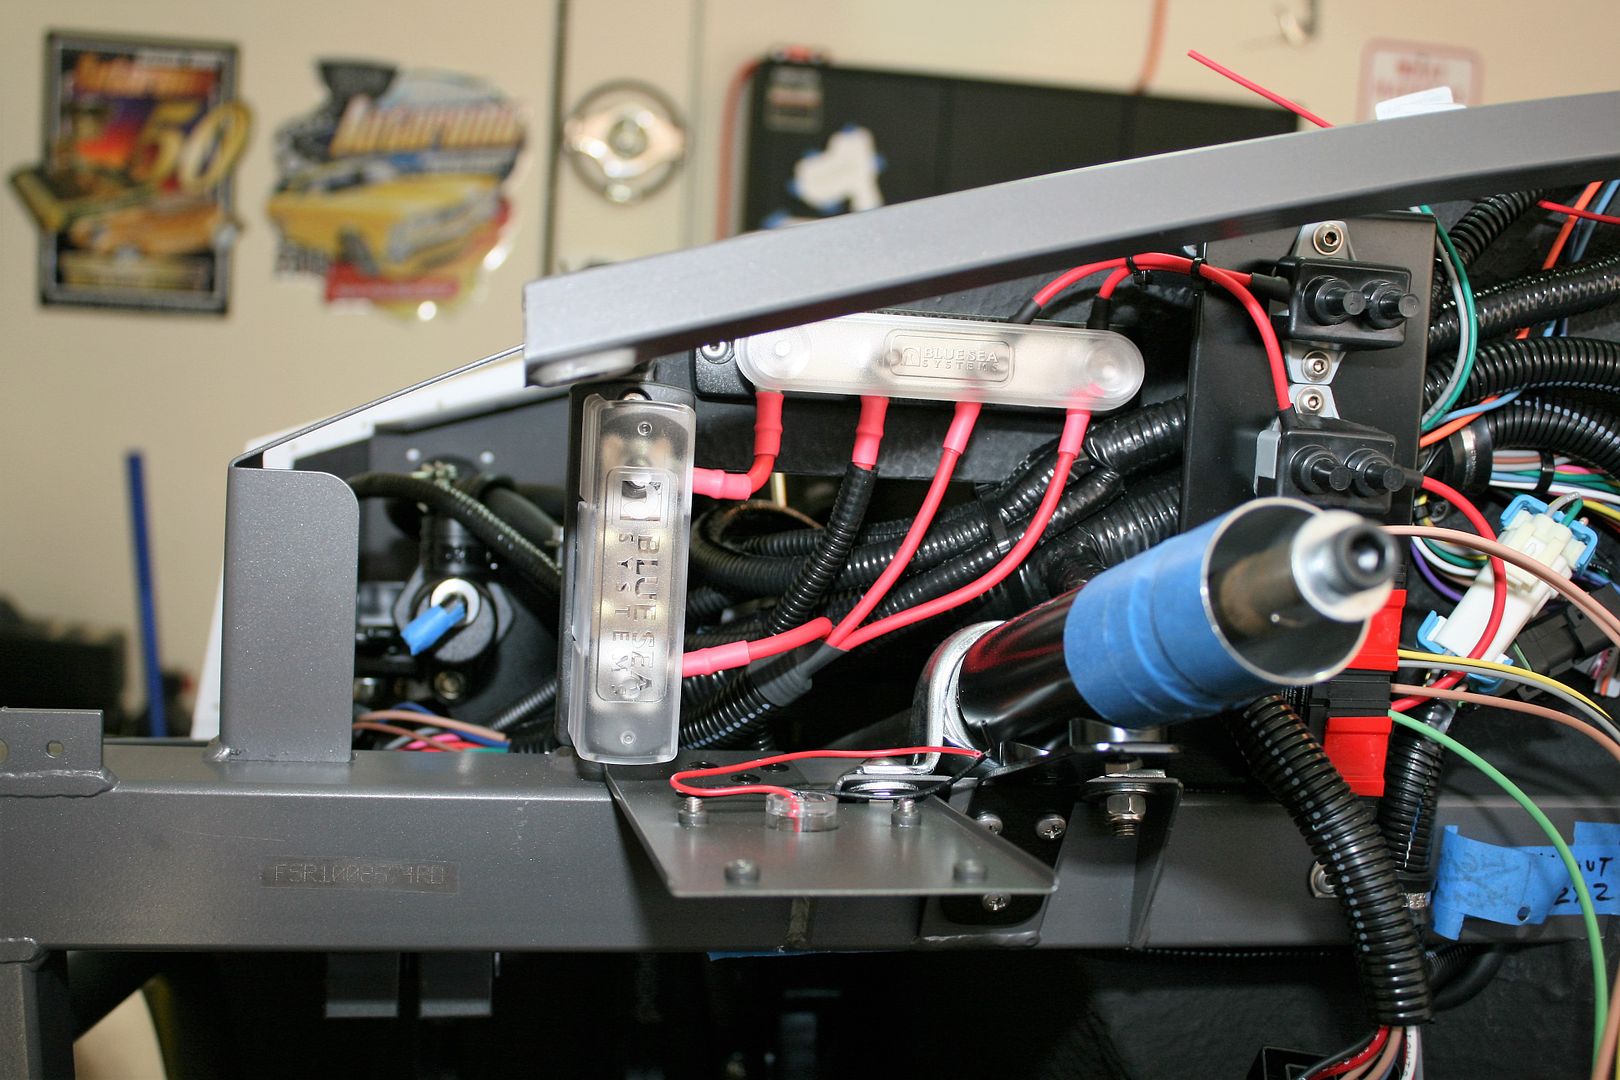
    (3) "With that all done, installed the main RF harness into the chassis along with the fuse panel. I did the power wiring much like my last build. I used a Blue Seas Systems bus bar for the main power. I have an 8 gauge wire from the switched side of the master disconnect to the bus bar. Then the three main power wires from the RF harness are attached. These are the same three wires that are normally attached to a firewall solenoid instead making just a 6-8 inch trip to the bus bar. Then I added a Blue Seas Systems 150 amp fuse to the alternator circuit. Typically DD’s have a fusable link in the alternator circuit. In stock form the RF harness has no protection from an alternator failure. Not typically a problem, but still something I prefer to add."

    I follow the RF feed from the top post of the power disconnect through the DS footbox and on to the 4 post buss. In the photo above, are the two leads coming out of the TOP of the buss related to your headlight control system? The other two leads coming out of the BOTTOM of the buss being from the RF Solenoid lead? Is there a 3rd line from the RF Solenoid lead attached on the buss? I see the jumper from the buss to the 150 amp fuse. What is the line at the bottom of the fuse? Lastly, what does DD's refer to? OK, that was more than a few questions.

    Any help you can give is appreciated.
    -Steve
    Mk IV #8901 - Complete kit, Coyote, TKO-600, IRS. Ordered 5/23/16, Delivered 7/14/16, First Start 8/13/17, First Go-Kart 10/22/17, Registered and Completed 10/18/18. Build Thread: http://thefactoryfiveforum.com/showt...V-Coyote-Build Graduation Thread: https://thefactoryfiveforum.com/show...-Roadster-8901

  33. #633
    Senior Member edwardb's Avatar
    Join Date
    Feb 2011
    Location
    Lake Orion, Michigan
    Posts
    10,871
    Post Thanks / Like
    Hi Steve. I'll take them in order.

    1. Yes. The blue RF wire from the ignition switch start terminal ends up at the 16-pin Coyote pigtail. Cavity #3, Light Blue, Starter Motor Request (SMR). When the ignition key is turned to start, +12V is sent to the Coyote pigtail which initiates the start sequence. Note it only takes a blip of the key to start the engine. You don't have to hold the key over. Works like a start button. Once the sequence is started, the engine keeps cranking until it starts. Also note this is different than how the FF instructions show the start wiring. They show using a firewall solenoid and the RF harness controlling the start function as it's been in the past.

    2. No, I followed the FF instructions, but with one important caveat. I followed the old instructions. If you follow the new instructions, the spot they have you cut the wire in the RF fuse panel takes the inertia switch out of the circuit. Not sure why, as I think the inertia switch is an important safety device. Maybe it's a mistake. They do mention taking the fuel pump fuse out of the fuse panel. But not the entire wire.

    3. Yes, the two leads out of the top of that bus bar are for things I added. One is to the headlight module you mention. The other is for my front fog lights. Since both need always on battery power, just took the power from there, through the circuit breakers, and then to the devices. The two leads out of the bottom are the RF RED-BATTERY FEED and RF RED-IGN SW-SOL wires. I like to have a mega fuse between the alternator and the main battery circuit. So I put a jumper from the bus bar to the fuse. The RF RED ALTERNATOR FD wire is on the other side of the fuse. That accounts for the three large RF wires that are shown in the schematic going to a solenoid. Which I obviously didn't use.

    Hope that all makes sense.
    Last edited by edwardb; 03-14-2017 at 07:57 PM.
    Build 1: Mk3 Roadster #5125. Sold 11/08/2014. Build 2: Mk4 Roadster #7750. Sold 04/10/2017. Build Thread
    Build 3: Mk4 Roadster 20th Anniversary #8674. Sold 09/07/2020. Build Thread and Video. Build 4: Gen 3 Type 65 Coupe #59. Gen 3 Coyote. Legal 03/04/2020. Build Thread and Video
    Build 5: 35 Hot Rod Truck #138. LS3 and 4L65E auto. Rcvd 01/05/2021. Legal 04/20/2023. Build Thread. Sold 11/9/2023.

  34. #634
    Straversi's Avatar
    Join Date
    Nov 2014
    Location
    Palos Verdes, CA
    Posts
    1,278
    Post Thanks / Like
    Quote Originally Posted by edwardb View Post
    Hi Steve. I'll take them in order.

    1. Yes. The blue RF wire from the ignition switch start terminal ends up at the 16-pin Coyote pigtail. Cavity #3, Light Blue, Starter Motor Request (SMR). When the ignition key is turned to start, +12V is sent to the Coyote pigtail which initiates the start sequence. Note it only takes a blip of the key to start the engine. You don't have to hold the key over. Works like a start button. Once the sequence is started, the engine keeps cranking until it starts. Also note this is different than how the FF instructions show the start wiring. They show using a firewall solenoid and the RF harness controlling the start function as it's been in the past.

    2. No, I followed the FF instructions, but with one important caveat. I followed the old instructions. If you follow the new instructions, the spot they have you cut the wire in the RF fuse panel takes the inertia switch out of the circuit. Not sure why, as I think the inertia switch is an important safety device. Maybe it's a mistake. They do mention taking the fuel pump fuse out of the fuse panel. But not the entire wire.

    3. Yes, the two leads out of the top of that bus bar are for things I added. One is to the headlight module you mention. The other is for my front fog lights. Since both need always on battery power, just took the power from there, through the circuit breakers, and then to the devices. The two leads out of the bottom are the RF RED-BATTERY FEED and RF RED-IGN SW-SOL wires. I like to have a mega fuse between the alternator and the main battery circuit. So I put a jumper from the bus bar to the fuse. The RF RED ALTERNATOR FD wire is on the other side of the fuse. That accounts for the three large RF wires that are shown in the schematic going to a solenoid. Which I obviously didn't use.

    Hope that all makes sense.
    Yes, thanks that helps greatly.

    I didn't have an old version of the FFR Coyote install guide but I downloaded the Hot Rod Coyote install guide and it still shows the old way.

    IMG_2504_zpsc1nga4bn-1.jpg

    IMG_2505_zpskbouoih3-1.jpg

    This looks like it bypasses the 15 amp fuse but still runs through the relay.

    Is this correct?

    Can I delete the Coil/EFI Crank lead and the Alternator lead from the RF harness? Or am I getting ahead of myself?

    You mentioned a fuel pump cut off switch, maybe under your dash? Is that recommended? Cut into the tan line coming out of the relay or the green line going in?. Does it matter which side?

    -Steve
    Mk IV #8901 - Complete kit, Coyote, TKO-600, IRS. Ordered 5/23/16, Delivered 7/14/16, First Start 8/13/17, First Go-Kart 10/22/17, Registered and Completed 10/18/18. Build Thread: http://thefactoryfiveforum.com/showt...V-Coyote-Build Graduation Thread: https://thefactoryfiveforum.com/show...-Roadster-8901

  35. #635
    Senior Member edwardb's Avatar
    Join Date
    Feb 2011
    Location
    Lake Orion, Michigan
    Posts
    10,871
    Post Thanks / Like
    Quote Originally Posted by Straversi View Post
    Yes, thanks that helps greatly.

    I didn't have an old version of the FFR Coyote install guide but I downloaded the Hot Rod Coyote install guide and it still shows the old way.

    IMG_2504_zpsc1nga4bn-1.jpg

    IMG_2505_zpskbouoih3-1.jpg

    This looks like it bypasses the 15 amp fuse but still runs through the relay.

    Is this correct?

    Can I delete the Coil/EFI Crank lead and the Alternator lead from the RF harness? Or am I getting ahead of myself?

    You mentioned a fuel pump cut off switch, maybe under your dash? Is that recommended? Cut into the tan line coming out of the relay or the green line going in?. Does it matter which side?

    -Steve
    Yes, that older pic shows what I did. The fuse in the RF panel is removed. Using that wire, the power for both the RF panel fuel pump relay and the actual in-tank fuel pump come from the Coyote green fuel pump wire via the Coyote PDB. The Coyote PDB has the necessary fuse for the fuel pump. The inertia switch wires complete the ground circuit for the relay. Inertia switch closed = relay grounded, relay closed, +12V from Coyote PDB goes to the fuel pump. Inertia switch open = relay open, no power to fuel pump. Exactly how you want it to work. For the fuel pump switch, I don't know if it's recommended or not. It's just something I wanted, and yes it's on the center dash support underneath and out of sight. Mainly for diagnostic purposes (can crank the engine without it starting) and also a hidden security feature if I'm so inclined. But I didn't switch the main fuel pump wire. That's carrying a lot of current and that would need a substantial switch. I added a small rocker switch in one of the inertia switch wires. So opening the switch is the same as the inertia switch being open and breaks power to the fuel pump via the relay. Pretty simple.

    For the RF ORG-EFI OR COIL wire, I used that one to connect to the Coyote pigtail cavity 5 Light Green Ignition Relay Trigger wire. The Coyote system needs ignition switched +12V to wake it up and keep it running. The RF ORG-EFI OR COIL wire is the perfect candidate.

    For the alternator wire, I'm not sure what you're asking. You need the main +12V battery feed wire from the RF harness (discussed in the last response) to the large post on the alternator. Then you need the alternator connector from the Coyote harness into the connector block on the alternator. Those two things provide the entire alternator function. There is a brown alternator wire coming off the RF ignition switch harness that goes to a connector on the end of the RF alternator harness wire. Maybe that's what you're asking about. That one can be deleted. Not used.

    I uploaded a wiring spreadsheet in my build thread. It has a lot of detail and maybe would help if you don't have it. It's post #325 here: http://thefactoryfiveforum.com/showt...l=1#post243285

    Continued good luck with the wiring!
    Last edited by edwardb; 03-15-2017 at 08:32 AM.
    Build 1: Mk3 Roadster #5125. Sold 11/08/2014. Build 2: Mk4 Roadster #7750. Sold 04/10/2017. Build Thread
    Build 3: Mk4 Roadster 20th Anniversary #8674. Sold 09/07/2020. Build Thread and Video. Build 4: Gen 3 Type 65 Coupe #59. Gen 3 Coyote. Legal 03/04/2020. Build Thread and Video
    Build 5: 35 Hot Rod Truck #138. LS3 and 4L65E auto. Rcvd 01/05/2021. Legal 04/20/2023. Build Thread. Sold 11/9/2023.

  36. #636
    Straversi's Avatar
    Join Date
    Nov 2014
    Location
    Palos Verdes, CA
    Posts
    1,278
    Post Thanks / Like
    Quote Originally Posted by edwardb View Post

    For the alternator wire, I'm not sure what you're asking. You need the main +12V battery feed wire from the RF harness (discussed in the last response) to the large post on the alternator. Then you need the alternator connector from the Coyote harness into the connector block on the alternator. Those two things provide the entire alternator function. There is a brown alternator wire coming off the RF ignition switch harness that goes to a connector on the end of the RF alternator harness wire. Maybe that's what you're asking about. That one can be deleted. Not used.

    I uploaded a wiring spreadsheet in my build thread. It has a lot of detail and maybe would help if you don't have it. It's post #325 here: http://thefactoryfiveforum.com/showt...l=1#post243285

    Continued good luck with the wiring!
    Ok, as I read this and look at the RF Schematic again, it looks like the RF Alternator FD line runs from the Starter Solenoid branch to the Alternator Branch of the untouched FR harness and not running through the fuse panel. Probably should have stripped back the conduit to make things clear.

    You are taking that RF Alternator FD line and running it directly from the large post on the alternator, through the firewall and connecting it to the bottom of the Mega Fuse, yes?

    I see in the last photo from your post # 315 that you have a second small conduit passing through your firewall. Is this for the RF Alternator FD line, tach lead, water and oil connections?

    Since I've already exposed myself as wiring challenged, you refer to DD's. What does DD stand for?

    My wife has lost a little confidence in my abilities as I walk from garage to office, carrying wiring harnesses with numerous schematics in hand, mumbling to myself and making notes. Last night, she asked "is this going to be safe?"

    I'm going to have a hard time making her believe that most people mount a fire extinguisher between the seats, just to be period correct.

    Can't believe I missed the spread sheet link. Thank you!
    -Steve
    Mk IV #8901 - Complete kit, Coyote, TKO-600, IRS. Ordered 5/23/16, Delivered 7/14/16, First Start 8/13/17, First Go-Kart 10/22/17, Registered and Completed 10/18/18. Build Thread: http://thefactoryfiveforum.com/showt...V-Coyote-Build Graduation Thread: https://thefactoryfiveforum.com/show...-Roadster-8901

  37. #637
    Senior Member edwardb's Avatar
    Join Date
    Feb 2011
    Location
    Lake Orion, Michigan
    Posts
    10,871
    Post Thanks / Like
    Correct. The large gauge alternator wire from the solenoid area on the RF schematic does not go through the fuse panel. If you were to strip all the insulation and convolute away, you'd see it going from there through the main harness and back out the long lead to be connected to the alternator. That's how it's physically connected. But since all the main power leads, including the feed to the panel, alternator, etc. are connected, the output from the alternator is everywhere on the harness. With the car running and the alternator doing its thing, the voltage everywhere in the harness will be what's coming out of the alternator. Typically somewhere in the 14v range. Hope that doesn't confuse things too much.

    I connect the alternator feed line to bus bar through the mega fuse as discussed before. Then use the long alternator lead to attach to the alternator post. After removing the extra connections it has. You only need one large ring terminal to attach to the Coyote alternator post.

    Yes, the smaller lead you see going through the firewall is the water temp, oil pressure, tach, and alternator.

    "DD" stands for Daily Driver. Kind of a generic term referring to the mass produced cars we drive each day. Sorry I didn't answer that before.
    Last edited by edwardb; 01-01-2018 at 12:17 AM.
    Build 1: Mk3 Roadster #5125. Sold 11/08/2014. Build 2: Mk4 Roadster #7750. Sold 04/10/2017. Build Thread
    Build 3: Mk4 Roadster 20th Anniversary #8674. Sold 09/07/2020. Build Thread and Video. Build 4: Gen 3 Type 65 Coupe #59. Gen 3 Coyote. Legal 03/04/2020. Build Thread and Video
    Build 5: 35 Hot Rod Truck #138. LS3 and 4L65E auto. Rcvd 01/05/2021. Legal 04/20/2023. Build Thread. Sold 11/9/2023.

  38. #638
    Straversi's Avatar
    Join Date
    Nov 2014
    Location
    Palos Verdes, CA
    Posts
    1,278
    Post Thanks / Like
    Quote Originally Posted by edwardb View Post
    Correct. The large gauge alternator wire from the solenoid area on the RF schematic does not go through the fuse panel. If you were to strip all the insulation and convolute away, you'd see it going from there back out the long lead to be connected to the alternator. That's how it's physically connected. But since all the main power leads, including the feed to the panel, alternator, etc. are connected, the output from the alternator is everywhere on the harness. With the car running and the alternator doing its thing, the voltage everywhere in the harness will be what's coming out of the alternator. Typically somewhere in the 14v range. Hope that doesn't confuse things too much.

    Yes, the smaller lead you see going through the firewall is the water temp, oil pressure, tach, and alternator.


    "DD" stands for Daily Driver. Kind of a generic term referring to the mass produced cars we drive each day. Sorry I didn't answer that before.
    Thank you.

    I'll tell our friends that I can follow a recipe, but my wife can cook. The difference is subtle when things go right. The difference is dramatic when things go wrong.
    You are a Master Chef. Thanks for sharing your knowledge. If our paths ever cross, I'm buying!

    -Steve
    Mk IV #8901 - Complete kit, Coyote, TKO-600, IRS. Ordered 5/23/16, Delivered 7/14/16, First Start 8/13/17, First Go-Kart 10/22/17, Registered and Completed 10/18/18. Build Thread: http://thefactoryfiveforum.com/showt...V-Coyote-Build Graduation Thread: https://thefactoryfiveforum.com/show...-Roadster-8901

  39. #639
    Senior Member edwardb's Avatar
    Join Date
    Feb 2011
    Location
    Lake Orion, Michigan
    Posts
    10,871
    Post Thanks / Like

    Build Thread P.S.

    I said I was done with the build thread. But I did have a final punch list after Autorama. So this really is the last progress report and maybe has a couple details those following the thread could use.

    I’m a few weeks into the 8-10 week waiting period for my Michigan title and VIN tag. Haven’t heard anything, so hoping that’s good news. The weather is gradually getting warmer. With any luck this is going to get wrapped up by the time driving season starts. Needless to say, I’m anxious to get driving.

    I put some protection film on the rear wheel flares right behind the doors. This is by far the area that takes the biggest beating from road debris. I bought of chunk of Xpel Ultimate on eBay and cut my own using patterns made for #7750. The Xpel is supposed to be self healing and depending on who you believe better than the usual 3M variety. Could be the same stuff or from the same factory. I’m not sure but it’s OK. Went on the flares fine using the normal wet soapy water process. I played around a little with putting some on the nose, but gave up. There are just too many curves combined with my complete inexperience. Even smaller pieces down low I couldn’t get to lay down satisfactorily. The jury is out whether having film on the front really is a good idea anyway. I’m going to drive without anything on the front, just like I have before. It only took a few hours over several days (as things were drying) to clean up two years of road rash on #7750. I’m OK with that. Goes with the car being a driver.

    I ordered a new snapless tonneau cover from Phillip and Kay Deal. Supposed to be done in the next week or two, but no hurry. They are so nice to deal with. Confirmed the Car Cover World cover I had fit OK. Even though officially a single roll bar version it fits the twin rolls bar setup on this build good enough for the (hopefully!) few times I have to use it. The “front” marking on the cover was fading to the point of disappearing so every time I used it involved hunting for that mark. I traced a Factory Five logo onto the front using permanent markers. Looks painted on and turned out pretty good (even if I do say so myself) and easy to find. Got the headlights aimed. Received word from Watson’s Streetworks that they had updated the LED headlight package to use Hella Vision Plus lenses instead of the Autopal ones I received. Also DOT approved BTW. Talked to them briefly and decided to go with the updated lenses since this was a good time to do so. They’re nice and seem a little clearer and better focused. I didn’t particularly like driving #7750 at night because it really was pretty hard to see. I think this is going to be a big improvement.

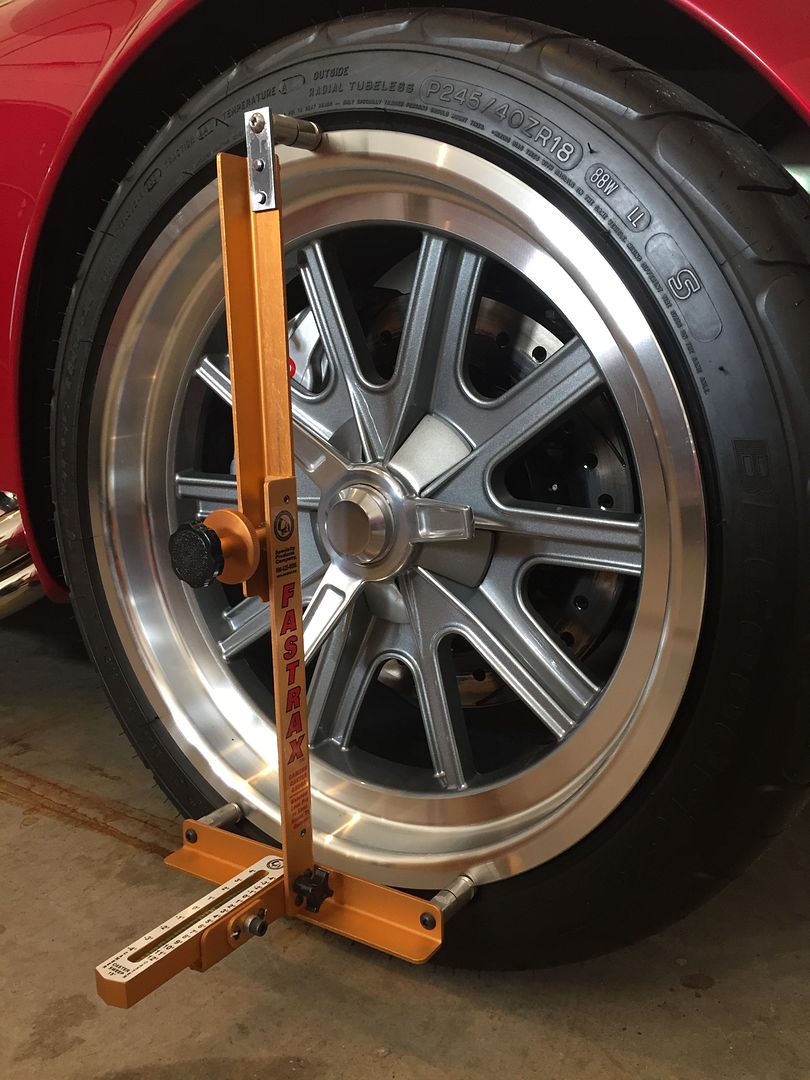
    The biggest remaining task was front and rear wheel alignment. I roughed in the alignment while it was still a go-kart. But didn’t take the time to get it perfect, plus ride height was still pretty rough. Yesterday I wrapped up the alignment and I’m satisfied I have it dialed in to the specs. I was very happy to find one of the bays in my new garage is almost exactly level side-to-side and only a couple tenths of a degree downslope. Worked well. One thing I learned doing the rough alignment was that my Fastrax alignment tool didn’t like the new Factory Five 18-inch wheels. Both because of the size but also because of the cool round edge. I have the 91030 no lip adapters, but the 91000 gauge wouldn’t quite reach. I got through it for the rough alignment by just kind of taping it in place. But I need a better way for the final alignment. I ended up make a small extension to the top connection point and the no lip adapters worked exactly the way they’re supposed to. Visible in this pic:


    This is my first IRS build, so first time with a rear wheel alignment. The new IRS setup is supposed to be much easier than the previous design. Loosen the jam nuts, dial it in, tighten, then go. Couldn’t be easier, right? Well, almost. It was easy to get to the adjustment points with the body off. Not quite so easy with it on. The more challenging part I found was the large camber adjustment nut on the UCA is almost impossible to turn with weight on the suspension. Reaching from under the car, once you wiggle to where you finally have a wrench on it, the leverage is such I could barely move it. Charles Atlas I am not. So I jacked it up each time to make an adjustment. Then dropped it back down, rolled it back and forth and bounced on it a couple times to settle the suspension, and checked the measurement. They were pretty close to start. Once to the spec, checked the toe. That one can be reached without jacking the car. There is some interaction between the two, so it takes a few times back and forth to get them both right. The PS came in very quickly. The DS took a lot longer. The instructions say -0.5 to -0.75 degrees camber and 1/8-inch toe in. Mine came in at exactly -0.75 degrees on both sides and the 1/8-inch toe in. Once it was done, I took the wheels off to lock in the jam nuts. I just didn’t trust I could get them sufficiently tight without full access. I used red Loctite on the two camber jam nuts per Factory Five’s recommendation. I didn’t put any on the toe arm nuts. I paint marked all the jam nuts so I can watch and confirm they aren’t moving.

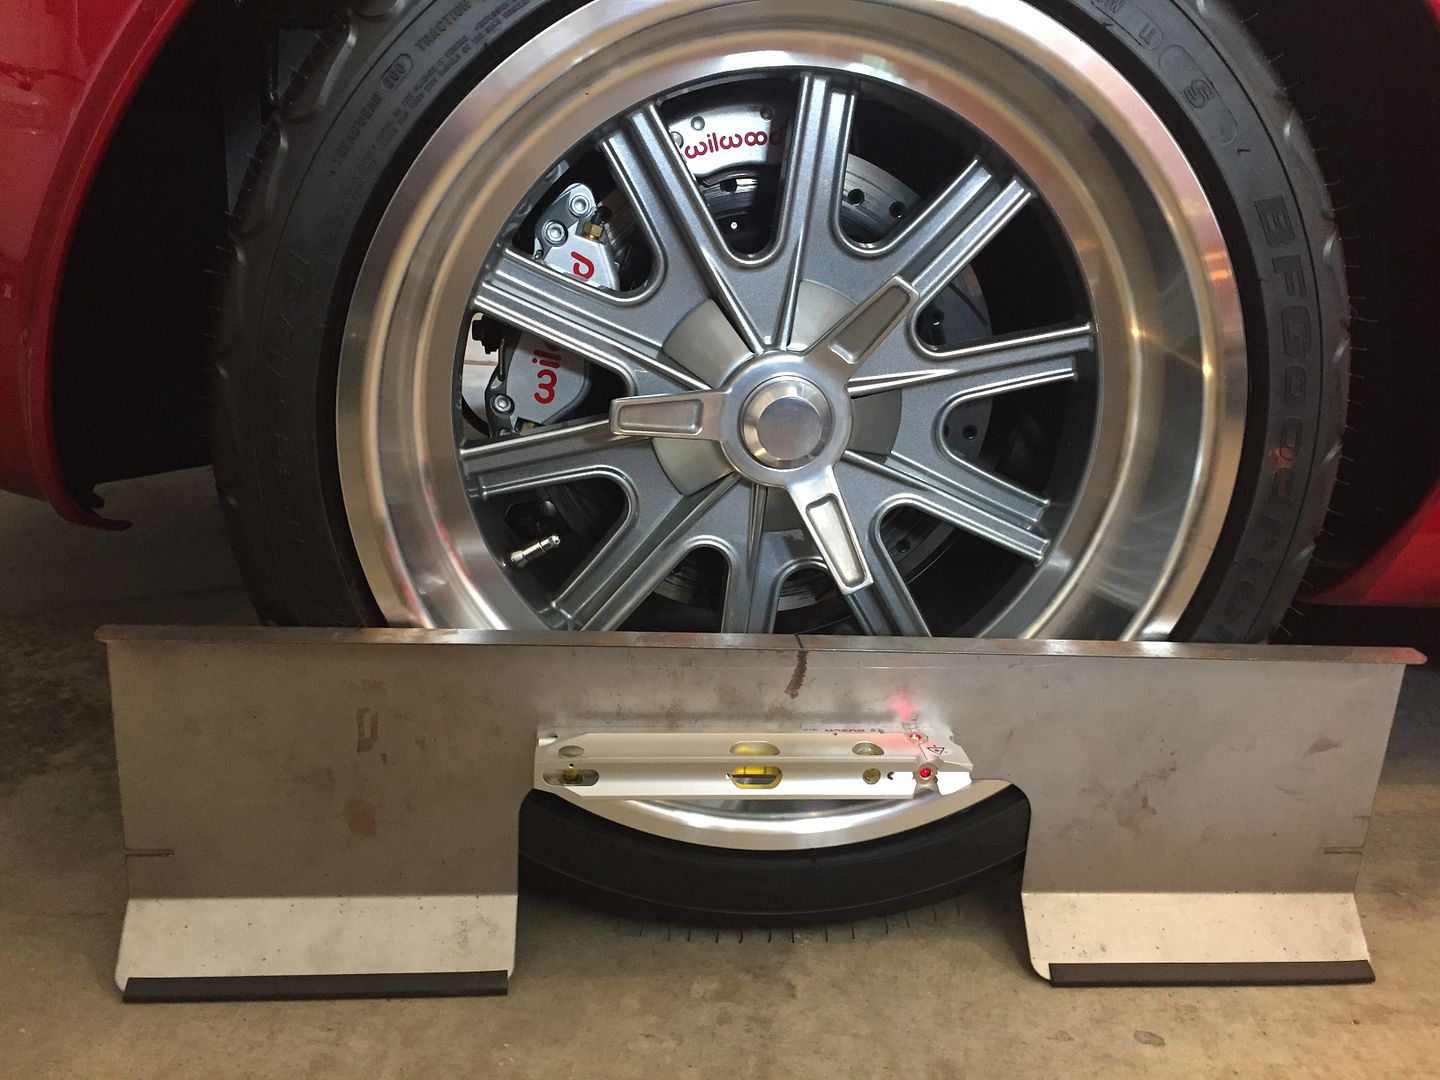
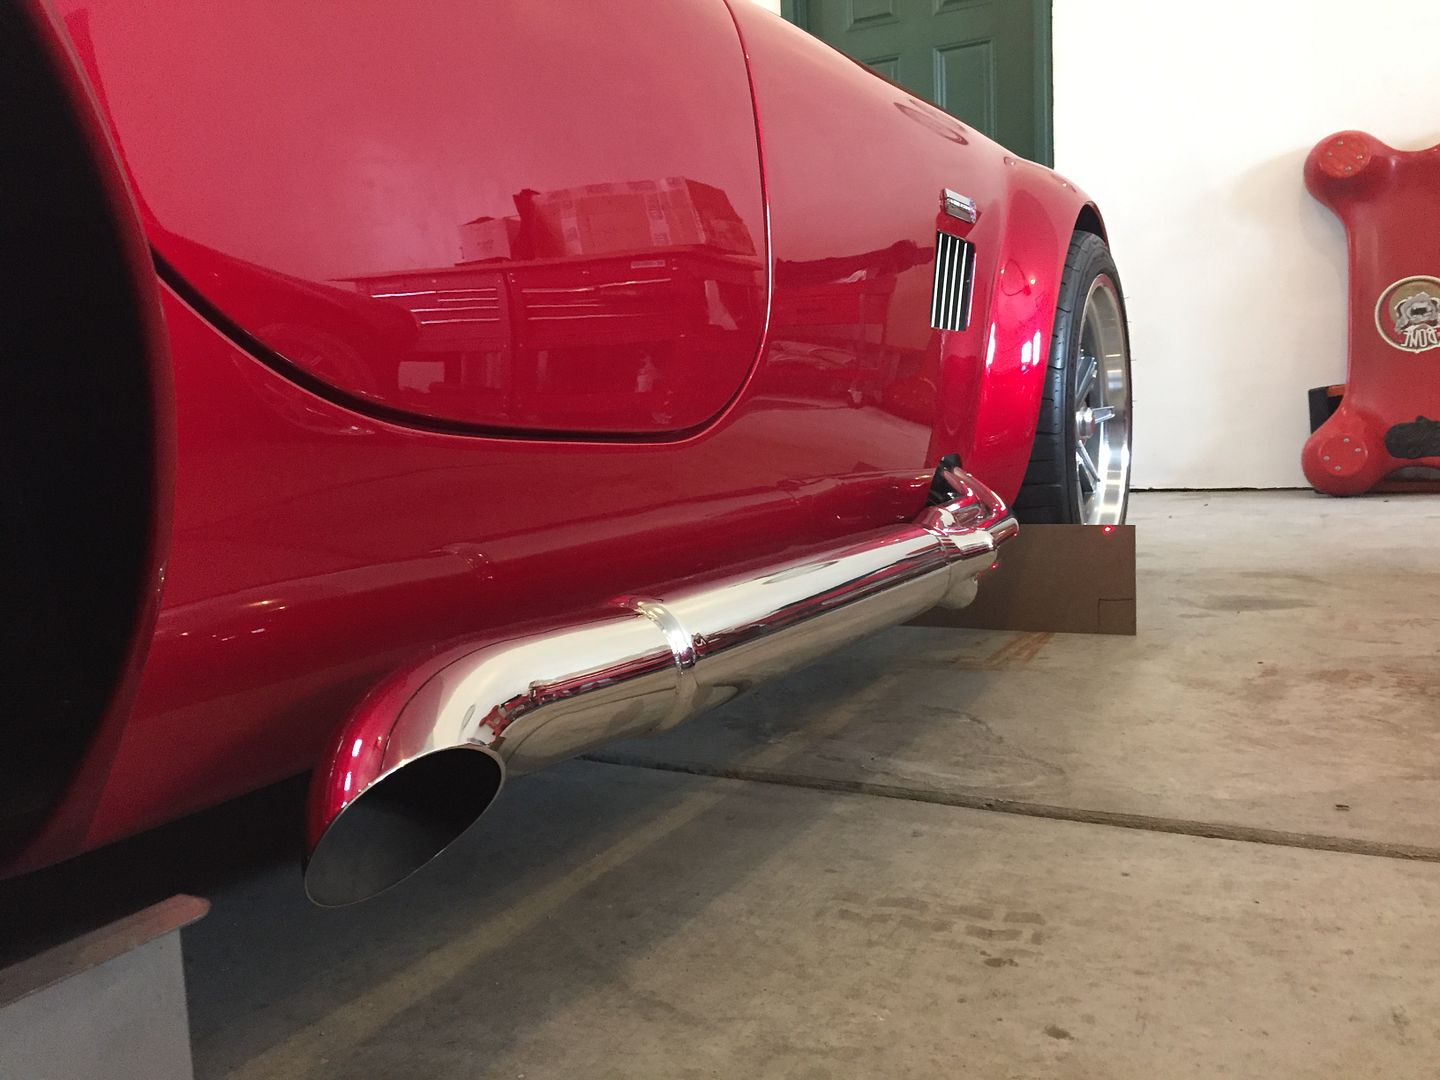
    One of the challenges of doing a home alignment is getting everything properly aligned with the chassis. It’s obviously important to have the required toe adjustment. But it also needs to be exactly lined up with the chassis. Some guys use strings for this, and that’s fine. For my last couple builds I’ve been using toe plates and a magnetic level with a laser pointer instead of strings. I think it works really well. Here is one of the Heidts toe plates with the level attached. Note this picture is missing the high tech double garbage bag “turn plates” I put under the tires. For the front toe in, the laser dot shows on the edge of the rear tires since the rear track is wider than the front. But projecting forward, there was nothing for the laser to hit. So I cut two pieces of 1/8-inch hardboard exactly square and exactly the same size. They slide behind the front tires and bank against the 4-inch frame tube and the ground. Then when adjusting the toe, not only am I looking for the 1/8-inch toe in, I’m measuring where the laser dot hits the hardboard and confirming they're the same on both sides. Hopefully that makes sense. Seemed to work really well and I’m satisfied my rear wheels are exactly tracking to the frame.

    Toe plate and level on rear wheels:


    Laser dot to confirm alignment to the frame. Adjusted so each side was exactly the same dimension from the end of the board along with the proper toe in.


    Moving to the front alignment, that was all pretty normal. While a bit of a reach, the UCA adjustment sleeves can be reached with the car on the ground and the body on. Tie rod ends are easy. I was able to get to the +8 degrees caster (power steering setting) without altering the rear sleeve as some have had to do. -0.5 degrees camber and 1/16 inch toe in also landed right on the numbers. I used the laser dot method described before to make sure with the steering wheel exactly centered and the toe in set to 1/16 inch the dot projected to the same spot on the rear tires on each side. Assuming they were set correctly (which I think they were!) then the front should also be on track. With one final check, locked everything down and called alignment done. While I was under there, also added a steering rack travel limit spacer on each side since my tires were hitting the F-panels.

    One final note regarding alignment. For those with a 4-post lift, assuming the car is level while on the lift, you have a big advantage for home alignments. You won't have all the fun crawling around and reaching. Certainly would make the process a lot easier.

    There are only two items left on my punch list: (1) Continue to monitor ride height. I’m pretty Ok where it is now. We’ll see how much it settles. (2) I want to remove the fuel pressure gauge on the fuel regulator once I’m driving and confirm the fuel pressure is exactly where it should be. Since it’s not on the engine, maybe not the safety hazard that some consider it to be when mounted next to a carb and subject to engine vibration, heat, etc. But I’m going to take it off anyway. No need to take a chance, and can’t read it without a mirror anyway.

    Ok, that’s really it. Thanks again everyone for following the build and your incredible comments and support throughout. Road trip in the next week or two to deliver #7750 to its new owner. Then hope it will be time to get some miles on the new build. Said it before, but will again. We are planning to be at the Factory Five Open House in June, and then already registered for London a couple weeks later. Hope to catch up with some of you at one or both events.

    Now about that Gen 3 Coupe…
    Last edited by edwardb; 03-25-2017 at 06:36 AM.
    Build 1: Mk3 Roadster #5125. Sold 11/08/2014. Build 2: Mk4 Roadster #7750. Sold 04/10/2017. Build Thread
    Build 3: Mk4 Roadster 20th Anniversary #8674. Sold 09/07/2020. Build Thread and Video. Build 4: Gen 3 Type 65 Coupe #59. Gen 3 Coyote. Legal 03/04/2020. Build Thread and Video
    Build 5: 35 Hot Rod Truck #138. LS3 and 4L65E auto. Rcvd 01/05/2021. Legal 04/20/2023. Build Thread. Sold 11/9/2023.

  40. #640
    Senior Member wareaglescott's Avatar
    Join Date
    Apr 2016
    Location
    Auburn, AL
    Posts
    2,147
    Post Thanks / Like
    Paul,
    Is a picture of the clear film you applied feasible or is it to clear? Maybe a picture of the template? I am interested in doing this as well but am having a hard time visualizing.
    Thanks for the alignment tips. I was thinking the other day the 4 post with the pneumatic jack is really going to come in handy for alignment. I did the exact same mod to make my tool fit the 18" wheels.

    Now I realize you want to shut this thread down but there is just to much good info. You will probably be responding to questions in this thread for years to come!
    MK4 #8900 - complete kit - Coyote, TKO600, IRS - Delivered 6/28/16 First Start 10/6/16 Go cart - 10/16/16 Build completed - 4/26/17 - 302 days to build my 302 CI Coyote Cobra - Registered and street legal 5/17/17
    Build Thread http://thefactoryfiveforum.com/showt...e-build-thread
    PHIL 4:13 INSTAGRAM - @scottsrides

Page 16 of 20 FirstFirst ... 61415161718 ... LastLast

Posting Permissions

  • You may not post new threads
  • You may not post replies
  • You may not post attachments
  • You may not edit your posts
  •  

Brown County Customs

Visit our community sponsor